Sunday, December 31, 2023

CyberLink PowerDirector for mobile review

We’ve long been champions of CyberLink PowerDirector. Earning 4.5 stars in our review, it’s not just one of the best video editing software out there, but after extensive testing, we found it one of the best alternatives to Premiere Pro, too. 

But that’s on desktop computers. We wanted to know if the company’s iOS and Android tool is one of the best video editing apps for your mobile device - or whether it’s best left on the cutting room floor.  

Cyberlink PowerDirector app: Pricing & plans

  • This is a subscription-only app, but if you don’t mind a few limitations and some watermarking, you can also use it for free 

Although you can use PowerDirector for free, you will be missing out on some advanced features, such as Auto Captions, Video Enhancer, and even Adjustments (that’s right: basic image calibration is considered a premium feature here). Some effects and transitions will also be out of bounds. On the plus side, you will be able to include these into your project; you just won’t be able to export it with them still present without subscribing. 

Another downside, which is of course totally expected, and more reasonable than forcing you to pay for colour adjustments, is a ‘PowerDirector’ logo stamped on the lower right of your video. And finally, the highest resolution you can expect to export for free is HD (1920x1080). 4K is a premium feature. You can try all of these premium features and even export your work without hassle, free for 7 days. After which, if you don’t cancel, you’ll be charged at the yearly rate. 

  • Pricing & plans: 4/5

Cyberlink PowerDirector app: Interface

CyberLink PowerDirector on iOS during our video editing app review

PowerDirector offers you some short demo projects which you can download and use as part of your own  (Image credit: CyberLink )
  • A good interface that can be used in any orientation - shame that setting isn’t switched on by default

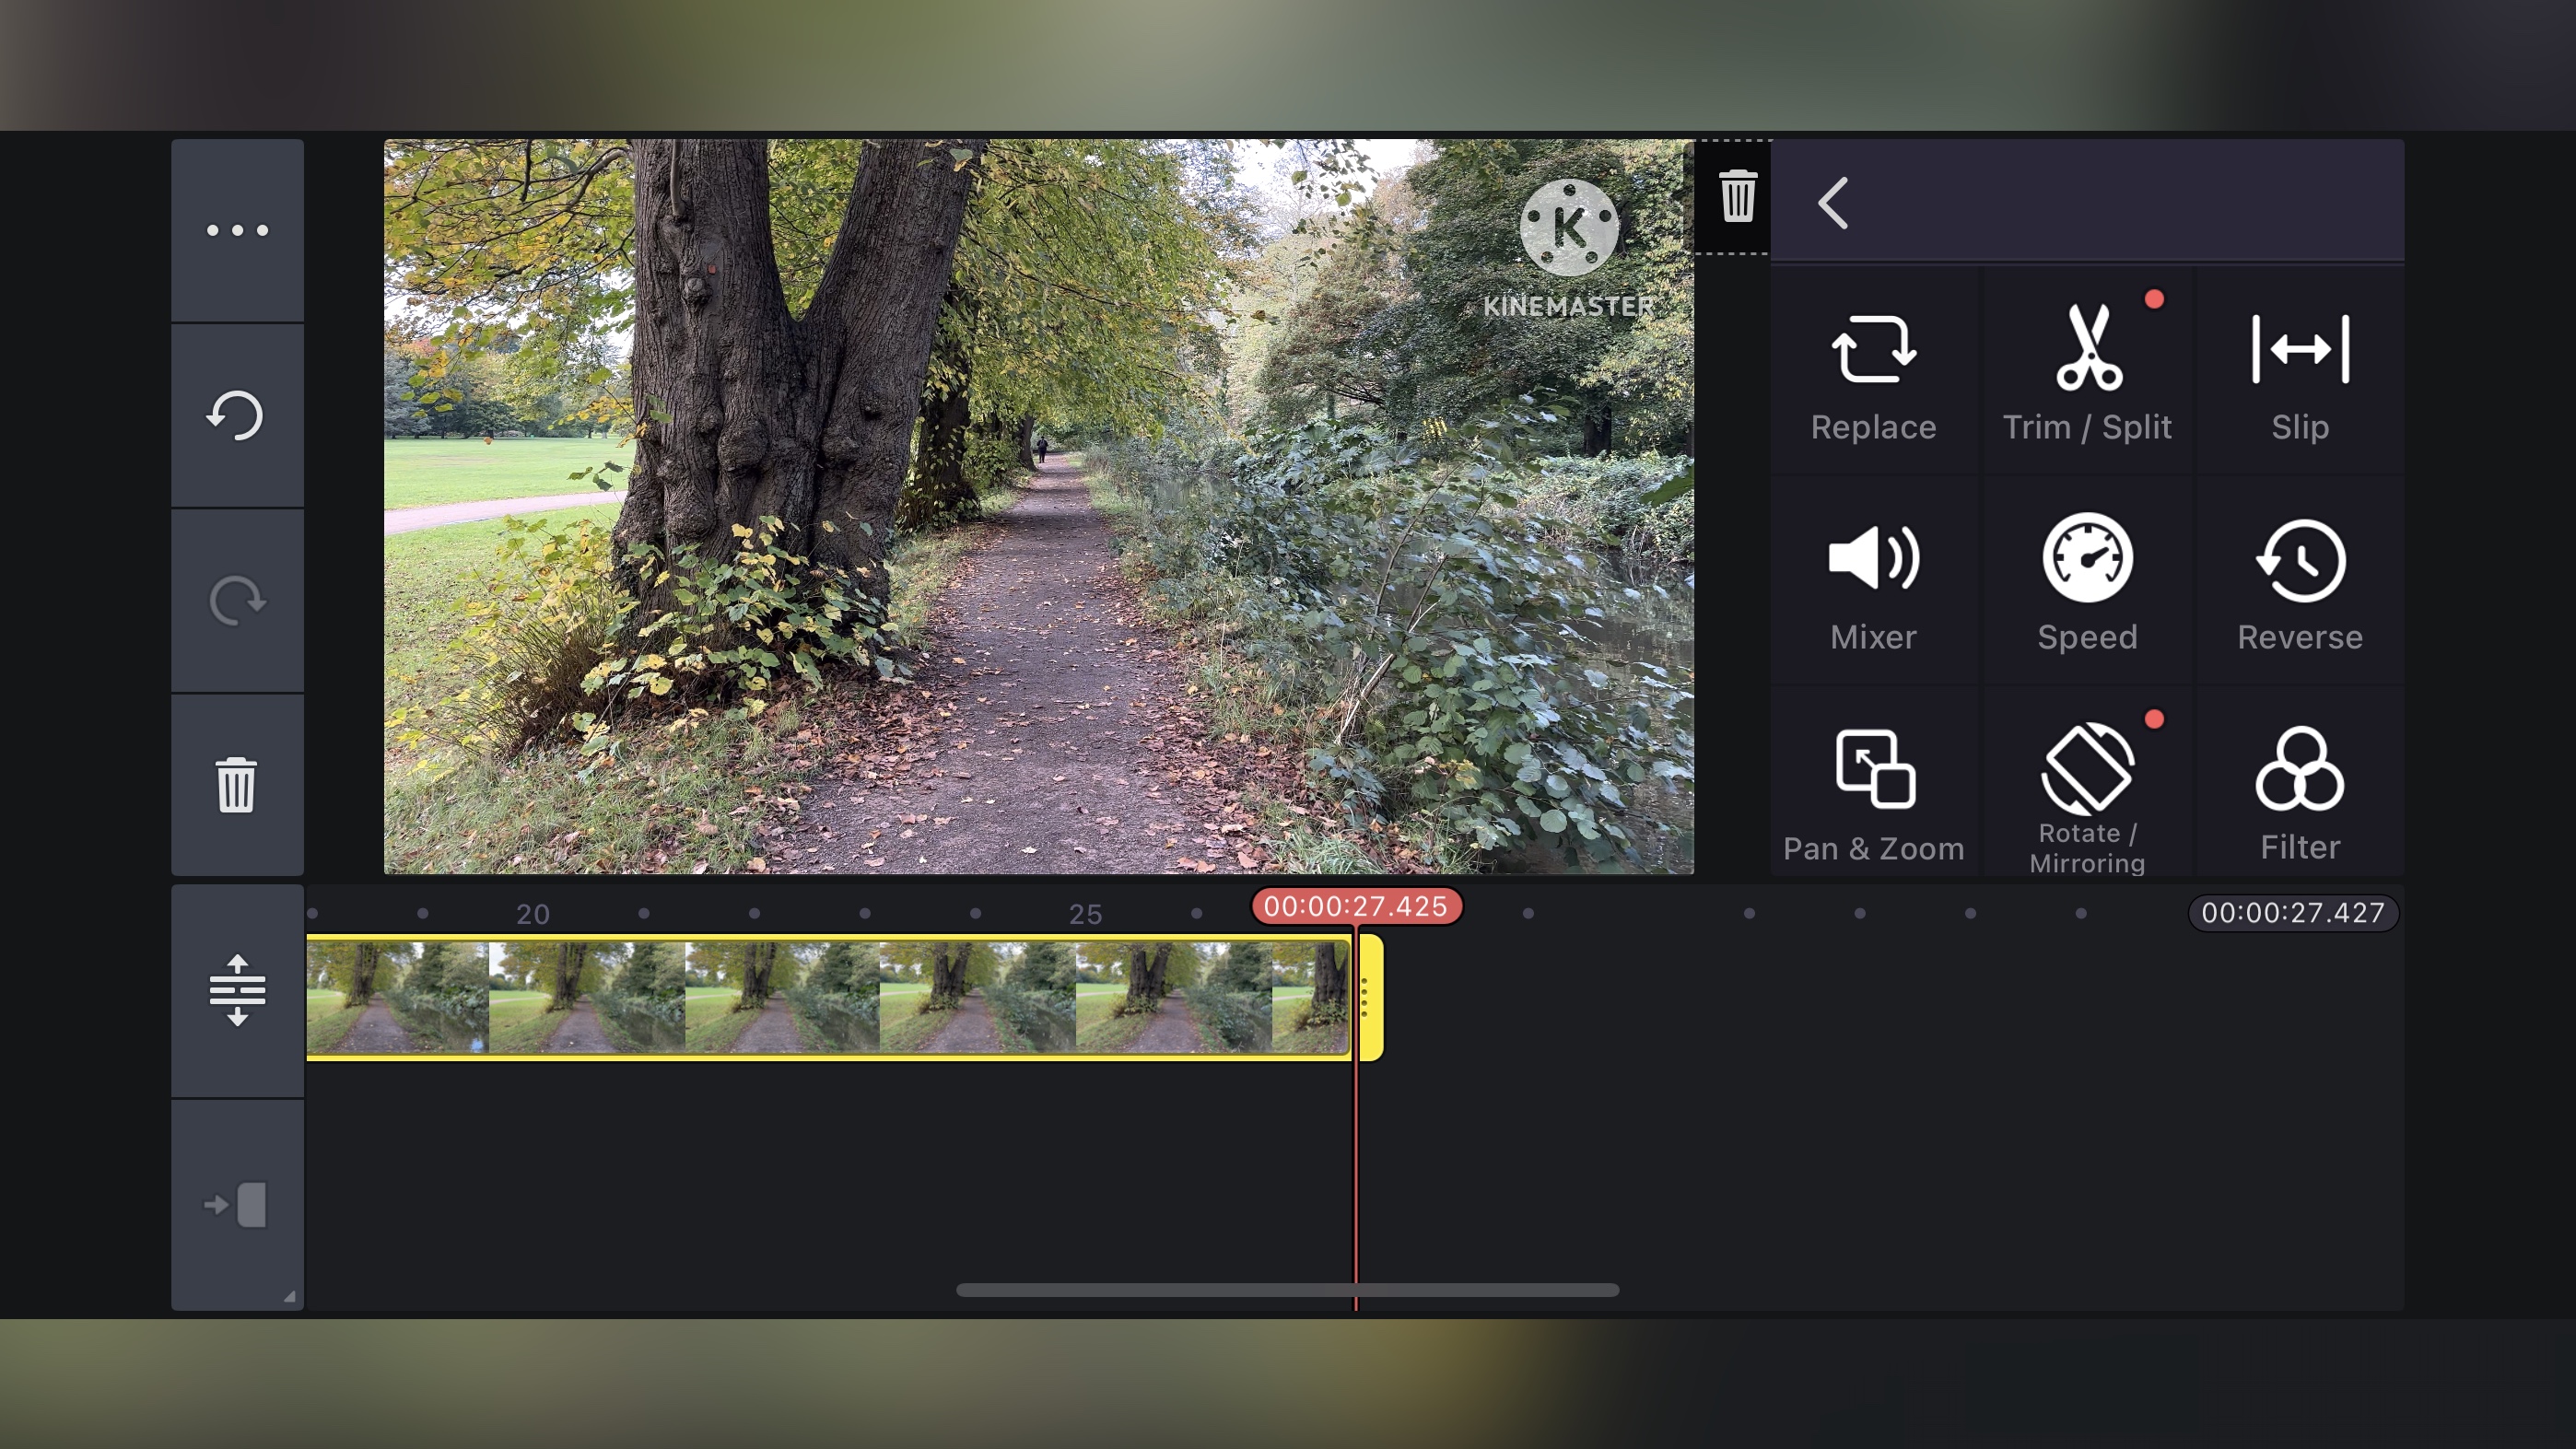
PowerDirector is designed to make editing easier, and with that in mind, it makes for some of the best video editing software for beginners thanks to a series of shortcuts should you need to make a quick edit on a single clip. You could, for instance, use ‘Video Enhancer’ to improve your shot, or ‘Speed’ to speed it up or slow it down. Want to blur faces in a clip (or the entire body, or even just the background)? Then ‘Mosaic' is for you. 'AI Colour’ is designed to automatically improve your image’s colours, while ‘Face’ and ‘Body Reshape’ are there to give you an instant new look without altering the background.  All these are but a click away and also come with a quick animated tutorial to give you an idea of how they work. 

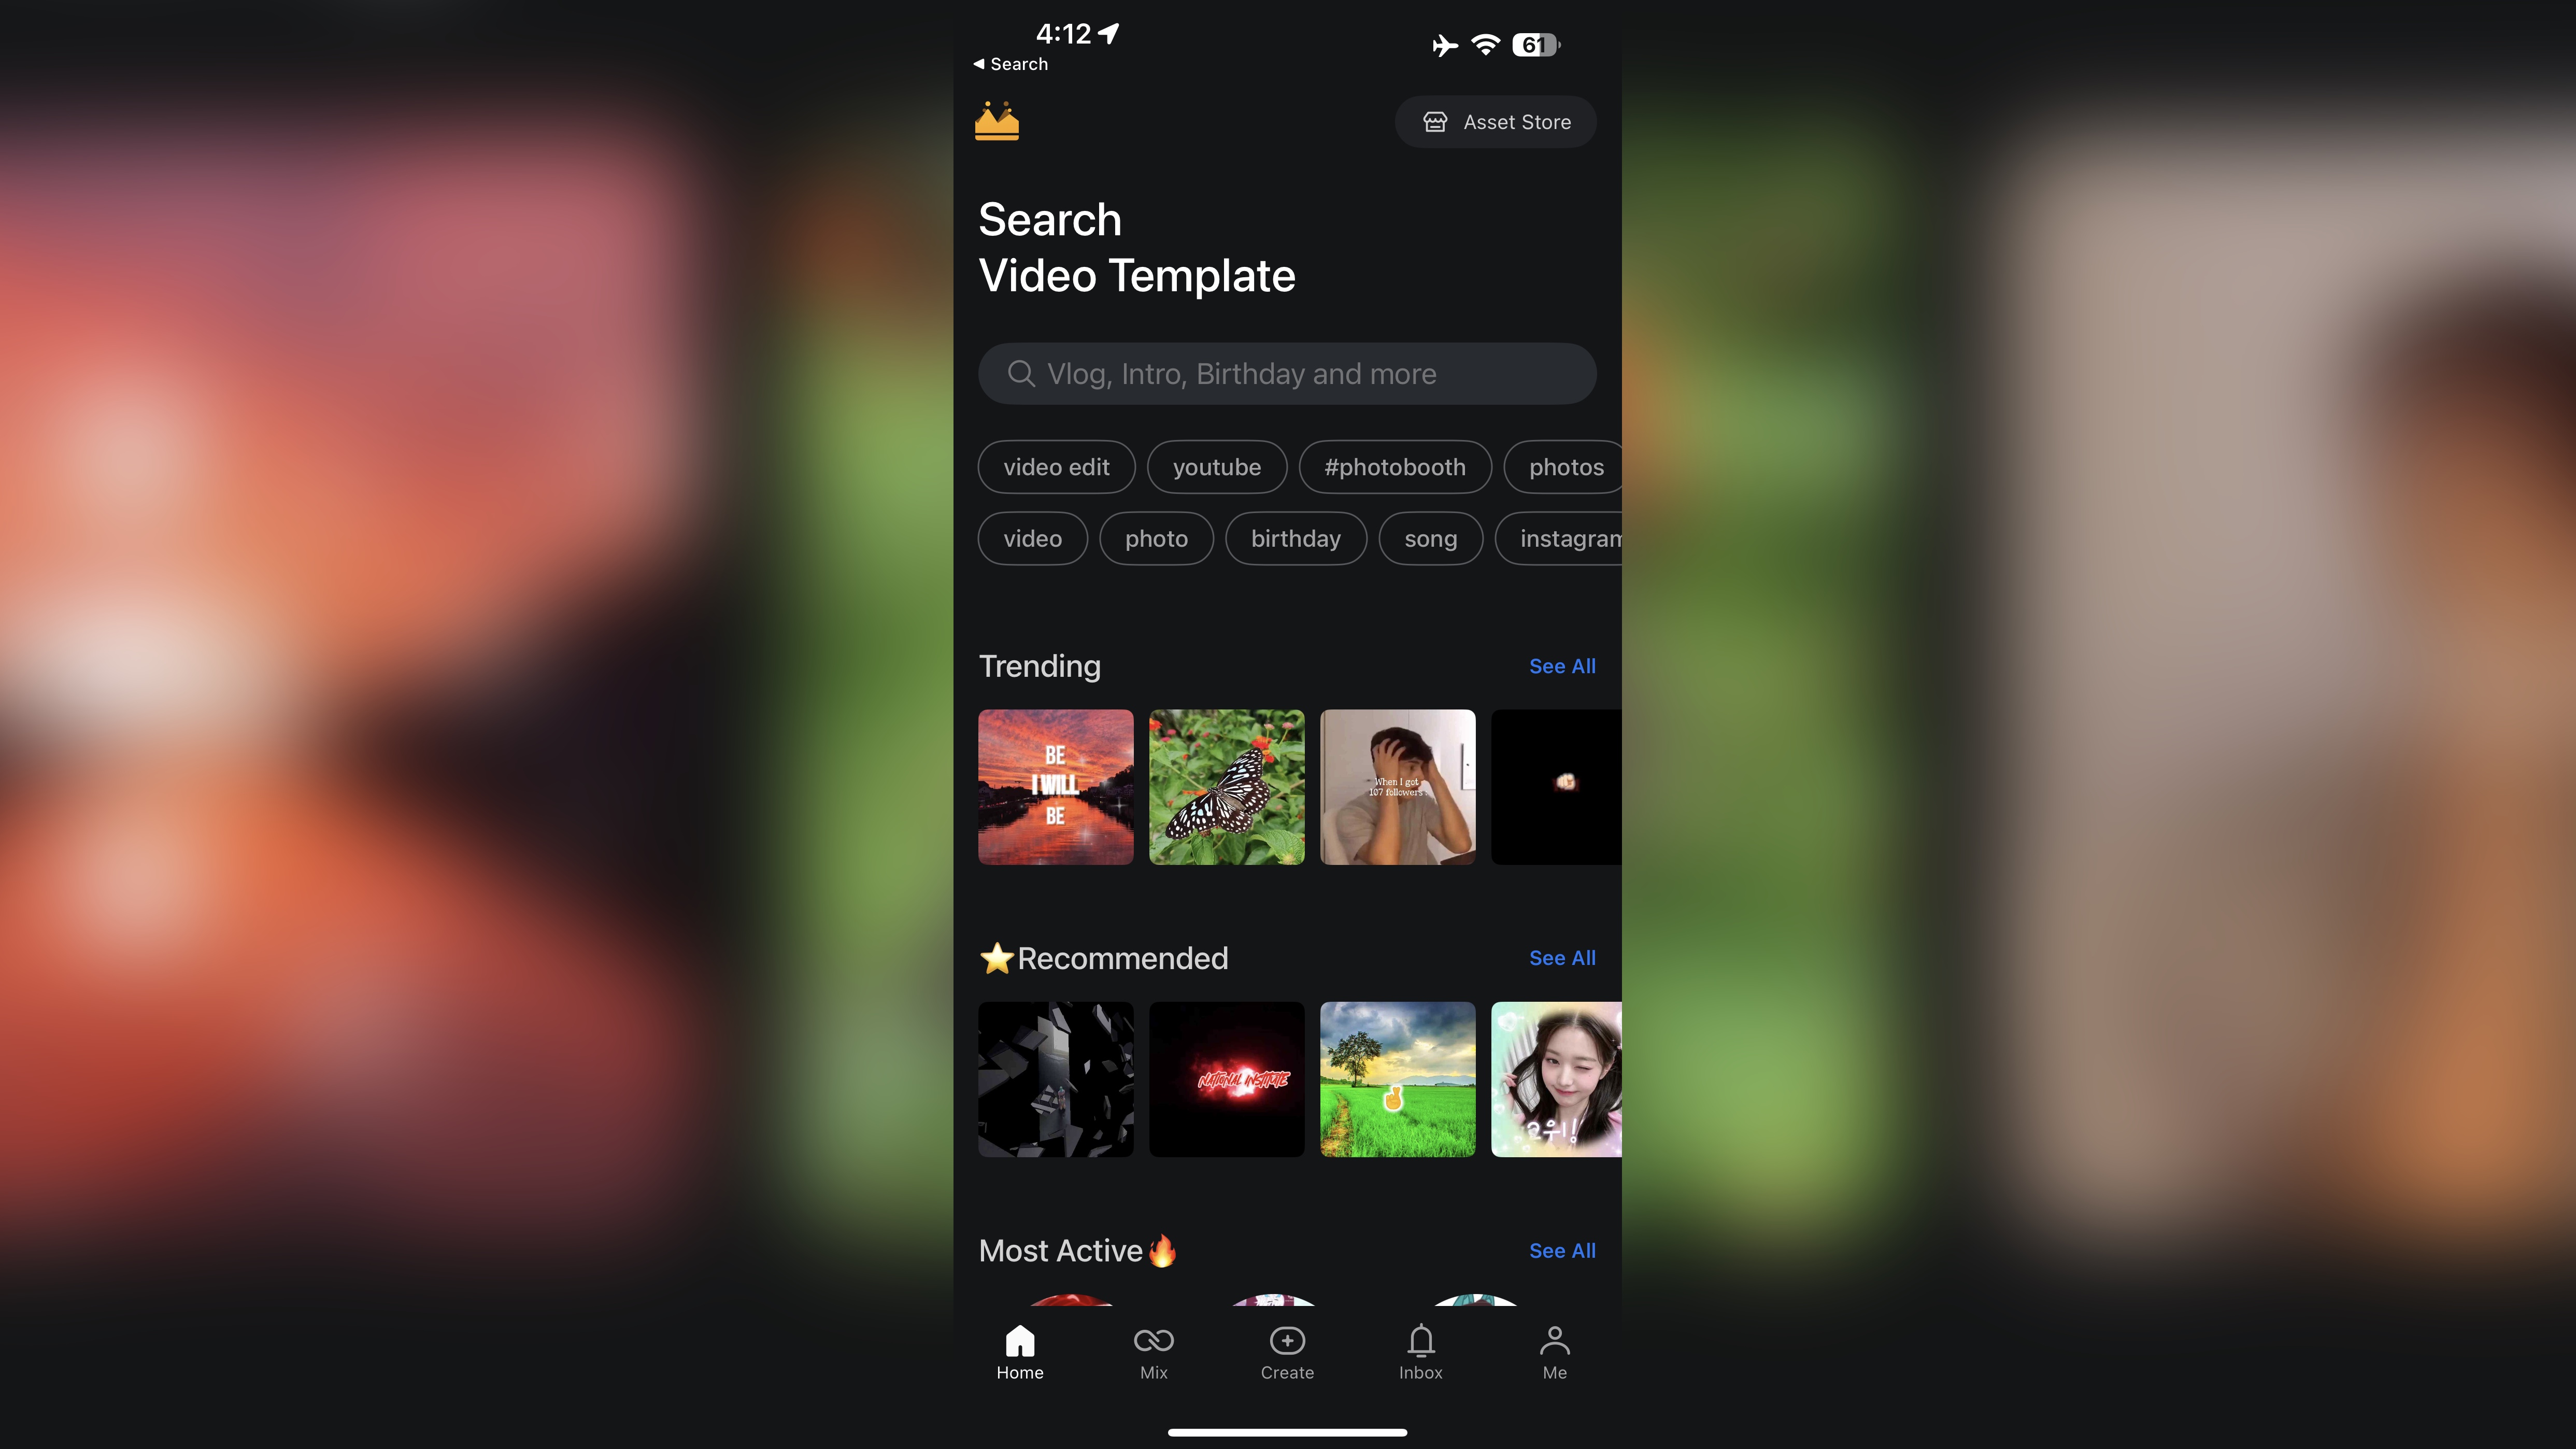
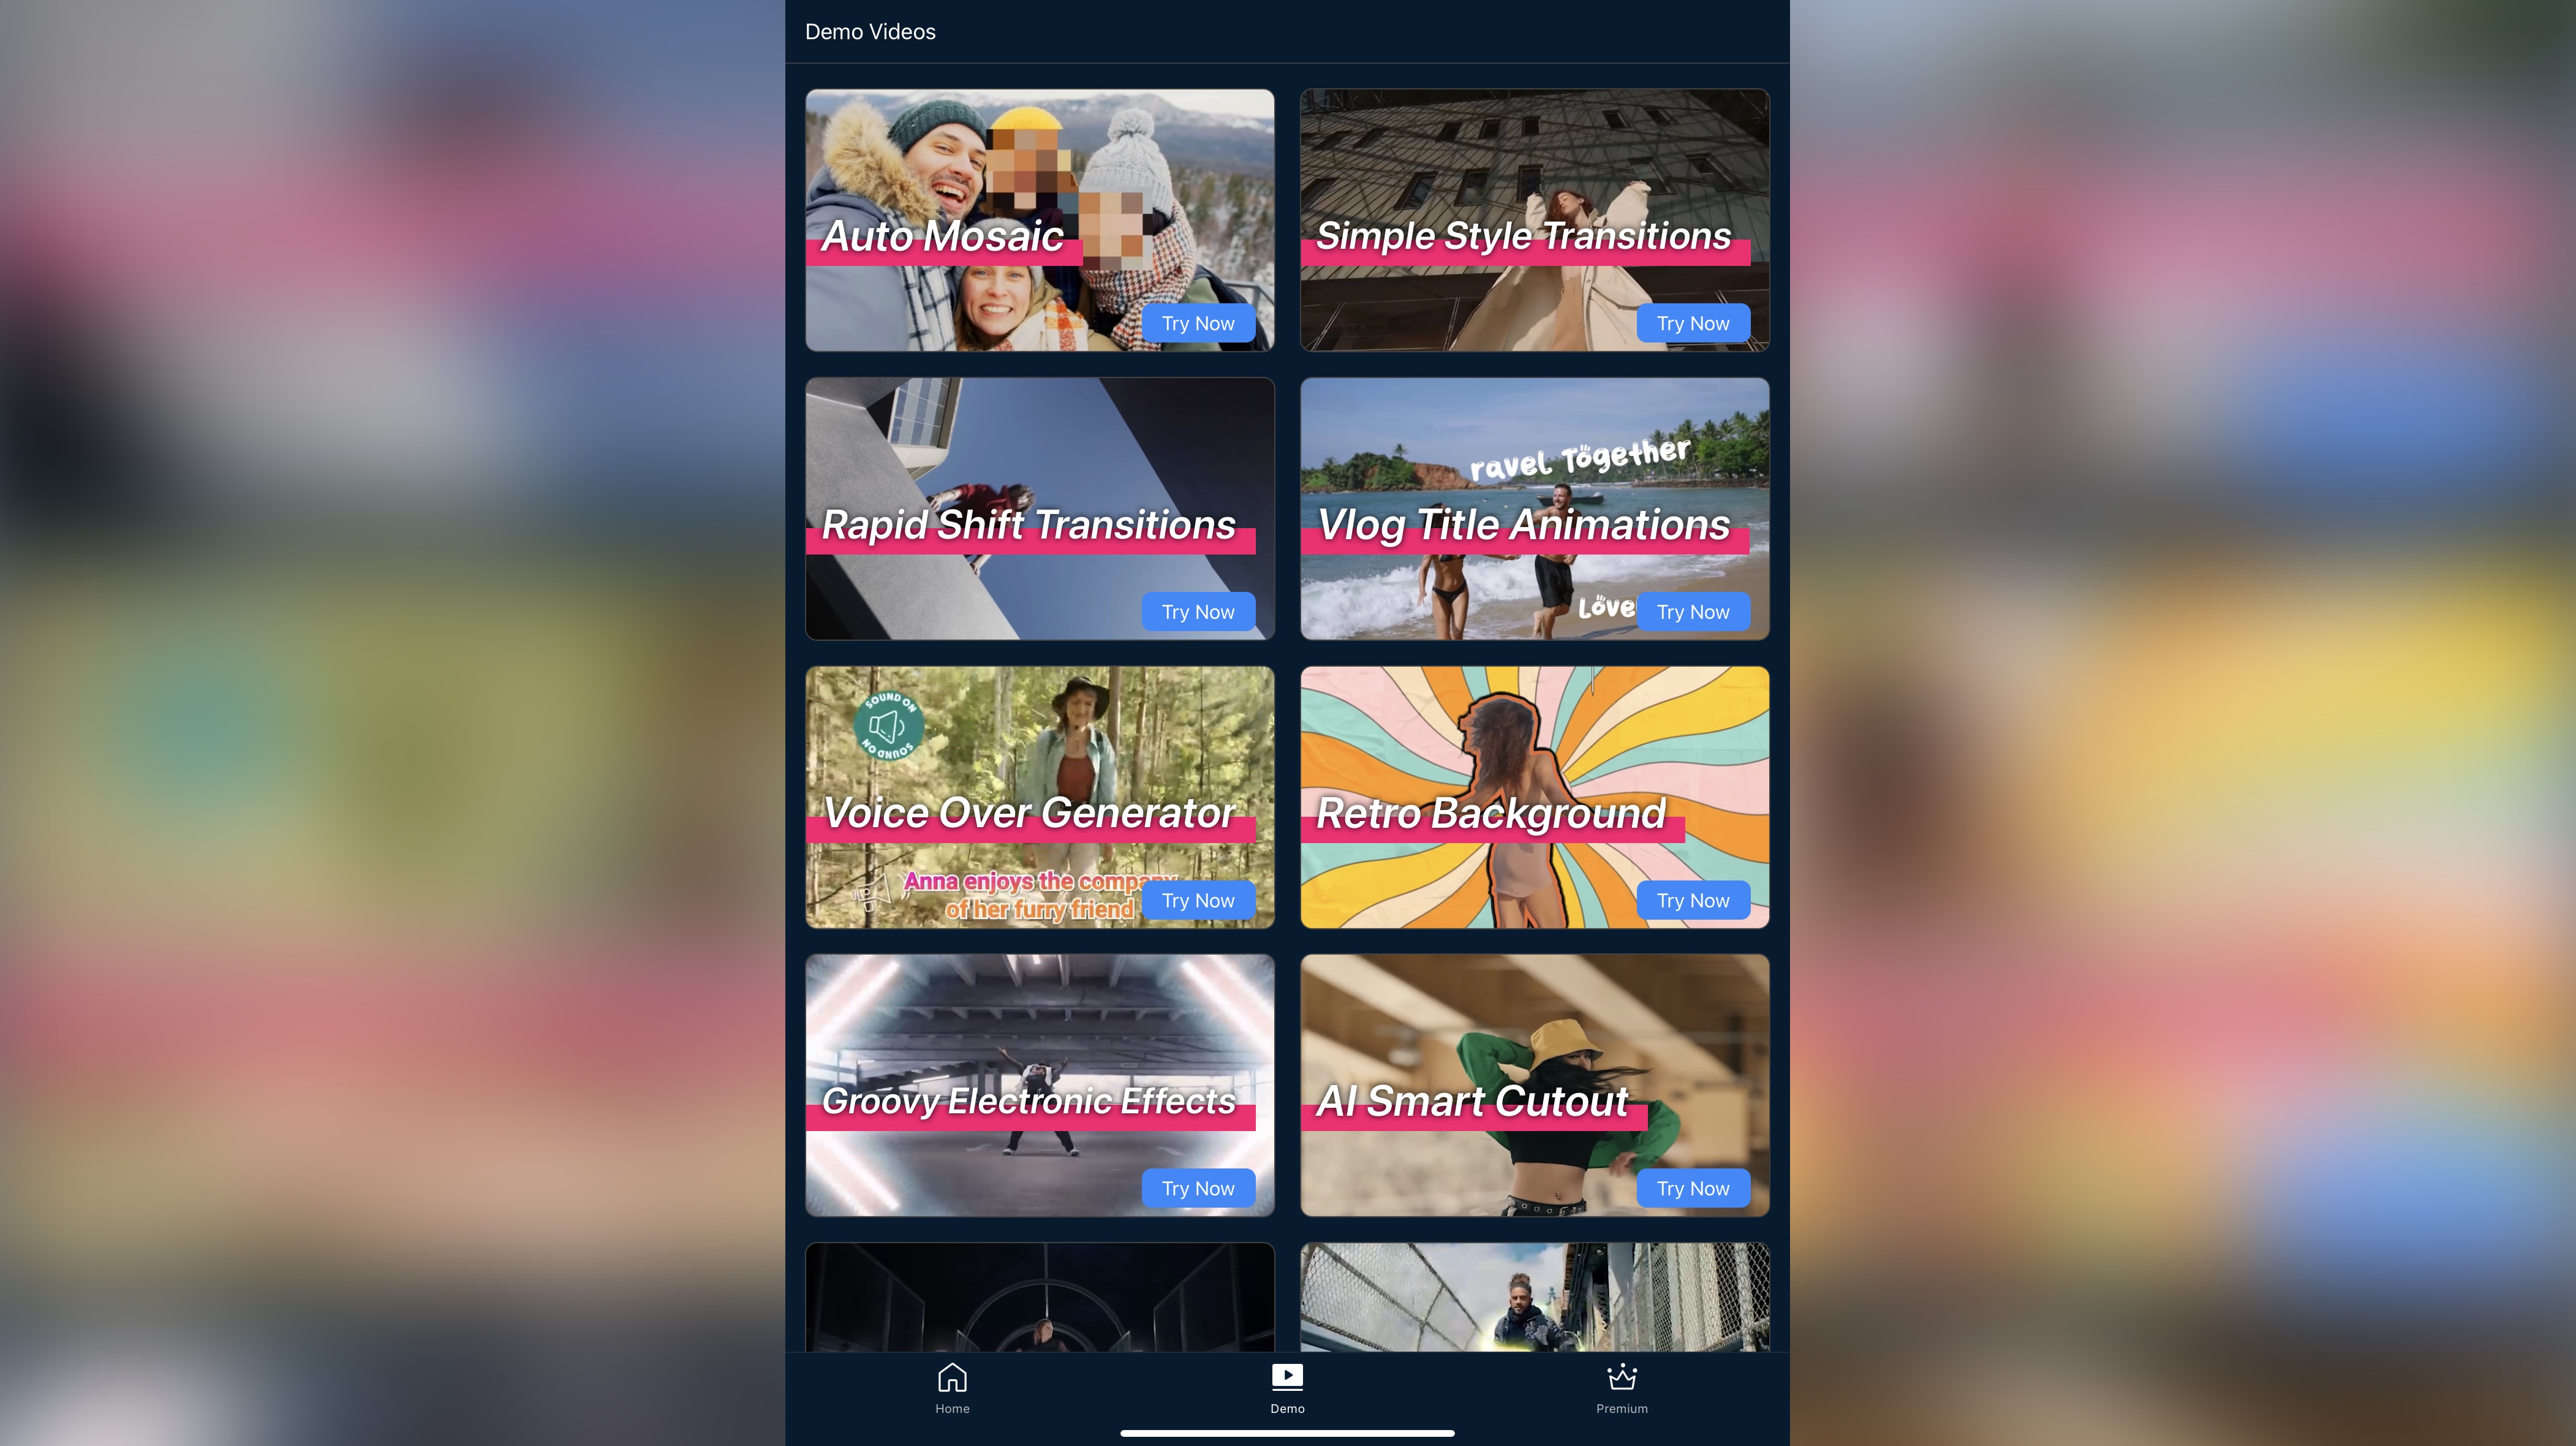
Bottom of the screen is an icon labelled ‘Demo’. It contains a series of short templates you can download and use in your own projects, speeding up the creation process. 

If you’d rather just start from scratch, just tap on ’New Project’. Any existing videos you’ve already started work on, will also be available in the ‘My Projects’ section beneath it. 

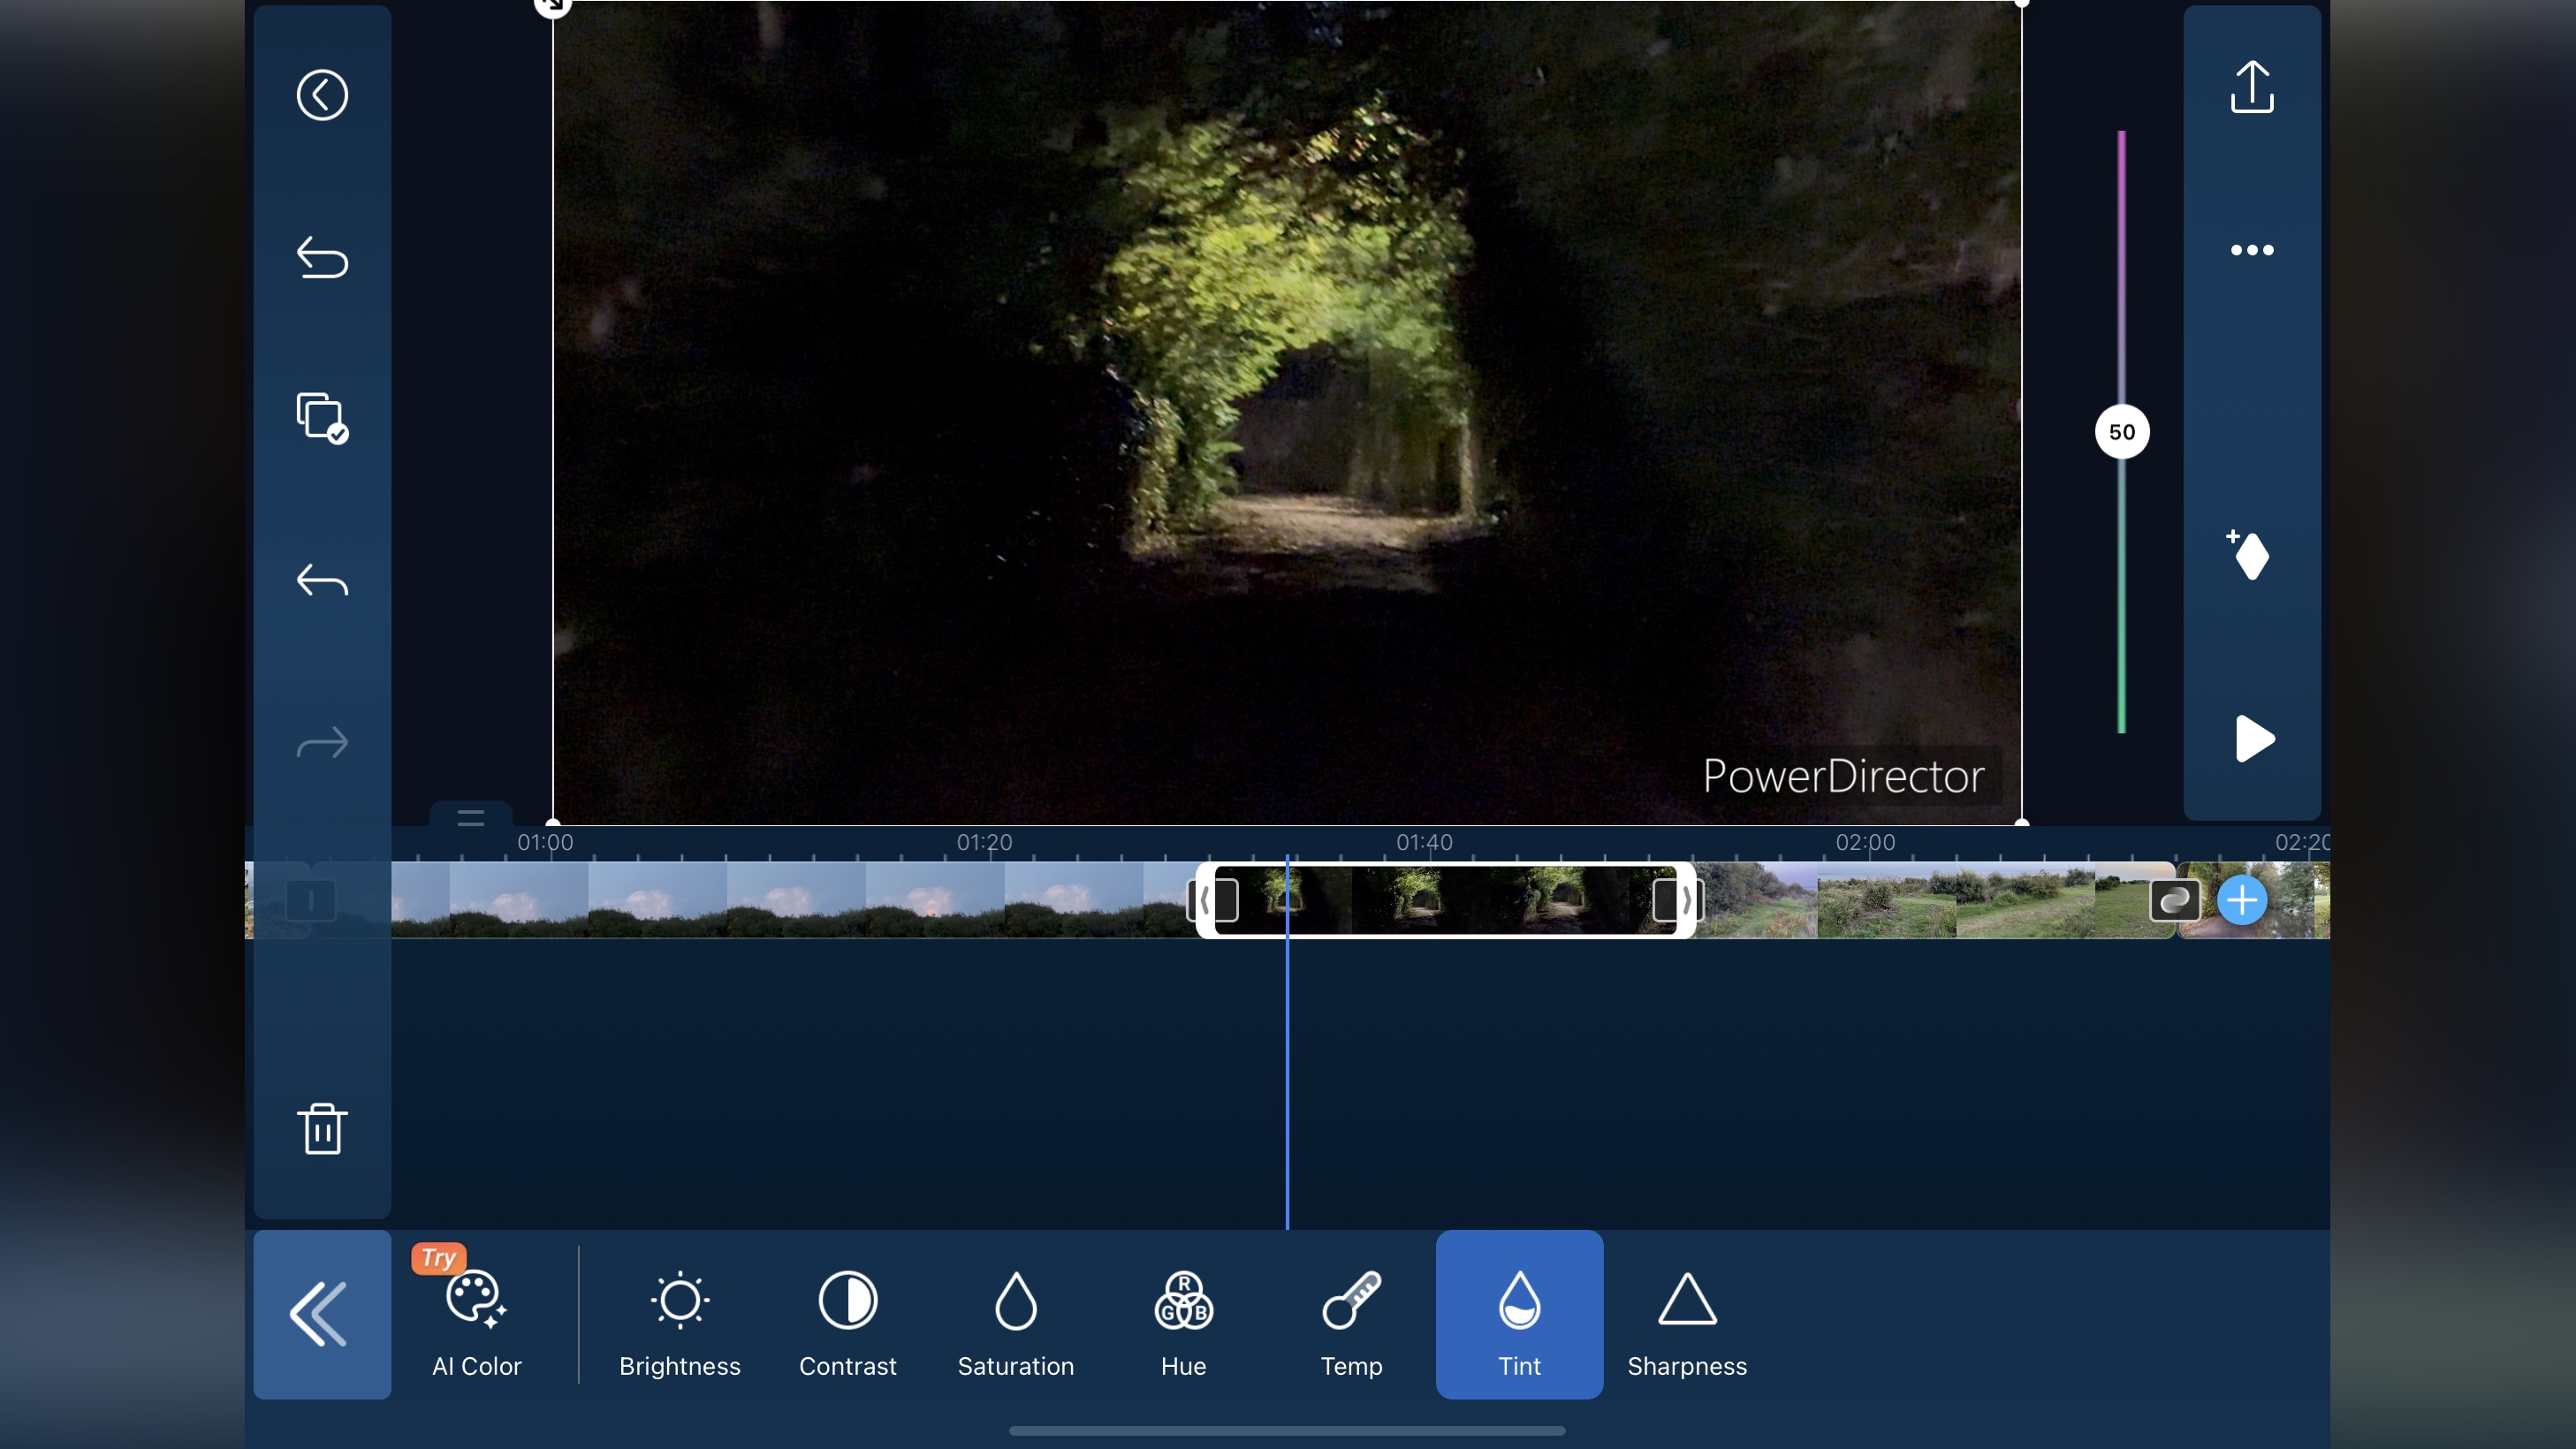
When it comes to the editing interface, you’re able to work in either orientation, although that isn’t immediately obvious by default: when you first open PowerDirector, you’re locked in portrait. You need to go into the Preferences, and manually switch to ‘auto-rotate’ to be able to work in either orientation. It’s a weird thing to restrict, especially when their promotional information makes a big deal that this app is orientation agnostic. 

When working, you’ll find the interface very clean and easy to use. You have a large preview section at the top, beneath that is your timeline, and at the bottom a series of tools. When working on a phone, those tools can be made to disappear in landscape when you’re not using them, to further declutter your screen.  

  • Interface: 4/5

Cyberlink PowerDirector app: Video editing

CyberLink PowerDirector on iOS during our video editing app review

Editing is very well implemented, with icons that are large enough to tap on, but not too big so as to distract from the work at hand  (Image credit: CyberLink )
  • A good series of editing tools is at your disposal, making it easy to construct your project 

You’ll find editing is as good as the best of them. It’s easy to scroll through your project, zoom out of the timeline to get a bigger sense of scale, then zoom in for fine, frame-accurate work. You can add as many clips as you need, trim them, reorder them, work with multiple layers, the works.  

Need to use a tool? No problem. The icons and their titles are large enough to be read easily, but small enough to not feel like they’re taking up too much room. 

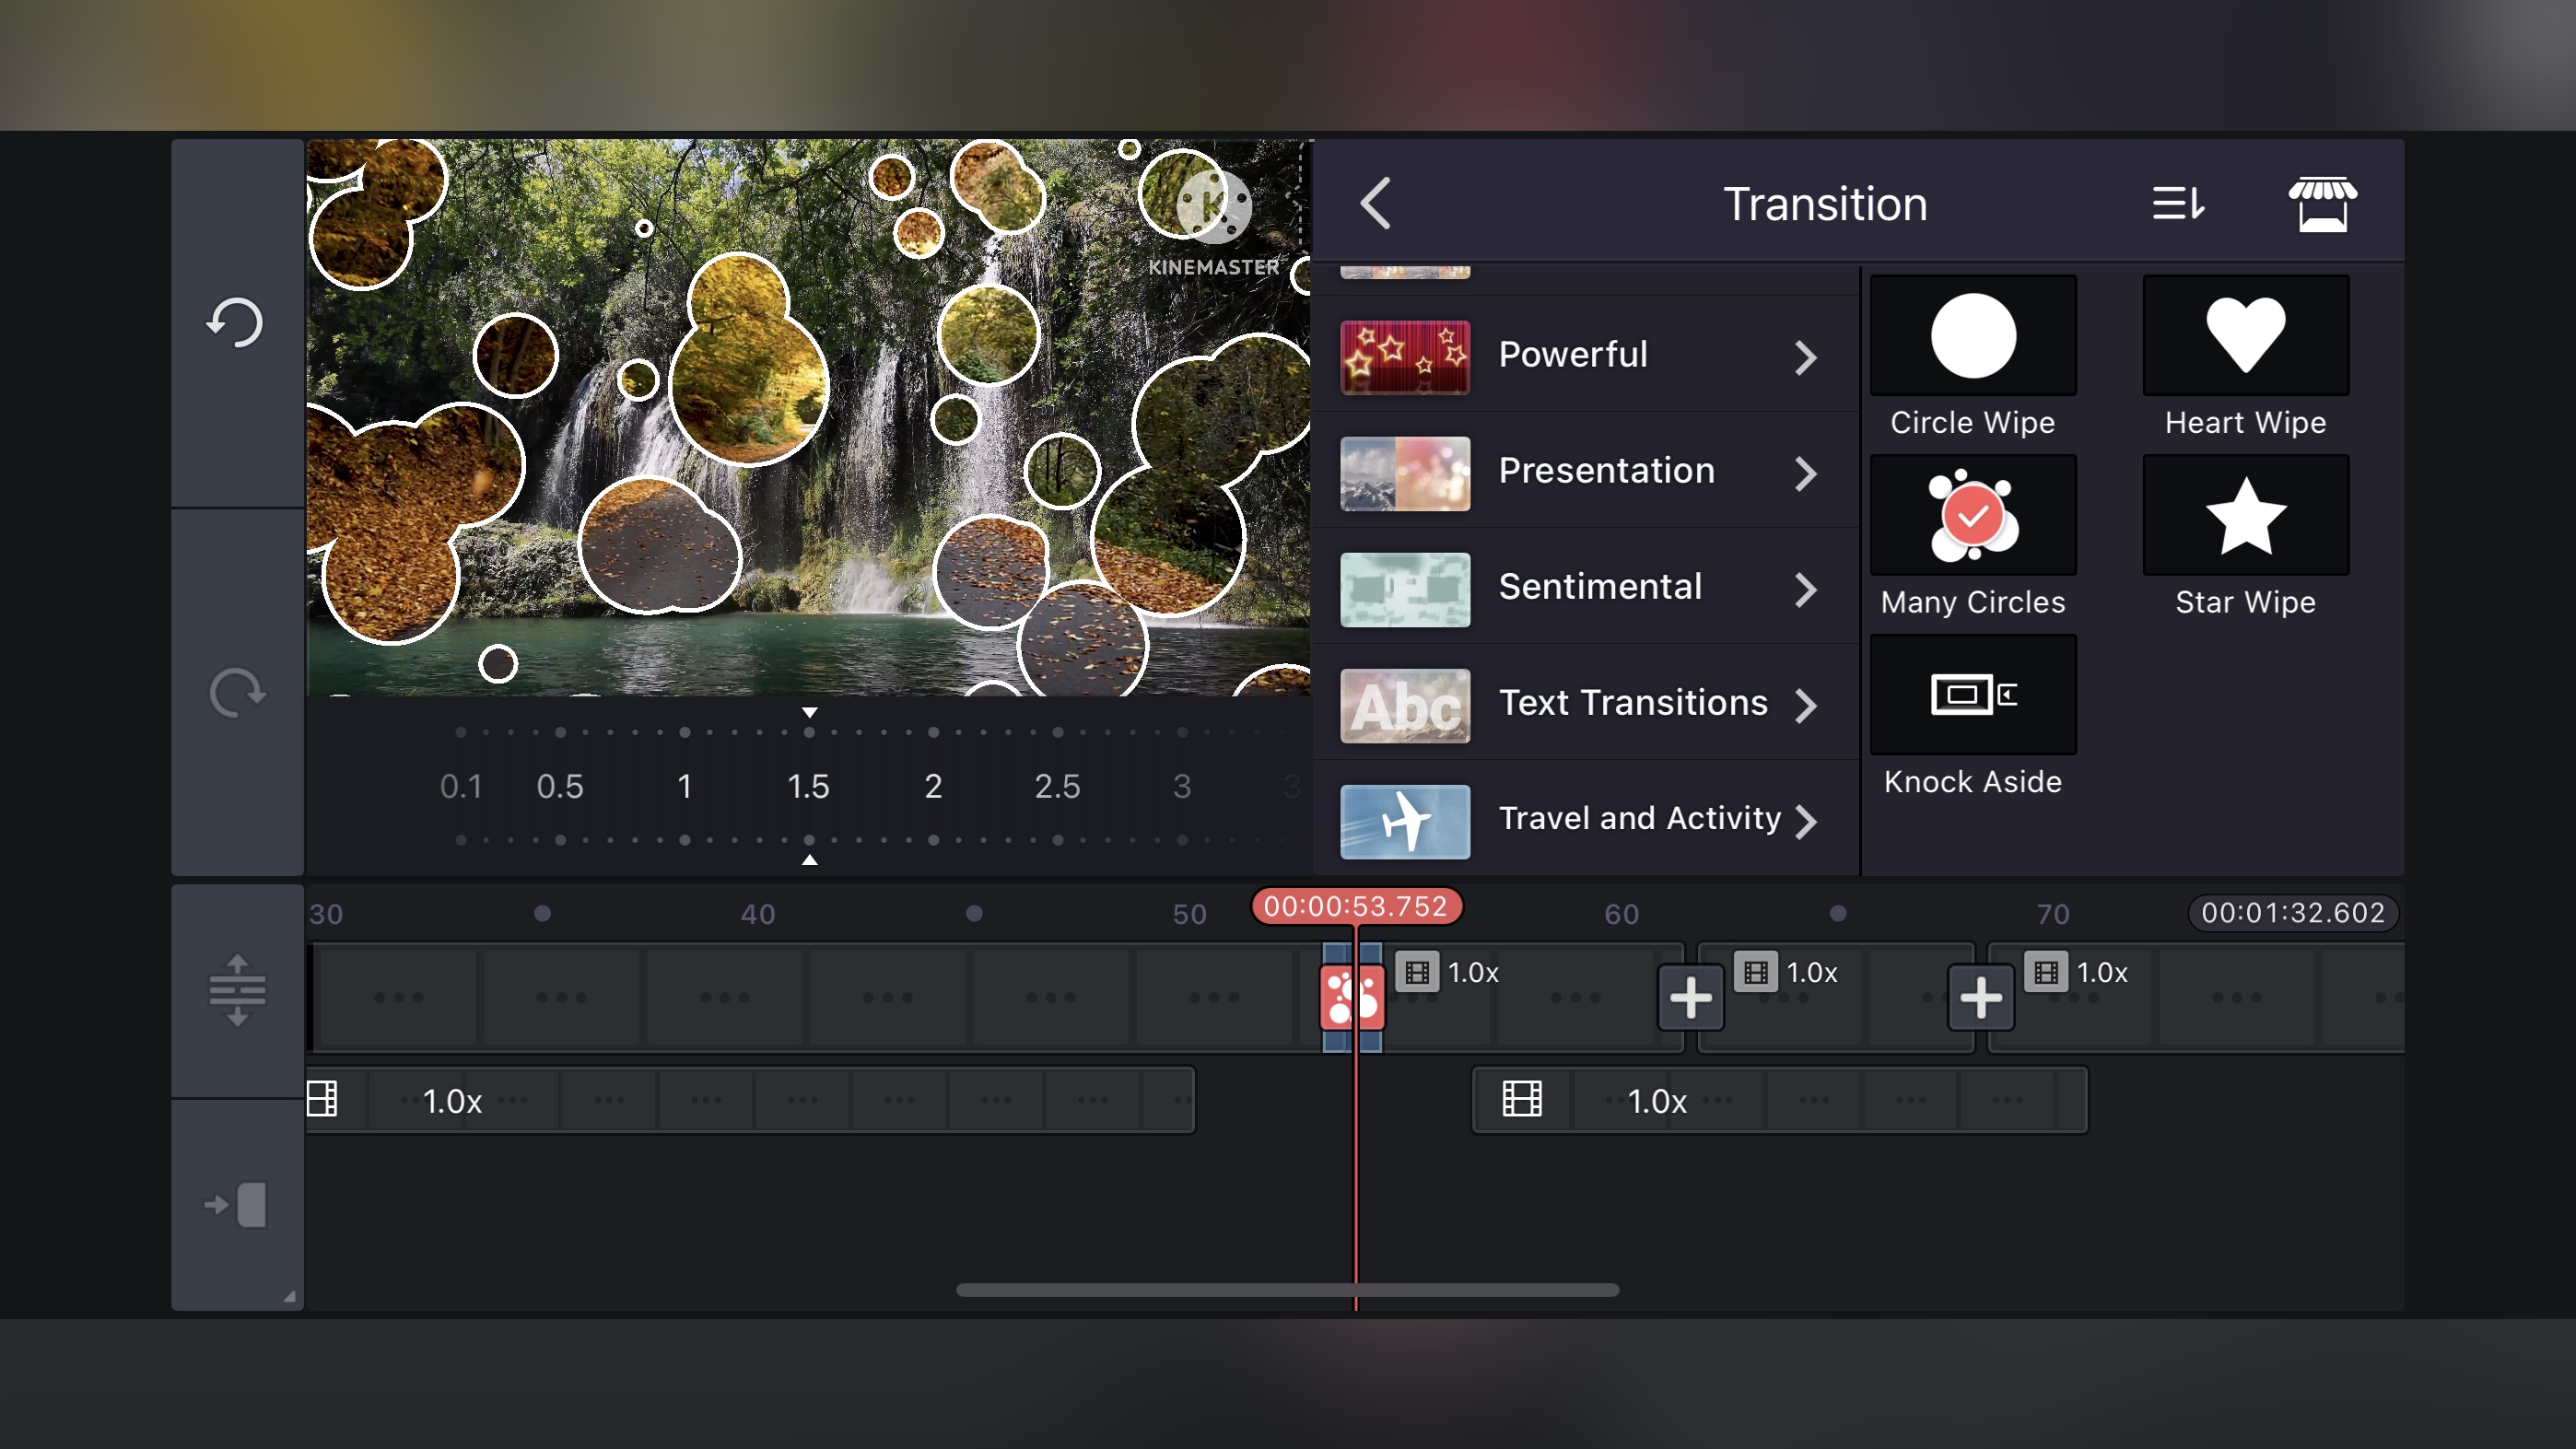
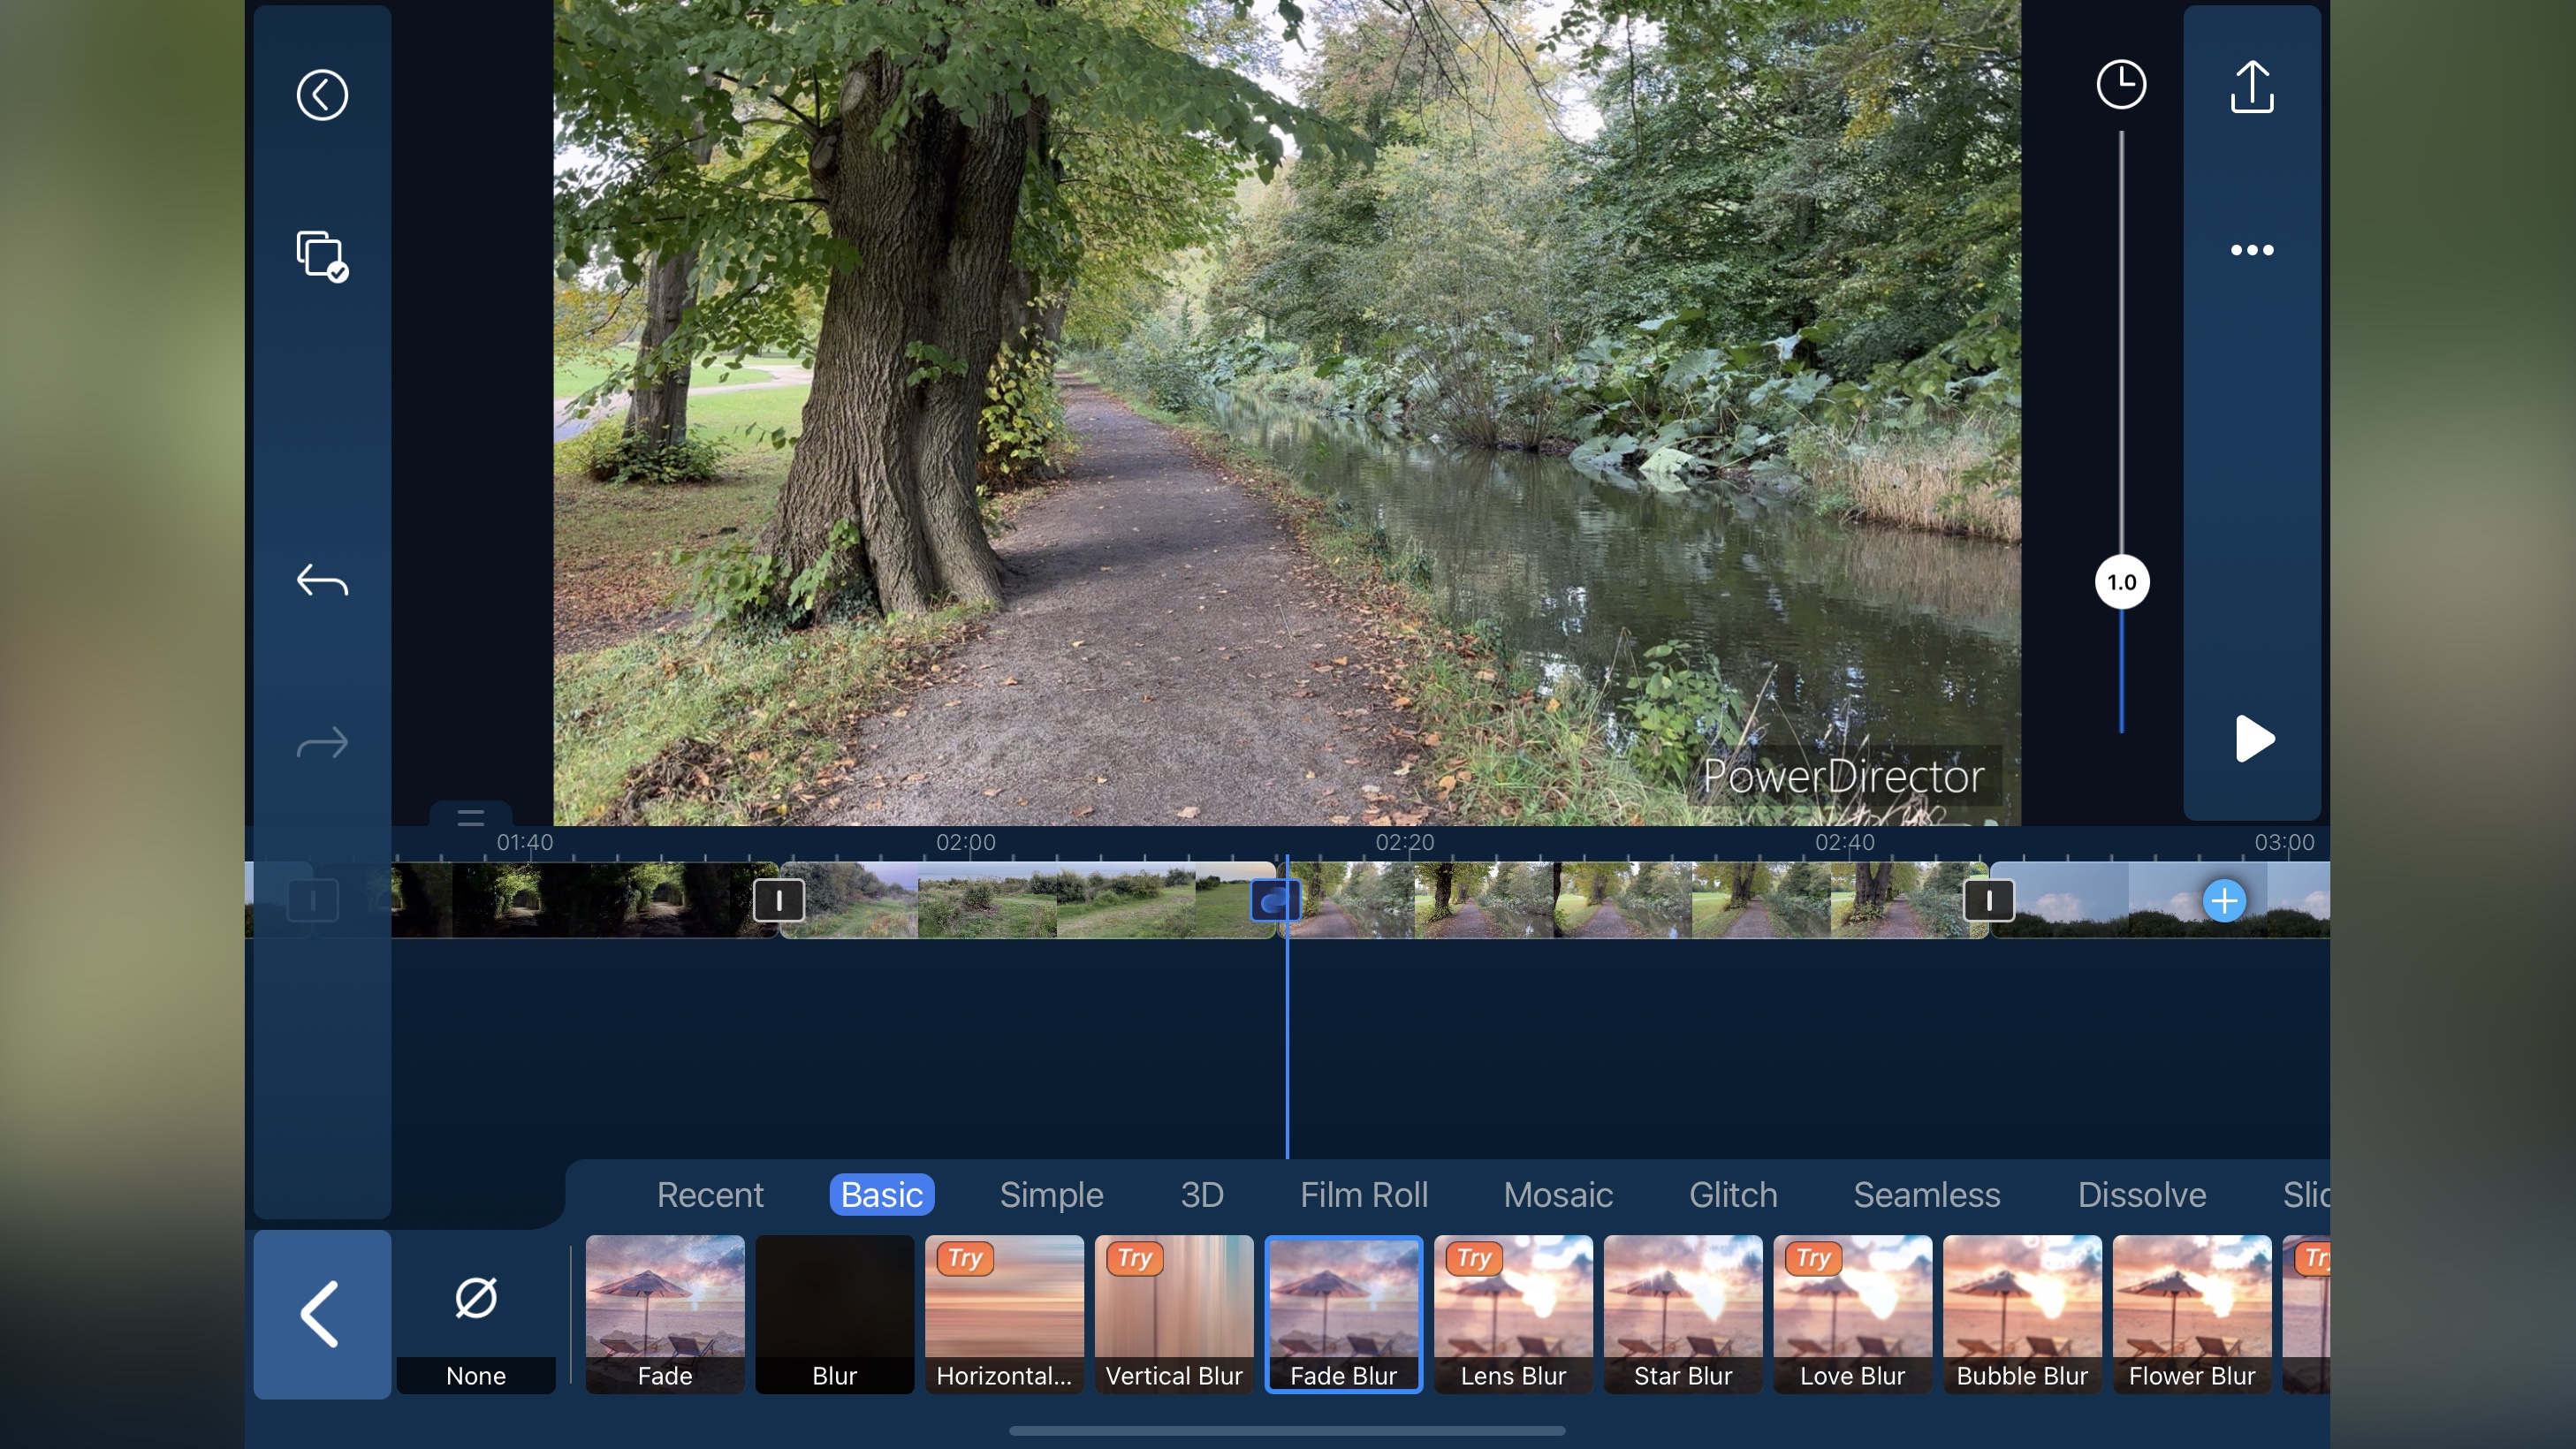
You can add stickers, titles, special animated effects known as ‘decors’, and filters. These appear as clips on separate layers, making it easy to move them around, and apply them across multiple clips if you want to. Altering their parameters is simply a question on tapping on them and seeing all available contextual tools at the bottom of the interface. 

CyberLink PowerDirector on iOS during our video editing app review

Working with green screen is simple, but other apps do a better job of removing the background from around messy hair  (Image credit: CyberLink )

When it comes to editing your text layer, repositioning the words is a simple matter of dragging it in the main preview section. Resizing and rotating is done in the same way. You’ll also find a long list of tools associated with text layers, ranging from animation to motion tracking. Simply tap, alter the parameters, and you’re good to go.

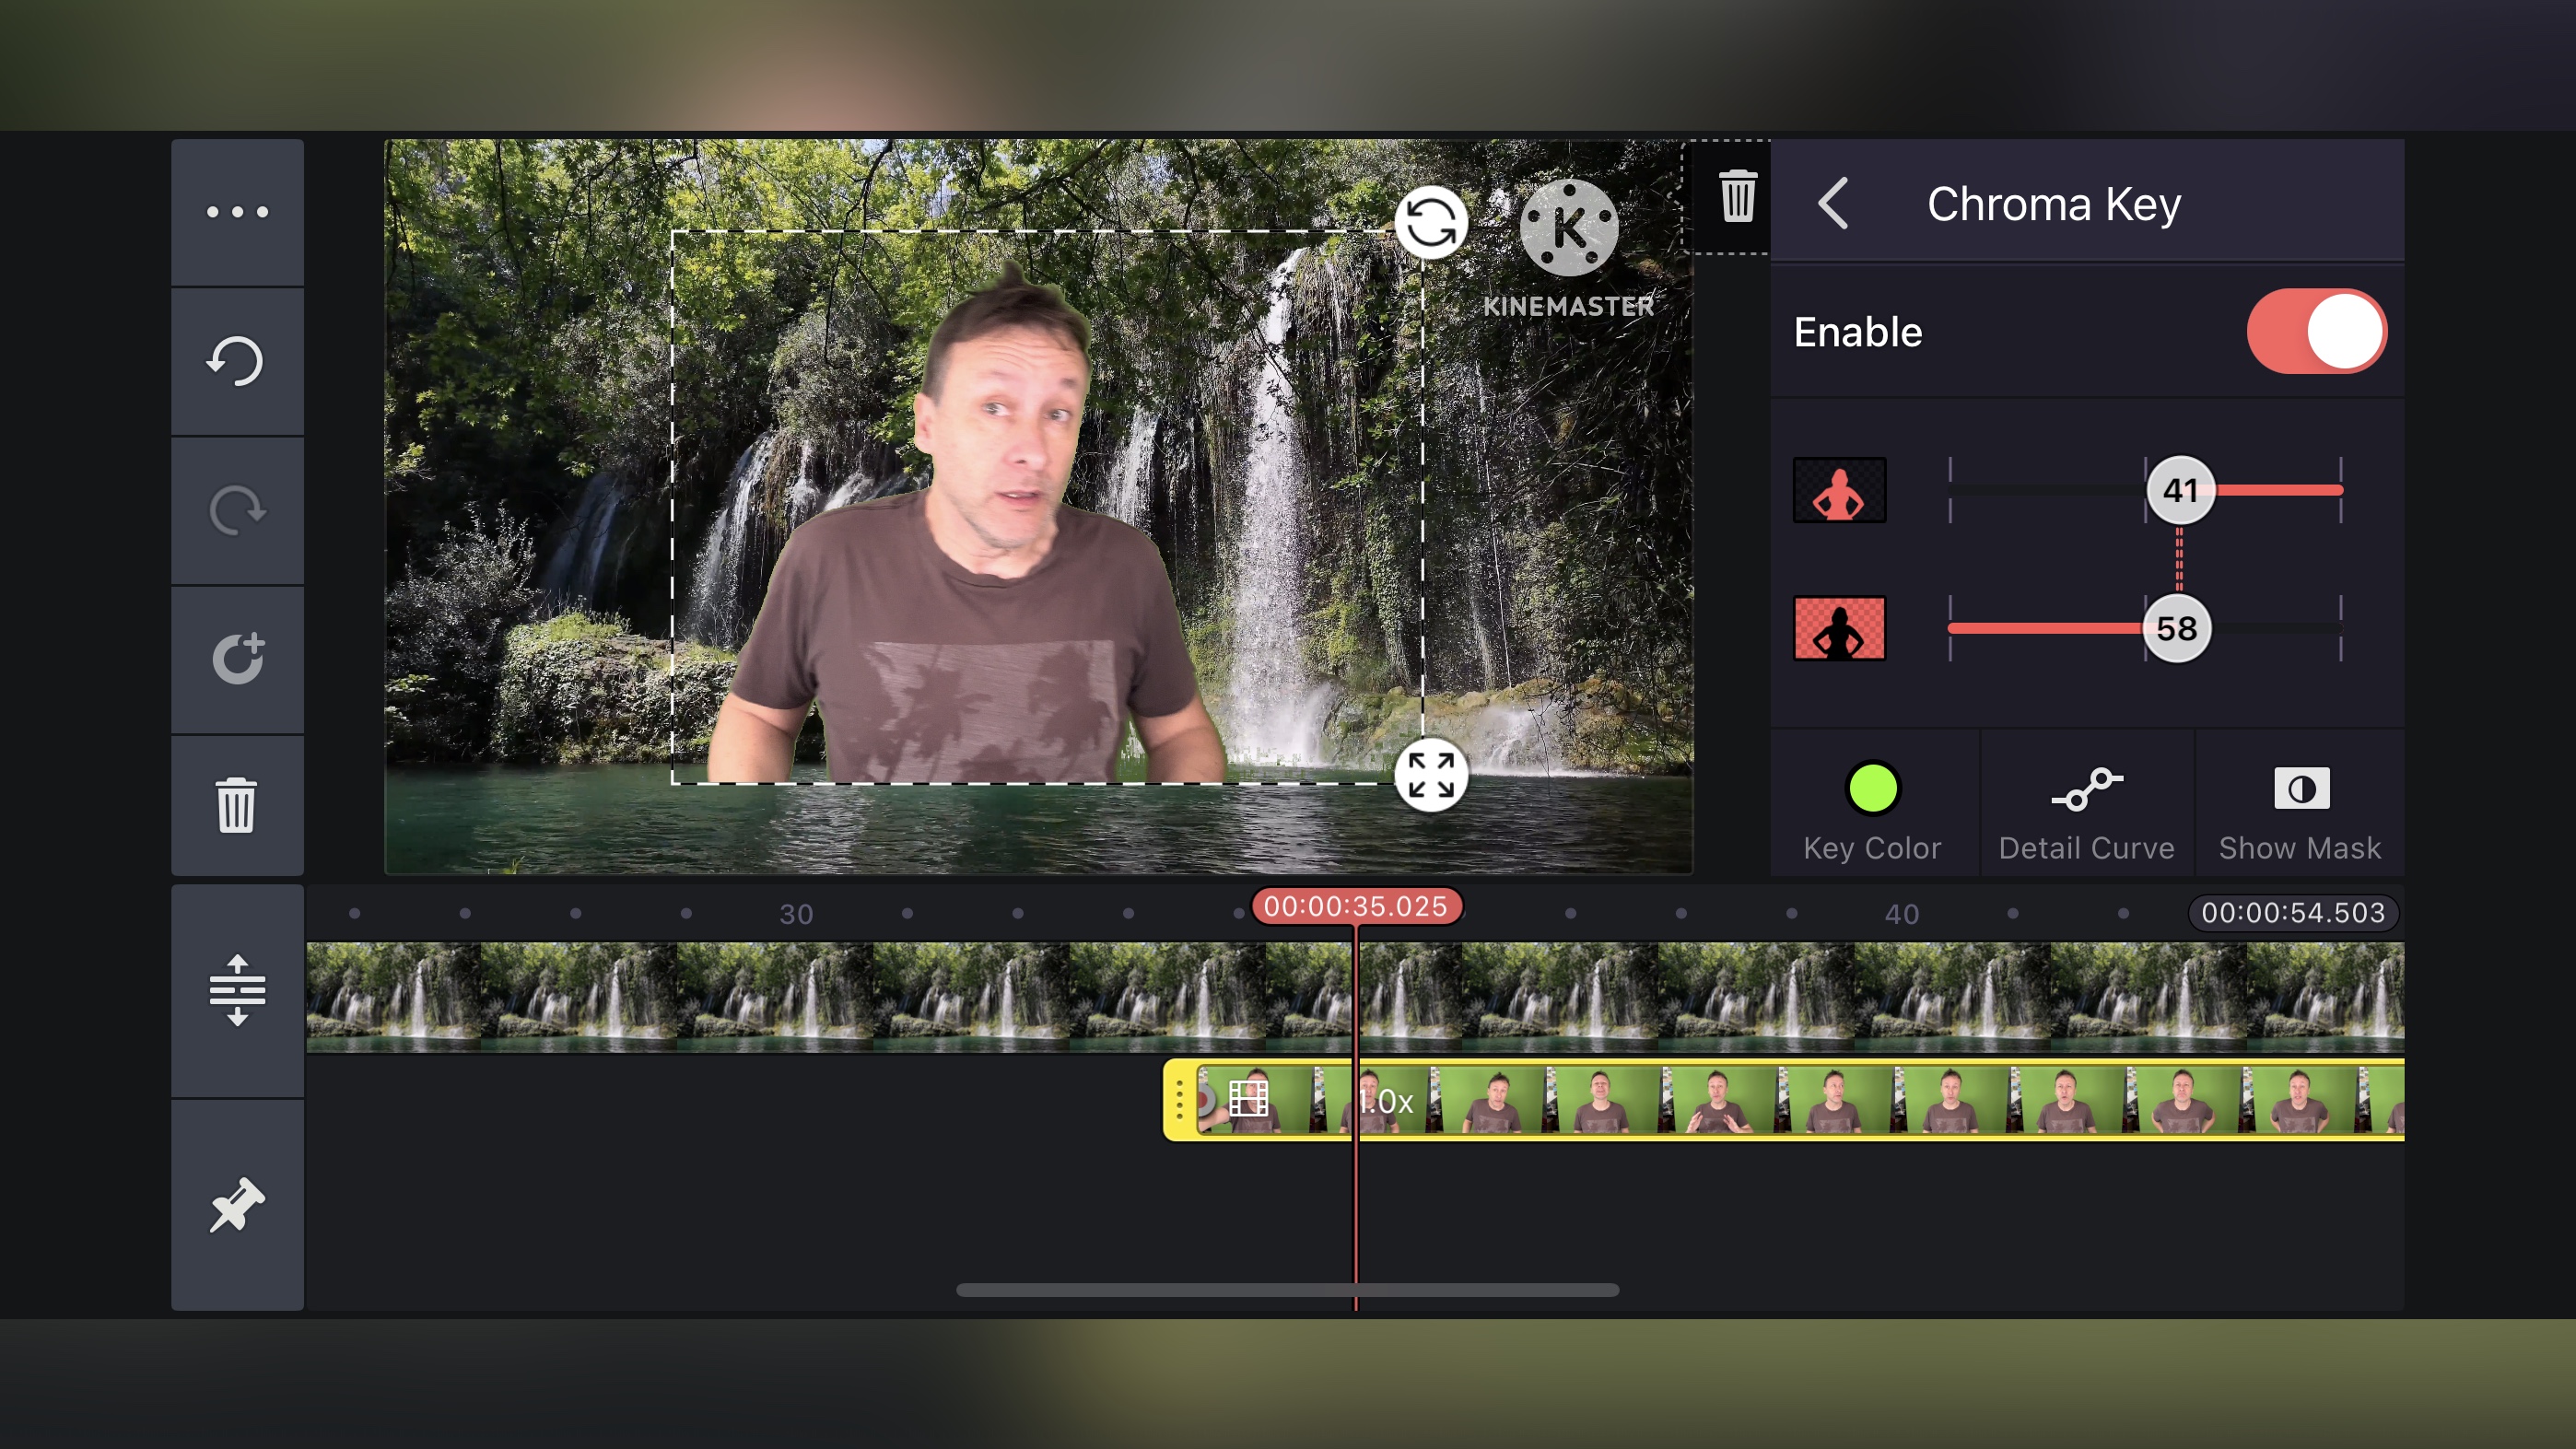
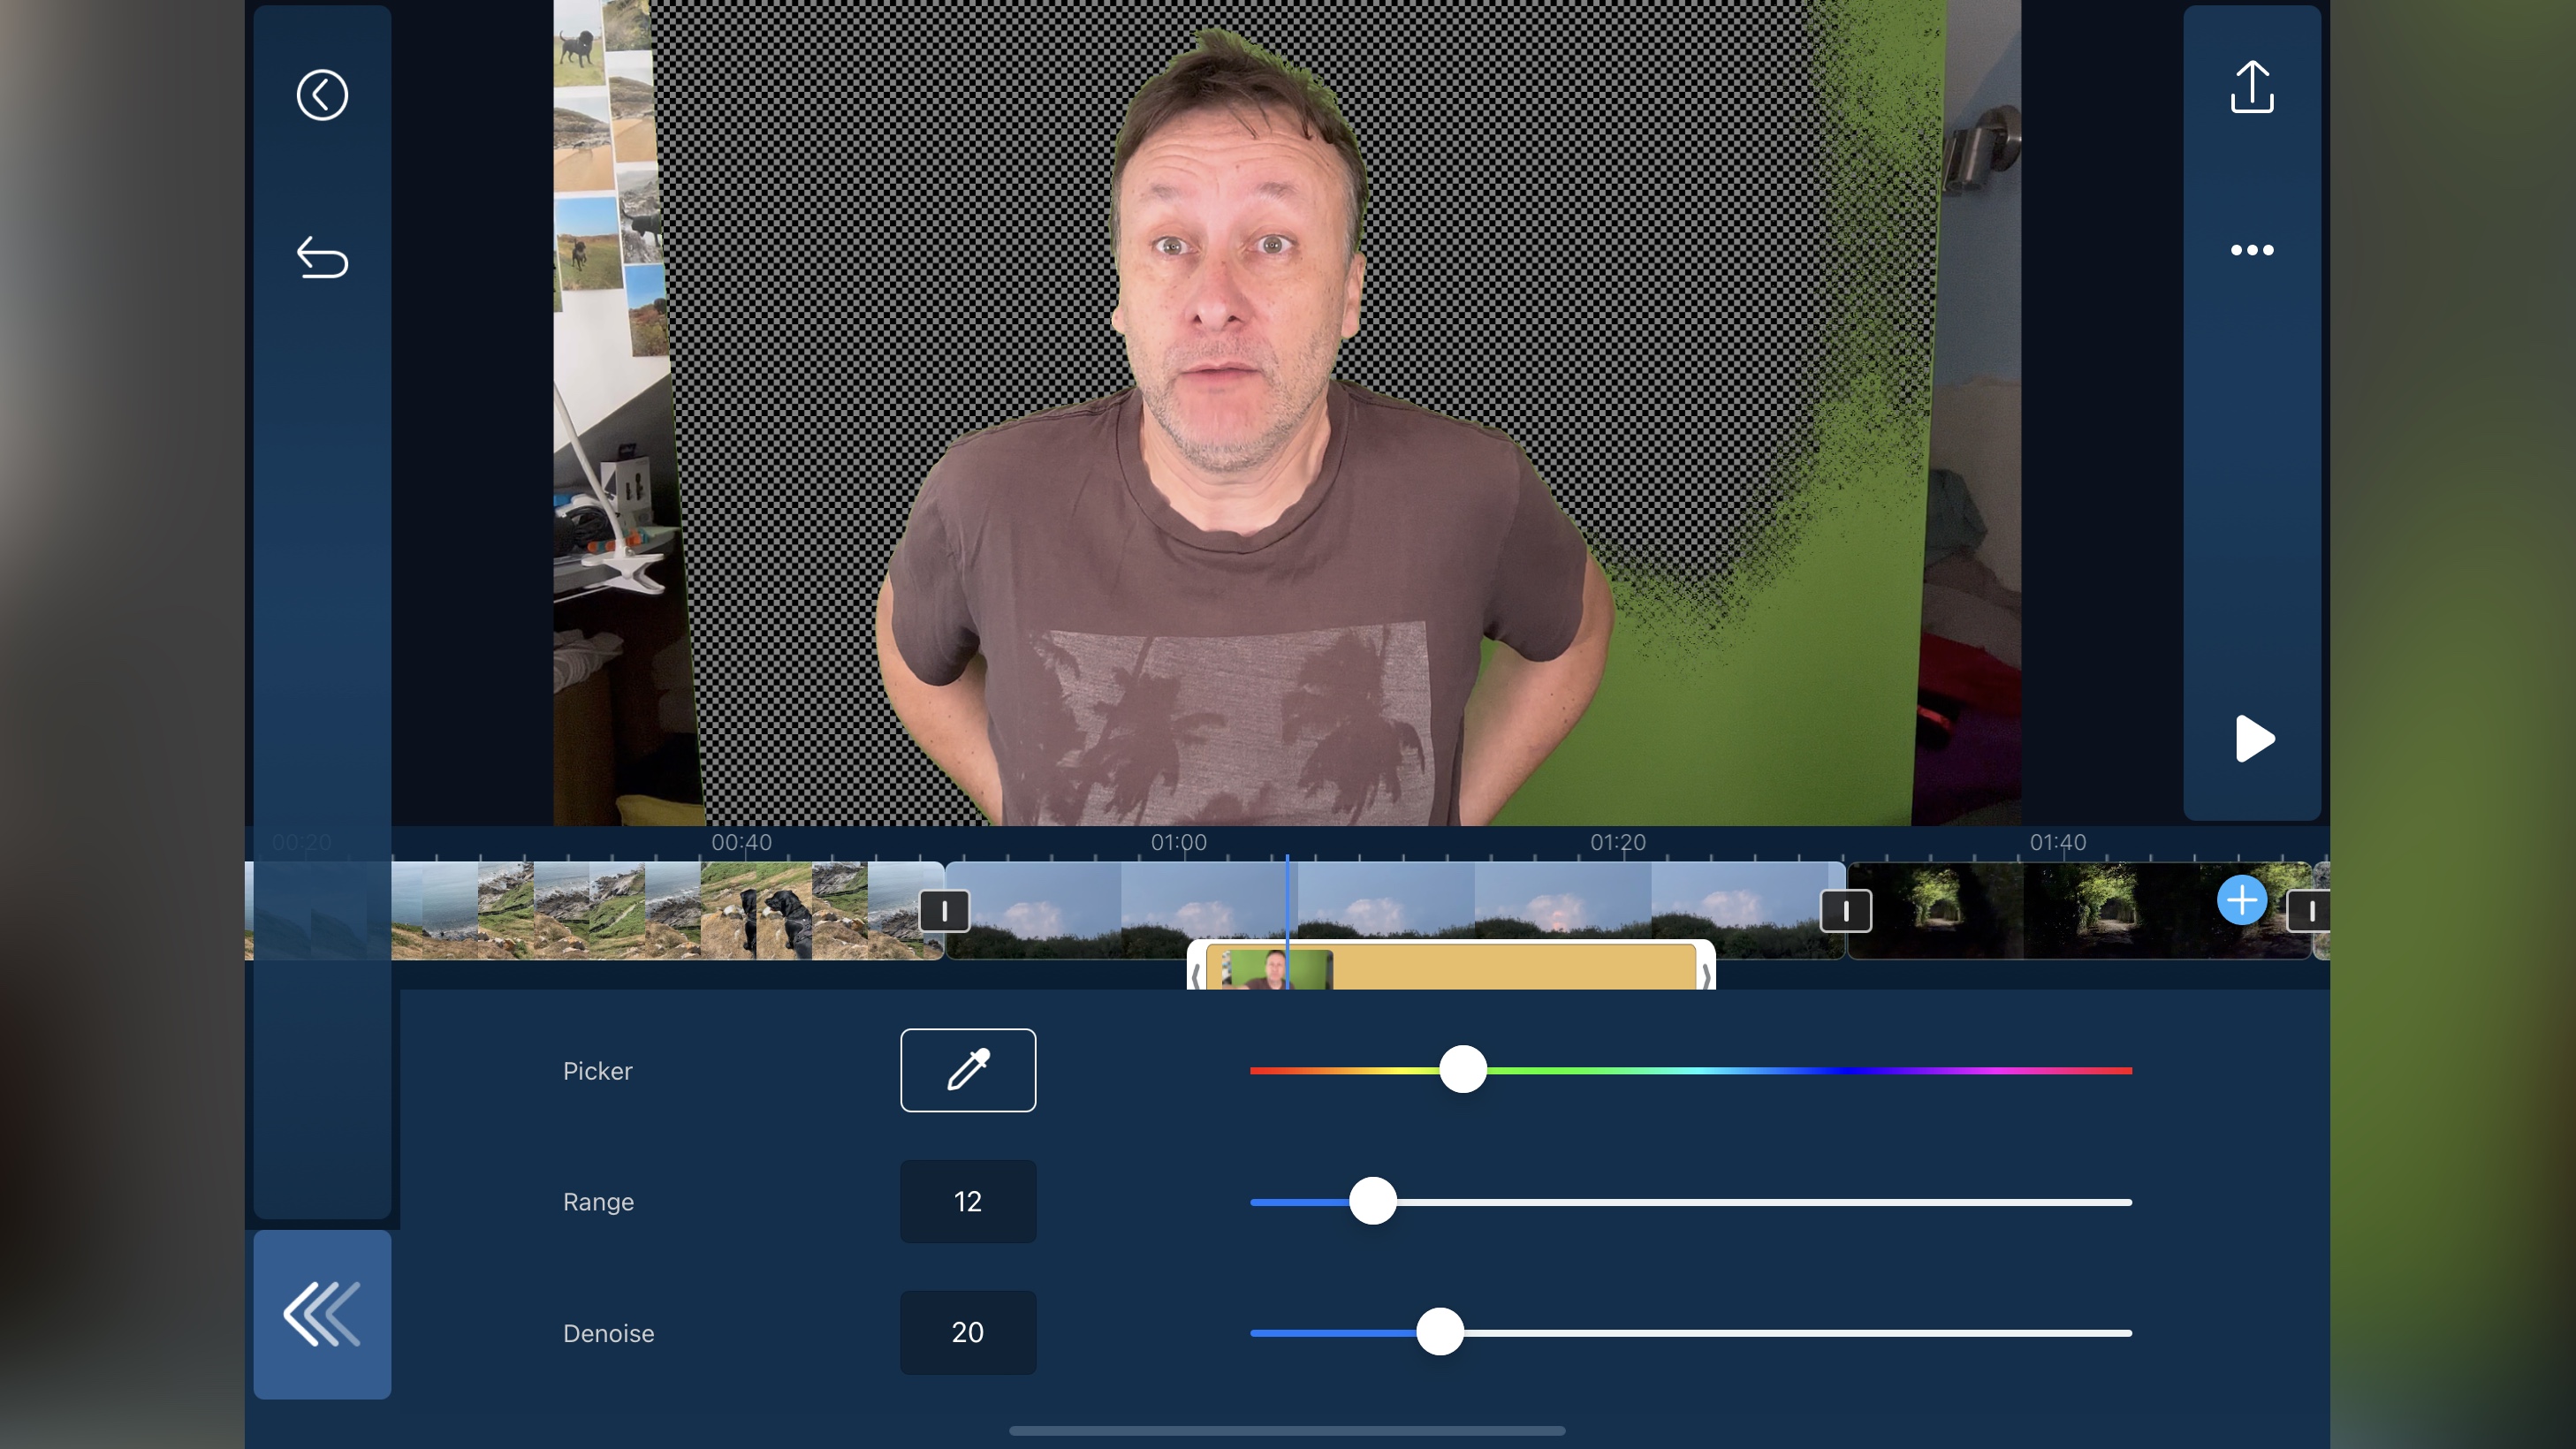
There are also advanced features such as chroma keying, although we found the results to be not as good as the competition, especially when it came to messy hair, where shades of green stubbornly remained in between unruly strands.

But really, for a mobile app, it does a pretty good job, with an interface that is not too small, and relatively easy to use. The only fiddly bit is moving clips around as it seems to take a little while for the app to realise what you’re trying to do. But aside from that, it’s pretty good.

  • Video editing: 4.5/5

Cyberlink PowerDirector app: Media limitations

CyberLink PowerDirector on iOS during our video editing app review

You have access to various online media libraries directly from within the app, 2/3rds of which are free to use (Image credit: CyberLink )
  • Good direct connection to a handful of online media library, but sadly PowerDirector runs roughshod over your request for privacy and insists on seeing your entire photo library

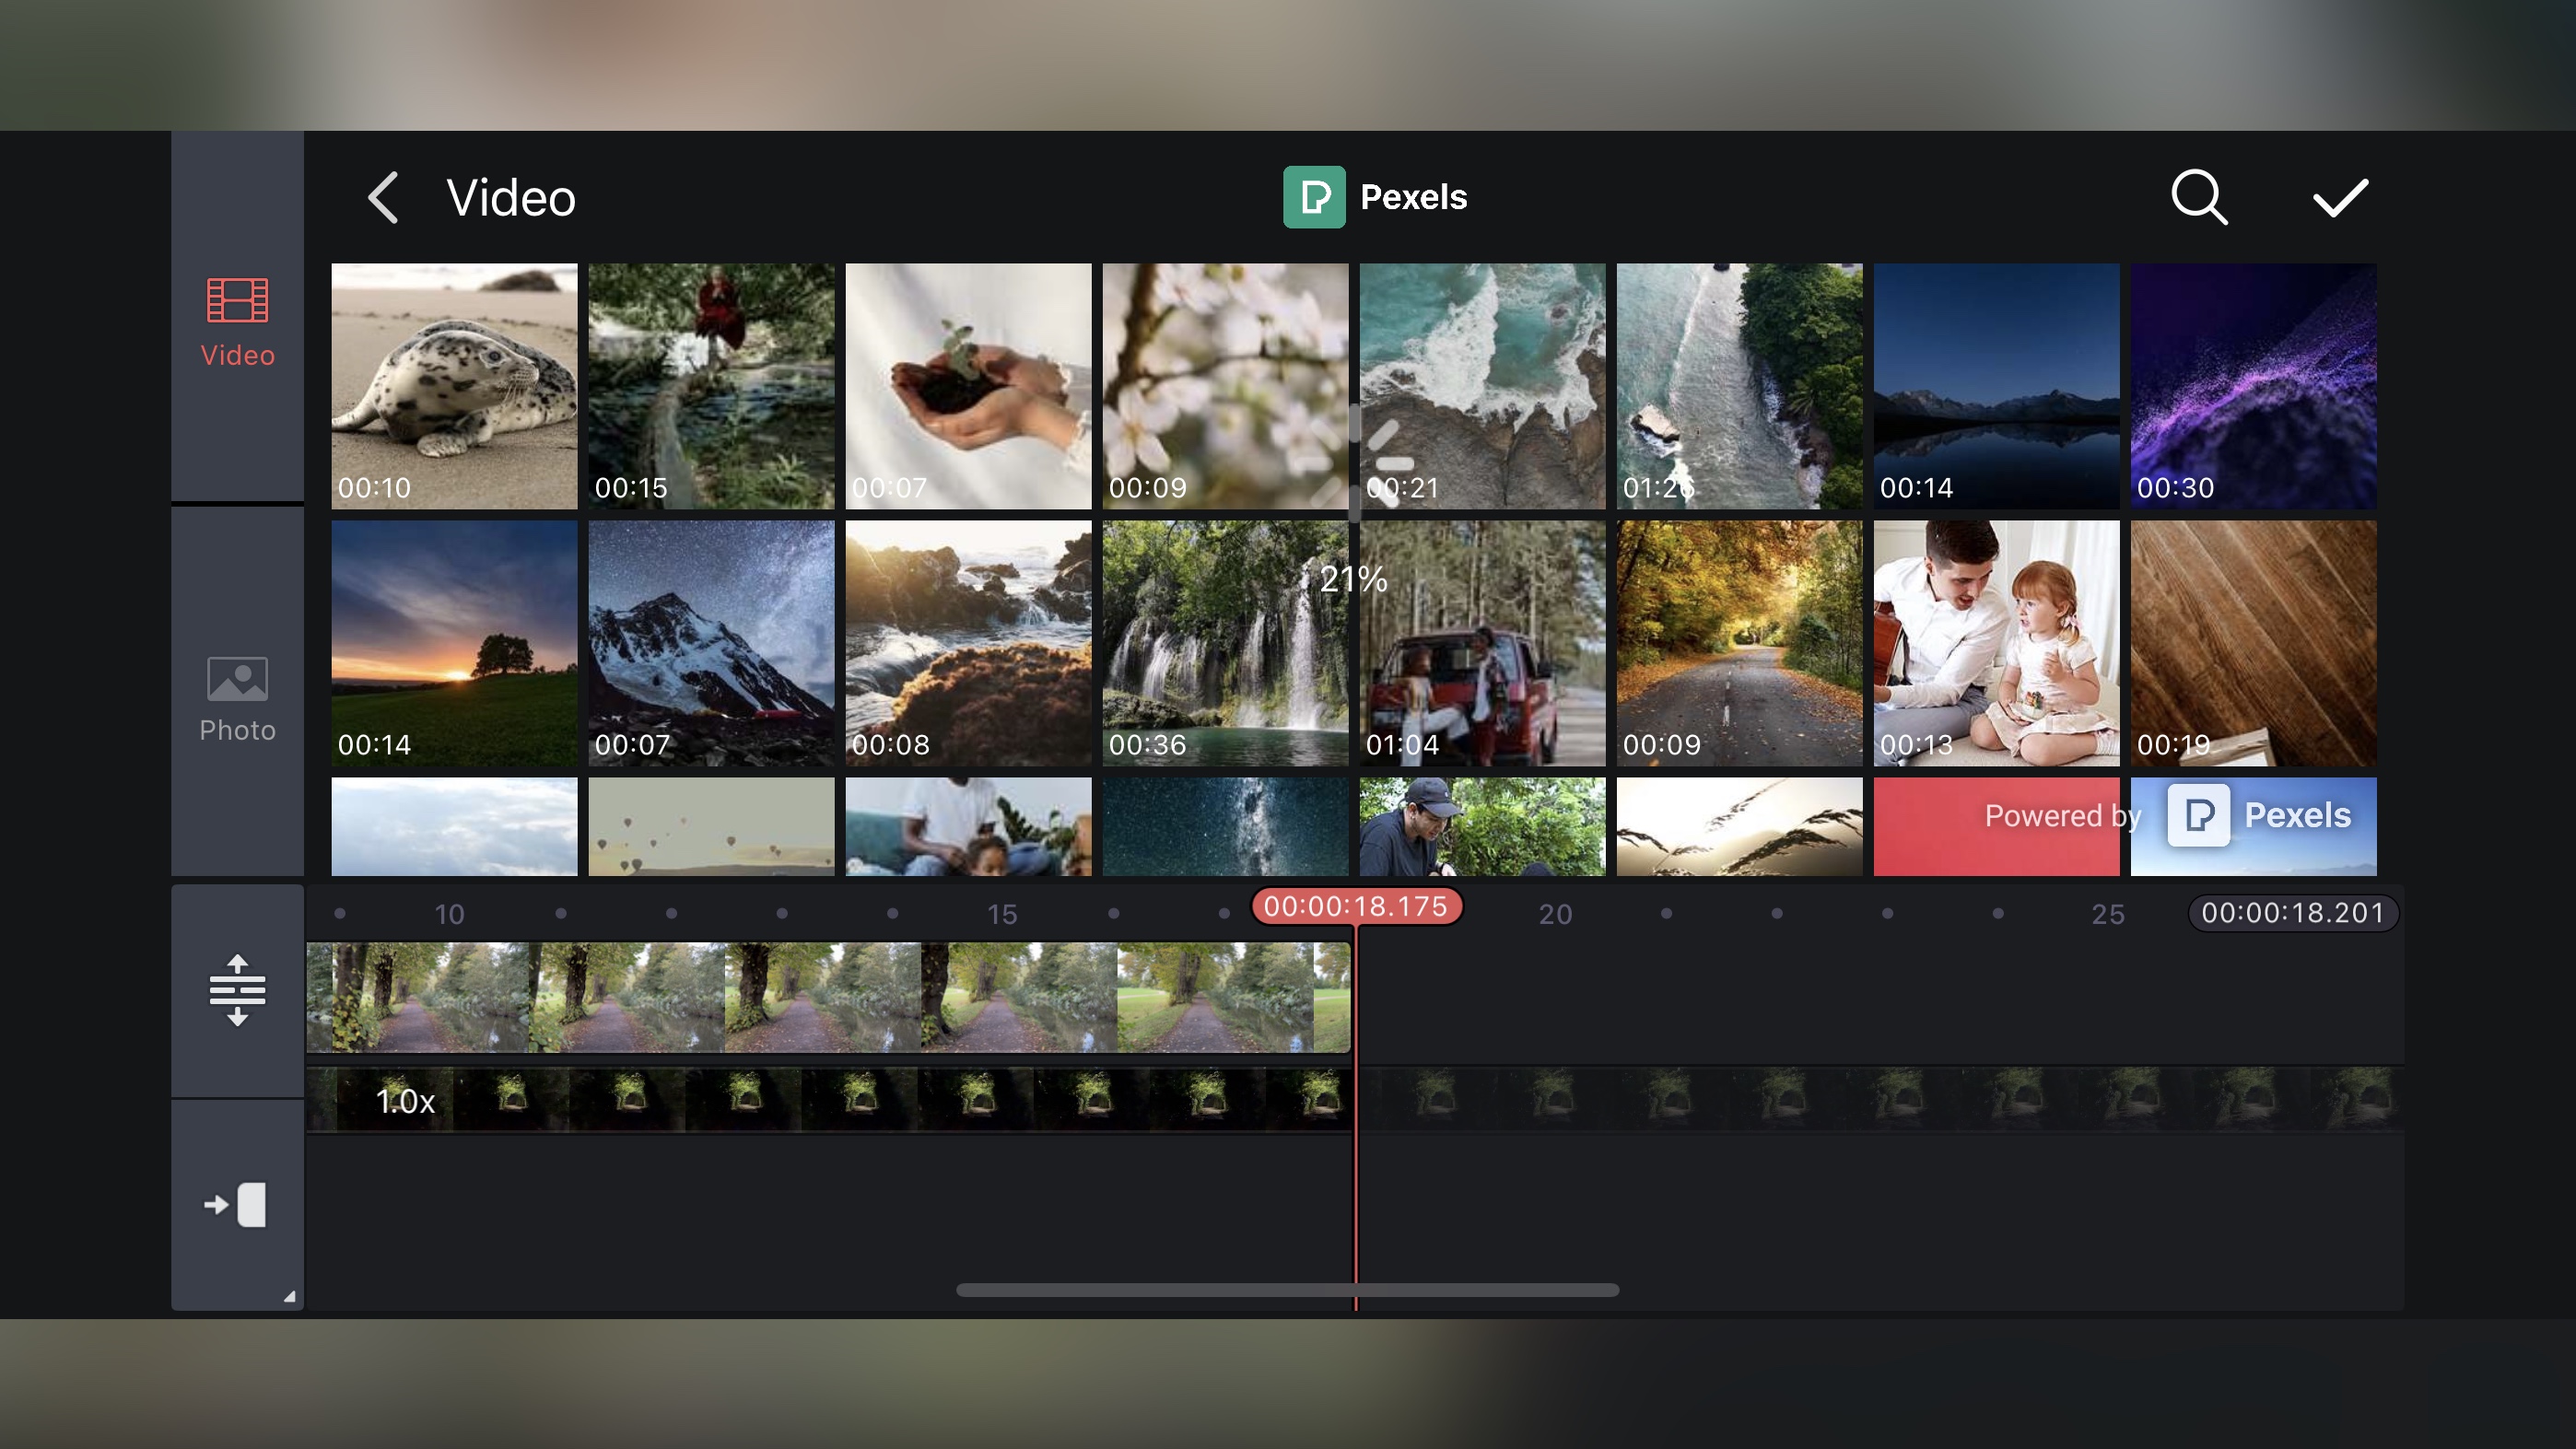
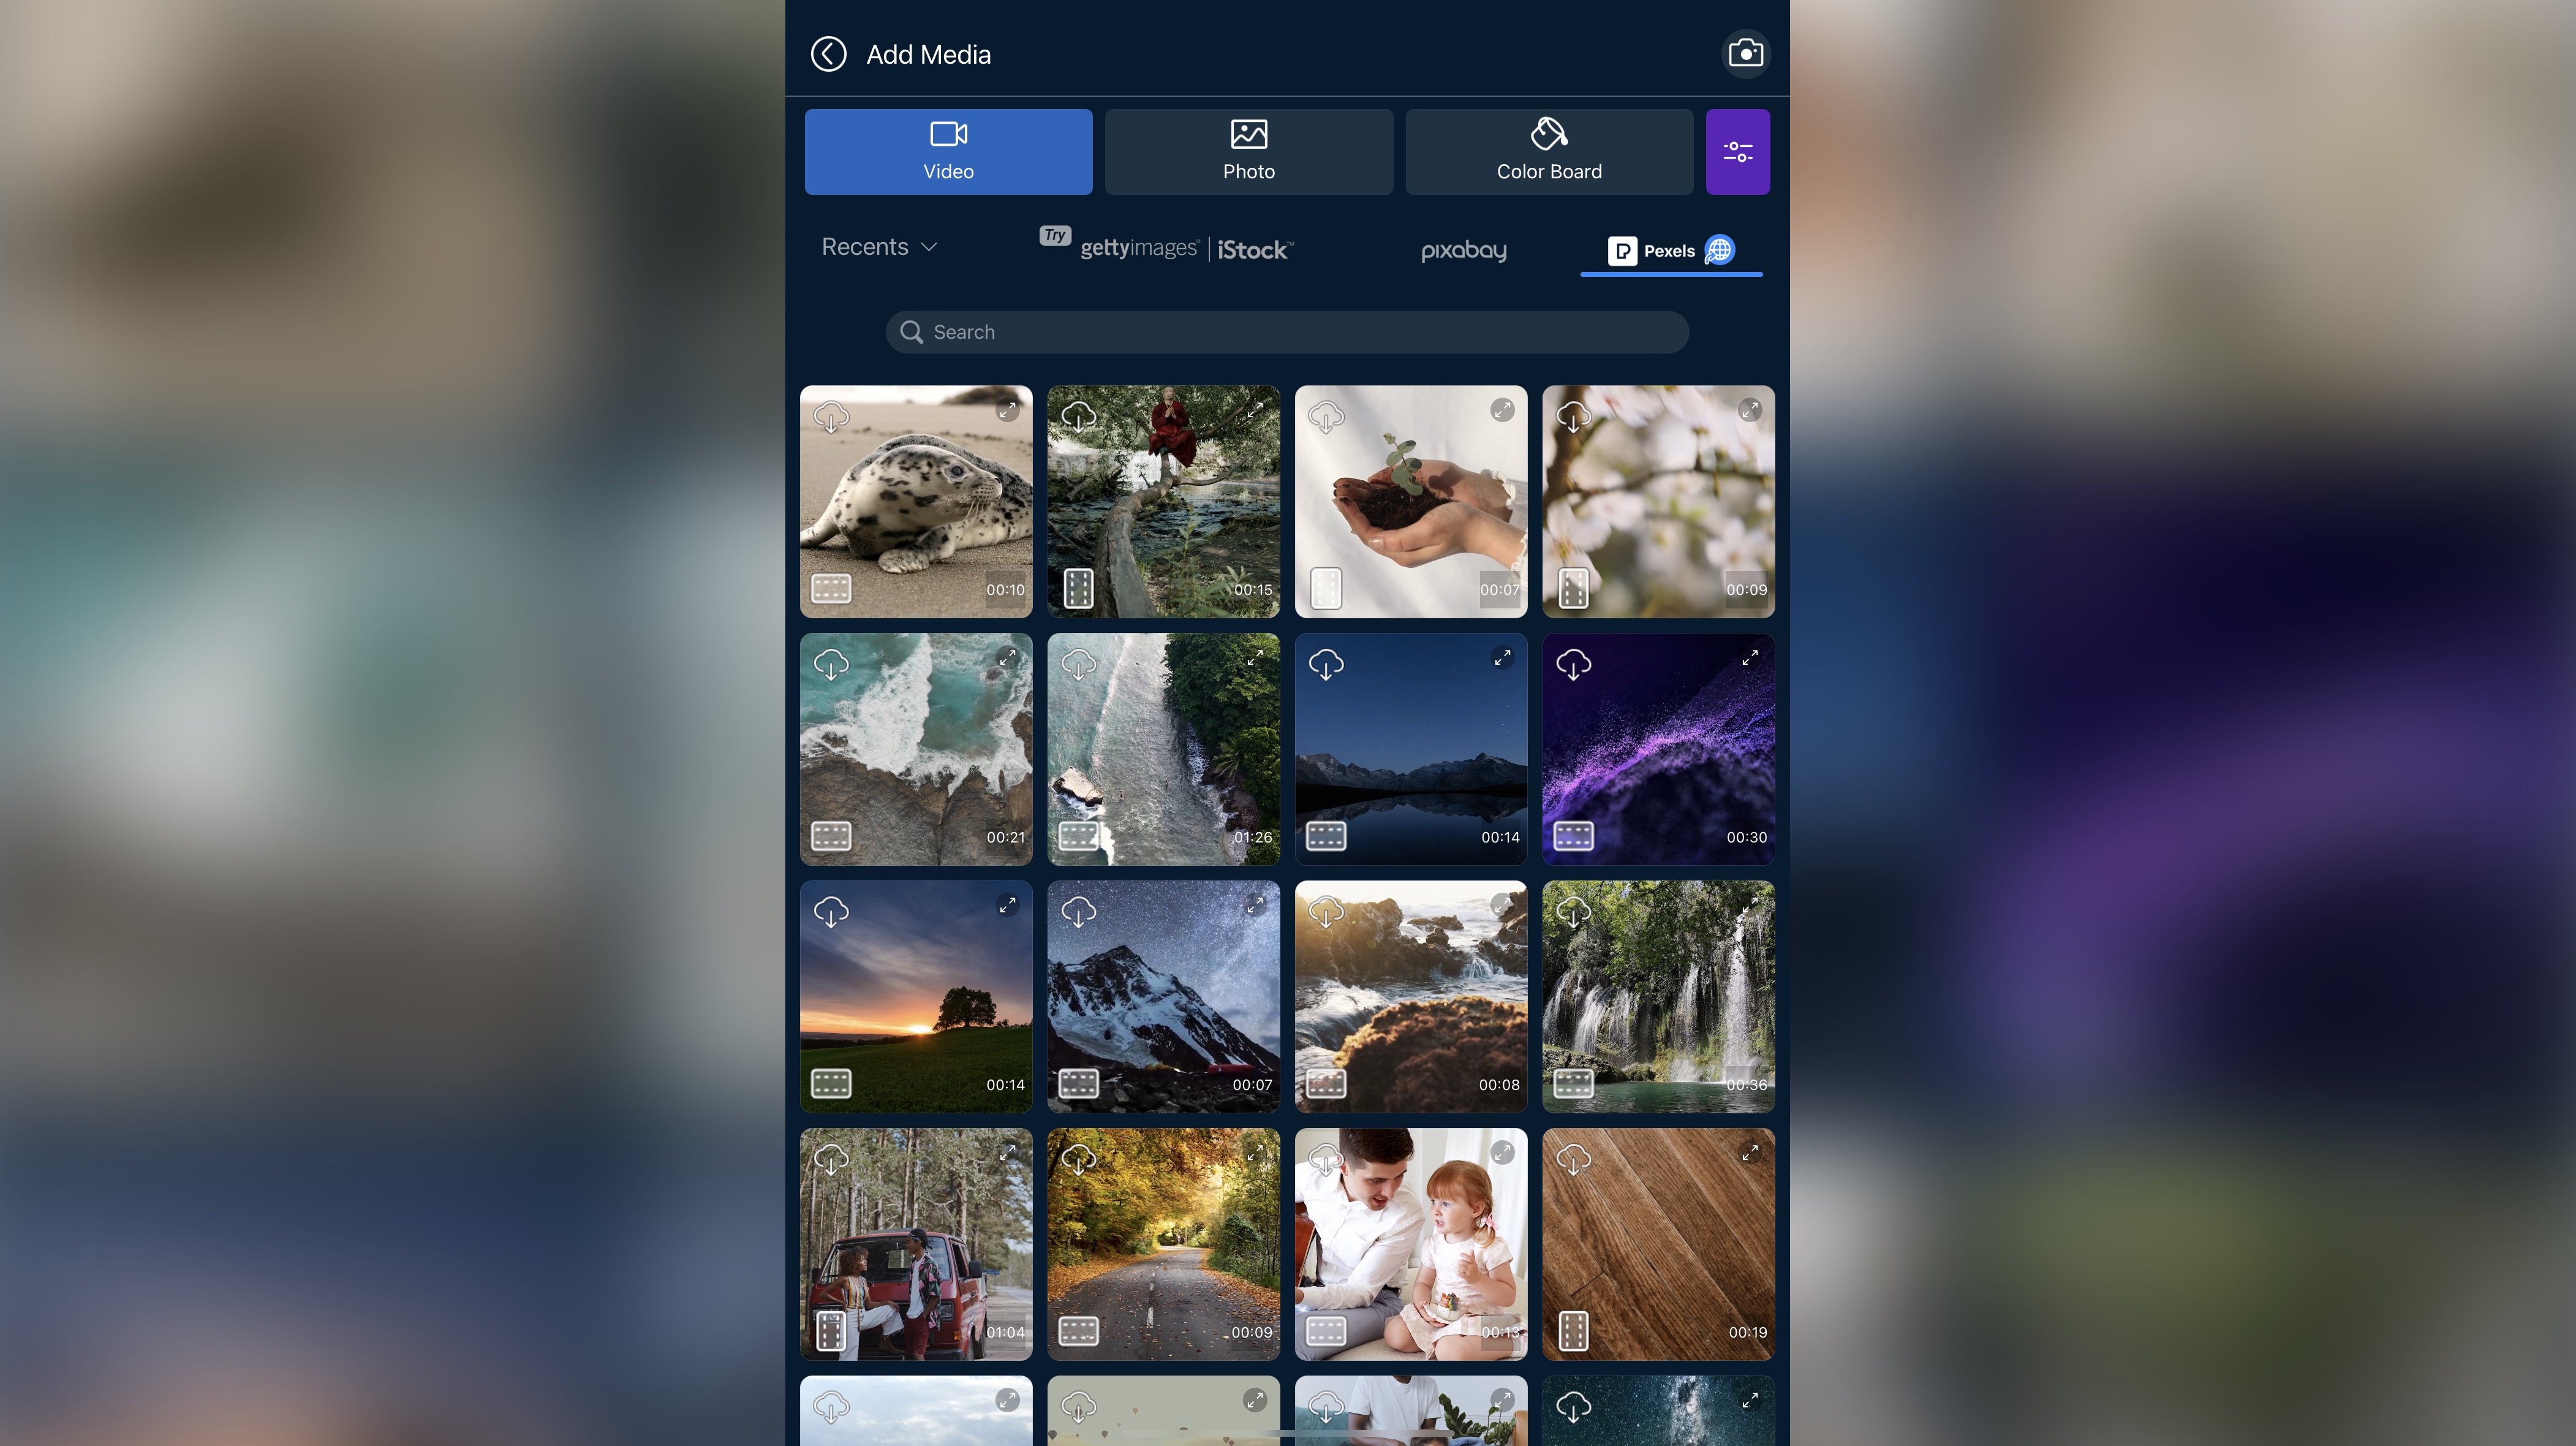
It stands to reason that a video editor would be useless without media to edit. And to help you with that, PowerDirector links you directly to free online libraries for botj Pexels and Pixabay, where you can choose as many video clips and photos as you’d like. There’s also a link to iStock, but that content isn’t free. 

If you’d prefer to use your own footage, no problem: you can access your device’s Photos Library too. Except there’s a pretty major hiccup for the privacy conscious. As with any other app, the first time you launch it, you’re asked if you’d like to grant it access to your entire library, or restrict it to just the media you want to use. So far so good. 

CyberLink PowerDirector on iOS during our video editing app review

Puzzlingly, PowerDirector insists on having access to your entire media library, even to export your project, when other apps can do that without breaching your privacy  (Image credit: CyberLink )

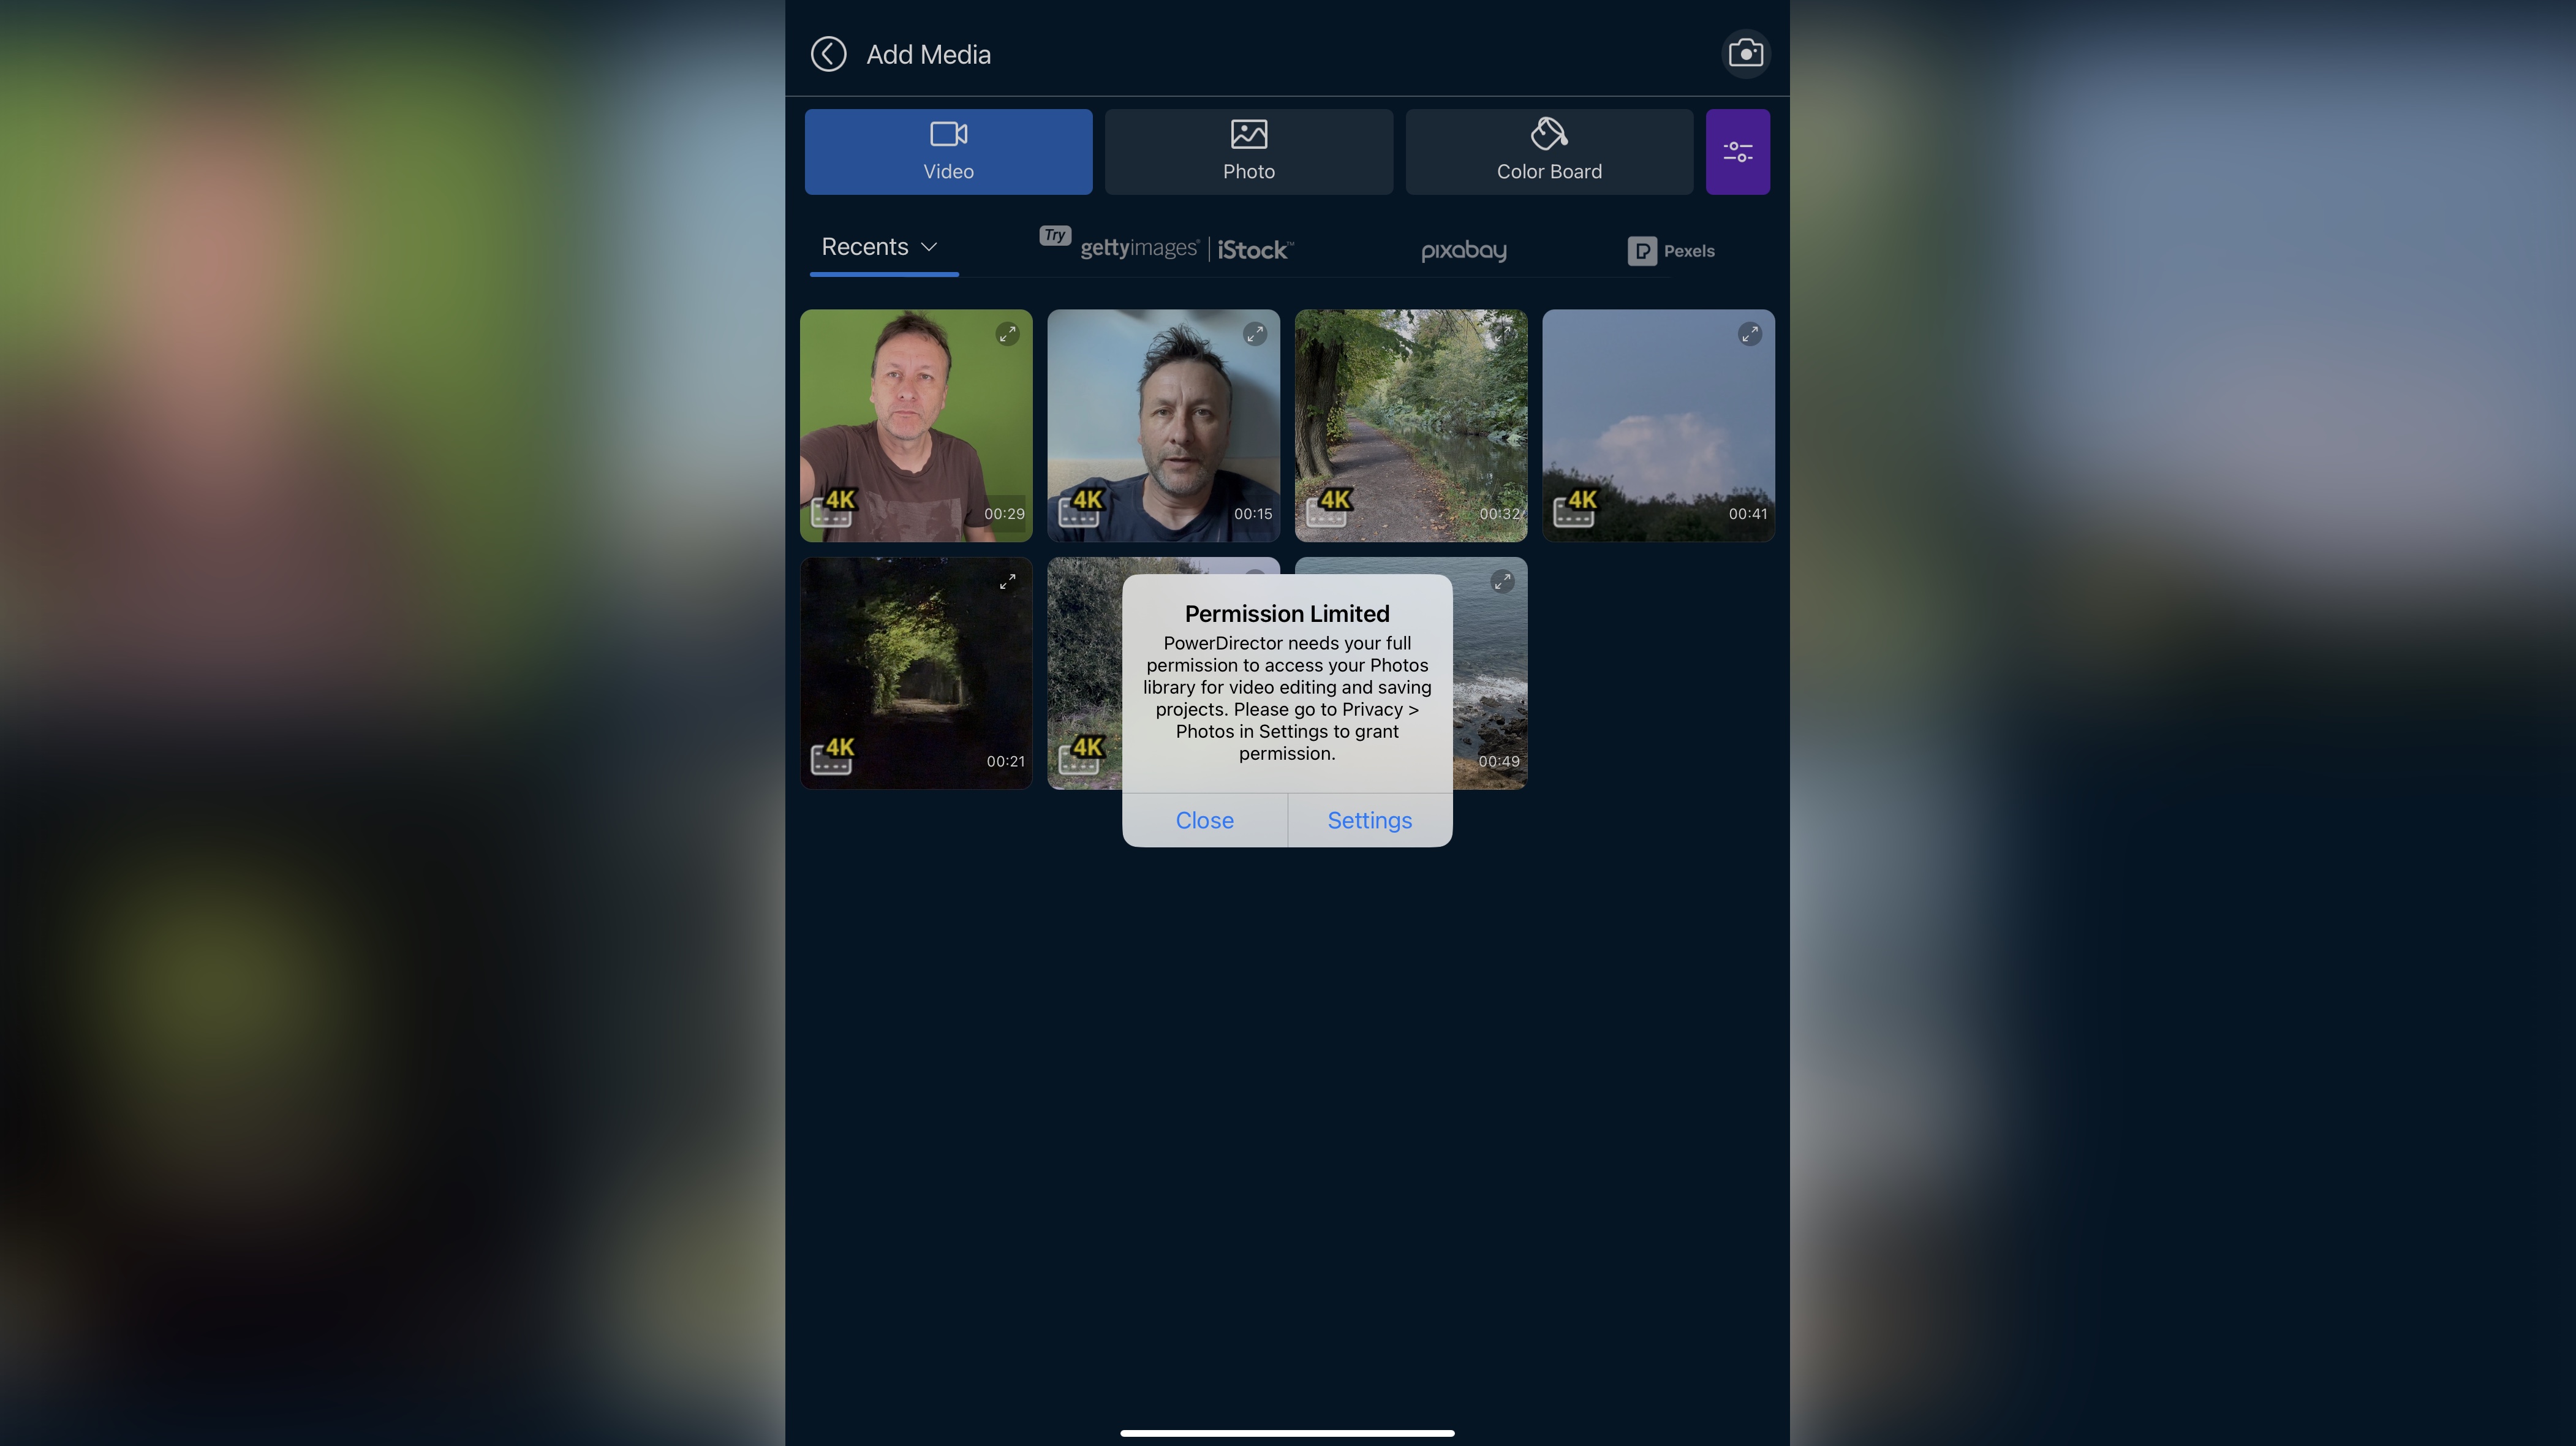
Unfortunately, if you wish to add additional clips after that first batch, you can’t. There seems to be no way to do that, and PowerDirector insists it needs to see all your media to work. But in actuality, that shouldn’t be the case: other apps work fine with just the clips you allow it to use.

PowerDirector also insists it needs full access to your library in order to export any projects. Again, other apps export fine without being granted full access. Which begs the question: why is PowerDirector so adamant your privacy is secondary to its needs?

CyberLink PowerDirector app: Scorecard

Should I buy?

CyberLink PowerDirector on iOS during our video editing app review

Tap between two clips to reveal all available transitions. Those with a crown icon are restricted to paid subscribers  (Image credit: CyberLink )

Buy it if...

You’re looking for an elegant mobile video editor, with many easy to use tools, and don't have access to any of the best video editing computers or the best laptops of video editing

Don't buy it if...

You don't like a video editing app side-stepping your privacy, and you’d rather buy something outright than subscribe to it.

CyberLink PowerDirector app: Alternatives

For some of the best alternatives to PowerDirector on iOS and Android, we recommend checking out LumaFusion, DaVinci Resolve for iPad, and CapCut.  

Thursday, December 28, 2023

Acemagic S1 mini PC review

Acemagic S1: 30-second review

Specs

CPU: Intel 12th Alder Lake N95, 4 cores, 6M cache
Graphics: Intel® UHD Graphics
RAM: 16GB DDR
Storage: 512GB SSD
Rear Ports: Dual Gigabit Ethernet, Dual 4K display ports Front Ports: 1.9" TFT LCD screen (170*320 resolution), USB ports
Connectivity: WiFi 5.2, Bluetooth 5.2
Audio: Integrated audio
Camera: Not included
Size: 127mm x 122mm x 40mm
OS installed: Microsoft Windows 11 Pro (64-bit)
Accessories: Magnetic detachable casing

The Acemagic S1 nibi PC is powered by the Intel 12th Alder Lake N95 processor and positions itself as an entry-level Mini PC for home and office users. With its compact design, 16GB RAM, and 512GB SSD storage, it's tailored for day-to-day tasks and serves well as a file storage server or a soft router/firewall in a home network; there's also the option for a 1TB version.

A standout feature of the S1 is its 1.9" TFT LCD screen, which displays crucial information like CPU power, temperature, memory load, and fan speed. We've tested out loads of the best mini PCs and this is certainly an 'extra' feature. It not only adds a touch of the futuristic to the design but also provides functional real-time system monitoring, more for interest than anything else. You can also delve into the preinstalled app and tailor what is displayed depending on your needs and interests. 

Performance-wise, the Alder Lake N95 processor ensures the S1 can handle multitasking and basic computing tasks with relative ease. Its benchmark scores reflect this capability, with a GeekBench CPU Single score of 1126 and a Multi score of 2514. These figures indicate that while it's not built for heavy computing, it's more than adequate for everyday applications such as web browsing, document editing, and file management.

In terms of graphics, the Intel UHD Graphics is sufficient for basic multimedia tasks but falls short when it comes to gaming or graphically intensive work. This is evident in the modest scores in Fire Strike and Time Spy benchmarks. However, this limitation is expected given its positioning as an entry-level mini PC.

The dual Gigabit Ethernet support is a significant advantage, particularly if you're looking to set up a reliable home network or require stable internet connectivity for streaming and online tasks. The S1's Wi-Fi 5.2 and Bluetooth 5.2 also ensure fast and stable wireless connections, catering to the modern demands of high-speed internet and wireless connectivity.

Design-wise, the S1 is compact and features a magnetic detachable casing, making it easy to add upgrades such as an additional SSD for storage. The option to place it vertically or horizontally adds to its versatility, making it suitable for various setups and space constraints. 

Heat management in the S1 is handled well thanks to its copper pipes and bottom ventilation design. Even under a full load, the system maintains low noise levels, an essential factor for a device intended for quiet home environments.

While the S1 may not be a powerhouse gaming or creative PC, it offers a balance of performance, convenience, and versatility at an affordable price point. Its expandable SSD slot and dual LAN support make it a practical choice for a home network storage solution. The unique LCD feature adds a twist, setting it apart from typical entry-level mini PCs. Its strengths overshadow its limitations in gaming, and high-end graphics work as a reliable, everyday computing device.

Acemagic S1: Price & availability

ACEMAGIC S1

(Image credit: Alastair Jennings)

With its Intel 12th Alder Lake N95 processor, the Acemagic S1 offers a value-packed entry-level computing solution. Priced at an accessible $279 for the 512GB version, it's a budget-friendly option for those seeking a compact and versatile mini PC. If you want more storage, the 1TB version is available for a slight increase in price at $299, making it an attractive option if you need additional space without a significant price jump.

If you're seeking a bit more power, the Alder Lake N97 variant starts at $509, providing a higher performance option. The Acemagic S1 is available for purchase through the official website and Amazon.

  • Score: 4/5

Acemagic S1: Design & build

ACEMAGIC S1

(Image credit: Alastair Jennings)

The S1 stands out in the entry-level market as it puts some design style into the standard box-like design and matches it with decent build quality. While the use of plastic in its construction is noticeable, it doesn't detract from its overall aesthetic appeal. The addition of an LED strip and that small LCD screen helps to improve the standard mini PC look, giving it a more premium feel than its price would suggest.

One of the key design features is its easy access to internal components. The quick-access panels for RAM and SSD upgrades are a convenient addition, especially considering the device's budget-friendly nature. The RAM slot supports single-channel memory, and the storage expansion options include one M.2 NVMe slot and an additional M.2 SATA slot. 

The form factor is another highlight. Designed to fit seamlessly on a desktop or a shelf, it can be placed either horizontally or vertically, catering to different space constraints. The inclusion of a magnetic base in the package enhances its stability when positioned vertically, showcasing the attention to detail in its design.

Overall, the ACEMAGIC S1 combines practicality and style in its Build. Its compact size, coupled with the expandable hardware options and visually appealing details, make it an attractive choice for anyone looking for an affordable yet stylish mini PC. This design approach positions the machine as a standout option in the entry-level segment, offering a balance of aesthetics and functionality.

  • Design: 4/5

Acemagic S1: Features

ACEMAGIC S1

(Image credit: Alastair Jennings)

At the heart of the S1 is the Intel 12th Alder Lake N95 processor. This CPU offers competitive performance with its 4 cores and 6M cache, providing speeds that meet multitasking needs efficiently. This makes the S1 ideal for general office tasks light creative work, and as a home file storage server.

You just can't ignore its 1.9" TFT LCD screen, with a resolution of 170x320. This small yet functional display provides real-time information on CPU power, temperature, memory load, CPU load, and fan speed. This feature adds a level of interaction and monitoring capability typically not found in  mini PCs for beginners, allowing you to keep an eye on the system's performance and health. A handy feature is you are using this as a home network storage solution.

In terms of connectivity, the S1 excels with dual Gigabit Ethernet, offering reliable and fast network connections. This feature is ideal if you want to use the S1 as a soft router, firewall, or file storage server in a home network. For storage, the S1 comes with a 16GB DDR and a 512GB SSD, providing ample space for most. The device also features an expandable SSD slot, allowing for easy upgrades to increase storage capacity as needed.

The S1 supports a dual-screen 4K display, enabling you to extend your workspace if using an application such as Photoshop, where a little more real estate can be beneficial. The S1 utilises copper pipes and a bottom ventilation design to help keep things cool and ensure the machine runs at low noise, even under full load. Lastly, the S1's Wi-Fi 6 and Bluetooth 5.2 ensure fast wireless connectivity, making it an excellent choice for everyday internet use and streaming.

  • Features: 3.5/5

Acemagic S1: Performance

ACEMAGIC S1

(Image credit: Alastair Jennings)
Benchmarks

Crystal Disk Read: 535MB/s
Crystal Disk Write: 456MB/s
GeekBench CPU Single: 1126
GeekBench CPU Multi: 2514
GeekBench Compute: 316
PC Mark: 2836
CineBench CPU Multi: 893
CineBench CPU Single: 894
Fire Strike Overall: 967
Fire Strike Graphics: 1048
Fire Strike Physics: 5681
Fire Strike Combined: 343
Time Spy Overall: 335
Time Spy Graphics: 292
Time Spy CPU: 2035
Wild Life: 2532
Windows Experience: 6.3

The Acemagic S1 is equipped with the Intel 12th Alder Lake N95 processor, which provides a level of performance that is quite impressive for an entry-level mini PC. This PC can be used for everyday office work, as well as being a decent space-saving alternative to the best laptops for photo editing and other light creative work. You could even squeeze some gaming out of it, though with limitations due to its graphics capability.

In terms of general office work, the S1 excels. Applications within the Microsoft Office suite, such as Word, Excel, and PowerPoint, run smoothly. This is supported by the GeekBench CPU scores of 1126 (single-core) and 2514 (multi-core), which indicate good performance for tasks that require both single and multiple processing threads. The S1's ability to handle multitasking and day-to-day office activities is further confirmed by its PC Mark score of 2836, reflecting its competency in typical productivity scenarios.

When moving to creative tasks, using the best photo editors and the best video editing software (in this case, Photoshop and Premiere Pro), performance remains respectable. The CineBench scores of 893 (multi-core) and 894 (single-core) suggest it can handle light creative workloads. 

However, it may not be the best fit for complex video editing or running the best 3D modeling software, where higher processing and graphics power are needed. If it's portability you want when getting seriously creative, we'd still choose the best video editing laptops and the best laptops for graphic design over this for any demanding tasks. 

Gaming on the S1 is a mixed experience. The Intel UHD Graphics limits its capability to run the latest graphics-intensive games like Red Dead Redemption II or Cyberpunk 2077. This is evident in the Fire Strike (overall score: 967) and Time Spy (overall score: 335) results, which are on the lower end for gaming. However, it can competently handle older or less graphically demanding games, offering a decent gaming experience for casual or retro gaming enthusiasts.

Where the S1 really stands out is in its role within a home network. With dual Gigabit Ethernet ports and 512GB of SSD storage (expandable via an additional M.2 slot), it serves well as a file storage server or a soft router/firewall, providing reliable and fast data management and network security within a home environment. Its WiFi 6 also enhances its appeal as a home network hub.

The inclusion of a 1.9" TFT LCD screen on the S1 adds a unique touch, allowing you to monitor CPU power, temperature, memory load, CPU load, and fan speed at a glance. This feature doesn't necessarily add to the performance of the machine, but it is interesting! 

The S1 is not suitable for the latest gaming titles or intensive creative work; its strength lies in its capability as a decent machine for the home office, networking, and storage solution. Its performance in benchmark tests, combined with its practical features and affordable price, make it a great option for anyone wanting a versatile, entry-level mini PC.

  • Performance: 3/5

Should you buy the Acemagic S1?

ACEMAGIC S1

(Image credit: Alastair Jennings)

In our experience, there's an interesting balance of price, features, and performance here. It is an excellent choice if you want a versatile mini PC for everyday tasks, a soft router or a network storage solution.

The S1 handles general office applications and light creative tasks with ease, making it a reliable choice for home or small office setups. While its Intel UHD Graphics limits its ability to handle the latest, graphics-heavy games, it performs adequately with older or less demanding titles.

The standout feature of the S1 is its suitability as a home network hub. Its dual Gigabit Ethernet capability, combined with fast Wi-Fi and expandable storage, makes it ideal for use as a file storage server or for managing home network security. The additional touch of the 1.9" TFT LCD screen for real-time system monitoring is a unique and nice addition.

Priced at $279 for the 512GB version, the S1 offers great value, especially for those who prioritise network connectivity and storage options over raw computing power. 

This is a solid choice for anyone looking for an affordable mini PC that offers more than just basic computing capabilities. Its strengths are in home networking and storage, coupled with its OK performance for everyday tasks and light gaming.

Buy it if...

Don't buy it if...

Ultion Nuki Plus smart lock review: the best UK smart lock just got better

One-minute review

The Ultion Nuki Plus is a premium, high-security device that easily sits among the best smart locks, packing some incredibly useful features and, crucially, fixing some of the woes we had with the more basic and slightly cheaper Ultion Nuki smart lock.

Like the previous model, the Ultion Nuki Plus is born of a collaboration between secure lockmaker Ultion and smart lock genius Nuki. By and large, the two products are pretty similar - but the benefits of the newer version far outweigh the admittedly significant price increase.

The less expensive version of this smart door lock does let you remotely check if your door is locked - as long as you also purchase a Nuki bridge. The bridge plugs into an available electrical socket and connects to the lock using Bluetooth. Aside from the irritation of having to spend more of your hard-earned cash, it can be troublesome if you don’t have an available socket within Bluetooth range of your front door (probably due to all the bridges required for other smart home devices).  Looking at the older model, I found myself asking, “Why don’t they just add Wi-Fi to the lock?” Well, for the Ultion Nuki Plus, they did.

Setting up the Wi-Fi connection and geofence for the Ultion Nuki Plus is as easy as it should be, thanks to the excellent Nuki app. The geofence is a 100-metre detection ring around your door lock, and the lock is prepared when your phone is detected within the geofence area. It will only unlock fully once you are within the 10-metre Bluetooth range, and will also lock the door behind you when you leave the geofence. 

The rechargeable battery pack is a welcome, sensible, and more sustainable addition that will pay for itself over time. It can be charged in situ (which is further evidence of good design), and I personally charge it from a power bank, but there’s no reason that it couldn’t be wired permanently, assuming you have a spare socket…

Ultion Nuki Plus fitted on a front door

(Image credit: Future)

Ultion Nuki Plus review: price and availability

  • List price: £379
  • Available on Amazon and Ultion website

The Ultion Nuki Plus is available for £379 in either black or white directly from Ultion, (not the Nuki website, as this product is UK-specific). Be aware that the Ultion Nuki Plus is not the same product as the Nuki Pro 3 available on Amazon.

This makes it £120 more than the basic Ultion Nuki smart lock, which, as mentioned, doesn’t include Wi-Fi connectivity or a rechargeable battery pack.

There are a number of packages and accessories also available from Ultion:

  • Value: 4.5/5

Ultion Nuki Plus review: specifications

Ultion Nuki Plus close-up

(Image credit: Future)

Ultion Nuki Plus review: design

  • Stylish, well-finished, and thoughtfully designed
  • Brushed steel dial for manual operation
  • Press button for semi-manual operation
  • In-situ rechargeable battery

With the Ultion Nuki Plus, the two-brand collaboration has dispensed with the “You can have any colour you want, so long as it’s white” mentality, adding black as an alternative option. 

Otherwise, it’s much the same as the previous Ultion Nuki collaboration; it’s a good, sturdy, purposeful-looking door lock. The design features a square base (now hosting the rechargeable battery pack rather than 4x AA batteries), a plain box-like main body, and a round lock turn with a button in the middle of it. The new brushed aluminium dial and barrel are also an improvement in my view, adding a stylish edge.

The base of the lock is square, and a small switch beneath the unit opens its battery compartment. The top of the lock features a round lock turn, which has a button in the middle. A ring of light surrounding the button indicates the lock’s status: a full ring for a locked door and a missing segment for an unlocked door. Should any issues arise, the lock will flash red. 

A lot of thought and design expertise has gone into the Ultion Nuki Plus. The box it comes in tells you something about the product you’ve just purchased; there are no brown papier mâché trays here. It looks like somebody cares.

Ultion Nuki Plus unboxing, showing the lock in its packaging with various instruction booklets

(Image credit: Future)

Given the limitations of current battery technology, Nuki has done well to try to blend this lock into the inside of your home. Yes, it’s bulky, but I feel that is in keeping with what it does; it is a lock, after all. Overall, the size of the unit is 300 x 60 x 60mm (not including lever handle).

Externally, it’s almost impossible to tell you’ve got a smart lock installed, however, the noise it makes when the door locks and unlocks is a bit agricultural, so it does advertise your security level to the person on the outside when you answer the door. I suppose this can be both a positive and a negative. Ideally, it would make the Star Trek “Ssschwika” door sound when the door unlocks, but hey, you can’t have everything.  

  • Design: 5/5

Ultion Nuki Plus fitted on a front door

(Image credit: Future)

Ultion Nuki Plus review: performance

  • Simple and well-designed app
  • Automatic locking works fantastically
  • Lock feels very secure and robust

It does not matter where you live once the front door is shut. But where you live does matter when it comes to securing your home. 

I was unaware of just how woefully inadequate the lock and handle on my front door were until I had the Ultion Nuki Plus lock fitted. The Ultion Three-star Plus lock cylinder included in the package is most likely much more secure than your existing one.

If you’re not ready to trust the door to lock using geofencing, the door can be set to auto-lock in as little as 30 seconds. Just remember that the handle must be pulled up in all cases. It’s also worth pointing out that it’s still possible to unlock the door “old school” style with the keys provided. I still take a key with me; I just can’t get out of the habit.

Overall, I had little-to-no issues when testing the Ultion Nuki Plus, barring one very small bug where it became unresponsive after I forgot to lift the handle - I wasn't able to reproduce this, however. 

It takes a few days to build confidence in the automatic locking but it is reassuring to see the notifications appear that the door has locked, particularly if you have your phone out for navigation in the car. Be warned, though; Apple Homekit requires you to confirm that you really want to lock your door, which is fine if you’re on foot, but less than ideal if you drive off in your car.

Ultion Nuki Plus in-app automation shown on iPhone printscreen

(Image credit: Future)

Apple, you are not only shooting yourself in the foot, you are emptying the whole magazine. 

You can work around this if you already have a Homebridge device as part of your home automation suite by adding a virtual switch triggered by the geofence. Apple doesn’t regard the switch as a security device, so doesn’t run around in circles with its hair on fire whenever you try to use it. When you leave, it turns the switch on, and the switch turning on causes the door to lock. Simple (...not). 

The previous non-Wi-Fi version was a bit hit or miss with automatic unlocking, tending to wait for you to fumble for your phone in your pocket and then unlocking just as you retrieve it, but I am happy to report that this version has worked flawlessly. Otherwise, in everything from its app to its features, the models perform almost identically.

A minor gripe is that the push button locking doesn’t work. It’s quite happy to unlock the door, but you need to rotate the dial to lock it. These things worked on the standard model so it should work on the Plus version.

Performance: 4.5/5

Should I buy the Ultion Nuki Plus?

Buy it if...

Don't buy it if...

Ultion Nuki review: Also consider

Ultion Nuki Plus not for you? Try out one of these alternatives...

How I tested the Ultion Nuki smart lock

  • I lived with the Ultion Nuki Plus as my main door lock for three months
  • I initially used the Ultion Nuki Plus exclusively through the iPhone app and Bluetooth. 
  • I connected the Ultion Nuki Plus to my home Wi-Fi and added it to my Apple Homekit home automation.

I installed the Ultion Nuki Plus on my home’s front door and used it as my primary door lock for the entirety of my testing, connecting to the device via my iPhone. I used the app to control the lock, but also added it to my Apple HomeKit to test its automation.

I tested all of the lock features as advertised, and also stress-tested the device to see how meticulous you need to be in use. This involved testing how quickly and successfully the door lock triggered upon exiting the geofence, as  well as real-world scenarios (e.g. “What happens when autolock is 30 seconds, I arrive home, leave the door open while I get my muddy shoes off on the door mat, etc.). I then tested how well the Ultion Nuki Plus recovered from these unexpected states and returned to normal service.

The device did fail to automatically lock once after I returned home. The indicator light was flashing, so I clearly neglected to lift the handle. However, the light continued to flash and the unit was unresponsive even after lifting the handle. Recalibrating the lock fixed it, and I have not been able to reproduce this issue.

All of the configuration options and features within the phone app were investigated and, where possible, added to my daily routine. The Ultion Nuki Plus was then added to Apple HomeKit to seek out configuration clashes between the Nuki app and home automation. Several automations were configured to assess if the Ultion Nuki Plus “played well” with other devices. The Ultion Nuki Plus was removed and added again to both my phone and home automation setup to test the consistency and reliability of the setup process.

Read more about how we test

First reviewed December 2023

Wednesday, December 27, 2023

KineMaster review

It’s been over three years since we last reviewed KineMaster - and that’s a lifetime when it comes to the best video editing apps for phones and tablets. As video production has grown in importance, the entire landscape has changed since our last look, from the arrival of rival free editors like CapCut to the release of LumaFusion and DaVinci Resolve for iPad, both bringing professional-level editing tools to mobile devices. So, we thought it was high time we went back and checked if it’s still worth a download.  

KineMaster: Pricing & plans

  • Although there is a subscription option, you can do a lot without paying - much more than other subscription-based apps

Not only can you download and start using KineMaster right away for free, the developers allow you to do this while providing very few restrictions. 

The only obvious drawback would be a relatively large watermark top right of the video. In addition to that, you will have certain other limitations, such as not being able to use premium assets. If you’d like access to these, remove the watermark so you can use them for professional use, and add 10GB of cloud storage, you’ll need to set up a subscription. We would've also liked to see a one-off cost option, as with LumaFusion and DaVinci Resolve for iPad's Studio upgrade,. 

  • Pricing & plans: 4/5

KineMaster: Interface

KineMaster video editing app undergoing tests during our review process

KineMaster starts in portrait mode, but switches to landscape when editing (Image credit: KineMaster)
  • Well-designed interface, offering you the tools you need when you need them

We did notice some changes to KineMaster’s interface in the intervening years, most prominently prior to diving into a project. The opening section is locked in the portrait orientation when viewed from a mobile phone, and this is where you can search for templates, ‘mix’ (i.e. use someone else’s creation as a template for one of your own projects). You can also check your inbox and manage your account. It’s worth noting that if a project you’d like to ‘mix’ contains premium assets, you’ll need a subscription to access those. Sadly, we couldn’t see a way of knowing if it requires a subscription until you hit that download button, so it’s a bit of a gamble browsing through the various possibilities.

Creating an account is free, and perhaps even better, is not needed if you just want to get started with your video projects. Once you tap on ‘Create’ and choose to either start a new project, or continue working on an existing one, the interface switches to landscape. You are restricted to editing in that way, and any experienced editor will likely prefer that anyway: there’s certainly more room to organise yourself.

On that side of the interface, very little seems to have changed. Even the best video editing software can often feel very restrictive on the small screen, and most developers have created very similar layouts, with tools mainly on the left, a preview section above, and the timeline below. On the plus side here, that does mean it’s 

KineMaster was a little more creative in that respect. That doesn’t mean to say you’d be lost in a wildly different interface; let’s put it this way, if you’ve used different editors in the past, it won’t take you long to figure out where everything is. The biggest difference is the circular interface top right. It’s divided into quadrants. This is where you get to add additional media, music, work with layers (titles, effects, etc), and record a voice over. The central button lets you access your device’s camera. There are also a handful of peripheral buttons just beyond that circle, to get into the asset store, playback your project or export it. It makes everything easy to access.

To the left are a series of buttons to control the look of your editing interface, take a screenshot, or jump to the next edit point.

  • Interface: 5/5

KineMaster: Video editing

KineMaster video editing app undergoing tests during our review process

The ring divided into quadrants, top right, is where you gain access to your media, effects, camera, and more (Image credit: KineMaster)
  • Very easy to edit, from hands on in the timeline, to a series of parameters all accessible via changeable contextual tools

The editing itself starts by tapping on a clip in your timeline. This replaces that circle with various editing tools. It’s not immediately obvious, but that list is scrollable, giving you access to a vast range of options, for both your clips’ video and audio parameters. This is necessary to make sure those buttons aren’t too small, and their labels are easily readable - something some other video editors could pay attention to.

This contextual list changes if you select other types of media, such as an audio clip, or even the edit point between two clips - which reveals all available transitions.

Aside from these, you can also directly affect the edit from the timeline itself, like trimming a clip by dragging one of its edit points inwards, or tap and hold to move a clip to another position, with the other clips slotting along, making sure there are no gaps in your edit,

You can also zoom in and out of the timeline using the traditional touch gesture, to quickly see more of your project, or get close for some frame-accurate work.

KineMaster video editing app undergoing tests during our review process

Tap on a clip in the Timeline to reveal contextual editing tools on the right (Image credit: KineMaster)

By and large, you’ll be working with a single layer of video - which certainly makes things easier if you’re looking for the best video editing software for beginners on a mobile device. However, you can work with additional layers, but only for specific purposes. This allows you to insert titles, special effects that encompass more than one clip, or just a portion of said clip, or add some media for that a picture-in-picture effect. The latter is also how you can superimpose some footage, and remove its background to blend two layers together.

In order to do that, you can use the ‘Chroma Key’ tool (if you shot your clip in front of a green screen), or the ‘Magic Remover’, which we found does a pretty impressive job, as long as the background isn’t too cluttered and you’re not moving the camera too much.

KineMaster video editing app undergoing tests during our review process

Green screen media is handled easily with KineMaster (Image credit: KineMaster)

For those who have seen us bemoan the casual disregard to a user’s privacy in our reviews for CapCut and Filmora, you’ll be pleased to learn KineMaster is a much kinder beast. You can easily restrict its access to your Photos Library at launch, and update your selection over time. We still can’t believe some developers don’t allow you to do that and insist on seeing your entire library.

All in all, KineMaster works surprisingly well, and will mostly get out of your way as you edit, offering you the tools you need for the job at hand, while hiding those that are of no relevance to the selected media.

  • Video editing: 5/5

KineMaster: Store & export

KineMaster video editing app undergoing tests during our review process

Not only can you gain access to some or all of your Photos Library, but you also select from Pixel’s online library of free photos and videos (Image credit: KineMaster)
  • A vast store where many assets are available to download for free, and hardly any restriction when exporting your project

If you’re looking for more effects, transitions, stickers, music, and so on, this is where KineMaster’s Asset Store comes into its own. You’ll find a lot of these assets are available for free. Just tap on them to download them into your app. Those that have a little golden crown to the thumbnail’s lower right are only available to subscribers. As you’d expect, this accounts for most of the best ones, although there is a huge selection for you to explore and use, even if you’ve decided not to go down the paid road.

Once your project is complete, you may expect the push to subscribe would be relentless, but we found KineMaster to be quite unobtrusive: tap on the ‘Share’ icon, choose your format (from the standard H.264, the more modern but less compatible H.265, and GIF - for simpler/smaller projects), select the resolution, bit rate and quality, and click on ‘Save as Video’.

This is where the request to subscribe will rear its head, but simply click on ‘skip’ to get on with the rendering. We were very pleasantly surprised to see you can export projects up to 4K. Most competing products restrict their free offering to HD at the most. You will, of course, get a ‘KineMaster’ logo, top right of your movie, but this is a very minor drawback to have access to so much for free.

  • Store & export: 5/5

KineMaster: Scorecard

Should I buy?

KineMaster video editing app undergoing tests during our review process

Tap in between two clips to reveal your transition options (Image credit: KineMaster)

Buy it if...

You want a high end video editing app for your mobile device, with a wide array of tools, all for free (as long as you don’t mind having your work watermarked).

Don't buy it if...

You want a free video editor without a watermark. 

KineMaster: Alternatives

We've reviewed plenty of the best alternatives to KineMaster. For free video editing apps, check out Apple iMovie for iOS and CapCut. For professional-grade video editors, we love the free DaVinci Resolve for iPad and LumaFusion, available for a one-off fee. Both are very powerful with excellent performance.

Montblanc MTB 03 review: divine looking wireless earbuds, marred only by OK ANC

Aren't they beautiful? Don't you want to produce them from your Aspinal Mini Paris bag, as you sit down to a Café Allongé in Montmartre, where you'll write your memoirs (in German, for now) in a leather-bound notebook using your also Montblanc Meisterstück fountain pen? 

Even next to the very best noise cancelling earbuds in the business, the luxury goods purveyor's inaugural earbuds are easily the prettiest of the lot (for clarity: they supersede the firm's debut Montblanc MB 01 Smart Headphones, an over-ear proposition released in 2020). The new MTB 03 are also gloriously small and comfortable to wear. You get aptX Adaptive support for higher-resolution audio, IPX4 water resistance, plus an app that – while relatively basic (compared to the Sony Headphones Connect app, for example) – still offers a five band EQ tab, interesting noise cancellation and ambient features, auto-off wearer detection and a lovely visual representation of the remaining battery life in each bud.

If you're happy to pay a premium for the quality build, finish and iconic snowcap emblem within earbuds that sound good, I support you – yes, sonically they are very good for depth and neutrality when listening to higher-resolution music files. Even layered, multi-faceted songs within Apple Music's Lossless oeuvre such as Nine Inch Nails' Head Like a Hole are celebrated with energy and alacrity by the MTB 03.

The complicated time signatures, dynamic shifts and delicate acoustic-guitar-meets-in-your-face-yelling within System of a Down's Chop Suey! are also handled with relative ease across the frequencies in a sensibly-refined mix.

Montblanc MTB 03 earbuds in their case, held in a hand on white background

It's not the smallest case on the market, but it's pocketable (Image credit: Future)

Will you need to make compromises to get the Montblanc look? Yes: the active noise cancellation (ANC) can be beaten for efficacy, you don't get multipoint connectivity (if there's also an iPad mini in that Aspinal bag for instance, you won't be able to chop and change between the two source devices with ease), there's no spatial audio processing or fit-fest whistles and bells, and the on-ear controls are not for tailoring – you get what you get. For the most part that's OK because I like what you get here, but it's my job to nitpick and crunch the numbers. 

The thing is, this truly is aspirational territory. At this price, the iconic Hamburg institution (and Axel Grell, the revered audio engineer who put his name to the sound) invites my pickiest criticism and given the premium cost of these high-end earbuds, I have three issues. 

First off, while the sound times very well indeed and is musically cohesive, it can lack the extra im Kopf expanse you'll find in the presentation of the Technics EAH-AZ80 –the kind of super-spacious mix that might allow the leading edges of notes within my reference tracks to reveal themselves anew. 

Don't get me wrong, I like the MTB 03's sound; the presentation is perfectly pleasing when you give them something good to work with. Lossy files will be divulged as such, (Spotify Free or MP3 listener? You won't like these – I found Ogg Vorbis tracks at 256kbps a little tinny) but this is Montblanc, if you're on the market for the opulent brand's earbuds, you'll probably also be able to spring for a paid-for music subscription.

Secondly, regular readers may remember that the aforementioned Technics May 2023 flagship earbuds offer multipoint connectivity to three devices. How many sources can the inaugural Montblanc earbuds connect to simultaneously? Just the one. 

Montblanc MTB 03 companion app, three screens showing the ANC and Live profiles

The immersive audio and modes are great fun to experiment with, but note that not all can't be used at the same time, in some Modes (Image credit: Future)

Finally, the noise cancellation profiles are fine rather than fantastic. Deploy ANC within the Sound Mode tab and you can pick from Sports, Office or Travel profiles. In the office (here, I select Office – well, you would), I find the audio playback is amplified somewhat, but the low-level background chat behind me still creeps in more so than with my reference Technics earbuds or the Bose QuietComfort Ultra Earbuds (although admittedly those are best-in-class, where noise-nixing is concerned). 

The 'Live Mode' tab below it offers Environment, Voice Focus or Attention options, all of which Montblanc suggests are useful in situations such as airports or listening for train announcements. My favourite of these is Voice Focus, which uses the MTB 03's three mics per bud to do what the profile promises without coloring or sweetening your music. Call quality is also good and the case can charge wirelessly as well as via USB-C. 

The true wireless earbuds market is full to bursting and the Montblanc MTB 03's USP is bijou beauty, rather than spatial audio wizardry, supremely tailored audio or bubble-of-silence noise cancellation. That said, to assume it's a case of style over substance would be wrong; the sound is better than that. 

What makes most sense to you when selecting a set of earbuds is of course a deeply personal matter. Yet Montblanc's proposition is at the very top end of the market and it would be wrong of me not to mention that for similar money you can buy extra features and marginally better sound, if you want that. 

Montblanc MTB 03 review: Price & release date

  • Officially priced $395 / £345 / AU$640
  • Launched July 1, 2023

At the risk of stating the blindingly obvious, by pricing them at $395 / £345 / AU$640, Montblanc expects you to pay a $95 / £45 premium over most of the MTB 03's direct rivals. 

Want to compare by way of a quick rundown of top-tier options from the heavy-hitters? Of course: Bose's QuietComfort Ultra Earbuds will set you back $299 / £299 / AU$449, Sony's 2023 flagship WF-1000XM5 are around $299.99 / £259 / AU$499 and the excellent Technics EAH-AZ80 (which boast triple-device connectivity and some of the best call quality I've ever experienced), also come in at $299 / £259 / AU$499). 

See what I mean? Then again, it has ever been thus in the designer fashion industry. Want the label? You have to pay for it. But hold on! That's not all you're paying for here. The build quality – simply cradle the small metallic case in your palm to feel it – does feel that little bit, well… more expensive. 

Montblanc MTB 03 earbud held in a hand

(Image credit: Future)

Montblanc MTB 03 review: Specs

Should you buy the Montblanc MTB 03?

Buy them if...

You want the look – and the feel
I mean, just look at them. Also that case is metal, not plastic, and the feel is cool and oh-so expensive. 

Your ears are on the delicately small side
The Montblanc MTB 03 are some of the smallest and most comfortable earbuds I've worn – and the little depression on each bud to show you where to tap is a lovely touch.

You pay for a top-tier music subscription
With aptX Adaptive onboard, you're going to want to make use of it with a Tidal, Qobuz or Apple Music subscription. The Montblanc MTB 03 don't take kindly to your lowlier Ogg Vorbis 256kbps files. 

Don't buy them if...

You like fit tests and otoacoustic listening profiles
There's a lovely five-band EQ tab and options for ANC, but if you want to undergo the pips and pops of hearing-test software, you need to look to something like the Denon PerL Pro or even the Nothing Ear (2)

You love multipoint connectivity
No dice here, friend

You need buubble-of-silence ANC
Montblanc's noise-nixing profiles do help to quash extraneous noise, but for this money you can do better –look to the Bose QuietComfort Ultra Earbuds. 

Montblanc MTB 03 on white background, held in a hand

(Image credit: Future)

Montblanc MTB 03 review: Also consider

Montblanc MTB 03 earbuds worn by TechRadar's Becky Scarrott

(Image credit: Future)

How I tested the Montblanc MTB 03

  • Tested for 10 days, listened against the Technics EAH-AZ80, Sony WF-1000XM5 and Bose QuietComfort Ultra Earbuds
  • Used at work (train commute; in the office; walking through London) and on the wild Dorset coast
  • Listened to Tidal Masters, Apple Music Lossless tracks and Spotify on an iPhone 12 Pro, Sony Xperia 1 IV and a MacBook Pro

When testing earbuds or headphones, time and attention is key – as is switching off and letting them surprize you. The Montblanc MTB 03 have been my musical companions for nine days solid – after a thorough 48-hour run-in period. 

And I've certainly felt pride of ownership during this time. To wear a designer earbud is to receive compliments and nods of approval, but it is made all the easier when they're as comfortable and easy to fit as these. 

To better test those comfort levels (and battery life claims), I wore them throughout the working day in a busy office and on the noisy London Underground network. I also wore them while pole training, to check the fit and security. They fared well.

The Montblanc MTB 03 accompanied me to work on weekdays (walking brusquely to the station; boarding a train and the London Underground; at the office) and on a particularly stormy day stomping on a secret Dorset beach – a great way to test any wind-interference from mics during calls. 

When testing the audio quality across the frequencies, I listen to myriad playlists (spanning everything from traditional Celtic songs to thrash metal and on to shoegaze) on Apple Music and Tidal, but also to podcasts and albums on Spotify – and TikTok videos on my MacBook Pro. 

I’ve been testing audio products for five years now. As a classical dancer, aerialist, and musical theater performer in another life, sound quality, fit, and user experience have always taken priority for me personally – and having heard how wonderful ANC can sound when done well, I know where the bar is there.

Tuesday, December 26, 2023

Creality Ender-3 V3 SE 3D printer review

The Creality Ender-3 V3 SE has refined what a 3D printer for beginners should be, packing all the essentials needed to get straight into 3D printing. The entry-level machine boasts a straightforward feature set, including an easy-to-use interface, a direct drive extruder, and a screen that guides you through filament loading and initial setup. 

Even if you're completely new to 3D printing, you can transition from unboxing to printing in under thirty minutes. Having tested out many of the best 3D printers, we can say the Ender-3 V3 SE itself is nice and simple, and this is complemented by Creality's intuitive print software, which easily handles files downloaded from the internet or, if you have the skill, those that you have designed yourself.

While it may lack advanced features like filament run-out detection and built-in camera capabilities, its low price makes it an attractive choice for beginners. However, with the market teeming with exceptional and innovative printers at not a great deal more, is straight, tried and tested design reliability enough even for a beginner?

Creality Ender-3 V3 SE: Design

Creality Ender-3 V3 SE

(Image credit: Alastair Jennings)

The Creality Ender-3 V3 SE 3D Printer adopts the popular bed-slinger design, where the print platform dynamically moves back and forth during the printing process. Many budget-friendly 3D printers favour this approach, which is also employed in premium models by brands like PRUSA and Lulzbot. As is common with this style of printer, the open-frame design offers a clear view of its internal print workings. This transparency is particularly beneficial if you're a beginner, as it will enable you to have a better understanding of how these machines work. 

If you're a beginner, then this hands-on and visible design is invaluable. It makes identifying issues like loose belts straightforward, and witnessing misprints as they happen can be an educational experience in troubleshooting. 

Creality Ender-3 V3 SE

(Image credit: Alastair Jennings)

Assembly of the Creality Ender-3 V3 SE is remarkably easy as the printer arrives almost fully assembled, requiring only the attachment of the vertical frame and some simple wiring to be plugged in. The process is quick, taking no more than 30 minutes, with everything you need to know covered in the manual.

When it comes to loading files and printing, the printer uses an SD card for file loading, with selections made via an LCD screen controlled by a dial rather than a touch screen. This interface, while somewhat retro, is apt for the printer's straightforward design ethos.

In terms of physical dimensions, the Ender-3 V3 SE measures 365 x 345 x 458 mm and weighs 6.5 kg, making it relatively compact and portable. The filament is mounted on top of the machine, necessitating some vertical space but contributing to its small footprint. Overall, the design of the Ender-3 V3 SE combines simplicity, accessibility, and practicality, making it an ideal choice for those new to the 3D printing world.

Creality Ender-3 V3 SE: Features

Creality Ender-3 V3 SE

(Image credit: Alastair Jennings)

The Creality Ender-3 V3 SE 3D Printer stands out in the entry-level market, not just for its affordability but also for its array of features that enhance the 3D printing experience. One of the key attributes of this printer is its impressive speed, which is capable of reaching up to 250mm/s. This performance is powered by a high-power processor, ensuring that speed does not compromise the quality of the prints.

Auto-levelling is a standout feature, thanks to the CR Touch sensor, that simplifies achieving a perfect first layer. This feature, along with the strain sensor for auto Z offset, ensures precision and ease in print setup, making it a hassle-free experience for users regardless of expertise level.

Specs

Print Technology: Fused Deposition Modeling (FDM)

Build Area: 220 x 220 x 250 mm

Minimum Layer Resolution: 0.1mm

Maximum Layer Resolution: 0.35mm

Dimensions: 365 x 345 x 458 mm

Weight: 6.5 kg

Bed: Auto-leveling with CR Touch sensor

Print Surface: PC Spring Steel

Software: Creality Print, Cura, Repetier-Host, Simplify3D compatible

Materials: PLA, PETG, TPU (95A)

Print Speed: Up to 250 mm/s (max), 180 mm/s (typical)

The Ender-3 V3 SE's 'Sprite' direct extruder is capable of handling a variety of filament types, including the flexible TPU, which significantly expands print options. Additionally, the printer is supported by Y-axis dual linear shafts, ensuring steady and accurate motion of the build platform. The UI on the printer's display provides a comprehensive view of the auto-levelling process, including the numerics of difference, which is fascinating, and other essential printing parameters.

When it comes to transferring files to the printer, this can be done using either an SD card or directly through a USB Type-C connection. The printer also features a stable dual Z-axis and a compact, elegant design that cleverly integrates all its components without compromising on its build volume of 220x220x250mm.

Creality Ender-3 V3 SE: Performance

Creality Ender-3 V3 SE

(Image credit: Alastair Jennings)

The 3D printer's performance in our tests was impressive, especially considering its position as an entry-level printer. Achieving a high score of 26.5 out of 30 in our tests, it stands out in its price range for its exceptional performance, a testament to its simple design augmented with advanced features.

The printer excelled in dimensional accuracy, a crucial aspect of precision in 3D printing. With an average error of just 0.054mm, it demonstrates an ability to reproduce dimensions accurately. This precision makes it suitable for detailed models and prototypes where exact measurements are essential.

The Ender-3 V3 SE scored highly in overhangs and bridging, both receiving a perfect score. This indicates the printer's robust capability to handle complex geometries and structures without support. However, it scored lower in fine flow control and XY resonance, suggesting some limitations in handling extremely intricate details and potential vibrations during high-speed prints.

A standout feature is the printer's highly accurate auto-bed levelling system, which ensured that every file that was run through the system was printed.

Proper filament management is crucial for this printer. Using a filament dryer, as recommended, can notably enhance print quality. However, the lack of a filament run-out sensor means users should be vigilant, especially when undertaking larger prints.

Creality Ender-3 V3 SE

(Image credit: Alastair Jennings)

Noise levels are moderate and not particularly disruptive, making the printer suitable for office or workshop settings. When it comes to print speed, while there is a noticeable decline in quality at maximum speeds, the prints remain acceptable. This flexibility is beneficial for rapid prototyping or test prints before committing to longer, more detailed print sessions.

The Creality unit is a highly capable entry-level 3D printer. Its blend of simplicity, essential advanced features, and reliable performance make it an excellent choice for beginners and those looking for an affordable yet capable 3D printer. 

Creality Ender-3 V3 SE: Print quality

Dimensional accuracy - score of 4 

Target 25 = X: 25mm / 0mm Error | Y: 24.90mm / 0.10mm Error 

Target 20 = X: 20.09mm / 0.09mm Error | Y: 20mm / 0mm Error

Target 15 = X: 15mm / 0mm Error | Y: 14.99mm / 0.01mm Error 

Target 10 = X: 10.05mm / 0.05mm Error | Y: 9.99mm / 0.01mm Error

Target 5 = X: 4.88mm / 0.12mm Error | Y: 4.84mm / 0.16mm Error

X Error Average = 0.052

Y Error Average = 0.056

X&Y Error Average = 0.054

Fine Flow Control - score of 2.5

Fine Negative Features - score of 4

Overhangs - score of 5

Bridging - score of 5 

XY resonance - score of 2.5

Z-axis alignment - score of 2.5

Adding up the totals gives a final score of 26.5 out of 30.

Creality Ender-3 V3 SE: Verdict

Creality Ender-3 V3 SE

(Image credit: Alastair Jennings)

The Creality Ender-3 V3 SE 3D Printer is a superb entry-level printer, particularly when you consider its price point and the market segment it targets. With a performance score of 26.5 out of 30, it stands out for delivering quality that exceeds expectations for its class. This printer combines the simplicity of design with a few advanced features, striking a balance that makes it an ideal choice for beginners and those looking for a no-fuss, reliable printing experience.

A key factor contributing to its high score is the exceptionally accurate auto-bed levelling system, which consistently ensures reliable and high-quality prints. This feature, coupled with the machine's straightforward setup and operation, makes it an attractive option for those new to 3D printing. The printer's ability to handle various filaments with ease, further boosted by the recommended use of a filament dryer, enhances its versatility.

While the printer lacks some advanced features like filament run-out sensors, its basic functionality doesn't detract from its overall use. The printer operates with a moderate noise level, which, while noticeable, is not overly disruptive, making it suitable for home or small office environments. The printing speed is another plus, with the printer capable of maintaining a reasonable quality even at higher speeds, which is ideal for testing or iterating designs before committing to final prints.

The Creality Ender-3 V3 SE 3D Printer is an excellent choice for those venturing into 3D printing. It offers a perfect blend of ease of use, reliable performance, and affordability, really this printer for the price is as good as it gets, before you do take that next step-up to the next generation machines. 

Purple Mattress review: the original GelFlex mattress is a revelation in comfort and cooling

Purple Mattress review: Two-minute review

The original Purple Mattress provides a unique sleeping experience. The two-inch tall GelFlex Grid is a proprietary hyper-elastic polymer layer that is the key difference between this and other mattresses I've tested. It appears in all of Purple's mattresses, but for this review I tested out the original model, simply called the Purple Mattress. I slept on this mattress for a week, and during this period I experienced a notable improvement in my sleep quality. 

Although the feel is different from the rest of today's best mattresses, the novel design is very effective. You can feel the checkered-like design immediately when you lay on it. You can also feel how supportive the mattress is, as the Grid contours to the pressure points, and supports the areas that don't immediately press as hard on the mattress, like your lower back.

Close up of GelFlex Grid in Purple mattress

(Image credit: Purple)

The Purple Mattress does an exceptional job at keeping you cool at night. I am a hot sleeper, and I often find myself rolling from one side of the bed to another just to find cool spots. The SoftFlex cover, combined with the open structure of the GelFlex Grid, helps dissipate heat, and I had no issues with overheating when sleeping on this mattress. No rolling around necessary.

I do recommend placing the mattress on your frame before unboxing, and letting the mattress settle and expand on the frame. The design of the mattress makes it incredibly heavy, and moving it around after it has been unboxed is rather difficult.

Any other downsides? The GelFlex Grid gives this mattress an unusual feel that I can imagine won't be for everyone. It really is unlike anything else I've slept on. But one thing I'm certain of – I slept well on the mattress, and felt supported and cool throughout the night. Read on for my full Purple Mattress review…

Purple Mattress review: Materials & design

  • 9.25" tall mattress with foams and GelFlex Grid layer
  • Super-stretchy cover, not removable
  • No handles for maneuvering

The real design story begins with the 2-inch hyper-elastic polymer GelFlex Grid. This proprietary engineering is designed to provide targeted support and pressure relief without trapping body heat. 

The cover is breathable and soft to the touch, but most importantly, super-stretchy – so you get the full benefit of the Grid beneath it. It can't be removed, so you're probably going to want to invest in the Purple Mattress protector for easy cleaning, without dampening the feel of the mattress. There are also no handles, which is particularly annoying because this isn't the easiest mattress to maneuver in the first place.

Exploded diagram showing internal layers of Purple original mattress

(Image credit: Purple)

Beneath the GelFlex Grid there's a 3.5 inch-polyurethane foam layer that's bordered by an additional edge support layer. The polyurethane foam is essentially your memory foam layer. This helps to provide that contouring feeling when you lay on it. The bordering foam simply provides extra support so the mattress doesn't sag too much around the perimeter. 

The final layer is a sturdier 4-inch polyurethane foam. This serves as a foundational foam to provide a firm support, essentially so when you lay on the bed, you don't sink right through to the platform.

At 9.75 inches tall overall, it's on the thinner side. In fact, we usually recommend a minimum of 10 inches for adult mattresses, although I found the Purple Mattress very effective despite it being slightly shallower than this. The thinner profile and simple design mean this mattress doesn't look particularly luxe or sumptuous.

  • Design score: 4 out of 5

Purple Mattress review: price & value for money

  • Sits in the upper-mid price bracket, second cheapest in the range
  • Often discounted around major shopping events
  • Not the cheapest, but fairly unique on the market

The original Purple Mattress sits in the brand's Essential Collection, and at time of writing is the second cheapest adult mattress in the range. Despite that, it's not especially cheap. At full price it sits in the upper-mid price bracket, with a queen size costing $1,399.

Purple mattress sales take place fairly regularly, so you can avoid paying that price if you're strategic about when you buy. More on that in a second, but first here's the ticket price of the main size options:

  • Twin: MSRP $799
  • Full: MSRP £1,199
  • Queen: MSRP $1,399
  • King: MSRP $1,799

Some bed brands run sales constantly, but Purple is not one of those. You'll need to plan ahead to get the best prices. There tend to be discounts around major shopping events – for example, the Labor Day mattress sales in September, the Presidents' Day mattress sales in February, Memorial Day mattress sales in May, the 4th of July mattress sales, and – for the biggest bargains – the Black Friday mattress deals

Discounts of $100 or $200 are fairly regular, but occasionally we see up to $400 off, with a queen size dropping to $999. If you spot a $400 discount, it's well worth taking advantage of. The extras – a 100 night trial, free shipping and 10 year warranty are fine but not especially generous.

There are plenty of options in this price bracket, and many with more complex designs and longer trials and warranties. However, due to the Purple mattress' unique feel, none are really direct competitors – if you want a Purple feel, you're going to have to shell out for a Purple mattress. There is one cheaper option in the lineup – the Purple NewDay, which still sits in the upper-mid bracket, with a queen costing $1,295 at MSRP.

  • Value for money score: 3.5 out of 5

Purple Mattress review: comfort & support

  • Medium-firm, with unique feel from the GelFlex Grid top layer
  • Slight sink on pressure points, but supportive elsewhere
  • Supports both lightweight and heavier individuals 

The Purple Mattress' GelFlex Grid provides a unique level of support that is soft on pressure points, yet firm and supportive on other areas. For reference, I am 5'9" and weigh roughly 150 pounds. When I laid down on the bed, as well as sat on the edges, I recorded about 2-inches of sink. I also had a co-worker, who is a big guy (6'3" and weighs about 300 pounds), do the same thing. We measured that same 2-inch sink. That goes to show the impressive amount of support the Purple Mattress provides. Both big and small people will enjoy the same amount of support. 

The hyper-polymer top is responsive, so when you lay on the mattress, and get up, the mold of the mattress snaps back into place immediately. You don't see the slow re-inflation found with classic memory foam. That was the case for me and also my bigger co-worker. 

Diagram of person lying on Purple mattress

(Image credit: Purple)

Purple describes the feel of the mattress as medium firm, and I would generally agree with that. The GelFlex Grid – the hyper-elastic polymer top layer – gives this mattress a unique feel. When you first lay on it, you can feel the grid-like design pressing against your skin, unlike laying on a standard mattress where the material feels flat and uniform. It's not uncomfortable, but it is different from any other mattress, and it might not appeal to everyone.

When I lie on the mattress, I can feel the mattress sink in and give way to the heavier parts of my body. When I lie on my stomach for example, I can feel the mattress sink in a little around my chest area, but rise up to support my stomach area. The same goes for when I lie on my back. I can feel the mattress sink around my upper back and shoulders, but rise up to support my lower back. It provides relief on the pressure point areas, and supports the areas that aren't as heavy. I found it helped ease my lower back pain.

I generally start my night by laying on my back, then move over to my side to fall asleep. But I also felt the same comfort and support when laying on my stomach. The Purple Mattress isn't made for any one sleep style. Regardless of back, side, or stomach sleepers, you'll feel comfortable and supported.

Purple Mattress review: performance

  • GelFlex Grid keeps you cool throughout the night
  • Great edge support bounces you out of bed in the morning
  • Minimal motion transfer – great for couples

A great mattress needs to be comfortable and supportive, of course, but there are other key factors that will affect your overall experience with it too. Read on for my take on how well the Purple Mattress regulates temperature, how supportive the edges are, and how effectively it absorbs movements on the surface.

Temperature regulation

With a breathable top cover, and a GelFlex layer beneath, this mattress does wonders in keeping you cool at night. I am a hot sleeper and notorious for rolling around, or putting a fan on me at night to keep me cool. During my testing, I stayed cool throughout the night, sans midnight fan. That's especially notable as my review period took place during the hottest month of the year in Utah. 

  • Temperature regulation score: 5 out of 5

Edge support

Great edge support is important for a couple of reasons – you don't want to feel like you're going to roll off the bed at night, and you don't want the mattress to sink in so much that it becomes difficult to lift yourself out of bed. This is especially important for older individuals who may not have the same leg strength as they once did. The Purple Mattress excels in this area.

Both myself and my heavier co-tester found that when we sat on the edge of the bed, the combination of the foam rails and the hyper-elastic polymer grid kind of propelled us up and out of bed. I'm a particular fan of this because as I get older, I'll take all the help I can receive to get out of bed. 

  • Edge support score: 4.5 out of 5

Motion isolation

The 5.5 inches of combined GelFlex Grid top and polyurethane foam below helps curb motion transfer. If I am having a particularly rough night of sleep and tossing and turning, the makeup of the Purple Mattress stops the motion transfer from disturbing the other person. This is great for those who share a bed with someone who is a light sleeper, those who frequently toss and turn, or who get up repeatedly to use the bathroom in the night. 

  • Motion isolation score: 4.5 out of 5

Purple Mattress review: Specs

Should I buy the Purple Mattress?

Buy it if...

✅ You're a hot sleeper: The top cover and GelFlex Grid help make this mattress super-breathable, and won't cling on to your body heat. As a typically hot sleeper, I never found myself getting too warm on this mattress.

You share a bed with a restless person: The Purple Mattress does a great job at eliminating motion transfer. If you or your partner often disturbs the other with relentless tossing and turning throughout the night, this mattress will help keep that motion from interrupting the other's sleep.

You need a mattress with good support: Due to rolling on my stomach during my sleep, I tend to wake up with a sore back on most mattresses. I didn't have that experience with the Purple Mattress. It offers great support that you can feel when you first lay on it.

Don't buy it if...

❌ You're on a tight budget: The Purple Mattress sits in the upper-mid price bracket, and there are plenty of options to choose from in that bracket – some of which arguably offer better value for money. If you want the Purple feel for a lower price, check out the NewDay

You want a traditional feeling mattress: The GelFlex Grid is unlike anything I've ever laid on. And I can imagine that it won't be appealing for everyone. We have separate guides to the best hybrid mattresses and the best memory foam mattresses if you specifically want those feels.

You're planning on moving the mattress about: In most cases, once a mattress finds the platform, it doesn't go anywhere. But if for some reason, you'll be moving the mattress to different rooms in your house, moving the Purple Mattress around is a heavy, and difficult endeavor. 

How I tested the Purple Mattress

I slept on a queen size Purple Mattress for a week in July, the hottest month of the year in Utah. Nights usually stayed in the mid 60s Fahrenheit during this period. I have Baroque sheets that are 100% polyester. Although I did not sleep at night with anyone during the testing, I first opened and did sink tests measurements, and motion isolation testing in our testing lab in Ogden, Utah. I am generally a side sleeper who wakes up on my stomach. I am 5'9” and weigh about 150 pounds, and I also asked a larger and heavier co-worker to try out the mattress and share their experiences. 

First reviewed July 2023

!!!!!!!!!!

Popular Posts

Categories

Blog Archive