KineMaster review
It’s been over three years since we last reviewed KineMaster - and that’s a lifetime when it comes to the best video editing apps for phones and tablets. As video production has grown in importance, the entire landscape has changed since our last look, from the arrival of rival free editors like CapCut to the release of LumaFusion and DaVinci Resolve for iPad, both bringing professional-level editing tools to mobile devices. So, we thought it was high time we went back and checked if it’s still worth a download.
KineMaster: Pricing & plans
- Although there is a subscription option, you can do a lot without paying - much more than other subscription-based apps
Not only can you download and start using KineMaster right away for free, the developers allow you to do this while providing very few restrictions.
The only obvious drawback would be a relatively large watermark top right of the video. In addition to that, you will have certain other limitations, such as not being able to use premium assets. If you’d like access to these, remove the watermark so you can use them for professional use, and add 10GB of cloud storage, you’ll need to set up a subscription. We would've also liked to see a one-off cost option, as with LumaFusion and DaVinci Resolve for iPad's Studio upgrade,.
- Pricing & plans: 4/5
KineMaster: Interface
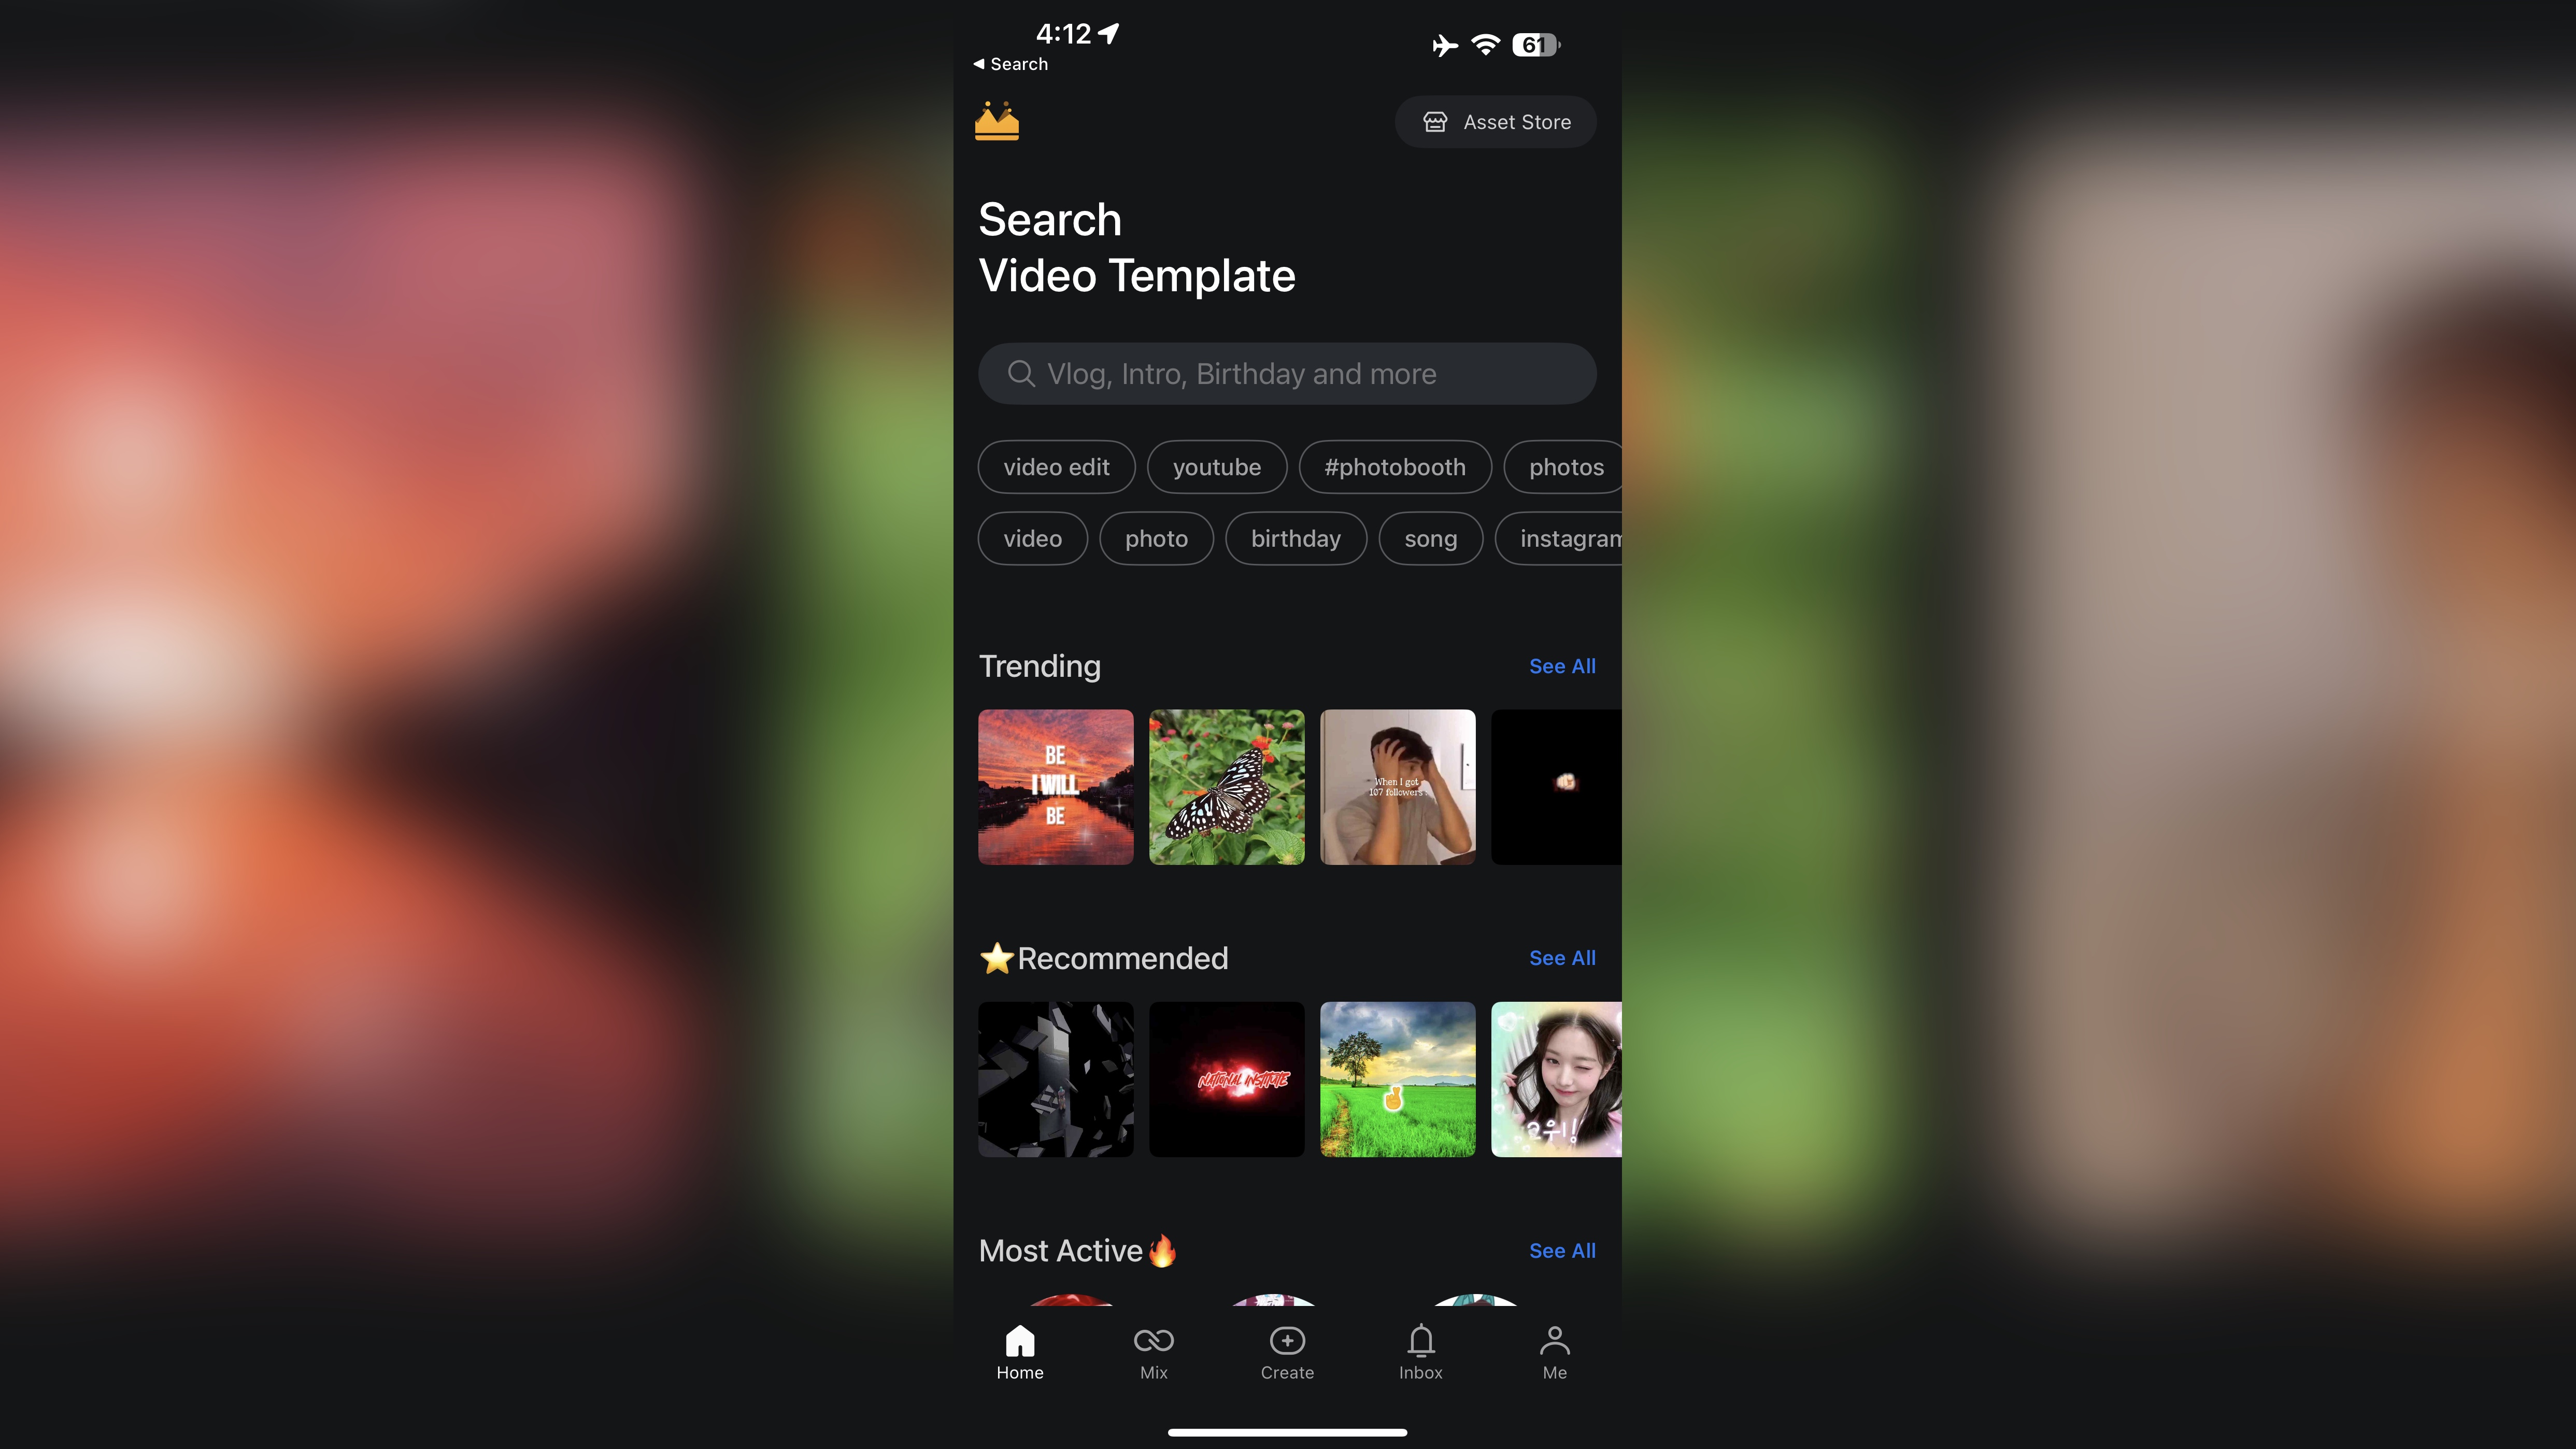
- Well-designed interface, offering you the tools you need when you need them
We did notice some changes to KineMaster’s interface in the intervening years, most prominently prior to diving into a project. The opening section is locked in the portrait orientation when viewed from a mobile phone, and this is where you can search for templates, ‘mix’ (i.e. use someone else’s creation as a template for one of your own projects). You can also check your inbox and manage your account. It’s worth noting that if a project you’d like to ‘mix’ contains premium assets, you’ll need a subscription to access those. Sadly, we couldn’t see a way of knowing if it requires a subscription until you hit that download button, so it’s a bit of a gamble browsing through the various possibilities.
Creating an account is free, and perhaps even better, is not needed if you just want to get started with your video projects. Once you tap on ‘Create’ and choose to either start a new project, or continue working on an existing one, the interface switches to landscape. You are restricted to editing in that way, and any experienced editor will likely prefer that anyway: there’s certainly more room to organise yourself.
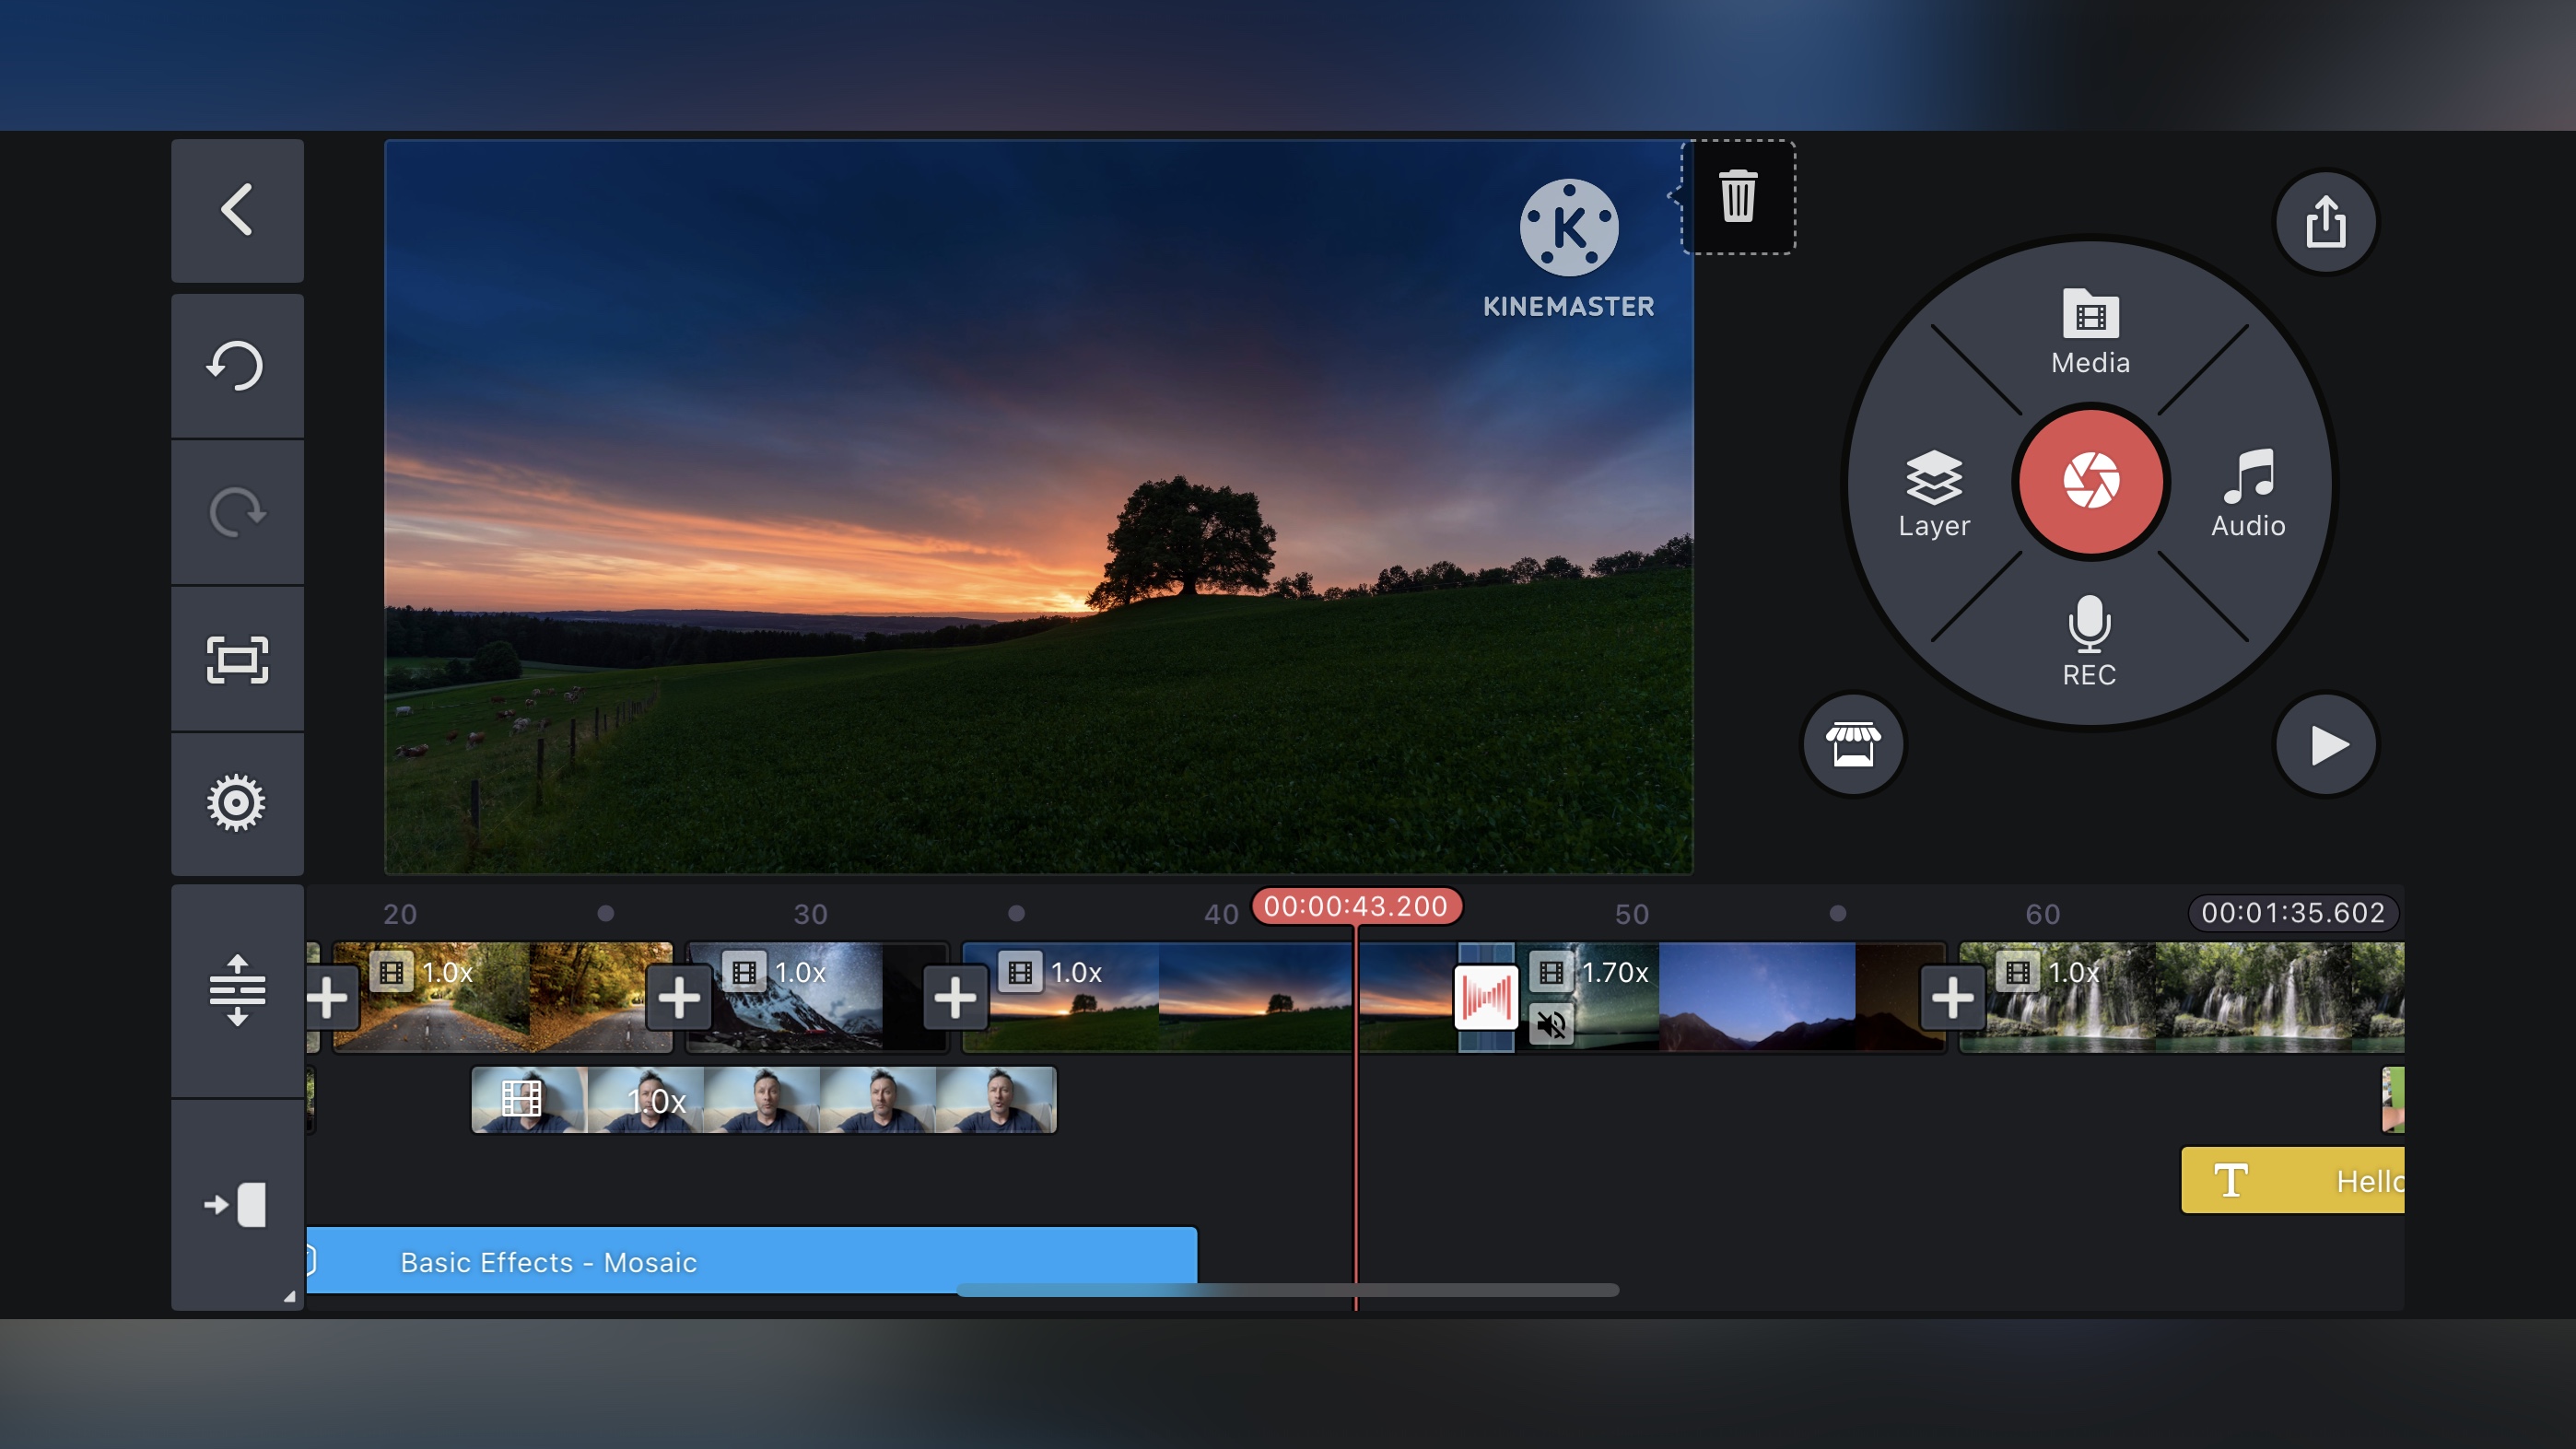
On that side of the interface, very little seems to have changed. Even the best video editing software can often feel very restrictive on the small screen, and most developers have created very similar layouts, with tools mainly on the left, a preview section above, and the timeline below. On the plus side here, that does mean it’s
KineMaster was a little more creative in that respect. That doesn’t mean to say you’d be lost in a wildly different interface; let’s put it this way, if you’ve used different editors in the past, it won’t take you long to figure out where everything is. The biggest difference is the circular interface top right. It’s divided into quadrants. This is where you get to add additional media, music, work with layers (titles, effects, etc), and record a voice over. The central button lets you access your device’s camera. There are also a handful of peripheral buttons just beyond that circle, to get into the asset store, playback your project or export it. It makes everything easy to access.
To the left are a series of buttons to control the look of your editing interface, take a screenshot, or jump to the next edit point.
- Interface: 5/5
KineMaster: Video editing
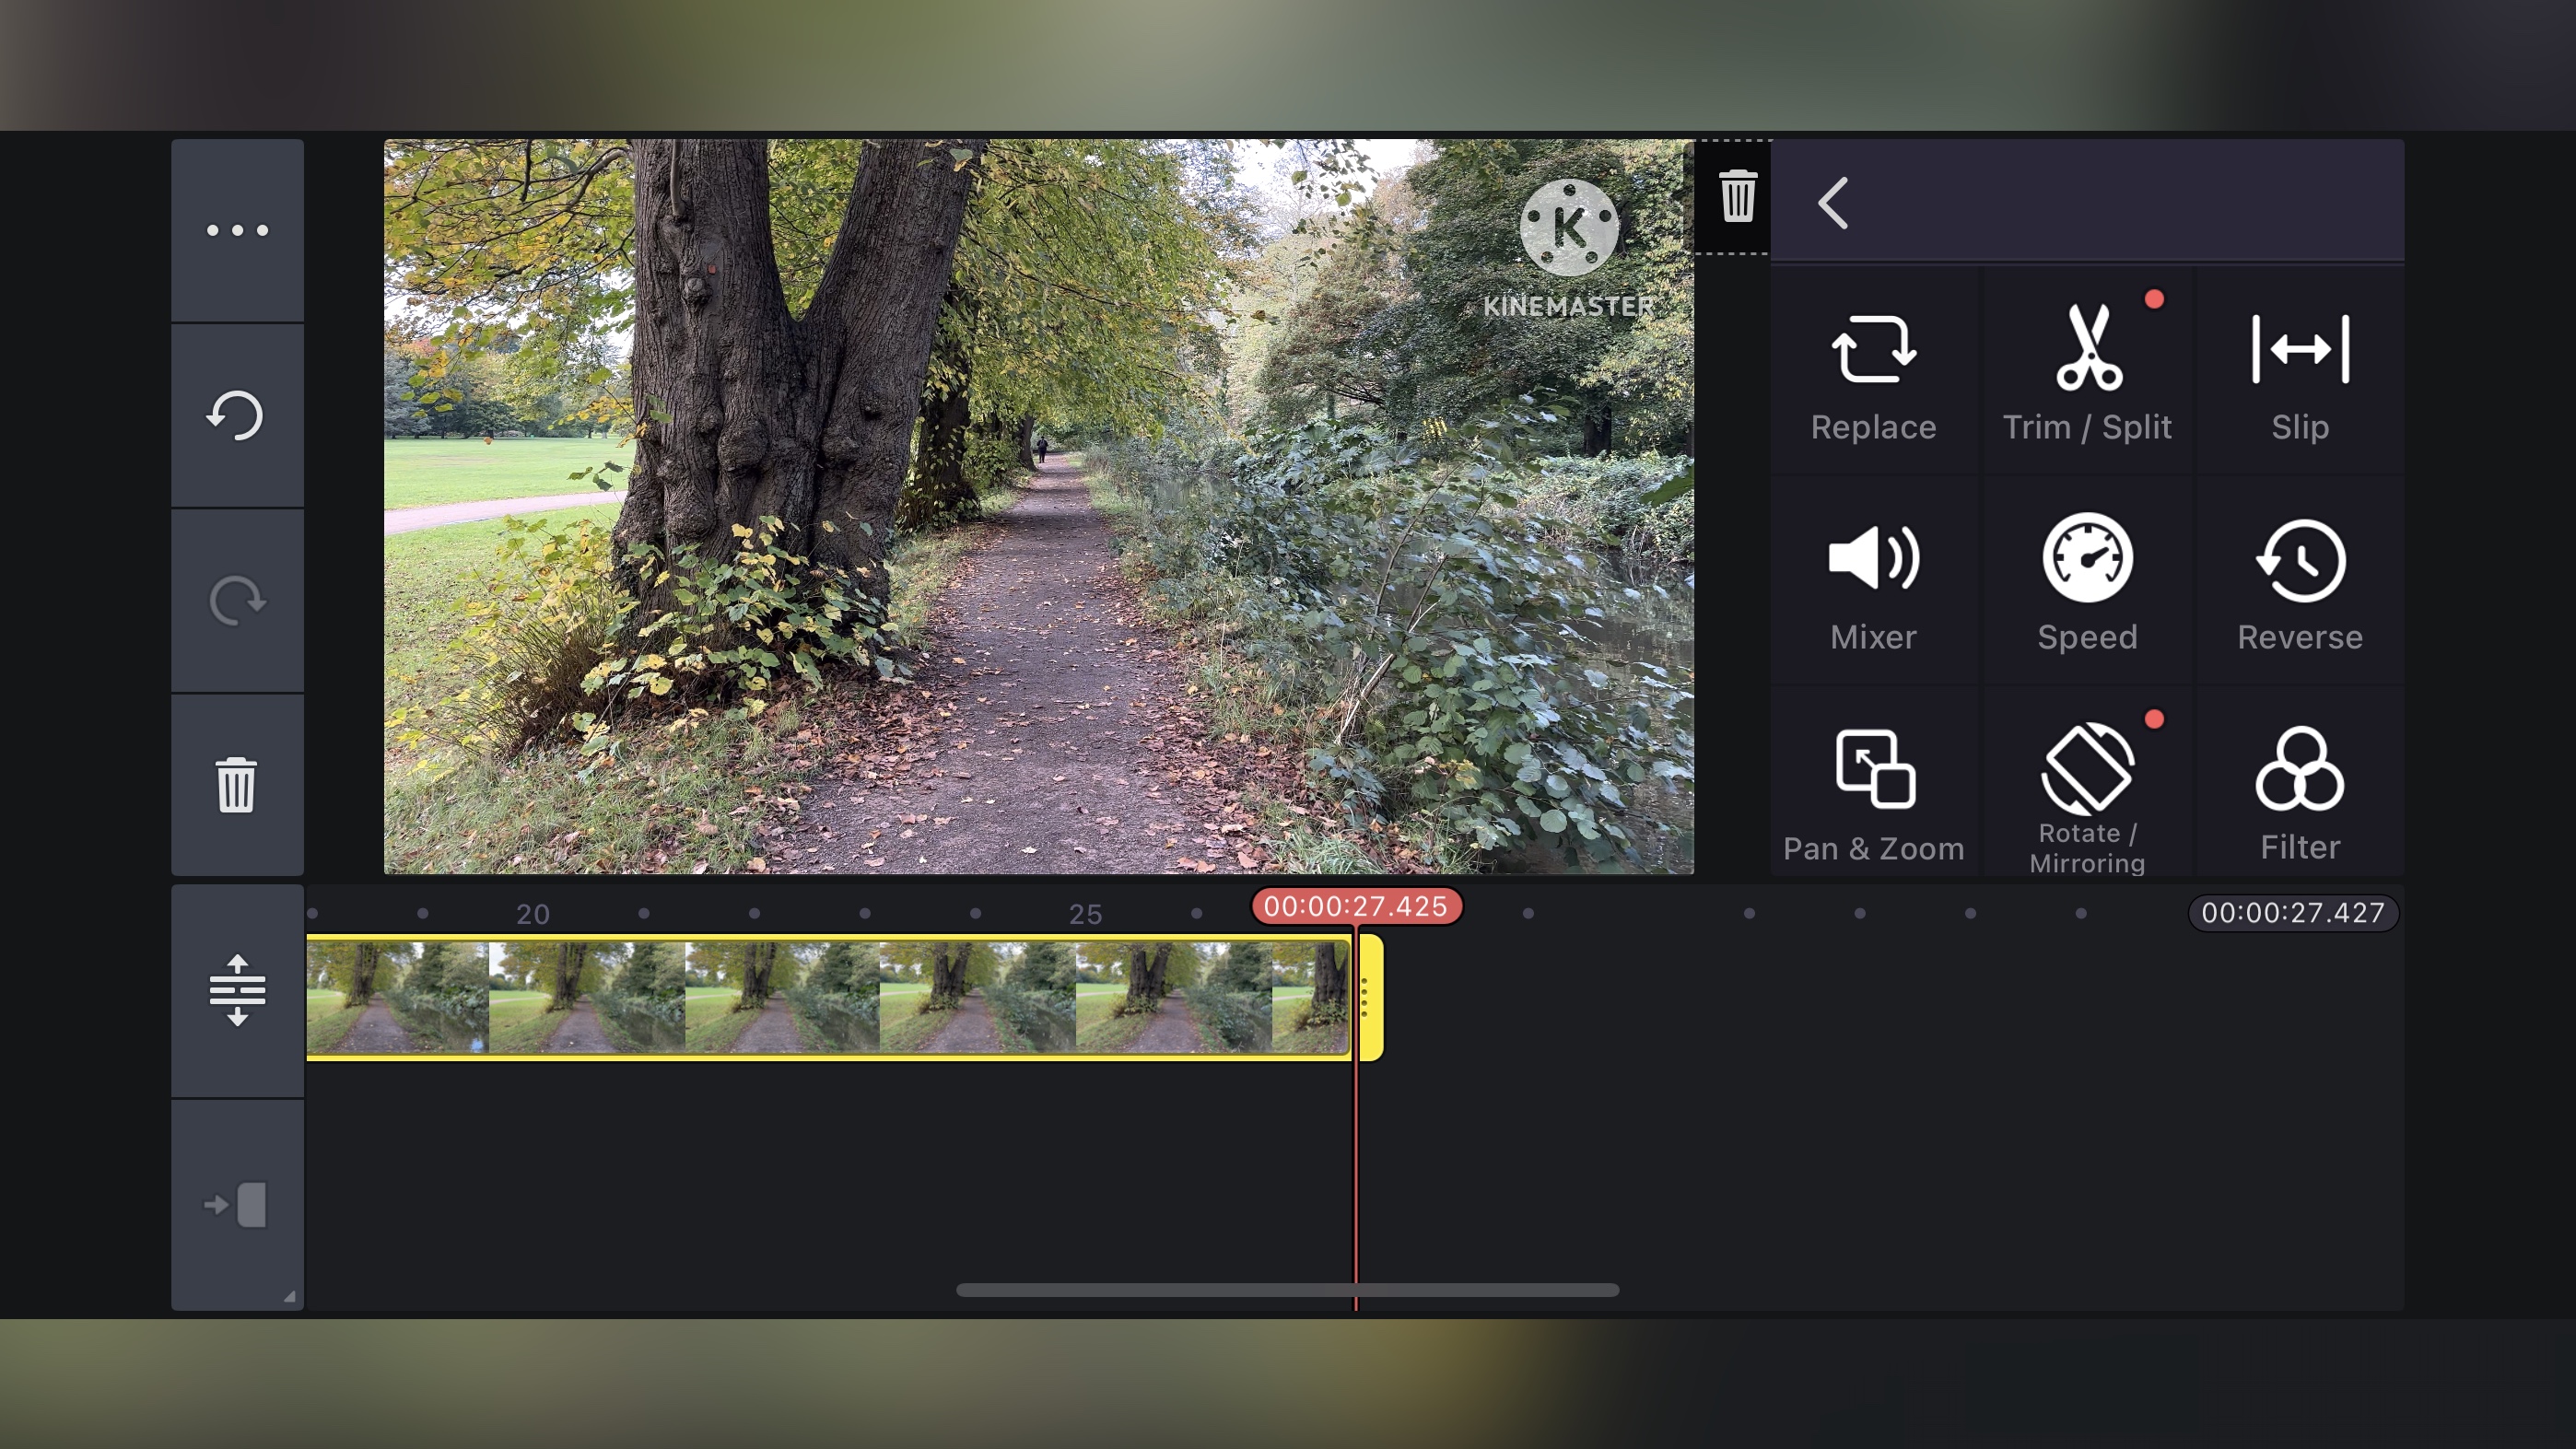
- Very easy to edit, from hands on in the timeline, to a series of parameters all accessible via changeable contextual tools
The editing itself starts by tapping on a clip in your timeline. This replaces that circle with various editing tools. It’s not immediately obvious, but that list is scrollable, giving you access to a vast range of options, for both your clips’ video and audio parameters. This is necessary to make sure those buttons aren’t too small, and their labels are easily readable - something some other video editors could pay attention to.
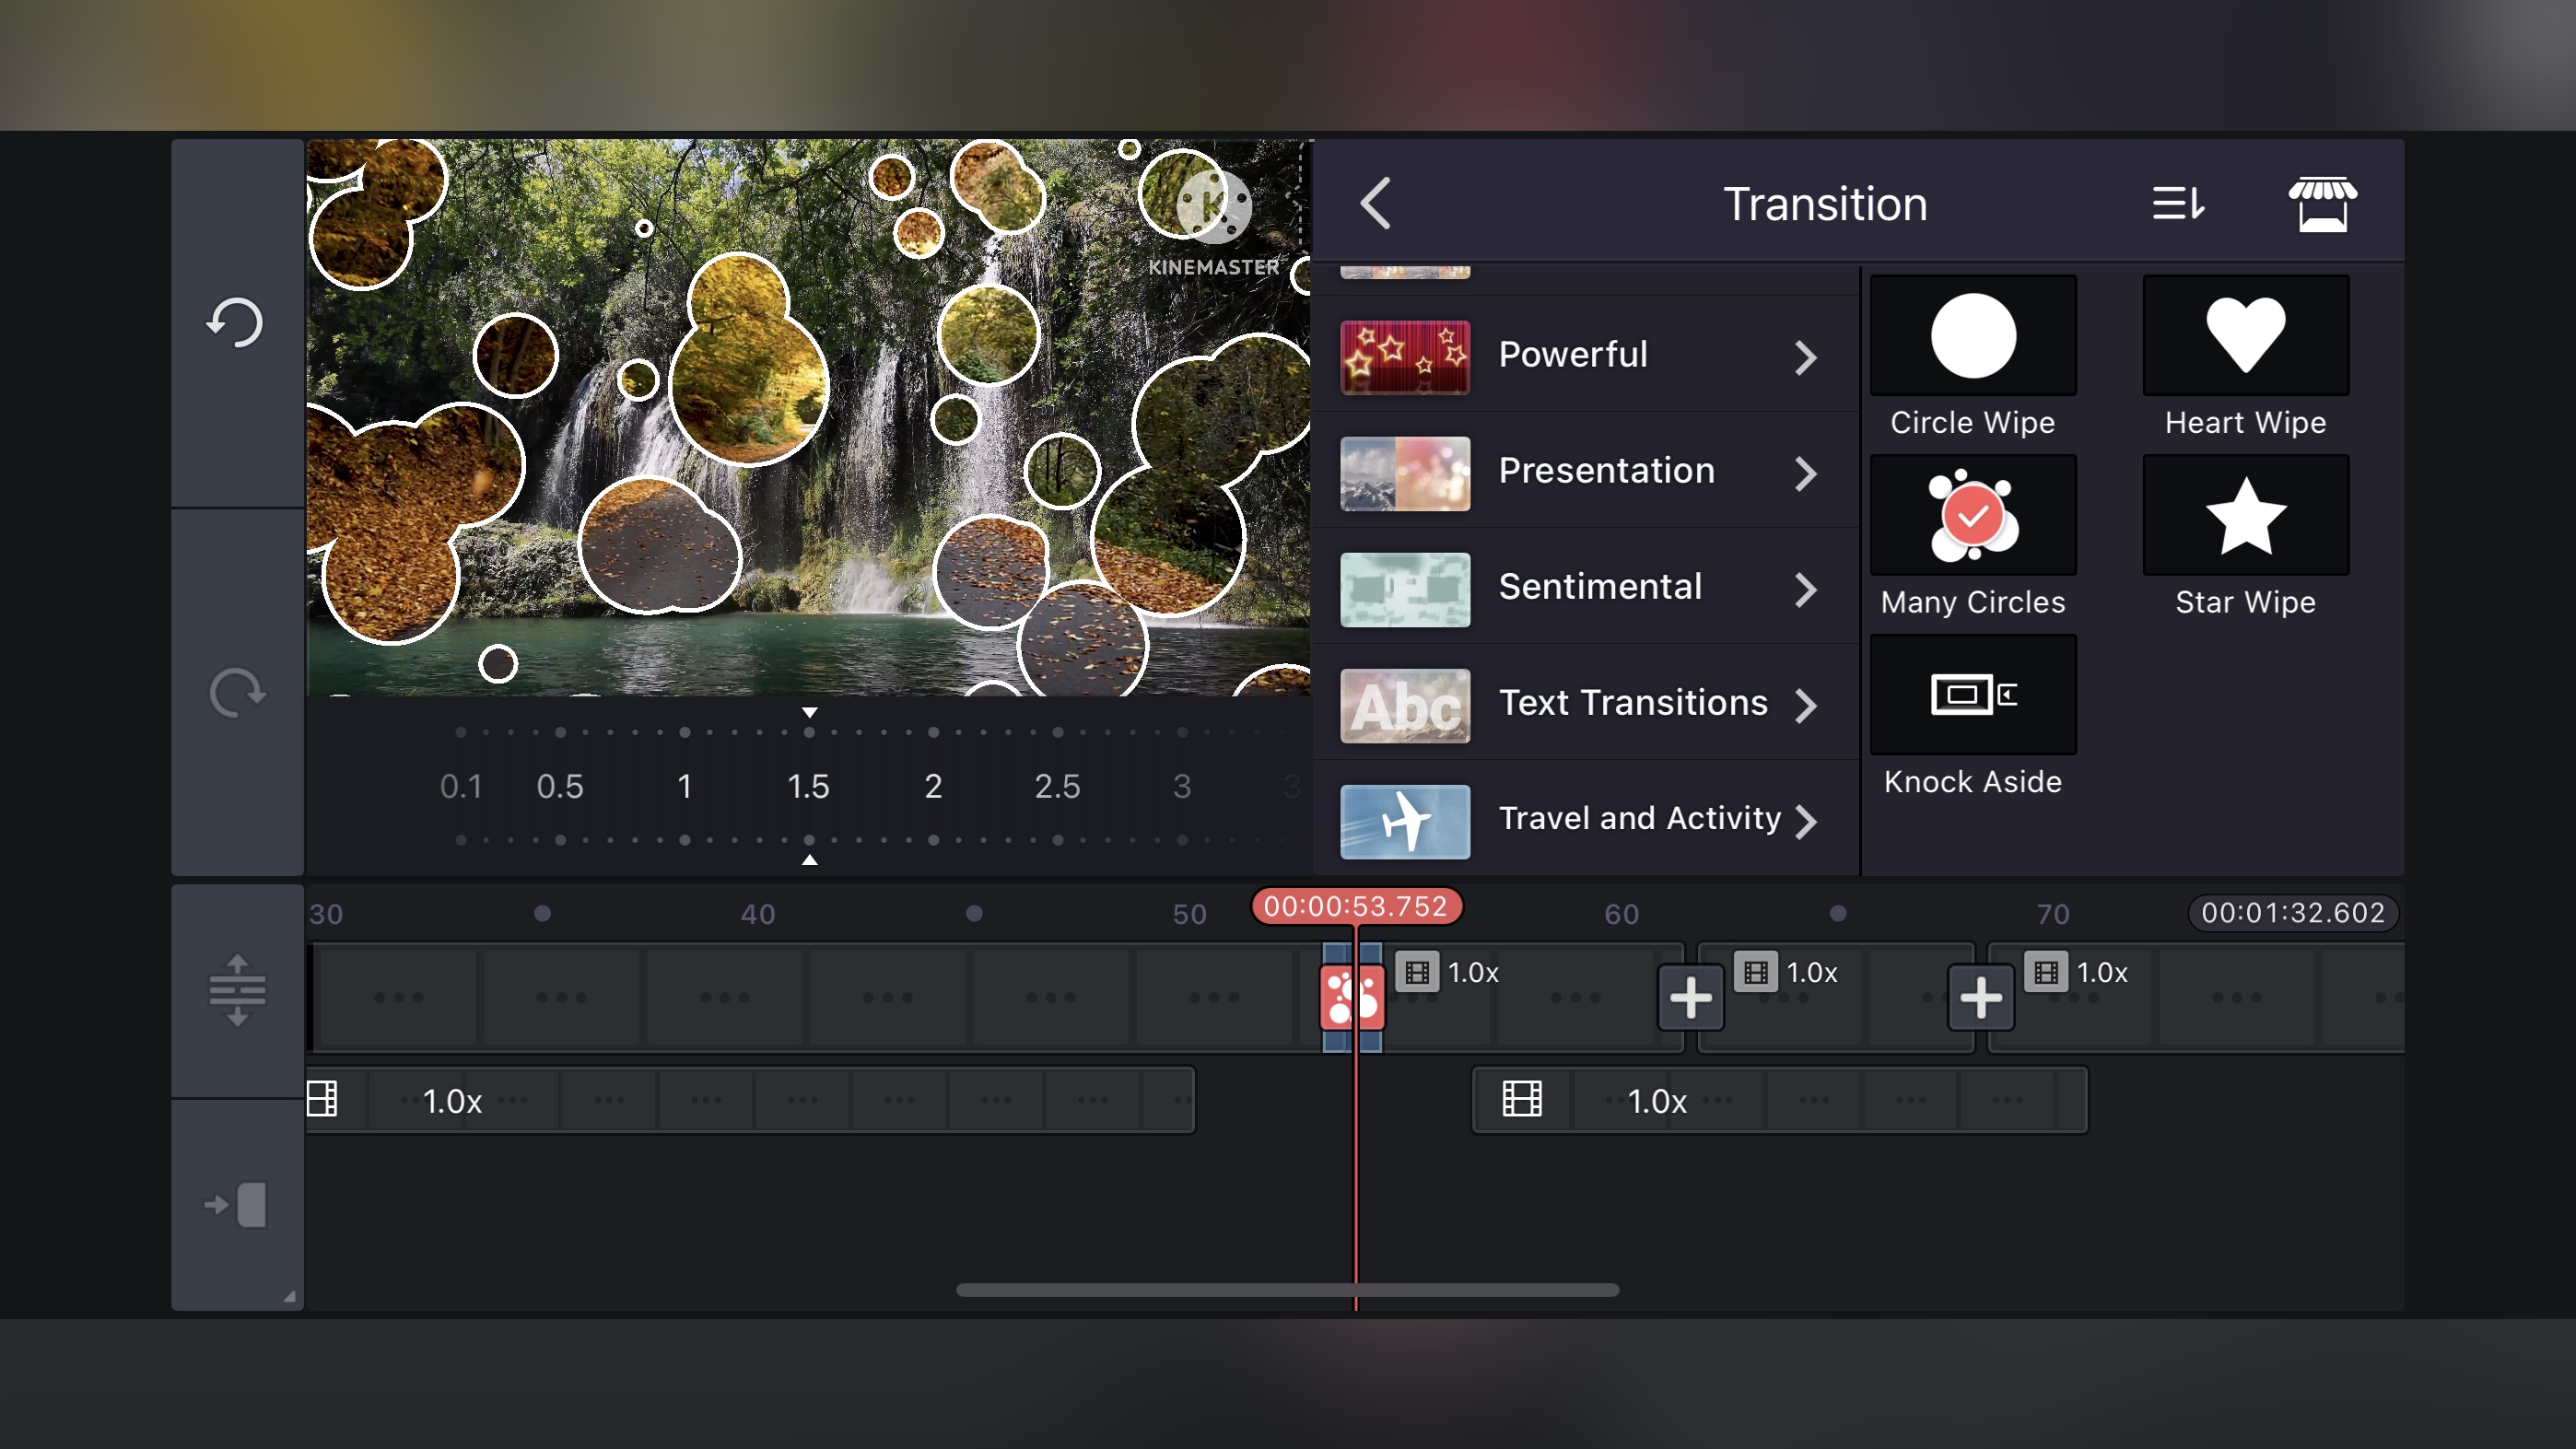
This contextual list changes if you select other types of media, such as an audio clip, or even the edit point between two clips - which reveals all available transitions.
Aside from these, you can also directly affect the edit from the timeline itself, like trimming a clip by dragging one of its edit points inwards, or tap and hold to move a clip to another position, with the other clips slotting along, making sure there are no gaps in your edit,
You can also zoom in and out of the timeline using the traditional touch gesture, to quickly see more of your project, or get close for some frame-accurate work.
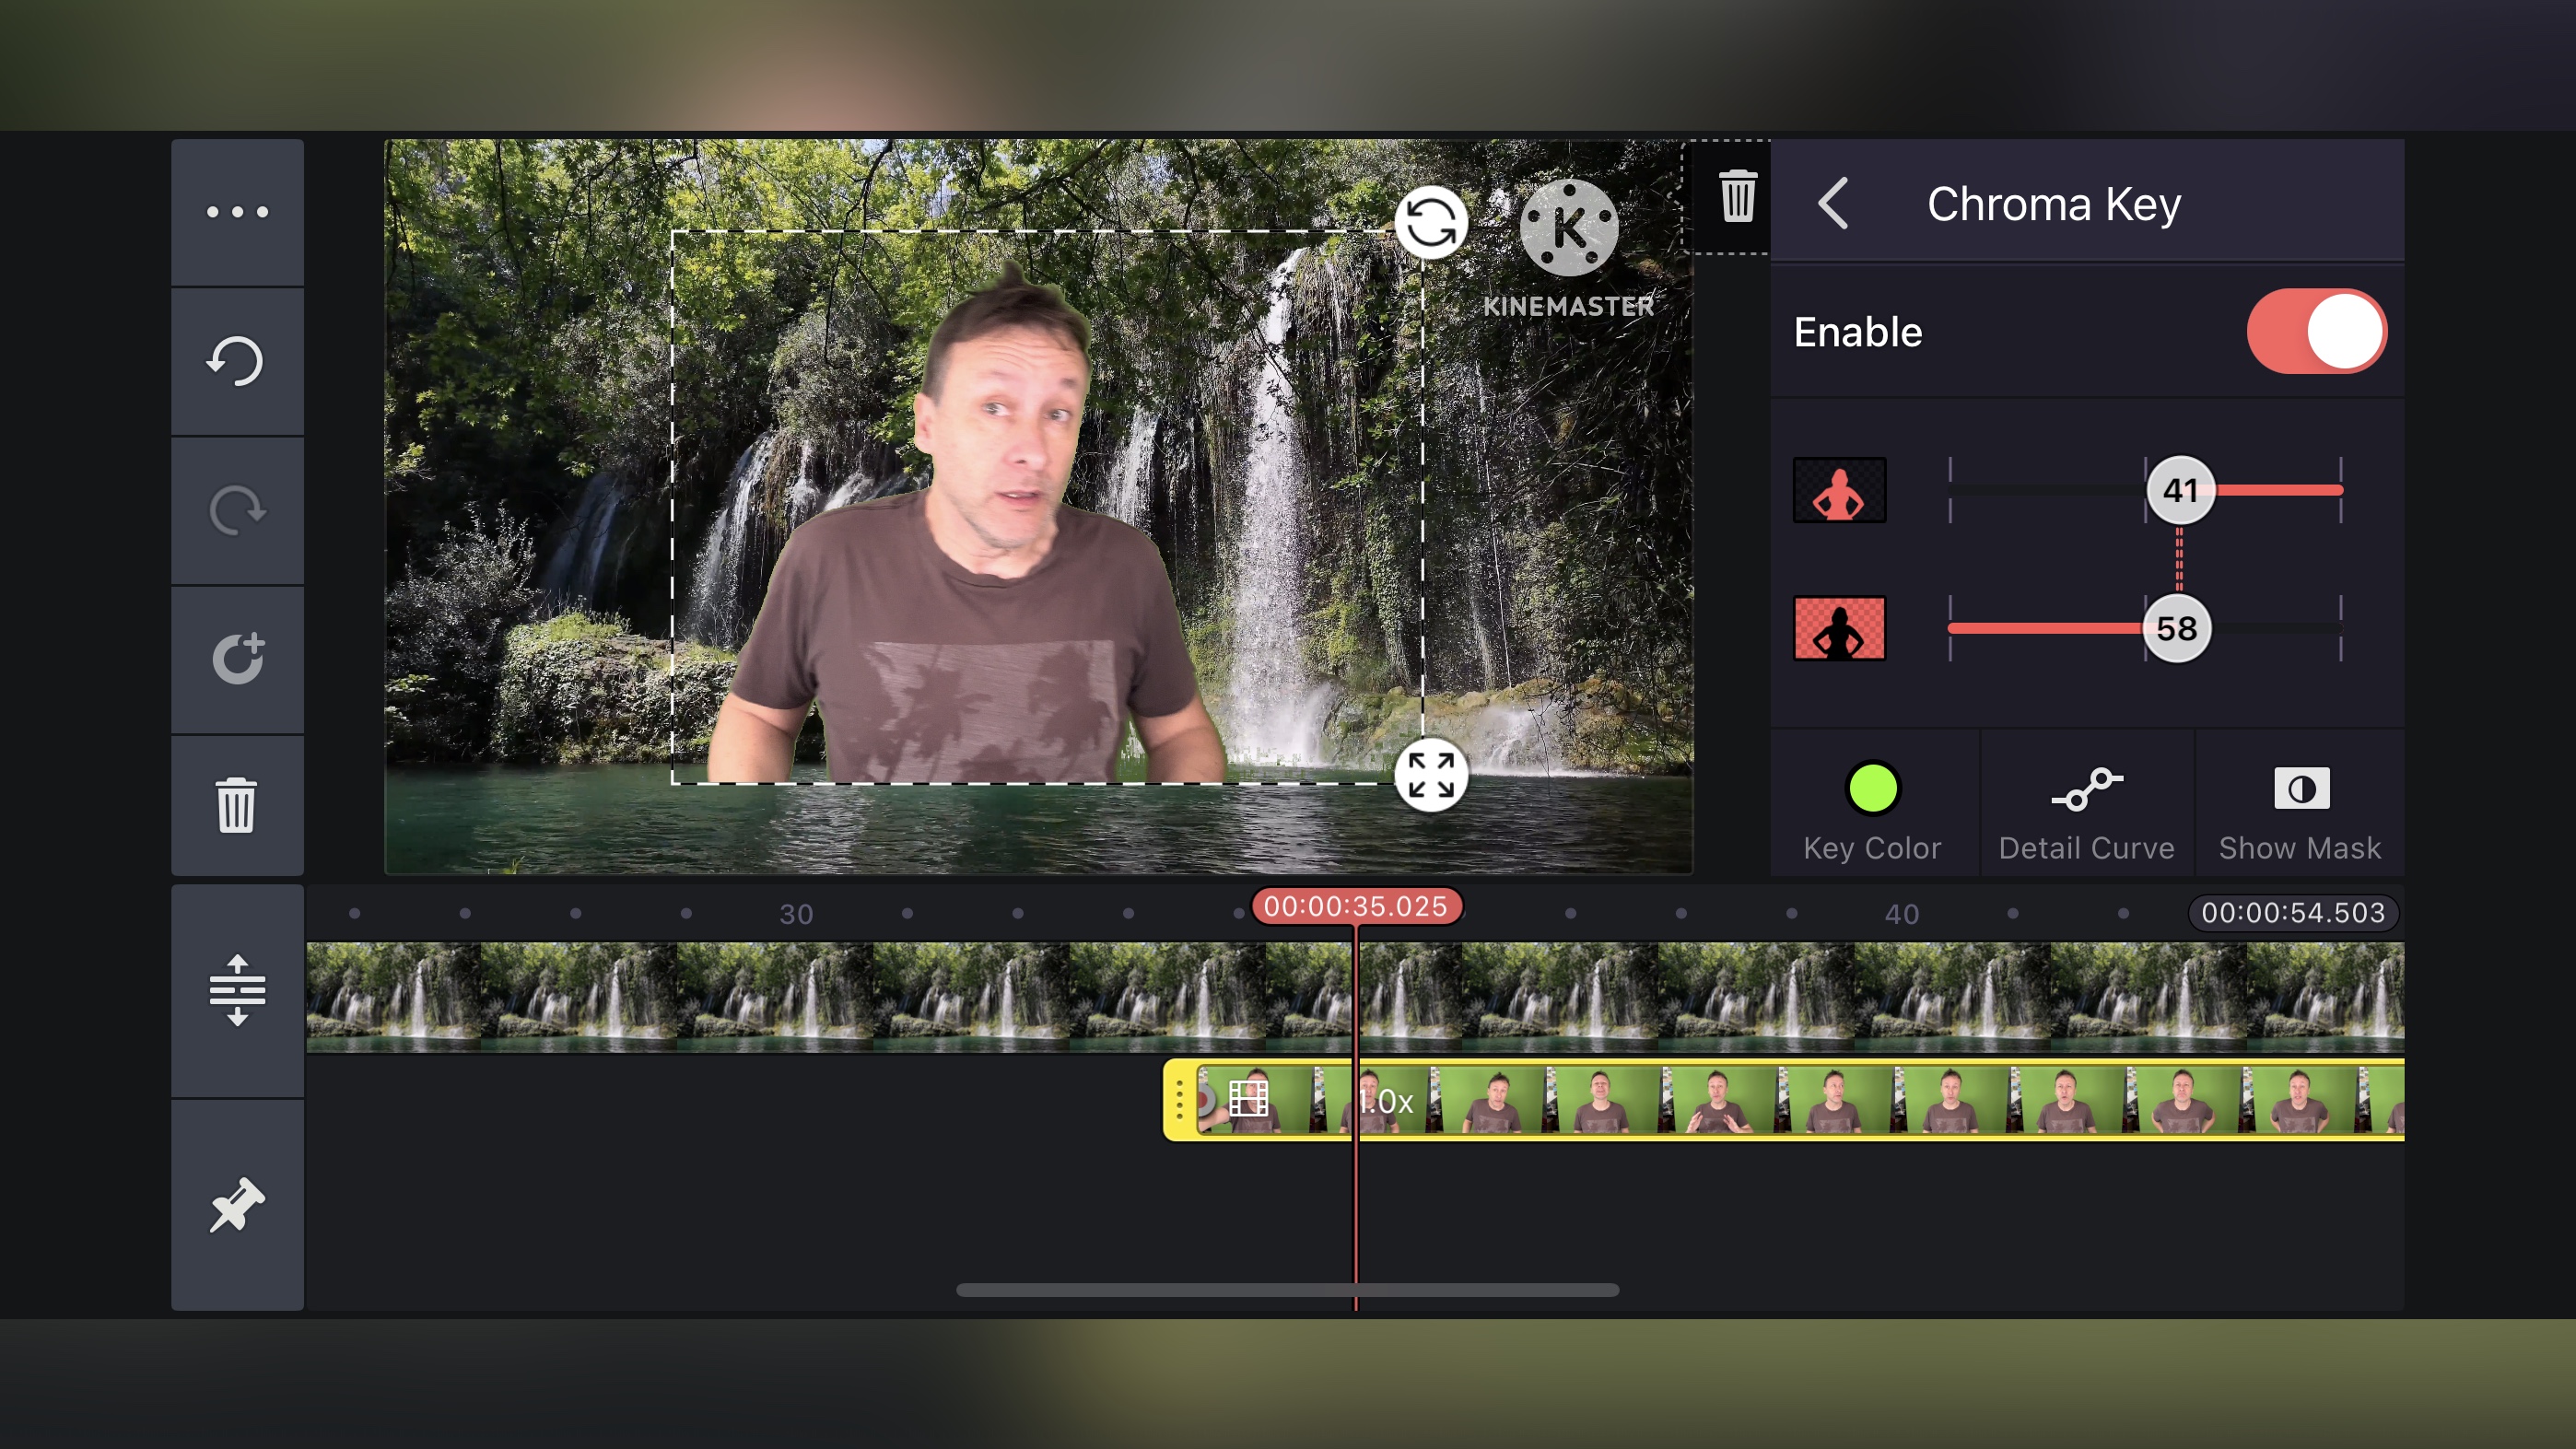
By and large, you’ll be working with a single layer of video - which certainly makes things easier if you’re looking for the best video editing software for beginners on a mobile device. However, you can work with additional layers, but only for specific purposes. This allows you to insert titles, special effects that encompass more than one clip, or just a portion of said clip, or add some media for that a picture-in-picture effect. The latter is also how you can superimpose some footage, and remove its background to blend two layers together.
In order to do that, you can use the ‘Chroma Key’ tool (if you shot your clip in front of a green screen), or the ‘Magic Remover’, which we found does a pretty impressive job, as long as the background isn’t too cluttered and you’re not moving the camera too much.
For those who have seen us bemoan the casual disregard to a user’s privacy in our reviews for CapCut and Filmora, you’ll be pleased to learn KineMaster is a much kinder beast. You can easily restrict its access to your Photos Library at launch, and update your selection over time. We still can’t believe some developers don’t allow you to do that and insist on seeing your entire library.
All in all, KineMaster works surprisingly well, and will mostly get out of your way as you edit, offering you the tools you need for the job at hand, while hiding those that are of no relevance to the selected media.
- Video editing: 5/5
KineMaster: Store & export
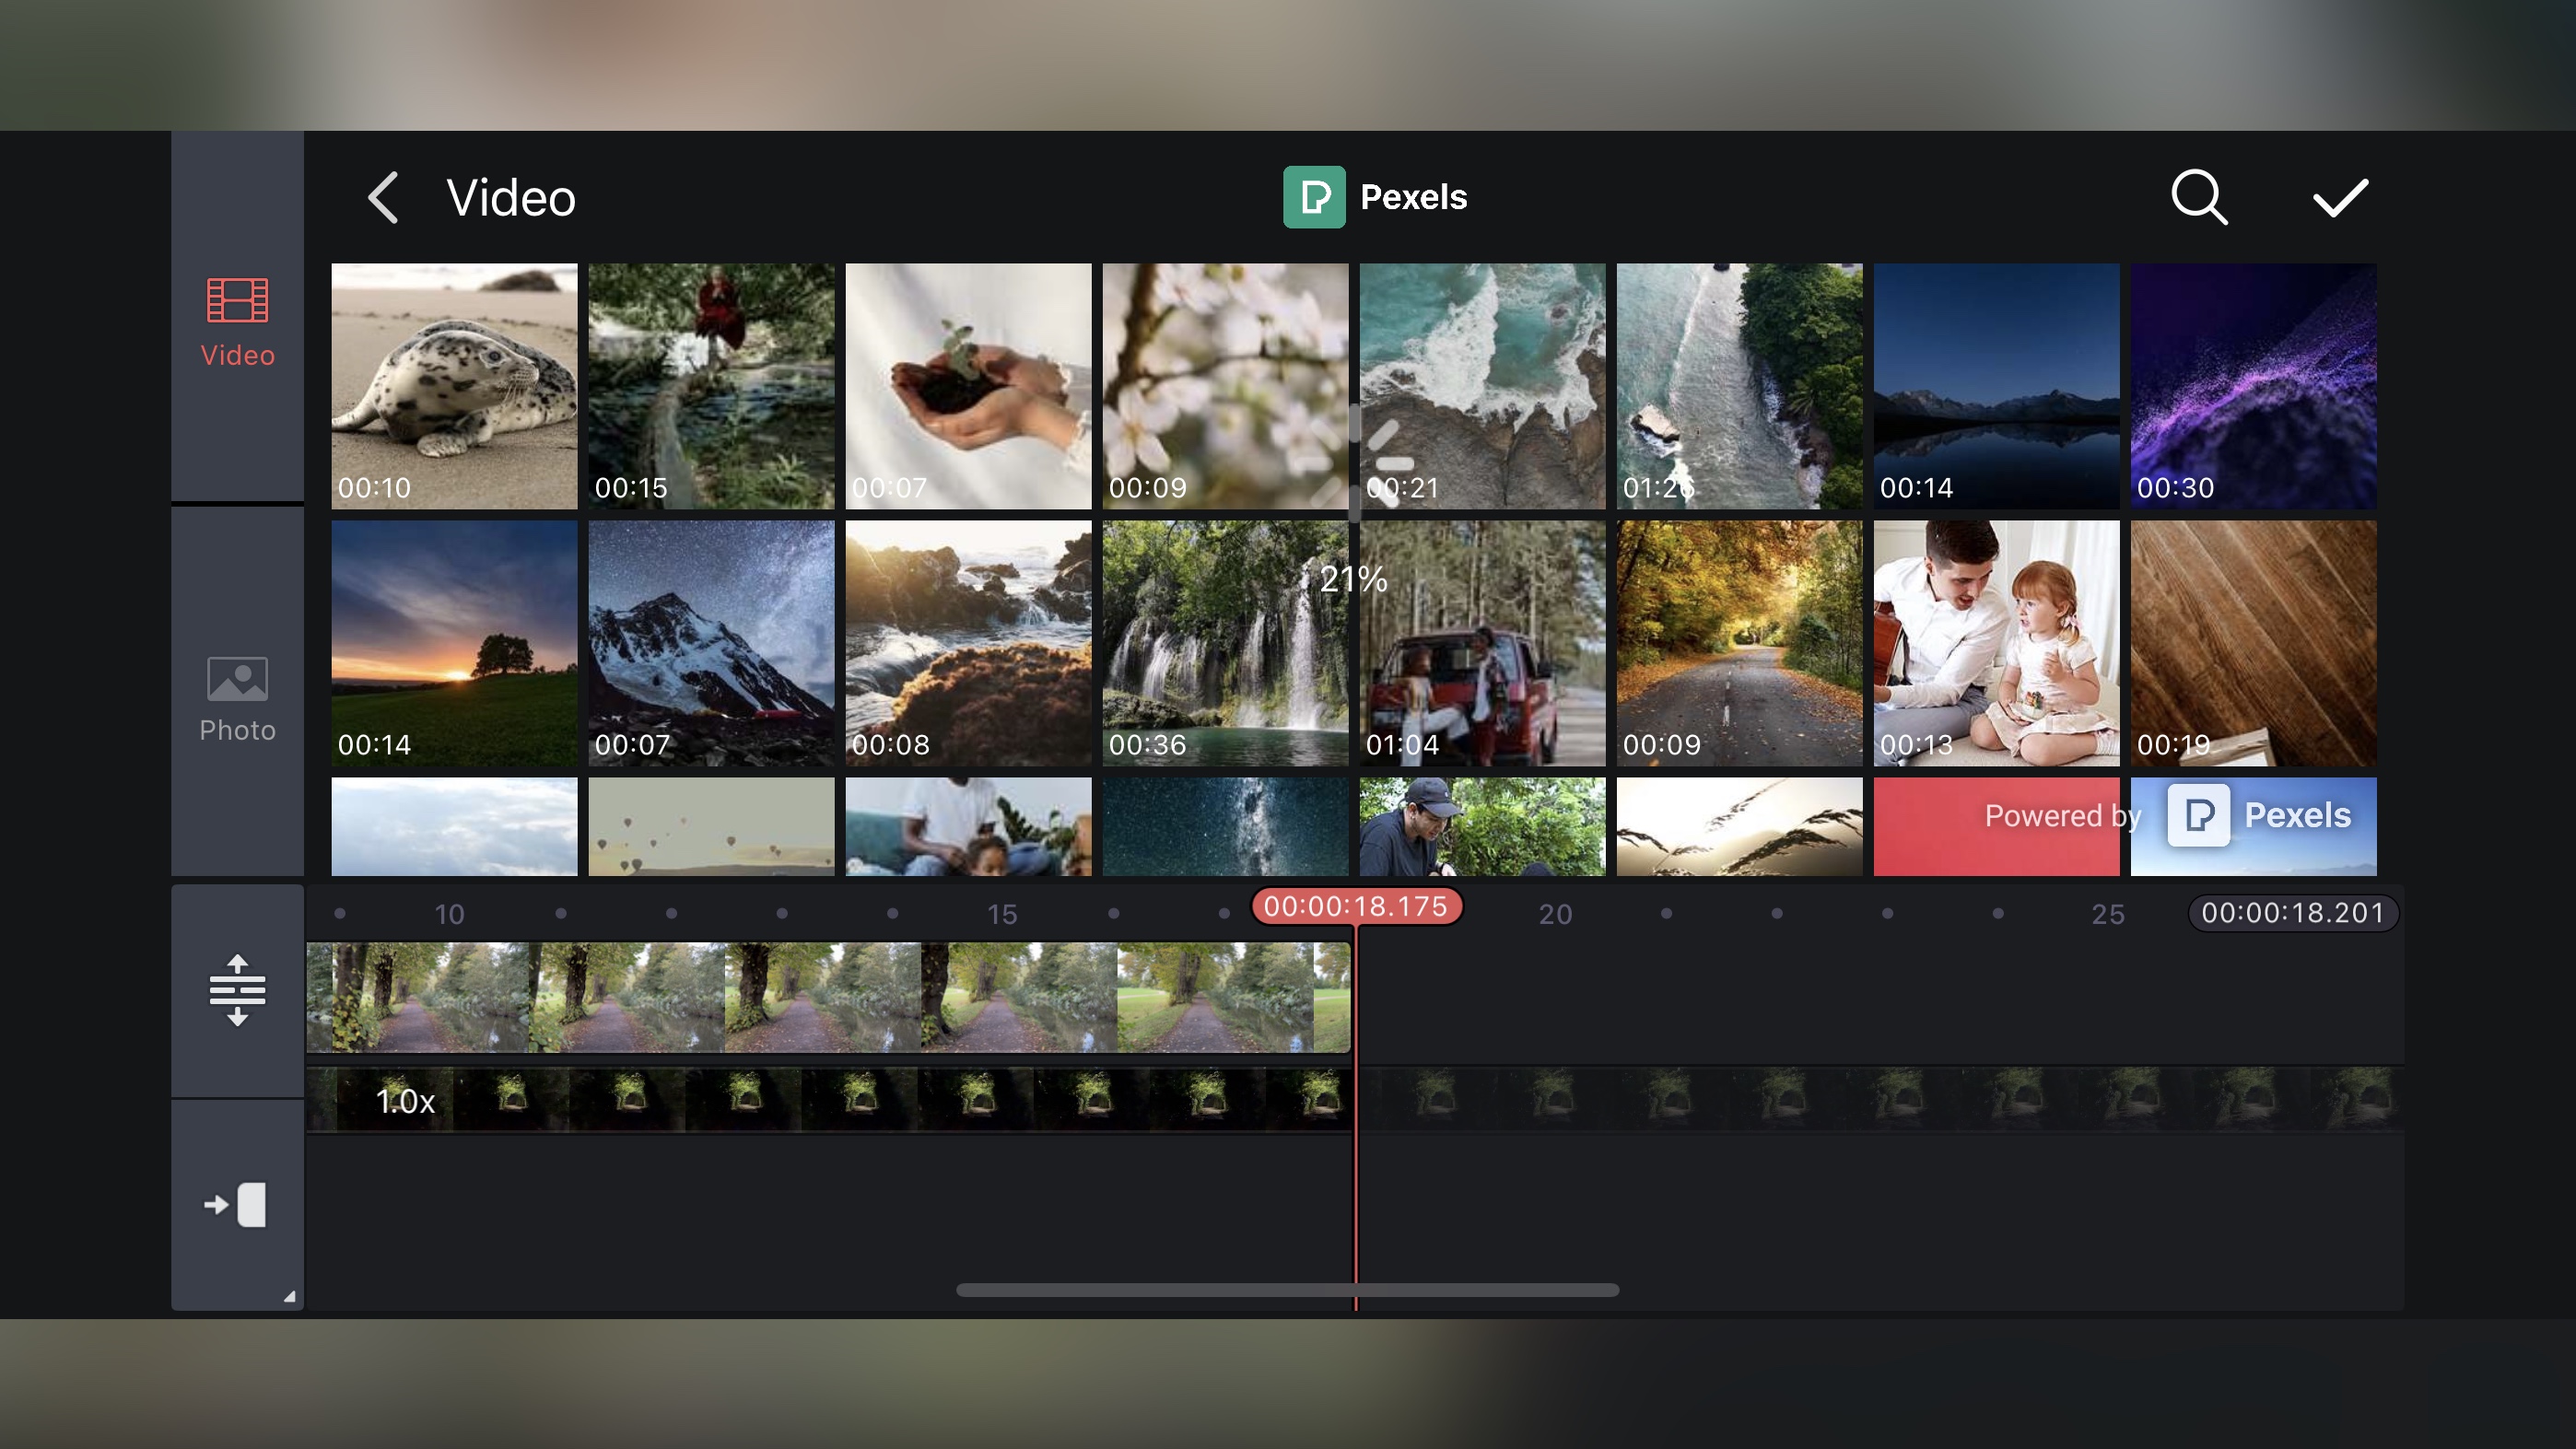
- A vast store where many assets are available to download for free, and hardly any restriction when exporting your project
If you’re looking for more effects, transitions, stickers, music, and so on, this is where KineMaster’s Asset Store comes into its own. You’ll find a lot of these assets are available for free. Just tap on them to download them into your app. Those that have a little golden crown to the thumbnail’s lower right are only available to subscribers. As you’d expect, this accounts for most of the best ones, although there is a huge selection for you to explore and use, even if you’ve decided not to go down the paid road.
Once your project is complete, you may expect the push to subscribe would be relentless, but we found KineMaster to be quite unobtrusive: tap on the ‘Share’ icon, choose your format (from the standard H.264, the more modern but less compatible H.265, and GIF - for simpler/smaller projects), select the resolution, bit rate and quality, and click on ‘Save as Video’.
This is where the request to subscribe will rear its head, but simply click on ‘skip’ to get on with the rendering. We were very pleasantly surprised to see you can export projects up to 4K. Most competing products restrict their free offering to HD at the most. You will, of course, get a ‘KineMaster’ logo, top right of your movie, but this is a very minor drawback to have access to so much for free.
- Store & export: 5/5
KineMaster: Scorecard
Should I buy?
Buy it if...
You want a high end video editing app for your mobile device, with a wide array of tools, all for free (as long as you don’t mind having your work watermarked).
Don't buy it if...
You want a free video editor without a watermark.
KineMaster: Alternatives
We've reviewed plenty of the best alternatives to KineMaster. For free video editing apps, check out Apple iMovie for iOS and CapCut. For professional-grade video editors, we love the free DaVinci Resolve for iPad and LumaFusion, available for a one-off fee. Both are very powerful with excellent performance.
0 comments:
Post a Comment