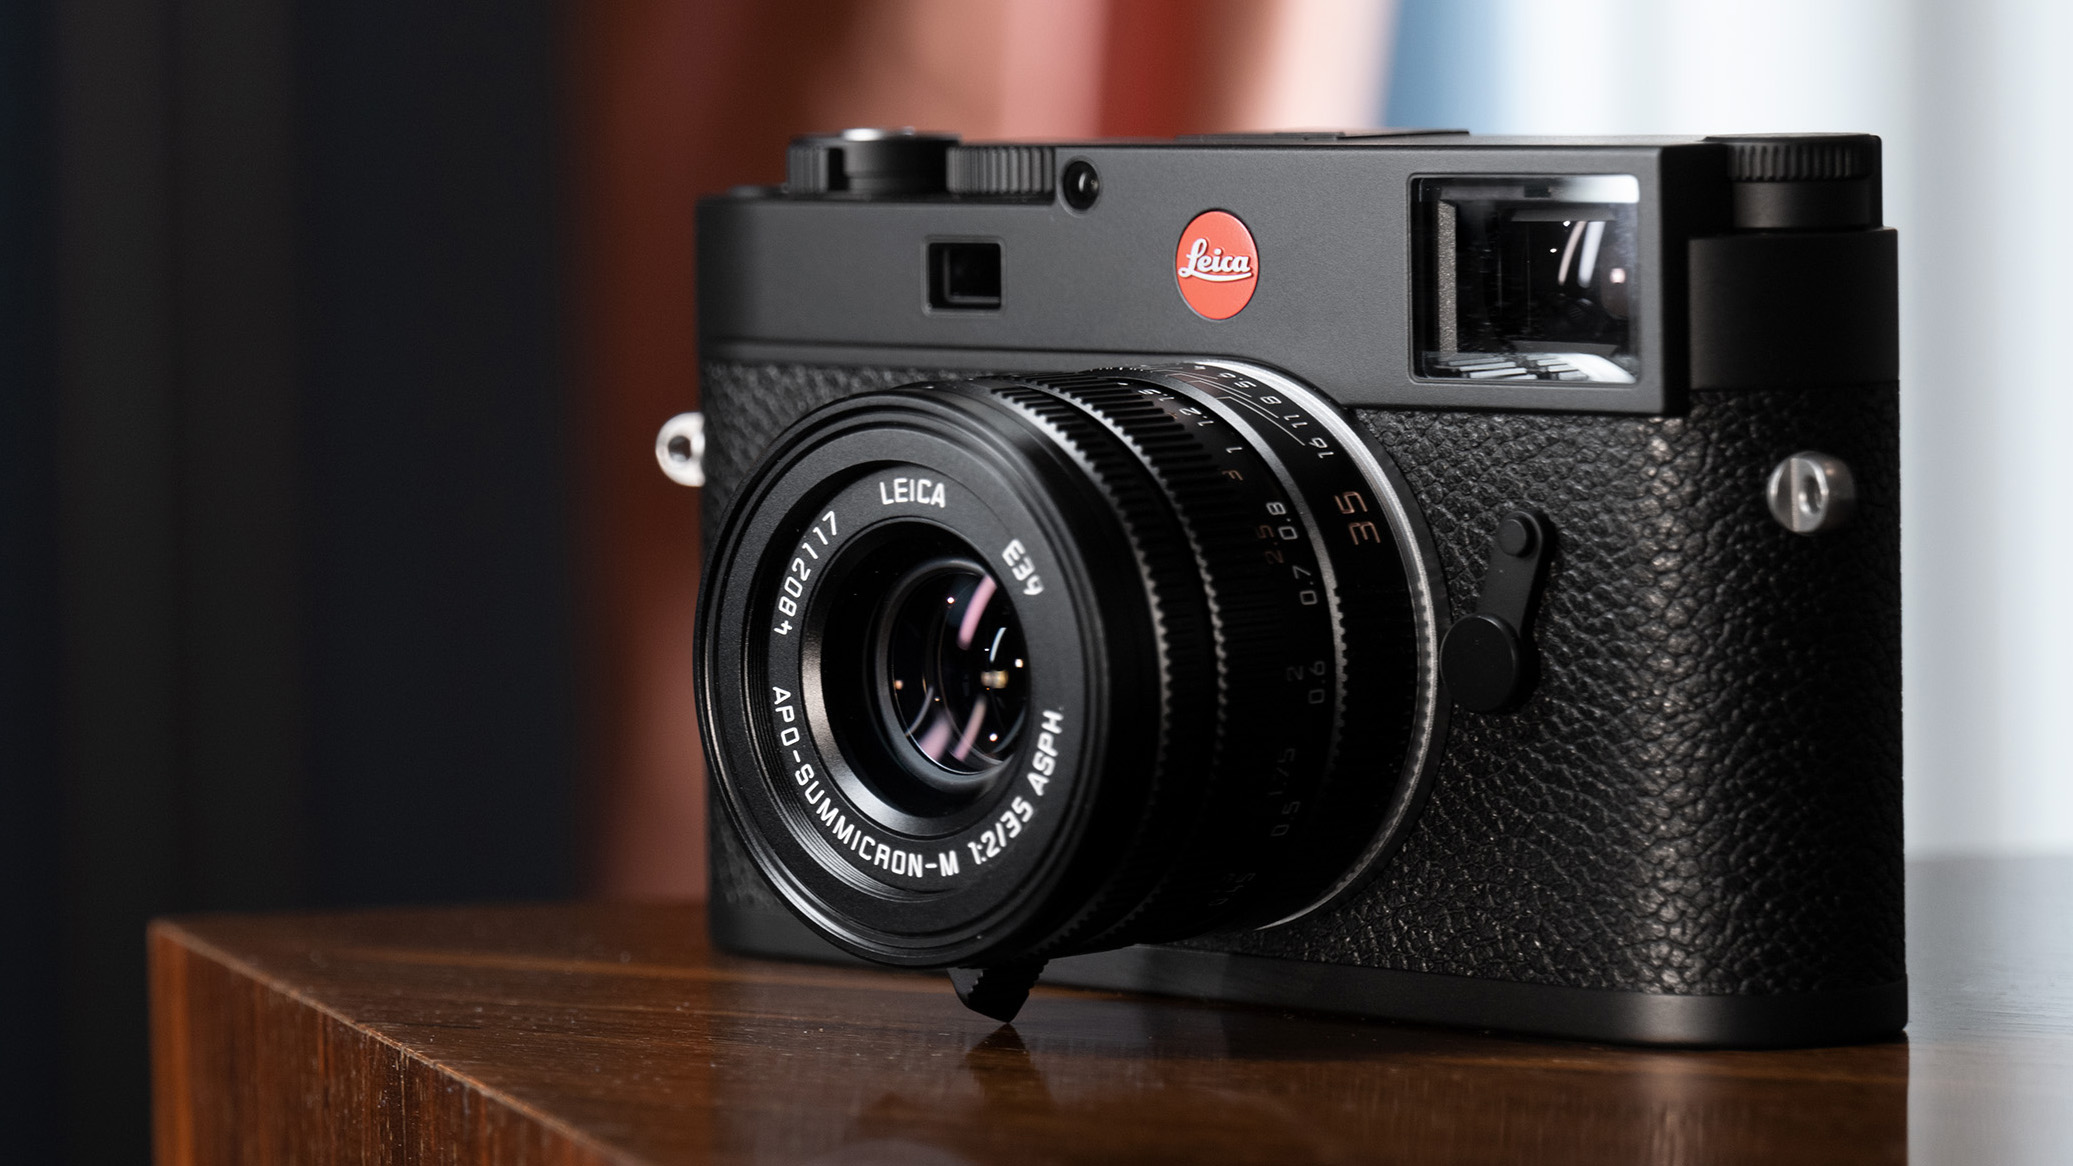
Monday, January 31, 2022

Leica M11

Leica's M-series cameras may date back to the 1950s, but the Leica M11 is the most modern and feature-packed model to date. It still has the exceptional build quality and minimalist design that you'd expect of this style (and price) of camera, but it also packs in a new 60MP full-frame backside-illuminated sensor and other innovations like 64GB of built-in storage.

This makes the Leica M11 the highest-resolution model in an M-series camera to date – in fact, it may even use the same sensor as the one we've seen in the Sony A7R IV. This is quite a jump from the 40MP Leica M10-R and allows much larger prints to be made, but the downside is that such a high resolution is unforgiving when it comes to even the slightest focusing errors and lens deficiencies.

The M11 is a niche take on an already niche camera, then, but it still carries many of the charms that have made the M-series so desirable. It's available in silver and black versions, with the latter's housing made partly of aluminum rather than the silver model's more classic brass-and-magnesium construction. And its minimalist controls  not only keep ‘pure’ photography at your fingertips, but also maintain the more traditional shooting experience these discreet rangefinders are known for.

The Leica M11 camera resting on a wooden bench

(Image credit: Future)

As usual, there's no autofocus, in-body image stabilization or video recording here, so if you're after a hybrid camera you should look elsewhere. The Fujifilm X-Pro3, for example, offers a more modern shooting experience for a considerably lower price tag. But the X-Pro3 also lacks the pure rangefinder experience you'll find on the M11, not to mention its hugely impressive build quality.

Overall, the Leica M11 does a good job of balancing the series' traditional charms with more modern features. We were impressed by the new sensor's dynamic range, with image quality excellent up to ISO 3200. But it is important to bear in mind the M11's limitations. It isn't built for speed or versatility, and that resolution does make it brutally unforgiving of focusing mistakes.

While there is the option to shoot DNGs and JPEGs at 60MP, 36MP or 18MP resolutions, that native 60MP resolution is arguably too high for a camera of this type. But if that issue and the M11's price tag aren't deal-breakers for you, it's another unique installment in a series that goes back almost 70 years.

Leica M11 price and release date

  • Announced January 2022
  • Available worldwide from 13 January 2022
  • Costs $8,995 / £7,500 / AU$14,180

Announced and released worldwide on January 13 2022, the Leica M11 is currently available for pre-order from retailers for $8,995 / £7,500 / AU$14,180 body only. 

This pricing follows what you’d expect from an M-series camera, and with new and improved features when compared to the Leica M10-R, it arguably represents better value for money than its predecessor.

The Leica M11 camera resting on a wooden bench

(Image credit: Future)

There’s also a reasonable chance we’ll see the release of a limited edition version of the camera in the future; pricing would ultimately depend on whether a limited edition version is available body-only or in a multi-lens kit. 

One point that's always worth considering in this situation is that limited edition Leica cameras in good condition can increase in value, so if an M11 model of this type is released it could essentially pay for itself over 5-10 years of use. Plus, even standard models hold their value better than mirrorless cameras from other manufacturers, if you can stomach that initial cost.

Features

  • 60MP full-frame back side illuminated sensor
  • 64GB of internal storage
  • 2.3MP touchscreen

Leica M-series cameras are a unique proposition with one foot firmly in the past, and the other in the digital present. 

This provides photographers with a shooting experience like no other – not even Fujifilm’s X-Pro3 is quite the same – despite offering a much more affordable alternative. But while the M11 maintains this balance between classic and contemporary, it’s easily the most technologically advanced M-series camera to date thanks to some impressive and useful features.

The 60MP full-frame backside-illuminated CMOS sensor makes the M11 the highest-resolution camera in the series to date. In the M11, the sensor offers Triple Resolution Technology which means that DNGs and JPEGs can be captured in 60MP, 36MP or 18MP resolutions, so you can select the resolution that’s most appropriate to the shoot in hand. Metering is also provided by the sensor, so there are now more metering options than previous M-series models – these include spot, centre-weighted and multi-field (evaluative).

The Leica M11 camera resting on a wooden bench

(Image credit: Future)

While most cameras that fall into the rangefinder category only provide a single SD card slot, the M11 has an ace up its sleeve in the form of 64GB of internal storage. This can be set to record data in multiple ways – you can have it set to provide individual storage, back-up your images, pact as overflow storage or capture different file types across both storage options.

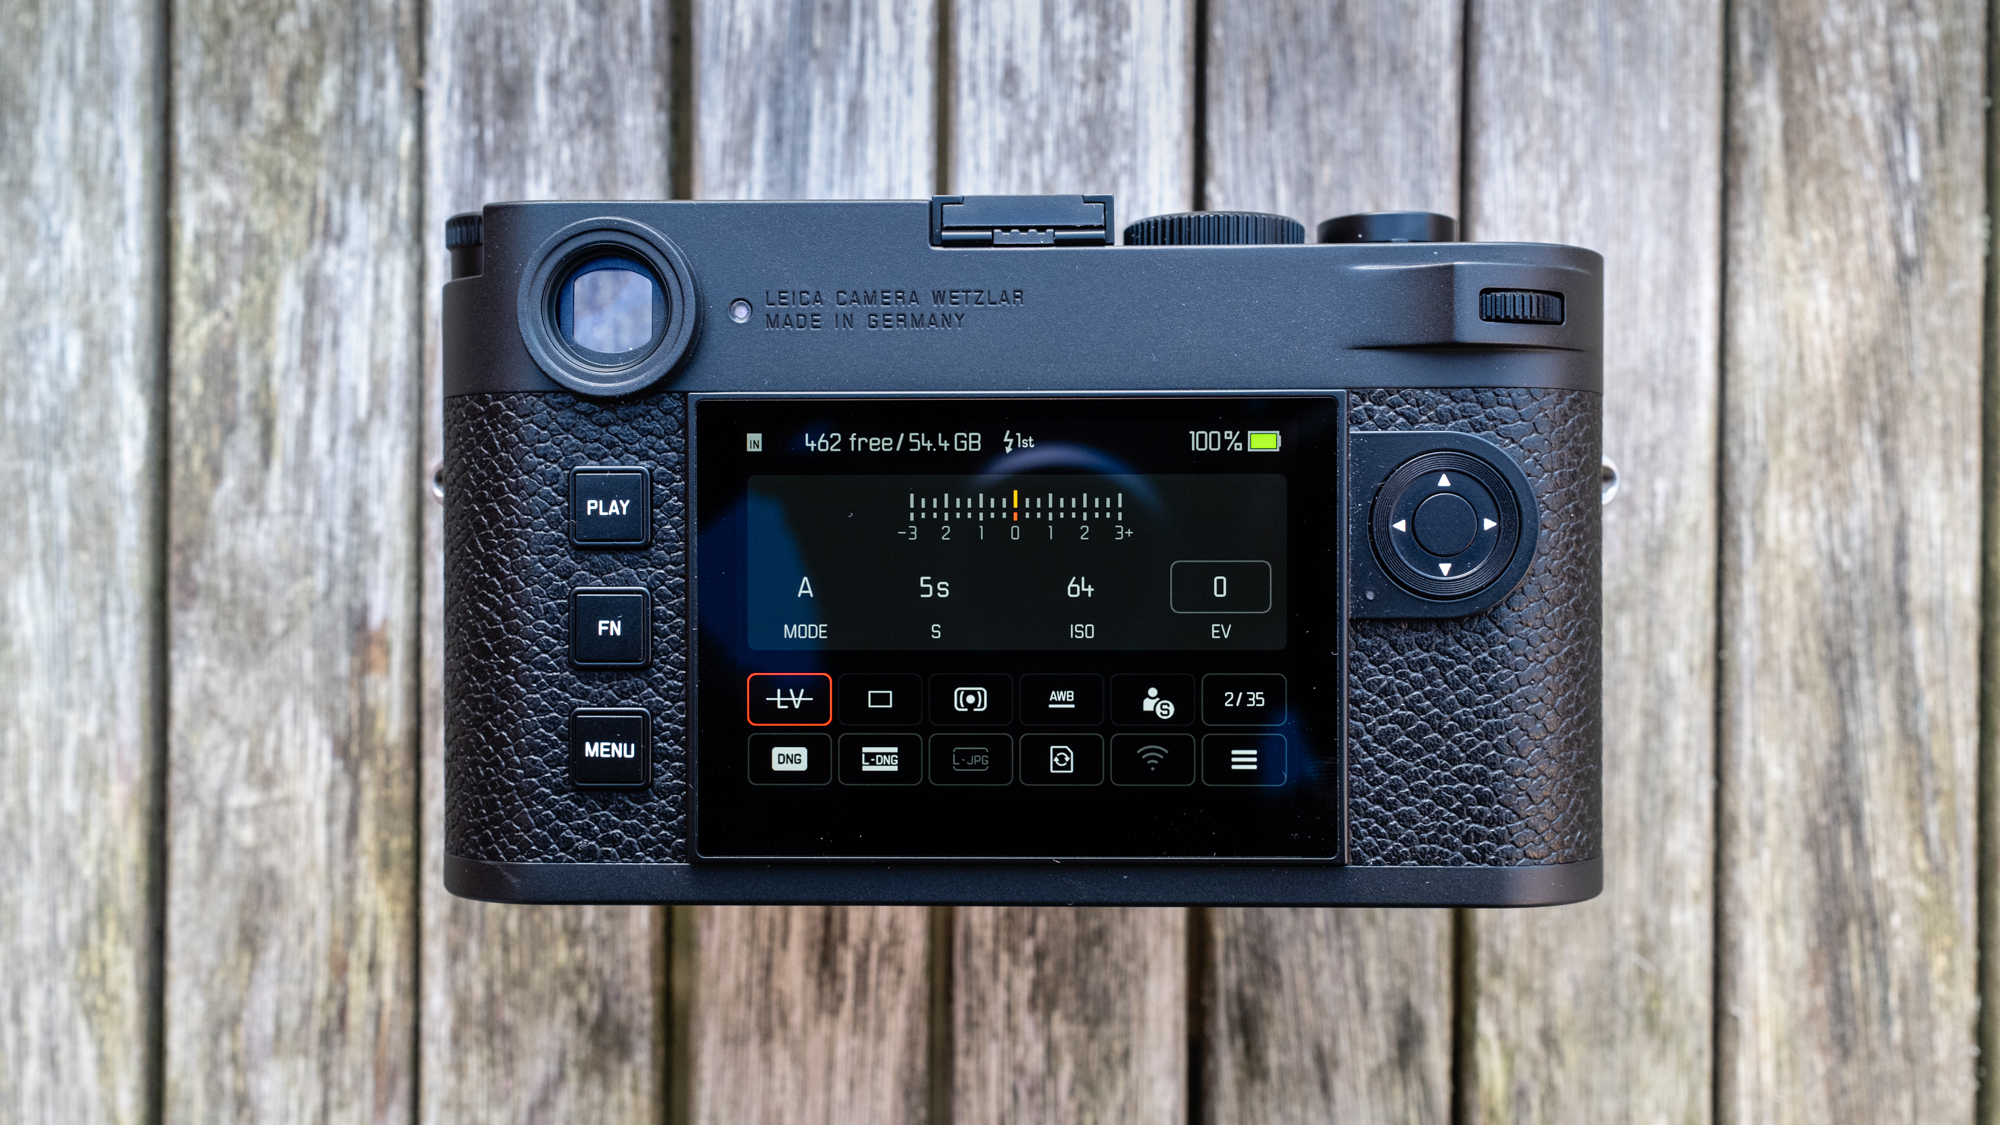
On the back of the camera, the 2.3-million pixel, 3-inch touchscreen is sharp and clear with a fantastically simple menu system that’s easy to navigate using the D-pad or by touch. But while the LCD screen provides a digital window on the world for an alternative to the optical viewfinder, there’s no video recording available, making the M11 a ‘pure’ photography camera model.

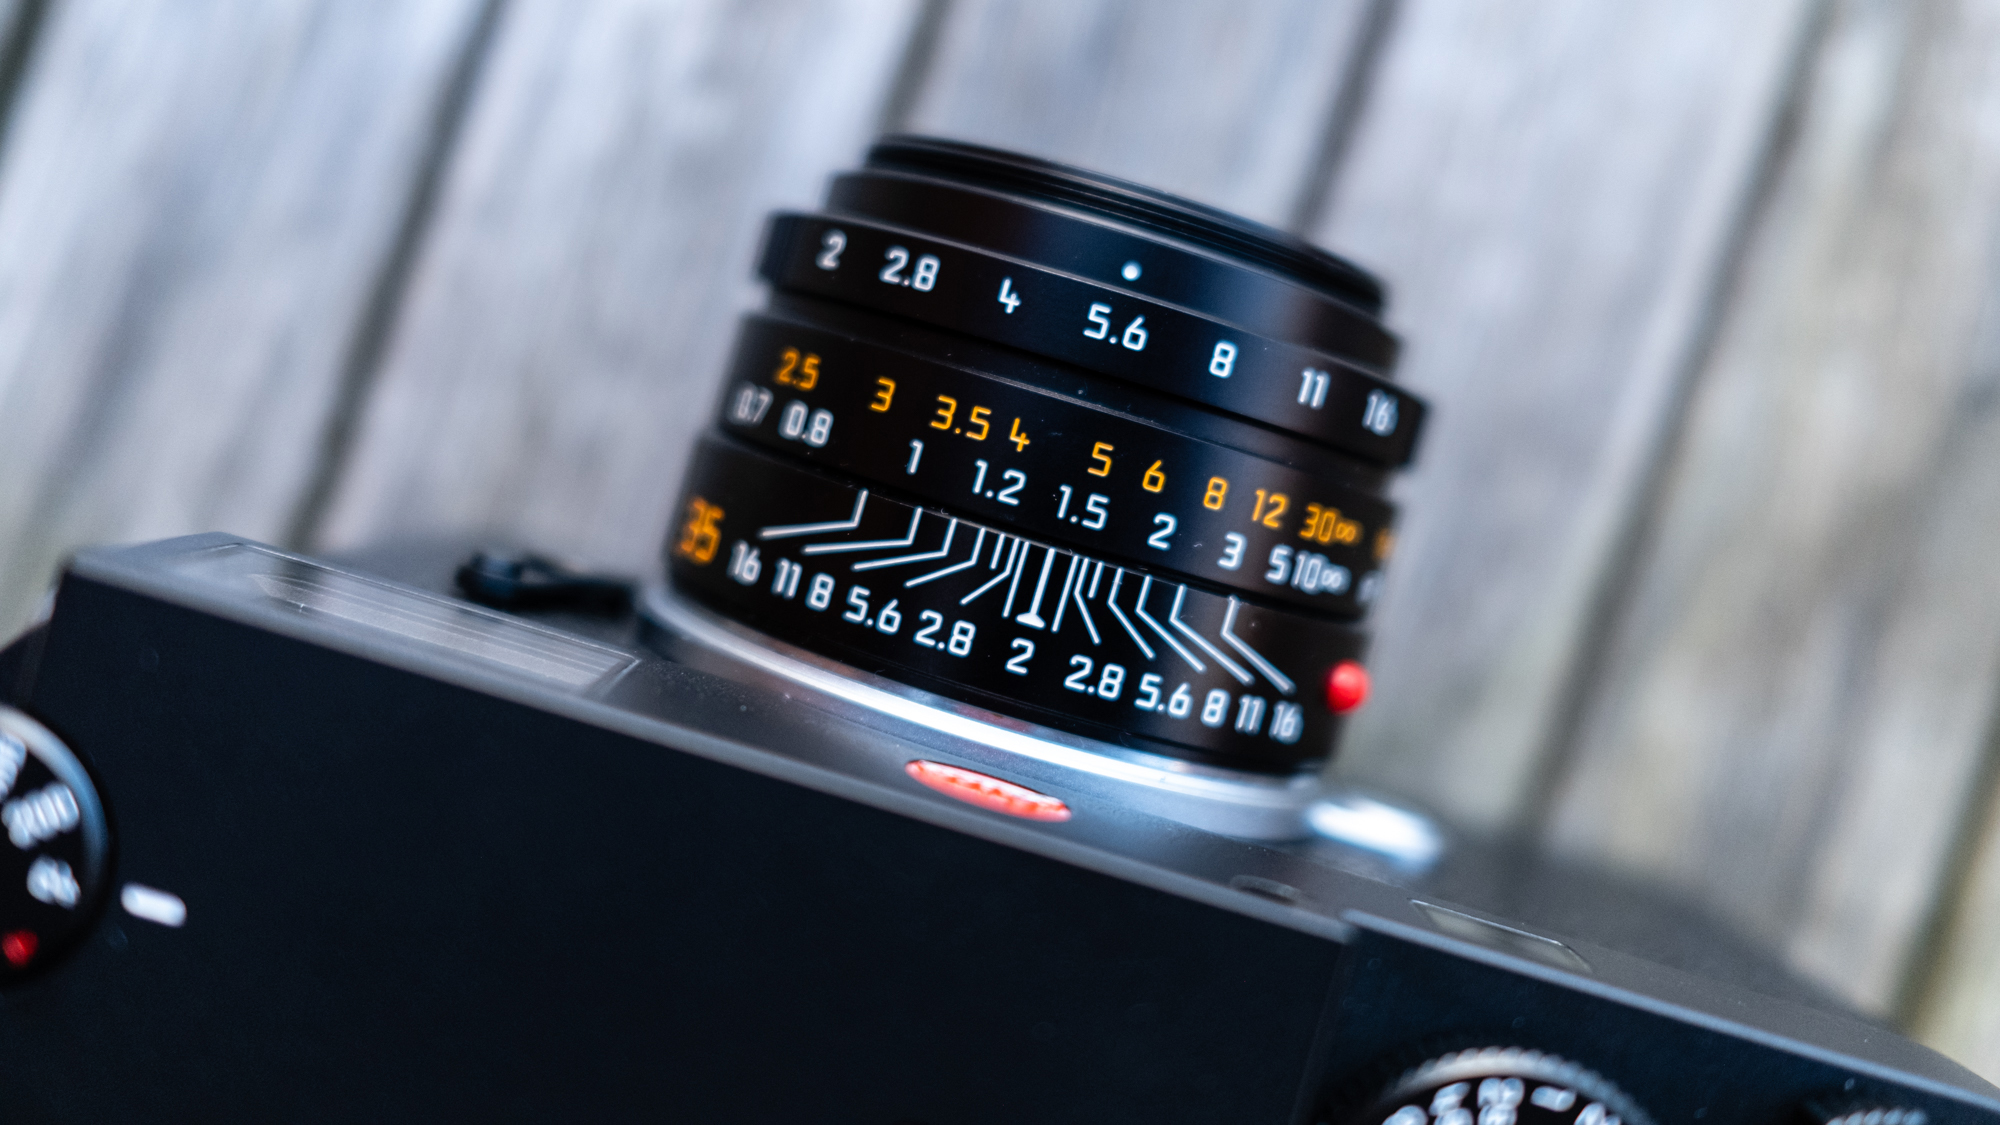
The optical viewfinder itself is bright and clear, with border lines indicating the edges of the frame when different lenses are attached. This is well suited to standard focal lengths such as 35-50mm, but can be trickier to use with wider and longer lenses. The new Visoflex 2 electronic viewfinder, available separately for $740 / £600, features a 3.7MP resolution and alleviates this issue by making wider and longer lenses easier and more comfortable to use, but it’s not exactly cheap.

Build, handling and performance

  • Minimalist design
  • Two colors available
  • New baseplate design

The M11 is clearly aimed at photographers looking for a hands-on, traditional rangefinder shooting experience with simple controls. Focusing is manual-only using the split-image rangefinder that's viewable through the optical viewfinder. This is easy to use, but not to everyone’s taste; it’s certainly not as fast and effective as autofocus, but focus peaking is available when using Live View and provides an alternative.

There are two finishes of the camera available – silver and black, with the black version using an aluminum top plate and the silver model offering a traditional brass top plate. This makes the black M11 110g lighter than its sibling, which is significant when such a physically small camera weighs 530g (black) / 640g (sliver). But with this comes a solid build quality and a stunning minimalist design in a camera body that measures just 139x38.5x80mm.

The Leica M11 camera resting on a wooden bench

(Image credit: Future)

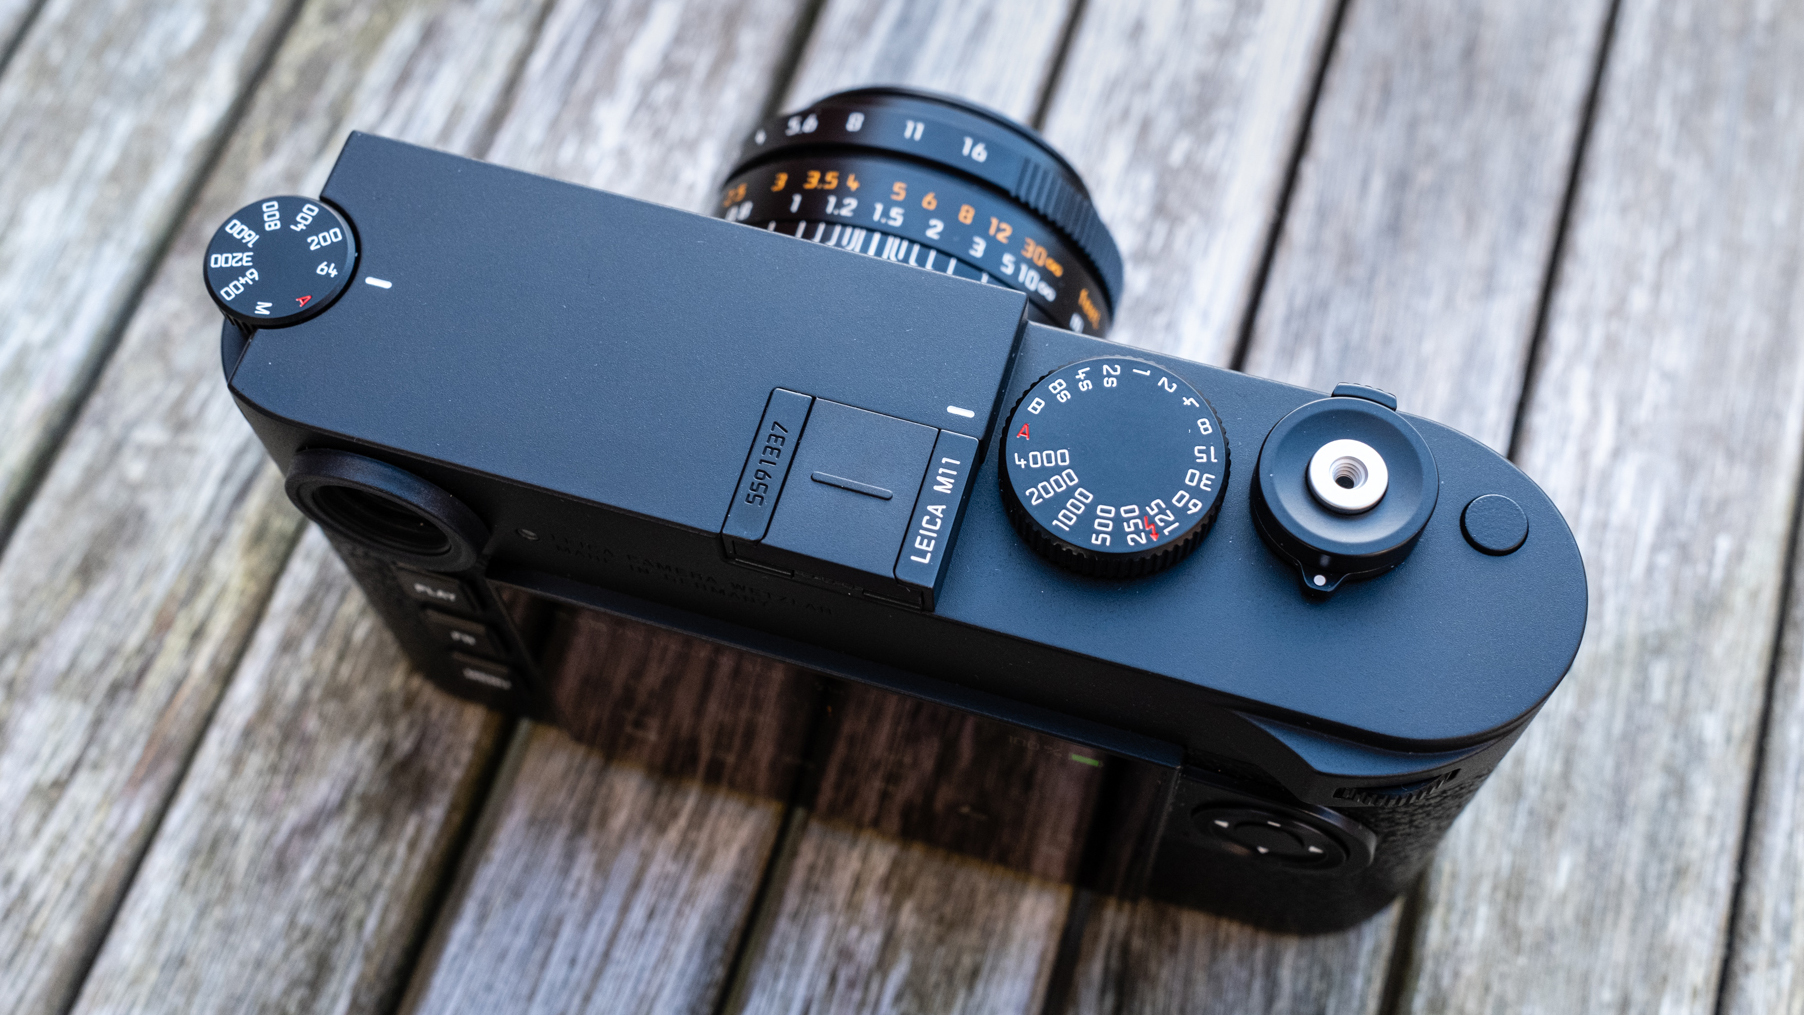
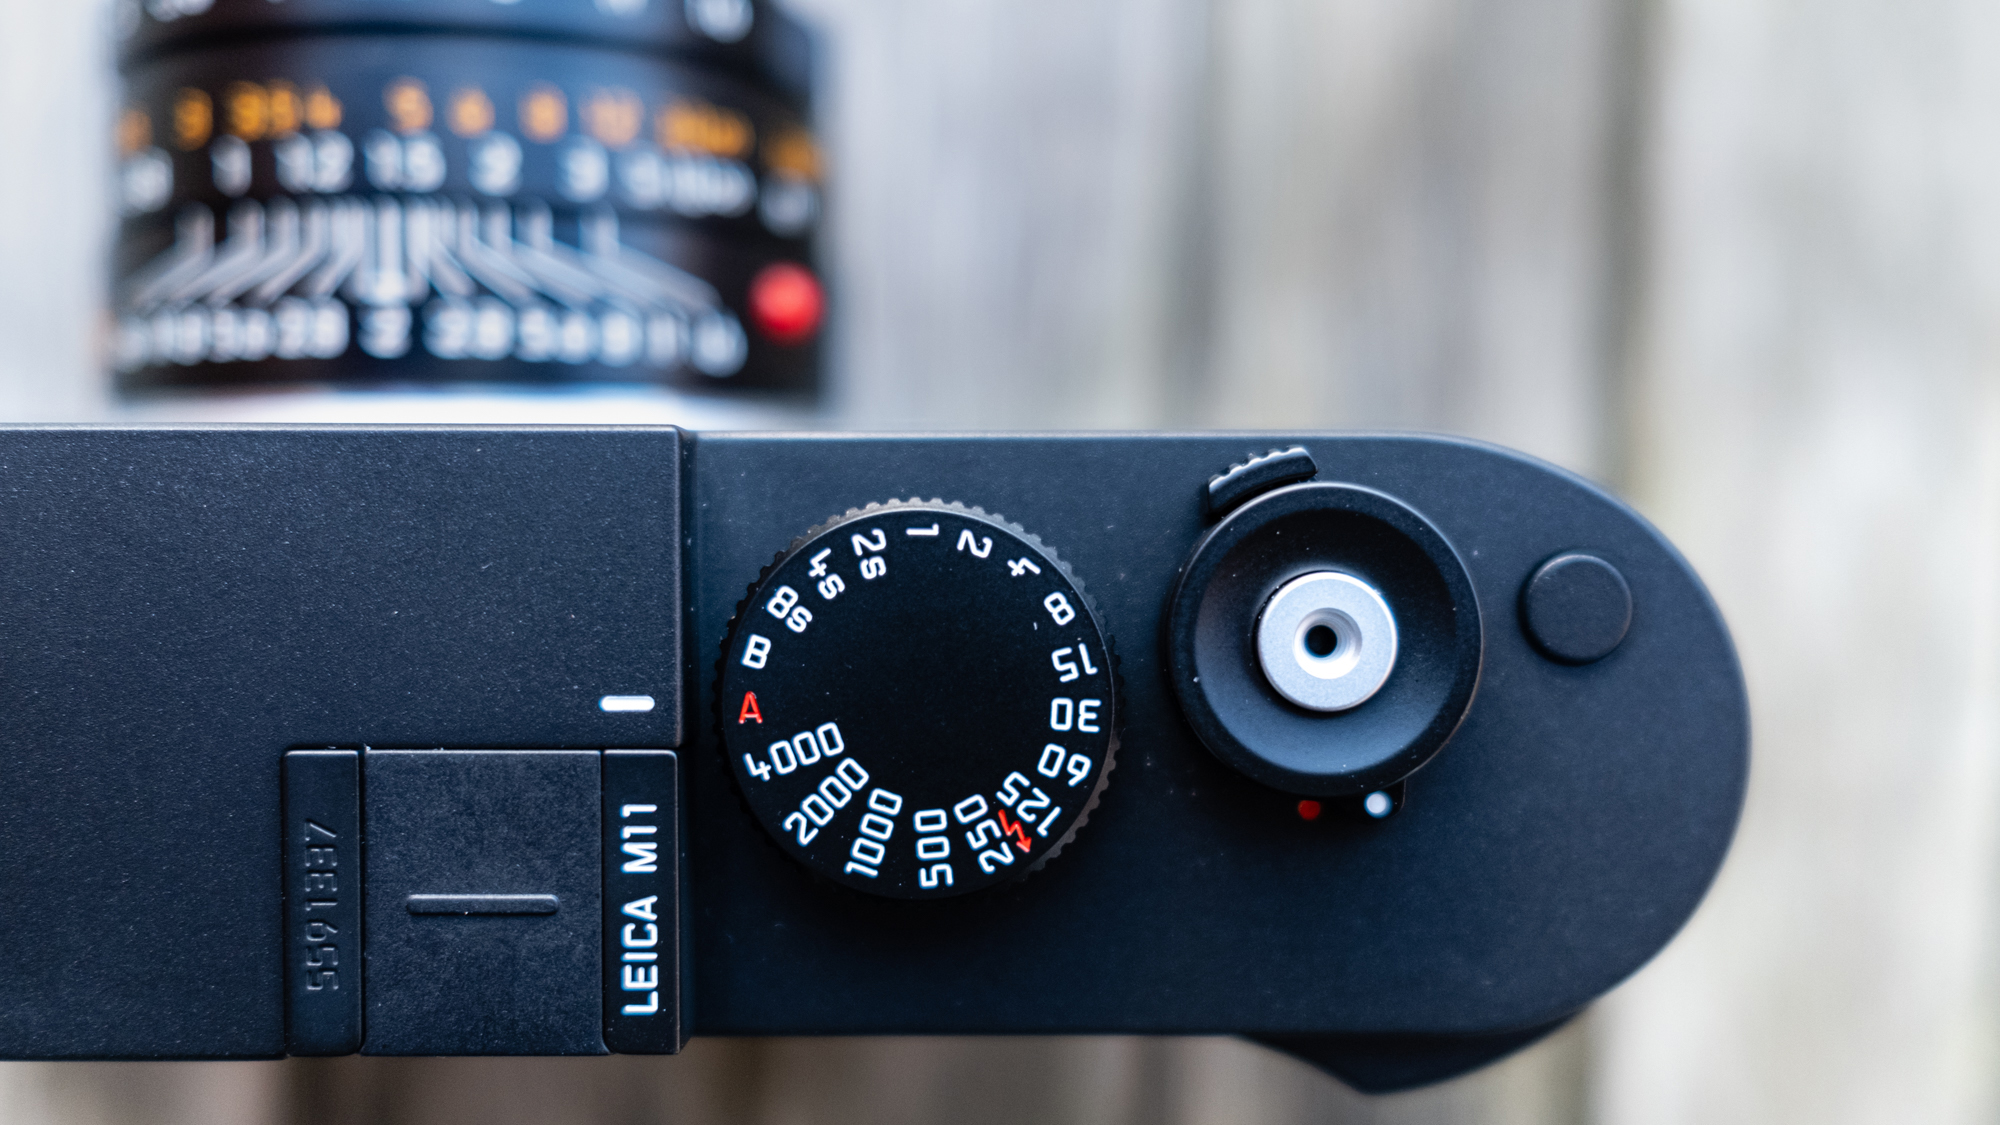
In terms of design, the M11 is a minimalist camera with direct access to key settings for stills photography – ISO, shutter speed and aperture (using the manual aperture ring on its lenses). On the back are just a D-pad, a thumb dial for adjusting exposure compensation, a Play button, Menu button and FN (function) button. By default, the Fn button is set to switch Live View on and off, but can be reconfigured to access one of 28 settings.

The traditional removable baseplate of previous models has (perhaps controversially) been omitted, but you now have quicker and easier access to the longer-lasting battery, SD card and the USB 3.0 port, which can be used for charging and data transfer. This ultimately removes a pointless and cumbersome feature that’s more suited to M-series film cameras than digital models.

The Leica M11 camera resting on a wooden bench

(Image credit: Future)

The new base design is a welcome change, but overall the camera certainly isn’t built for speed and versatility. The minimum focusing distance is a massive 70cm, and continuous shooting is limited to just 4.5fps. 

To be fair, this isn’t the kind of camera you’d use for high-speed continuous shooting, so the frame rate can be overlooked, but it’s surprising that the mechanical shutter only goes up to 1/4000s. The electronic shutter goes up to 1/16000s, but electronic shutters are inferior to their mechanical counterparts because of the potential for shutter roll.

Image quality

  • 15-stops of dynamic range
  • 14-bit raw files
  • ISO range of 64 – 50,000

On paper, the M11 boasts some impressive credentials when it comes to image quality. There's a 60MP backside-illuminated sensor with a claimed 15-stops of dynamic range, a base/native ISO of 64 with a range that goes up to ISO 50,000, and 14-bit DNG raw files. Plus, there’s an IR (infrared) and UV cut filter that Leica claims to be able to correct oblique rays of incident light hitting the sensor.

Image 1 of 6

A person smoking in front of a window

(Image credit: Future)
Image 2 of 6

Two cyclists shot on the Leica M11

(Image credit: Future)
Image 3 of 6

A person walking towards a postbox shot on the Leica M11

(Image credit: Future)
Image 4 of 6

A person walking in front of a tunnel shot on the Leica M11

(Image credit: Future)
Image 5 of 6

A person walking in front of a wall shot on the Leica M11

(Image credit: Future)
Image 6 of 6

A river and bridge shot on the Leica M11

(Image credit: Future)

These are all welcome features, but it’s not all black and white here. The 60MP sensor is brutally unforgiving of focusing errors and is perhaps too high-resolution for a camera of this type. 

If your focus is even fractionally off, the resulting images can be unusable. Plus, when sharp images are reviewed on the LCD screen they look pin-sharp, but when you get them into Lightroom they’re quickly revealed to be not quite as sharp as they first appeared, so focusing is more critical than ever.

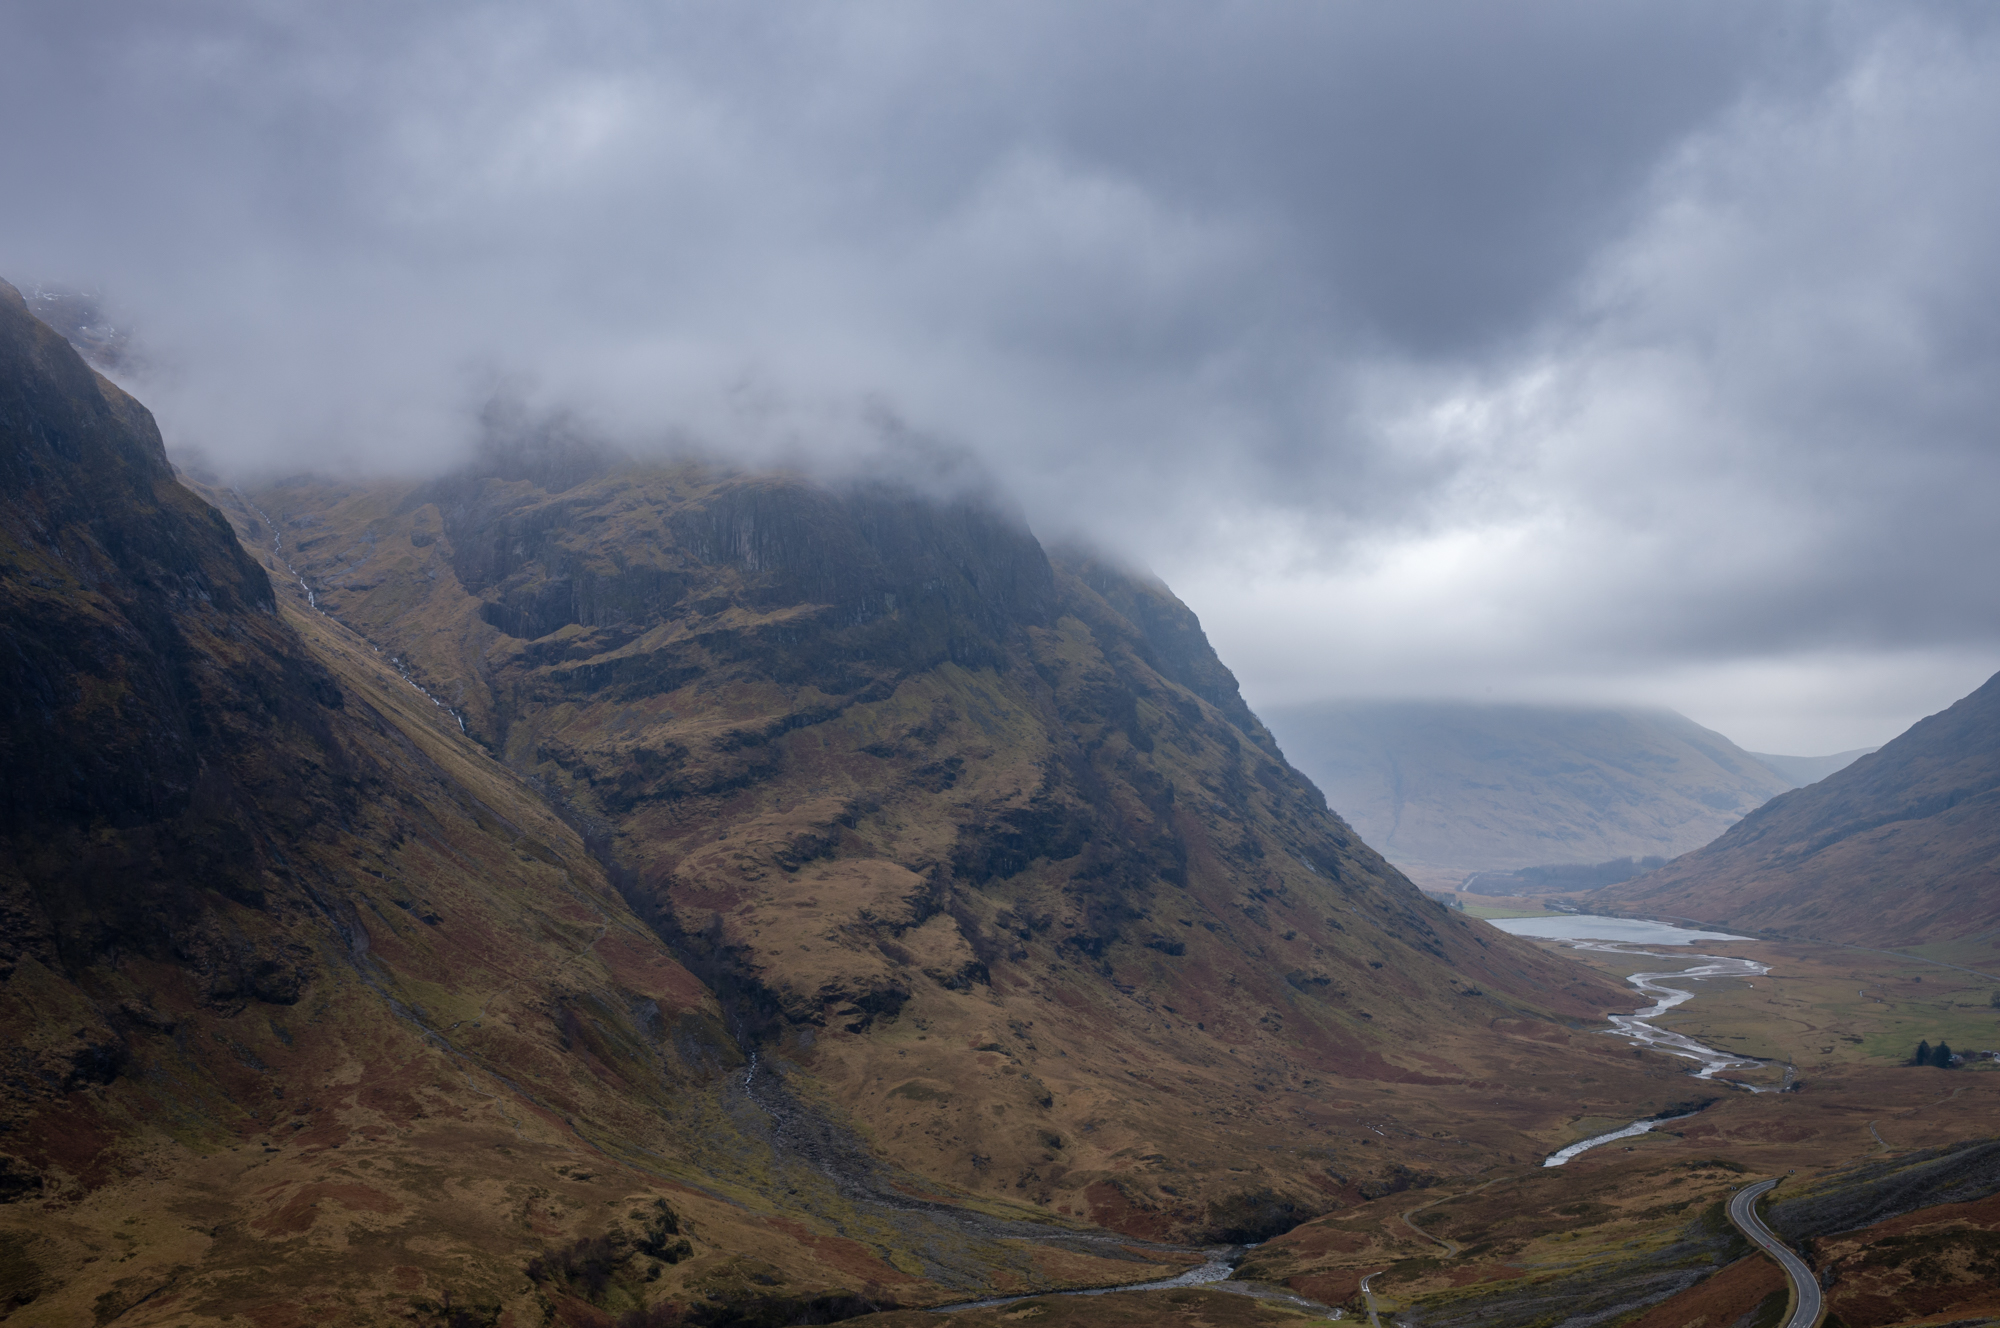
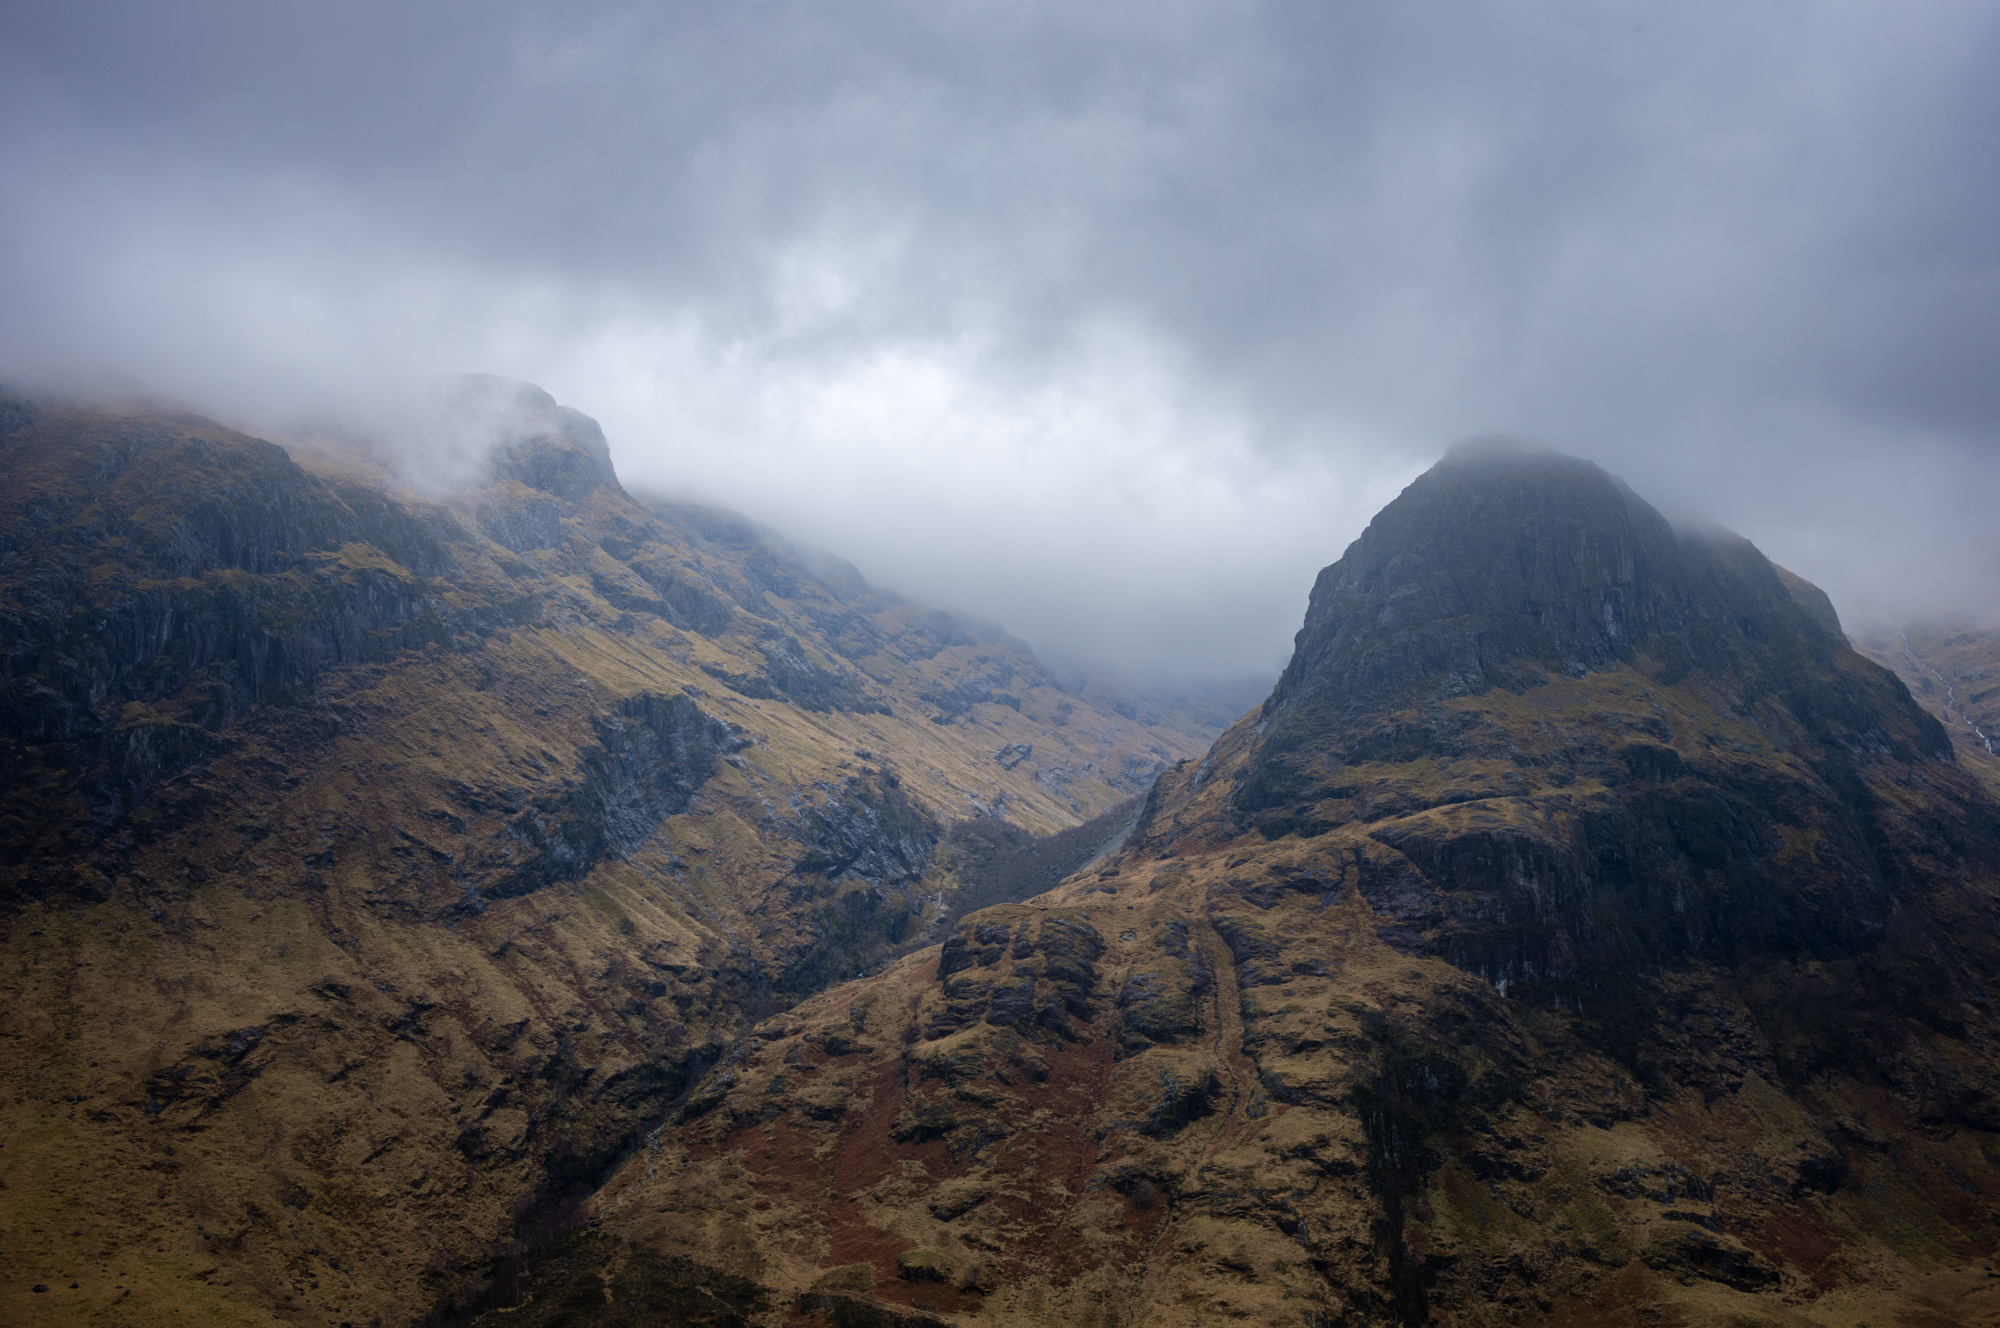
The camera certainly has a wide dynamic range. We tested this by shooting towards the light on an overcast day in Scotland, where detail was captured throughout the scene without the use of any filters. Detail could be easily recovered from shadows areas, and in terms of overall light gathering the results couldn’t be faulted.

Image 1 of 5

A mountain in Glencoe, Scotland

(Image credit: Future)
Image 2 of 5

A mountain in Glencoe, Scotland

(Image credit: Future)
Image 3 of 5

A mountain in Glencoe, Scotland

(Image credit: Future)
Image 4 of 5

A mountain in Glencoe, Scotland

(Image credit: Future)
Image 5 of 5

A mountain in Glencoe, Scotland

(Image credit: Future)

With regards to ISO, image quality was best at the base ISO with excellent results up to ISO 1600. ISO 3200 was still usable with color noise removed minimal color noise reduction applied in Lightroom. 

By ISO 6400, noticeable color shifts began to occur, although images remained usable albeit with a reduction in overall quality due to these shifts and some more noticeable grain. 

Should I buy the Leica M11?

The Leica M11 camera on a wooden table

(Image credit: Leica)

Buy it if…

You're a real traditionalist
The minimalist design of the M11 puts the controls that matter at your fingertips; ISO, aperture and shutter speed. While other settings can be accessed via the menu. The manual focus lenses and rangefinder focusing isn’t for everyone. But coupled with the whisper-quiet shutter it promotes a discreet and hands-on shooting experience.

You need data security
Small digital rangefinder cameras typically only have one SD card slot, so if you like to have a backup of your images on a second SD card, this usually isn’t possible. With the Leica M11, you get 64GB of internal storage alongside an SD card slot, and can configure the camera to save images to one or both storage options.

Money is no object
Nobody needs to be schooled in the cost that Leica cameras command. Very few photographers can justify their price tags. But if money is no object and you’re looking for a premium, manual rangefinder camera that’s built like a tank, the M11 could be the perfect camera for you and one that will last for many years to come.

Don’t buy it if…

You prefer autofocus
Autofocus has come on leaps and bounds in the past ten years and with many new and exciting features such as Eye AF on some camera models, giving up this functionality will be difficult for many photographers. The Sony A7R IV uses a similar sensor to the M11 and delivers excellent AF performance for half the cost.

You shoot video
The Leica M11 is a camera for photographers, so there’s no video functionality whatsoever. For Leica purists and photographers who don’t use this functionality, it’s not a problem. But if you want the famous red dot and do require video, check out the Leica SL2.

You’re on a budget
There’s no getting away from the fact that Leica cameras are expensive. So, if you’re budget doesn’t stretch this far or you think the M11 isn’t worth the cost, but you’d still like a digital rangefinder, consider the Fujifilm X-Pro3. It offers autofocus and many more features at a much lower cost.

DJI Mic dual-channel wireless microphone system

Sometimes, I think DJI has a little bit of Apple in it. It doesn't just make powerful tech gear like drones, tiny gyroscopic cameras, and action cams, it often builds beautiful, intriguing, and smartly-turned out products. 

DJI Mic is another one of these products, blending Bauhaus looks with surprising power and mostly excellent usability.

When it comes to videos, people often talk about image quality, but if your audience can't hear or understand you, you might as well skip making the video. Getting audio right, however, isn't easy. You need a good mic (or two) and solid connections to your camera (iPhone, regular video camera, or DSLR). A wired connection is best but then you have to deal with the length of the cord. Can you freely move in front of the camera? Raise your hand if you've almost accidentally pulled your iPhone and tripod to the ground with one sweeping gesture.

What you want are wireless mics, but those are expensive and take some expertise to set up and use. What you can get now is the DJI Mic, a dual-channel wireless microphone system that puts everything inside a portable and quite attractive little charging box.

DJI Mic

(Image credit: Future / Lance Ulanoff)

Design

The $329 / £289 / $509AUD set appears to think of everything. Inside the compact 4-in. by 2-in. x 1.5-in. case, which is charging all components and itself is recharged via USB-C cable, is a pair of wireless microphones, a compact wireless receiver, adapters for plugging the receiver into either an iPhone or an Android phone that suppers USB-C, powerful magnets that let you clip the mics to your shirt, and a DSLR hot-shoe adapter for the receiver.

The receiver even has an LCD touchscreen display that shows you, among in brilliant color audio pickup on both mics, charge status for the mics, its charge level and gives you access to a variety of settings. One thing I was a little surprised about is that there is no DJI Mic app. Virtually all of DJI's other gadgets work with an app. In a way, I'm relieved this doesn't need one.

Magnets, by the way, figure largely in this tiny system. The case is magnetized to hold the components in place when you're not using them. The tiny magnetic squares that start off holding onto the back of each magnetized mic clip (yes, you can just clip them to the top of your shirt color, but more on that later), are so strong that when one got misplaced on my metal table, I couldn't pry it off. I had to slide it to the edge.

Similarly, the magnet that holds the adapters in place makes it near impossible to remove them. I mean, thanks for the thoughtfulness, DJI, but maybe next time dial back the case magnetism just a bit.

DJI Mic

(Image credit: Future / Lance Ulanoff)

Features

The wireless mic units are fascinating bits of technology. They're a middle ground between a lav mic and the transmitter you might attach to the back of your pants if you're wearing a wired lav mic on TV.

There are no wires here, so the omnidirectional microphone and transmitter are squeezed into these roughly 1.75 in. by 0.75 in. by 0.5-in. mics. They can look a bit awkward hanging on your shirt, but you can also place it under clothing where it will still pick up sound. Each mic has just a few buttons for power, linking to the receiver, and starting recording.

The mics have 3.5mm jacks for connection to additional external mics (though they caution not to connect it to any powered mics with 24v or 48v power supplies).

The mic is flush against the housing, but there is room to attach, bayonet-style, an included, tiny fur windsock.

The receiver, which is slightly larger, albeit lighter, than each mic offers the touch screen on the face, a power button and USB-C data port on one side, and monitor and audio-out to camera jacks on the other. On the back are the charge points and a slot where you slide in the smartphone adapters. I like this last part but wish the adapters snapped into position when you slide them on. Instead, they still slide and often move out of alignment against the receiver when you plug the adapter into a smartphone.

Setup and performance

All of this might sound complicated but it's not. I scanned over all the instructions but then, growing impatient, slipped the iPhone adapter into the receiver, powered it up, and attached it to my iPhone 13 Pro, which asked if it was a headphone. I said it wasn't. I powered up both mics, grabbed one, and, while holding the thumbnail-sized magnet square on my shirt, attached one mic to my chest. Then I grabbed my wife and put the other mic on her.

The receiver warned me that it was only recording mono audio. That's a shame since the iPhone can record stereo, but I was still hopeful it might sound good, at least for voice recording (my main interest).

I opened the camera on my iPhone, selected video, hit record, and we started talking. My wife didn't even know what she was wearing. I tried to explain and then asked her to leave the room (the wireless mics have a 250m range). She complained she couldn't hear me. I yelled that it didn't matter, the mic should pick up her voice. She wandered around the house and then headed outside. Getting into the spirit of things, she started to sing. I prayed I was capturing it all.

DJI Mic

(Image credit: Future / Lance Ulanoff)

I stopped recording and removed the receiver from my iPhone (you can't playback the audio with it attached to the phone, but can listen after if you're wearing Bluetooth earphones). Then I hit play. I heard everything, every word I said and every one of my wife's utterances and, yes, her singing, too. It was all crystal clear and bright. Seriously, there wasn't a hint of distortion.

Lance Ulanoff wearing DJI Mic

You can wear DJI Mic outside (left) or under your clothes (right). Notice that only the magnet shows on the right. (Image credit: Future / Lance Ulanoff)

For my outdoor test, I attached the windsock as recommended by DJI. Then I attached the mic to the outside of my sweater and started walking and talking through New York City. I didn't shout, just spoke in a normal tone of voice (no one looked at me, this is Manhattan, after all). The DJI Mic did an excellent job of picking up both my voice and the appropriate level of ambient noise. None of it overpowered my voice, but I think you could tell I was walking and trotting through a city.

In another test, we put the mics under a thick denim shirt (under the pocket area, actually, doubling the layers of fabric) and under a sweater. Now only the tiny magnets were showing. For both tests, we ever wore our Pandemic-mandated face masks. The sweater's knit allowed more of the sound to come through to create a clear recording. The dual-layer of denim muffled the sound just a bit, but it was still pretty good.

DJI Mic

(Image credit: Future / Lance Ulanoff)

I keep thinking about what a godsend this kit would be for an amateur movie maker. No more complicated sound systems or expensive booms. Just an iPhone attached to a tiny receiver and to carefully hidden, yet powerful mics.

Obviously, you needn't use an iPhone. The system can connect directly to a camera, or the mics can be used without a camera. Each of the microphones has hours of internal battery life and 8GB of onboard storage, which offers about 14 hours of recording - the system will break up the recording files into 30-minute segments. To record on the devices, you press the record button once. The mic will vibrate and you'll see a red recording on the corner opposite a glowing green one (that indicates the mic is ready for use).

After you record, you can attach each mic (both have USB-C ports) to a computer to download them as 24-bit mono .wav files. After that, you have to format the storage on each mic using the Receiver.

If you do use the system with a camera, you'll want to use the touch screen to swipe down and slide over to the "S" for "stereo" setting. Through that tiny screen, you can also adjust Receiver Gain, Volume on the monitor line, and access full settings.

Final verdict

The weird case magnetic stuff and iPhone mono recording aside, I have to hand it to DJI. This is a tremendous first effort. The DJI Mic wireless dual-microphone system is well designed, sturdy, easy to use, works in a wide variety of situations, can attach to almost any metal serface, and records high-quality audio that can be used on your home movies, professional films, podcasts, and more. The set is well worth $329.

ScrapingANT

ScrapingANT is a web scraping provider which offers both proxies and the infrastructure you need to use them: a headless browsing service, custom API and support in getting them set up.

The company offers 50,000 data center and 2,000,000 residential proxies across 17 countries: Brazil, China, Czech Republic, France, Germany, Hong Kong, India, Italy, Israel, Japan, Netherlands, Poland, Russia, Saudi Arabia, Spain, UAE and USA.

The ScrapingANT API is basic, but covers the raw essentials. You can make simple requests, or use headless Chrome to render JavaScript. You're able to pass custom cookies along with a request, to perform some action in the context of an authorized account. And the ability to execute custom JavaScript enables scrolling, clicking buttons or whatever other interactions you need.

It's not exactly powerful, but it's enough to get you started on simple projects. The API is easy to understand, too: check the website for the lowdown on how it all works.

Pricing

(Image credit: ScrapingANT)

Pricing

ScrapingANT's plans start with a free-for-personal-use option. Just handing over your email address gets you access to JavaScript rendering via headless Chrome, the custom cookie option, output preprocessing and basic email support. Your access to the service is limited to 10,000 API credits (we'll explain those in a moment.)

The Enthusiast plan upgrades you to Standard support and 100,000 credits for $19 a month.

Opting for the Startup plan gets you priority email support, 'expert assistance' and 500,000 credits for $49 a month. And the industrial-strength Business plan provides a dedicated manager, expert guidance and 3,000,000 API credits for $249 a month. Which looks like a big jump, but if the 'expert guidance' can help get your project working more quickly, it could be worth the price.

Aside from its own services, ScrapingANT also has a Free Proxies page on its site where it lists free HTTP, HTTPS and SOCKS proxies. There were 45 servers on the list at review time, across various countries. We didn't test these, but the company says they are checked 'every few minutes', perhaps making this a useful resource for anyone on a budget.

API Cost

(Image credit: ScrapingANT)

API credits usage

ScrapingANT charges a different number of API credits for each of its four request types.

A simple request via a datacenter proxy costs one credit. Opt for a headless browser for JavaScript rendering and that's ten credits. 

Sending your request via a residential proxy lifts the price to a 50 credits. And if only the best will do, using both a headless browser and residential proxy costs 250 credits.

Translating that, the free plan gets you from 10,000 simple datacenter requests to only 40 headless browser and residential proxy actions a month.

Paying $19 for the Startup plan delivers 100,000 data center requests ($0.019 each), 400 headless browser and residential proxy requests ($0.0475 each) or your preferred combination of the two.

If you need even more residential proxy action, upgrading cuts the cost still further. The top-of-the-range business plan may cost $249 a month, but it gives you 12,000 headless browser requests for only $0.021 each.

Request Generator

(Image credit: ScrapingANT)

Getting started

ScrapingANT allows users to sign in with their GitHub or Google accounts, or by handing over an email address and choosing a password. We weren't asked for company, billing or any other information.

The service dashboard enables creating a scraping request by choosing your various options: URL, proxy type (standard or residential), country, a custom cookie, JavaScript snippet to execute after the page has loaded, the DOM element to wait for before returning a result, and whether this is a simple request or uses the headless browser.

As you customize the various options, the dashboard generates the cURL, Python or Node.js code you need to retrieve the results. 

Alternatively, if you're new to scraping (or ScrapingANT) and not completely clear on what you're doing, you can execute the request and immediately see any results in your browser. That's extremely useful for testing, although keep in mind the free plan's strict data limits. If you're just experimenting with various options, trying this and that to see what happens, you might use the bulk of your monthly allowance in a single session.

Web Documentation

(Image credit: ScrapingANT)

ScrapingANT still deserves plenty of credit for providing any kind of free plan, of course, and that's just part of the help it provides. Its blog includes some genuinely useful primers on various web scraping topics, from avoiding IP limits and downloading images with NodeJS, to advice on using Puppeteer and recommendations for a couple of free proxy scraping tools.

If you're an experienced user, you know precisely what you're doing, and you're really just after a powerful API and an infrastructure that can handle millions of requests every month, this won't make very much difference.

But if you're new to the web scraping business, ScrapingANT's free plan and resources could be just what you need to point you in the right direction.

Final verdict

ScrapingANT doesn't offer the features, the power or control of the big proxy providers, but its ease of use, simple API and free options make it worth a look for newbies and small-scale personal projects.

We've also highlighted the best proxy and best VPN

Hive Active smart plug

One-minute review

The Hive Active Plug is a single-outlet smart plug designed to work with the Hive smart home ecosystem, including the Hive Active Heating 2 smart thermostat, and Hive smart light bulbs. As such, it requires a Hive Hub connected to your router to function, and so is best suited to those who already have a Hive system

The Hive smart plug works much like any other, letting you turn appliances on and off with the tap of a smartphone app, or by speaking to Alexa, Siri, or the Google Assistant. Deeper smart home integration is offered with support for Philips Hue and IFTTT too, and there is a physical button on the plug for controlling the outlet manually.

Daily and weekly schedules can be created within the Hive app, and a series of customisable actions help integrate the smart plug with other devices in your Hive system, such as window and door sensors, light bulbs, and the Hive View security camera.

One obvious omission is the lack of a function for turning the plug, and anything connected to it, on or off in a pattern to simulate the appearance of a home being occupied. However, a detailed schedule for this can be created manually in the Hive app.

The Hive Active Plug makes most sense for those who already have a Hive system or have decided that Hive is going to form the foundations for their new smart home installation. At £39, this smart plug is considerably more expensive than most others; deals from Hive on packs of three and five plugs help bring the price down, but not by much.

The Hive Active Smart Plug stood upright on a countertop

(Image credit: TechRadar)

Hive Active Smart Plug price and availability

  •  RRP:  £39

The Hive Active Plug is priced at £39 for one, £109 for three, and £159 for five. It is available from Hive and Amazon in the UK. As of 31 December 2019, Hive products and services are no longer officially available in the US, although some retailers still have stock but this won’t last forever.

The side view of the Hive Active Smart Plug connected to an electrical outlet

(Image credit: TechRadar)

Design

  • Single smart socket
  • Manual power button
  • 2.4GHz Wi-Fi only

As with most smart plugs, the Hive Active Plug sports a simple and inoffensive design. It is white plastic with a textured and transparent panel on the front to add a bit of visual flair. Rectangular and fairly compact, although not the smallest smart plug on the market, the Hive measures 10cm tall and 5.4cm wide. It is 3.55cm deep, excluding the pins.

We’re pleased to see how narrow the plug is, meaning it shouldn’t block access to the neighbouring socket, although the extra height means it’ll occupy two spaces when plugged into an extension cable with two rows of sockets facing each other.

The manual power button is surrounded by a simple light ring to show when the plug is switched on. The light changes colour to show when the plug is ready for its initial setup, successfully connected, and when there are connection issues. Interestingly, Hive has opted not to include any branding on the device.

The Active Smart Plug only works on the 2.4GHz band, which may mean you suffer connectivity issues if you’re installing it in a different room to your router. 

The Hive Active Smart Plug laying on its side on a countertop

(Image credit: TechRadar)

Performance

  • Some hiccups during setup
  • Instant control via Hive app or voice assistants
  • Useful status light

Smart plugs are usually very simple devices to set up and use. And, while the Hive plug should be in practice, we found it initially failed to connect to the Hive Hub attached to our router. 

The Hub would search endlessly for the plug, but after a couple of resets of both products, they found each other and all was well. This is likely a common story for many smart home builders, when new products sometimes take some persuading to play nice with each other and with a router.

Once set up, however, everything worked as promised. The plug responds instantly to the Hive app, setting up voice control with Alexa took just a couple of minutes, and its response to our spoken commands was equally speedy. 

As with other plugs, a physical click can be heard when the plug switches on or off, helping to confirm the instruction was understood and acted upon, while the LED also offers a visual update on the status of the plug too.

Screen grabs for the app used to control the Hive Active Smart Plug

(Image credit: TechRadar)

App

  • Easy to use
  • Good integration with voice assistants
  • Simple to create automations

The Hive app is smartly laid out and setting up schedules and actions is straightforward enough, with a welcome amount of plain language and no confusing tech jargon. This makes the Hive system perfect for those who are new to smart home systems. 

The app also does a good job of explaining how Hive devices work with Alexa, Apple HomeKit, Google Assistant, Siri, Philips Hue and IFTTT, acting as a welcoming and simple launchpad for getting everything set up just how you want. The only obvious omission here is Samsung SmartThings, but all bases are otherwise covered.

Creating schedules is also nice and easy, giving you full control over when the plug switches on and off each day of the week. You can’t pick a precise minute, but splitting each day into 15-minute chunks is granular enough for us. All that’s missing here is an away mode designed to turn a lamp on and off to simulate someone being home while your house is empty.

But, as we alluded to earlier, Hive products require the £80 hub to function, which seriously increases an already loft price tag if you are starting to build a system from scratch. It’s a shame that, unlike many other smart plugs from the likes of TP Link, Hive plugs can’t connect directly to the cloud.

Should I buy the Hive Active Smart Plug?

Buy it if...

You already have a Hive hub
Adding the £80 hub to an already-expensive smart plug is a very expensive way to have Alexa turn your space heater on. But if you are already invested in the Hive way of life, then this smart plug is the obvious choice.

You want simple integration with voice control
Once connected, it’ll open the door to wider home automation and voice control integration. It’s very easy to get the smart plug playing nice with Alexa, Siri and Google Assistant via the Hive app, which spells everything out while avoiding too much tech jargon.


You want a discrete, unbranded smart plug
We like how the Hive plug doesn’t have any branding on it, and is a simple, discrete design. It’ll fit in well with the decor of any home, and even the status light and power button are neatly designed.

Don't buy it if...

You’re on a tight budget
Not only is this a fairly expensive smart plug, it also requires the Hive Hub. Buying the two is going to cost in the region of £120.

You don’t want to buy into one system
Once you have the hub you’ll be invested into the Hive system. That could be fine for many users, but others will want the freedom of building a smart home that is more flexible.

You want to use Samsung SmartThings
If you have chosen to build your smart home around SmartThings, then you’ll need to look for a smart plug elsewhere. Hive works with a lot of other systems, but unfortunately SmartThings isn’t one of them.

First reviewed: January 2022

Tailor Brands' Logo Maker

If you haven’t got the skills nor the time to do it yourself, there are many companies that will offer to design your company logo. Obviously such services often come at a high cost, but why not try something a little different? How about using a tool that will do most of the work for you, while offering you options to tweak and customise the design? Would such a service appeal to a large section of the self employed? This is what Tailor Brands is hoping with their online Logo Maker service.

Setup

Answer a few question to get the AI started (Image credit: Tailor Brands)

Getting started

The process is pretty simple: type in your company’s name and tagline (if you have one), and click on the big red ‘Design!’ Button. The system will then ask you what your business centres on - is it a service, do you offer physical goods, produce original content, that sort of thing. You’ll then have to select your industry, as well as describe what it is you actually do. The more information you give it, the more accurate the initial design will be (or so the spiel goes).

Next, Tailor Brands will ask you what type of logo you’re after. Should it be icon, name, or initial based? If you’re not certain, you can always skip that part for now.

Icon Search

You have a wealth of icons to choose from (Image credit: Tailor Brands)

If you decide to go with an icon for instance, it’ll be up to you to select it (whether it’s a geometric shape or an actual icon). Thankfully, there’s a handy search field to help you choose the one that works best for you. Even better, you’re not limited to only one choice: there’s room in the system for you to select up to five.

Moving on, you’re offered fifteen different font styles. Three need to be selected before you can continue to the next step.

Processing

It’ll take a few seconds for your logo to be ready (Image credit: Tailor Brands)

And then the magic happens… except the moment your logo is ready, Tailor Brands insists you must either log in, or create a new account. We know creating an account is de rigeur for online services, but letting you go through the entire set up process before forcing you to register adds an unwelcomed layer of frustration.

It’s quite possible that they realised people are more likely to sign up having done all this preparatory work first, and had it been requested at the start, prospective customers might have just walked away, but for this reviewer anyway, it felt underhand and deceptive for it to happen at that stage.

Still, there’s no way around this, so register we did.

Your Logo

Ready for you to use (Image credit: Tailor Brands)

Merch

Your logo is then available to you, based on your previous choices. You’ll notice a list of other design options on the left sidebar - some of which work better than others. As you select a different option, you’ll see the main part of your page change, displaying your currently chosen logo on all the merch Tailor Brands can create for you, such as a digital business card, or regular cards (printed on thinly sliced trees), see how your logo would look on bags, hats, mugs and more. But perhaps the most important option might be the red ‘customise’ button.

Customization

You have a handful of customisation options (Image credit: Tailor Brands)

Customisation

Altering your chosen logo takes place on the left side of the page - where the previous sidebar used to be - the ‘merch’ side (which takes up most of the screen real estate) remains, and will automatically update itself with each change you make.

From here, most decisions you made during the setup process can be modified: use the ‘Type’ menu to use different fonts, for instance, or the ‘Icon’ to choose a different one (be one of those you selected earlier, or an entirely new one thanks to a handy search field).

Of more interest are the ‘Colour’ and ‘Layout’ menus, as these offer design options that weren’t part of that initial process.

As its name implies, ‘Colour’ lets you choose from a small selection of 24 colour palettes. If those don’t appeal, click on the ‘Main’ icon above them, to alter your logo’s main colour (which more often than not is the only colour). This seems to give you lighter colour options than the palettes do, and even allow you to select any shade you’d like irrespective of those offered by default.

The ‘Layout’ gives you a handful of choices as to where the logo is located in relation to your company name.

Once you’re happy with your design, click on ‘Finish’, to move to the next stage…

Additional Options

When ready, you can plaster your logo on some merch, get a website, business cards, etc. (Image credit: Tailor Brands)

Subscriptions

If all you wanted was a logo to download, you’ll be somewhat disappointed. Not because you can’t, but because you can’t do it for free.

Tailor Brands wants to be your supplier of merchandise, website, business cards, etc. for the long term, and with that in mind, they want you to subscribe to their service.

You have three plans to choose from: Basic, Standard and Premium. They offer progressively more features the higher up you go, from getting high quality logo files and the ability to upload your own image for Basic, to being able to download vector EPS files and have a full website builder for Standard, and gain a social media auto-scheduler and an online store with Premium (among many others). These will set you back $10, $20 and $50 each month respectively.

On the plus side, if you cancel your subscription, you still get to keep your logo, so you could conceivably only pay $10 to get your design. Do note that these subscriptions only allow you to create a single logo. Need additional ones? You’ll have to get additional subscriptions for each.

Final verdict

As you can see, Tailor Brands is much more than a logo maker, but judging this service by that feature alone, you’ll find the creation process pretty effortless, with easy to understand basic customisation features. If you just want to get something simple yet snazzy, you might like what they have to offer, and may even enjoy it enough to stick around for a while.

We've also featured the best logo maker and designer and the best business plan software

Epson EcoTank ET-3850

Meet the Epson EcoTank ET-3850, the middle model in a new line of all-in-one printers aimed at the home office. It’s a three-in-one device with an ADF (automatic document feeder) and refillable ink tanks instead of cartridges. 

At around $400 (about £360, AU$680) it might seem expensive for a fairly ordinary all-in-one with no touchscreen and no dual scan mode, until you consider that it comes with enough ink in the box to print 14,000 black and white pages, or 5,200 color. That equates to around 70 cartridges and Epson’s bottled ink refills are refreshingly inexpensive to buy. Up to 90 percent cheaper than cartridges according to Epson.

Epson EcoTank ET-3850 hero

(Image credit: Future)

Aside from the remarkably low running cost, the Epson EcoTank ET-3850 might also tempt you with its compact form factor, which manages to hold 250 sheets of A4 paper and 337ml of ink. That kind of capacity will keep you printing for longer before having to refuel. It comes in Arctic white in the US or plain black in the UK and is supported by an improved companion app called Epson Smart Panel. 

If you really want a touchscreen, fax facility and a front USB port, you should be looking at the step-up Epson EcoTank ET-4850 instead. Otherwise, read on to find out how the ET-3850 performed in out test.

Epson EcoTank ET-3850 hero 2

(Image credit: Future)

Design and build

Specifications

Type: 3-in-1 color A4 inkjet printer 

Functions: Print, scan and copy

Connectivity: Ethernet, Wi-Fi, Wi-Fi Direct, USB

Data storage slots: None 

Print speed: 15 ppm (mono)

Paper capacity: 250 sheets

Print quality: 4,800 x 1,200 dpi

Scan quality: 1,200 x 2,400 dpi

Apple AirPrint: yes

Consumables included: 4x ink bottles (14,000 mono, 5,200 color)

Dimensions/Weight: 375 x 347 x 131 mm (WxDxH)/6.7kg

The Epson EcoTank ET-3850 is a little larger than other A4 all-in-ones because it has to accommodate four fairly large ink reservoirs, but it hides its bulk well. It is almost cuboidal in shape with all of its flaps, including the ADF and tilting control panel folding seamlessly away. It is surprisingly light at 6.7kg and it feels a little flimsy in construction. Our sample arrived in a dented carton that had clearly been dropped and despite all the polystyrene packaging, it was enough to make the flaps of the ADF fall off. They clipped back in with no permanent damage, but it doesn’t feel like a premium product.

The ink tanks stand out on the right side, but in other respects they are integrated neatly and we appreciate the way you can fill them so easily. The ink bottles have nozzles shaped to key into the correct tank and open only when inserted correctly. Just invert the bottle, twisting it into place, and watch the reservoir fill through the clear plastic window. The ink will stop flowing when it’s full so you don’t need to worry about that.

Epson EcoTank ET-3850 ADF

(Image credit: Future)

Features and specifications

You will find all of the crucial functionality of a home office printer present in the Epson EcoTank ET-3850, but there are a few features missing. It has an auto duplex mode, but no duplex scan mode, for instance. It can print in color or black and white on any kind of blank media up to A4 size and has Wi-Fi built in with a USB port at the rear for a hard wired connection to your computer, but it does not have a USB Host port at the front for walk-up printing from a thumb drive. 

The 6.1cm LCD is color, but it is not a touchscreen as you might have expected at this price point. The reason for skimping on such features is because Epson is not making its money back later through sales of ink and therefore not subsidizing the initial cost of the printer. The old ‘razor and blade’ business model that worked with Epson’s budget cartridge inkjet printers does not apply here.

Epson EcoTank ET-3850 display

(Image credit: Future)

The spec-sheet is also a little underwhelming for the same reason. The top speed of 15ppm (pages per minute) for single-sided mono pages will be fast enough for most home users, but it’s slow compared to a laser printer costing similar money. Color prints emerge at a rate of just 8ppm. There’s room for a useful amount of paper in the main paper tray (250 sheets) and you can fit 30 sheets of printed paper in the out tray. 

Importantly, both the scan resolution and print resolution are good and high at 1,200 x 2,400 and 4,800 x 1,200 dpi respectively. This means you can make accurate copies and potentially print sharp photos. It prints using Epson’s PrecisionCore Print Head nozzle configuration which is made up of 400 black nozzles and 128 color nozzles.

Epson EcoTank ET-3850 ink

(Image credit: Future)

Setup and operation

The Epson EcoTank ET-3850 is particularly easy to set up, thanks largely to Epson’s excellent new Android/iOS app which walks you through the procedure. With no touchscreen interface of its own, typing in long-winded Wi-Fi passwords could have been a fiddly process, but the free Epson Smart Panel app makes your smartphone the interface. Every printer has a companion app these days, but this one is the most intuitive we have come across.

You will be prompted to fill the ink reservoirs with the ink supplied in the box. Thanks to the cleverly designed bottles and tanks, we managed to do this without spilling a drop. It’s actually quite satisfying to see exactly how much ink you have in your printer. With cartridges, you never really knew for sure how much was left. 

The Epson EcoTank ET-3850 is also very intuitive in operation, especially if you are using the app instead of the printer’s own tilting control panel. The only slightly annoying thing is that you have to have to confirm your paper selection every time you open the paper tray and this means scrolling to the top of the display and pressing ‘close’ to get back to printing.

Epson EcoTank ET-3850 rear

(Image credit: Future)

Performance

The Epson EcoTank ET-3850 performed well in all of our tests. It’s certainly not the fastest inkjet around, but neither is it the slowest and the quoted speed of 15pps for consecutive black and white pages is accurate enough. It slows right down to 6ppm in auto duplex mode, but it prints quite quietly and smoothly. 

Black text looks satisfyingly bold and dark on plain paper. Even at very small point sizes the type was legible through a magnifying glass with no smearing or blotting of the pigment based ink. It is perhaps a little heavy on ink, but with the cost of bottled ink so low, that’s really not a problem.

Epson EcoTank ET-3850 setup

(Image credit: Future)

Full color documents are equally well presented with no banding or blocking and the colors are nice and bright. The three dye-based colored inks work very well on glossy photo paper too. Although it is intended for office duty, it works rather as a photo printer. 

Copies made using the flatbed scanner look remarkably faithful to the original, while the ADF is useful for copying multiple pages. It’s only a pity it cannot scan both sides of the page automatically.

Epson EcoTank ET-3850 side

(Image credit: Future)

Final verdict

Epson has pitched this three-in-one printer perfectly at the home office. It’s relatively compact, given its high capacity for ink, and it has all the essential functionality of a business printer on board. It’s a pity there’s no touchscreen, USB Host port or dual scanning, but we would gladly swap those expendable features for running costs as low as this. With so much ink in the box, the Epson EcoTank ET-3850 more than justifies the high price tag. Most importantly, it prints well, and that goes for both documents and photos.

We've featured the best workgroup printers.

Honor MagicBook View 14 business laptop

Two minute review

Honor’s latest flagship laptop will be well received by professional users looking for something different with some compelling features for a business use case. However we do not understand why Honor only rolled it out to three territories (Russia, France and Belarus) outside of China when it could easily have done so.

That aside, the laptop is a very well executed product and one that - if it ticks the right boxes for you - should be on your list of best business laptops. The screen is a pleasure to work with, it is fast enough for most tasks, even graphics intensive one, the touchpad is huge, the webcam is one of the best around and so is the audio subsystem. Only the slightly disappointing battery life and the placement of the Thunderbolt 4 ports are worth mentioning in the “to be improved” section.

Pricing and availability

You can’t buy the Honor MagicBook View 14 in the UK or in the US. We do understand the hesitation when it comes to the latter but can’t understand the rationale behind foregoing the United Kingdom (where the Honor 50 launched late last year). The laptop is on sale in France for just under 1,100 Euros (about £920, $1,240, AU$ 1,730). If you are adventurous enough to attempt changing the language on a Chinese laptop, then you can purchase Honor’s latest flagship product on Banggood for $1,180 (about £870, AU$1,650). Note that local taxes and delivery fees are excluded.

Design

(Image credit: Future)

Design

It is difficult to ignore the influence Apple’s legendary MacBook Pro range had on Chinese laptop manufacturers like Huawei, Honor or Xiaomi. The minimalist looks of the aluminum alloy chassis (available in Space Gray or Blue Hour) go hand in hand with the brushed metallic finish that delivers a premium feel to the product. Other than the Honor logo and a couple of stickers, the surface of the MagicBook View 14 is pristine.

Display

(Image credit: Future)

Open its lid and you’re met with a slab of glass, a black mirror that peers back at you. This is the 14.2-inch touchscreen display with a 3:2 aspect ratio, a refresh rate of up to 90Hz and a resolution of 2520 x 1680 pixels (that’s more than twice the number of pixels on a full HD display). With a screen-to-body ratio of 90.5%, it comes as no surprise that its bezels are minuscule, especially at the top and near the bottom and connected to the keyboard via a long hinge.

Hinge

(Image credit: Future)

The laptop is surprisingly portable given its screen size. At 227 x 310mm, it is a smidgen bigger than an A4 sheet. Its thickness, 14.5mm, excludes one rubber bar and two rubber feet that lift the base of the laptop to ensure better air circulation. Choosing aluminum over magnesium as primary material for the chassis and glass as the touchscreen overlay explains why the device is heavier than expected, at 1.48Kg.

Keyboard and Touchpad

(Image credit: Future)

The keyboard is located between two speaker grills (which hide two tweeter drivers) with two other speakers firing towards the base of the device. There’s also a very large touchpad (121 x 72mm), one of the largest we’ve seen on a 14-inch class laptop. Four microphones are located on the front edge of the chassis and only visible as four tiny dots. There’s also a pair of infrared cameras that allows you to face unlock your device, great for securing your laptops using biometric features.

Thunderbolt 4 Ports

(Image credit: Future)

As for connectors, there’s a couple of Thunderbolt 4 on the left next to a 3.5-mm audio connector. 

HDMI and USB-A

(Image credit: Future)

A full size HDMI port and USB Type-A connector are located on the opposite side. There’s no card reader and we’d love to have at least one Thunderbolt 4 connected on the right for balance.

Underside of Device

(Image credit: Future)

Hardware

An Intel processor, the Core i7-11390H CPU, powered our Russian-sourced laptop. A slower model with an Intel Core i5-11320H processor is also available. To make things a bit more confusing, the Chinese market has a model with a dedicated GPU from Nvidia, the MX450, which the rest of the world doesn’t have.

Spec Sheet

Here are the full specs of the Honor MagicBook View 14:

CPU: Intel Core i7-11390H

Graphics: Intel Iris Xe Graphics G7

RAM: 16GB DDR4

Screen: 14.2-inch 2520 x 1680 resolution

Storage:  512GB PCIe SSD (Toshiba KXG60ZNV512G)

Ports: 2 x Thunderbolt 4, 1 x USB-A 3.2 Gen 1, 1 x HDMI, audio jack

Connectivity:  Intel AX201, Wi-Fi 6, Bluetooth 5.1

Weight: 1.488kg

Size: 227 x 310 x 14mm  (H x W x D)

Battery: 56Whr 

This is a 10nm product with four cores, eight threads, 12MB cache and a relatively high clock speed that’s matched by the relatively high TDP (35W). The MagicBook View has a high performance mode that kicks the laptop in high gear and sends the TDP to 45W (and gets the fans to whir faster).

The MagicBook View 14 is one of the first laptops to feature a 5-megapixel camera, one that is a breath of fresh air amidst notebooks with low-resolution laptop webcams that are the bane of Zoom and Microsoft Teams video conferencing sessions. It boosts a 90-degree wide-angle view with two camera sensors. There’s no camera shutters but you can turn the camera off by pressing a dedicated button that disables it.

The rest of the specifications includes an Intel Iris Xe Graphics G7 GPU with 96 Execution Units, 16GB DDR4 memory (dual channel for better performance), a 512GB PCIe SSD (Toshiba KXG60ZNV512G), Wi-Fi 6, NFC, Bluetooth 5.1 (courtesy of an Intel AX201 chipset) and a 65W power supply unit.

In use and performance

The MagicBook View 14 runs on Windows 11 Home and an upgrade to Windows 11 Pro is a mere click away. There’s hardly any bloatware (other than what Windows 11 brings in by default); you do get PC Manager though which is Honor’s own all-singing-all-dancing system optimization software package.

Benchmarks

Here’s how the Honor MagicBook View 14 performed in our suite of benchmark tests:

Passmark: 2762

Passmark CPU: 14743

CPU-Z: 596 (single-thread); 3310 (multi-thread)

Geekbench: 1665 (single-core); 6405 (multi-core); 20276 (compute)

3DMark: 1981 (Timespy); 5304 (Firestrike); 19034 (Nightraid)

CrystalDiskMark: 3281MBps (read); 2947MBps (write)

Cinebench Multi CPU: 5945

Novabench: 2238

Atto: 3000MBps (read, 256mb); 2760MBps (write, 256mb)

AJA: 2828MBps (read); 2714MBps (write)

Windows Experience Index: 8.2

As expected, the glossy display is very reflective but on the other hand, Honor engineers seem to have slapped a layer of oleophobic substance that mitigates the sticky issue of greasy fingerprints. We can’t stress enough how nice 3:2 aspect ratio displays are and we’d wish more laptop vendors jumped onboard. With a claimed brightness of 400 nits, the View 14 display subjectively produced great colours under various scenarios.

Under load, the system was audible without being unacceptable. The benchmarks unanimously point to a very capable processor with an equally very capable SSD; and boy is this GPU capable! It should outpace entry level Nvidia GPUs like the MX350 or the MX450 which makes it a good match for light or casual gaming.

Perhaps the only real disappointment was the battery life; again things are relative and while 406 minutes on our YouTube benchmark is not that bad, it is still lower than what the MagicBook Pro (intel and AMD versions) scored last year with smaller batteries (56WHr).

The power button integrates a fingerprint reader which makes it ideal as a password or PIN replacement. Shame that the button next to it is the delete button that also doubles as the insert key; something that may cause havoc for fast touch typers.

As for the keyboard, it has a comfortable 1.5mm travel and while we can adjust to some of its minor quirks like tiny up/down buttons, others like a dedicated print screen button might be too much for some users. It is a tad noisier than what we’d expect and we do miss the slightly concave surface of Dell Latitude laptop keys.

Keyboard Close Up

(Image credit: Future)

Should I buy the Honor MagicBook View 14 business laptop?

 Buy it if:

You want to run 8K on a budget. You should be able to get this laptop to power - via a compatible adaptor - an 8K display like the LG 55NANO956, a huge but relatively affordable 55-inch television set.

Looks matter (yours and your laptop). The MagicBook View 14 looks great thanks to its premium finish and its 5-megapixel webcam produces sharper, more life-like pictures compared to most other laptop cameras.

Don’t buy it if:

You want an out of the box experience. If you are not a customer in one of the four official territories where the MagicBook View 14 is on sale, then you’re out of luck. An English-speaking customer will face several hurdles; getting it delivered being the least consequential of them.

We've also highlighted the best business laptops

!!!!!!!!!!

Popular Posts

Categories

Blog Archive