Homestyler
The advantage of using an online service is that it’s not only automatically cross platform, but you can also log on from any machine and carry on working with your design. There is one proviso to Homestyler though: it will only run best on Google Chrome. Microsoft Edge doesn’t seem to have any conflicts with it, however it will advise Firefox users to use Chrome “to ensure a smoother design experience”, but if you want to, it will still allow you to login and work. Safari’s a different matter though: that browser isn’t supported “at this moment”.
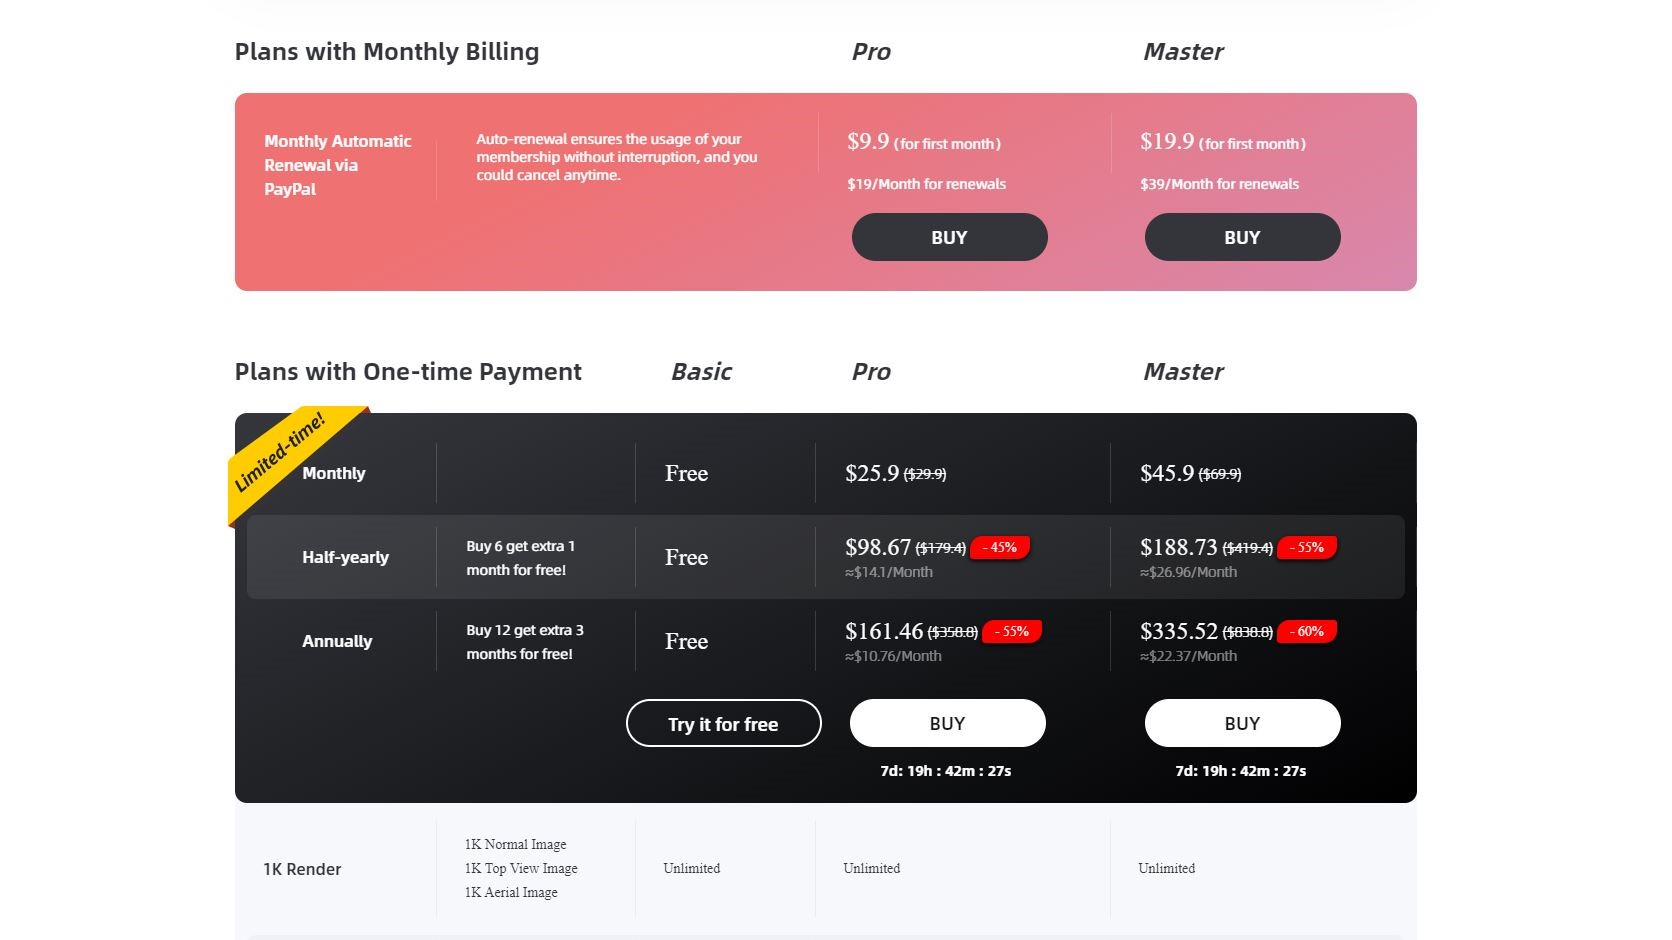
Plans and pricing
Now that we’ve got this out of the way, let’s take a look at what you get for your money.
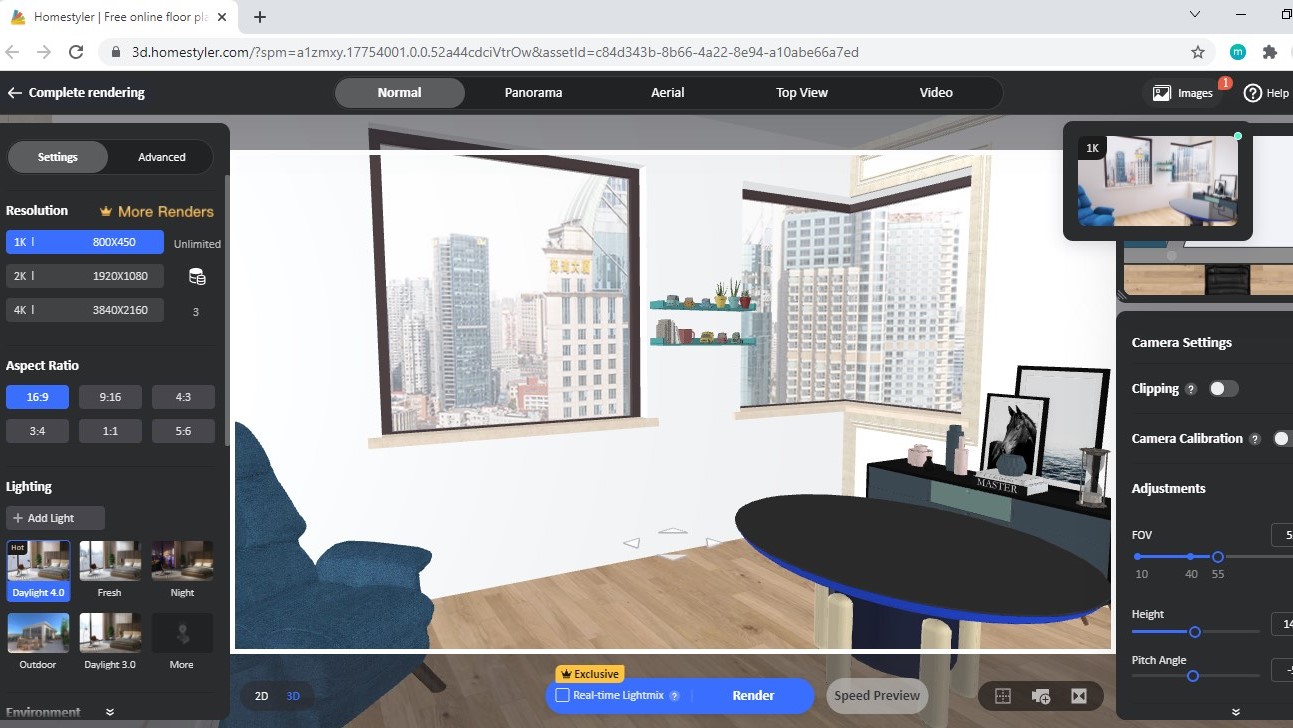
The good news is, there’s a free plan called Basic. The limitations are to do with the renders of your design. For instance, although all three plans (Basic, Pro and Master) allow you to create unlimited 1K image renders, if you go up to 2K, it’ll cost the Basic plan 1 point; Pro gets 75 such renders a month, and Master has no limits.
Basic can’t even access 4K renders or 12K panoramas. Watermark removal isn’t an option either, nor is render retouch, features that are available for Pro and Master users.
There are video options too, but those are limited in duration and quality. For instance. A Master could create a 30 second 1080p video, whereas a Pro is restricted to 10 second at that resolution.
If you need more flexibility than your plan will allow, renders and videos can also be purchased individually, from $1.99 for one 4K render, to $29.99 for a 100 second 1080p video for instance.
There is a promotion at the time of writing, where the Pro plan is available for a $25.9 monthly subscription. Buying half a year or a whole year in advance would reduce the overall cost by a third ($119.4 and $238.8 respectively).
A Master plan would currently cost you $45.9 per month, but you’ll get a generous 43% discount should you decide to pay half a year or a whole year in advance ($239.4 or $478.8 respectively).
Getting started
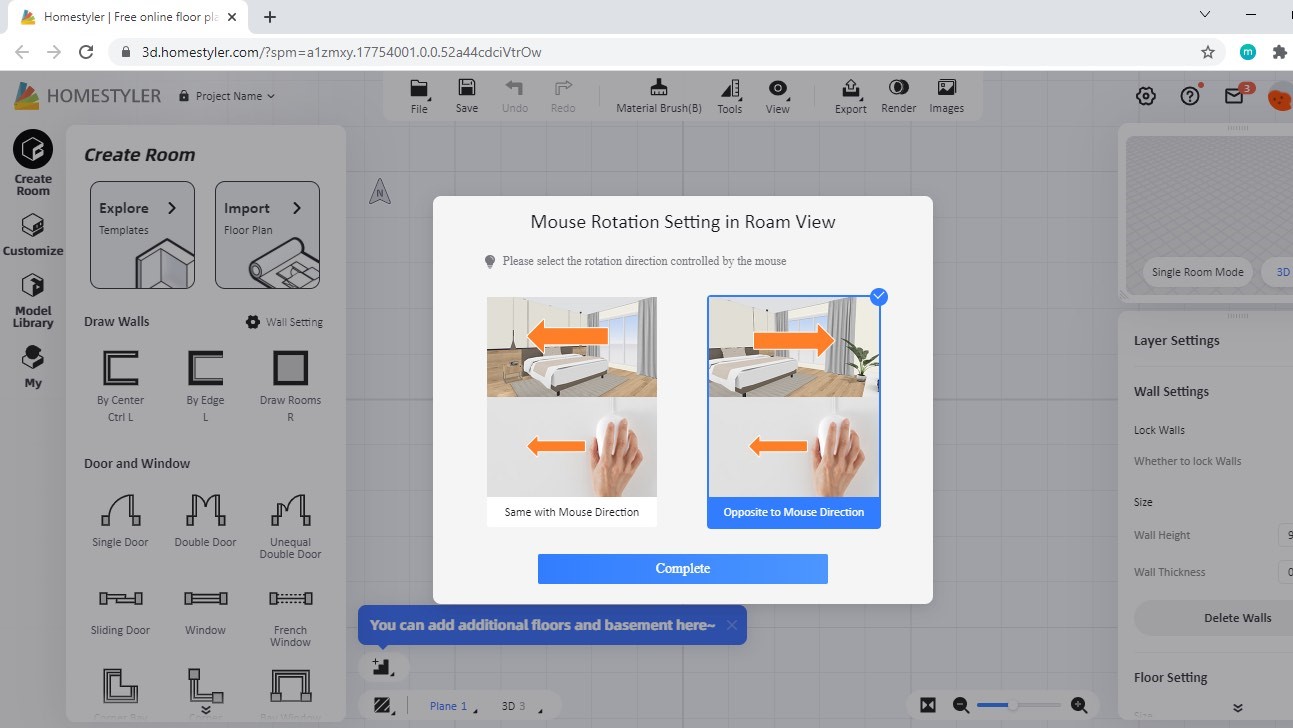
When you start a project for the first time, you’ll be asked some basic settings, like how you use the mouse to interact with your virtual environment for instance (these settings can be accessed at any time via the interface’s Preferences, located in the File drop down menu).
Once that’s done, you get to create a new space, or draw inspiration from a handful of available templates.
If you’re more of a keyboard person, you have full keyboard control as well: the WASD keys let your move forward, left, back and right respectively, with Q and E allowing you to alter the elevation.
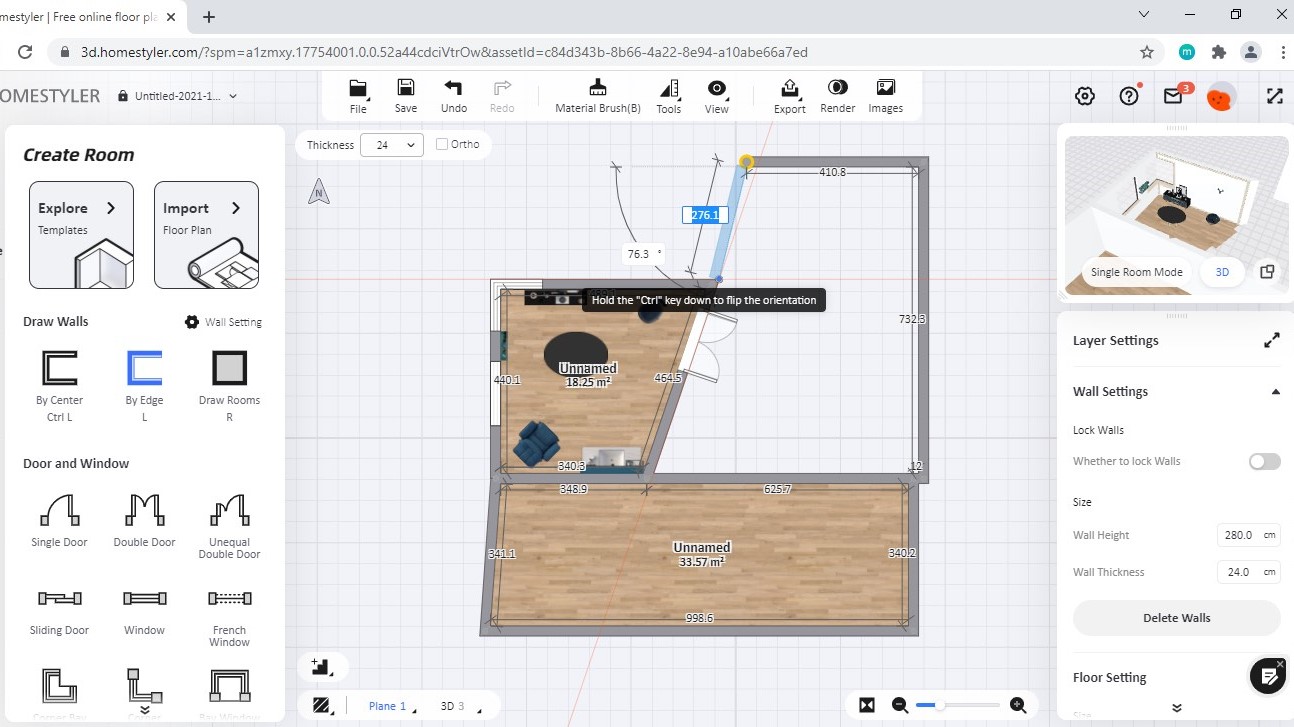
The design process is simple enough. Add a rectangular room, or draw walls individually. As you build your space you’ll notice guides appear which are useful to help you connect all walls together, particularly when some aren’t at right angles.
Click on a wall to reveal options just as converting that straight line to an arc, or splitting the wall (you cannot split an arced wall). Drag a wall to extend or contract it, drag an edge to alter the angle of the walls. It’s nothing we haven’t seen before, but it’s done really well, and so effortless, you’ll be making great progress in minutes. The same applies to doors and windows.
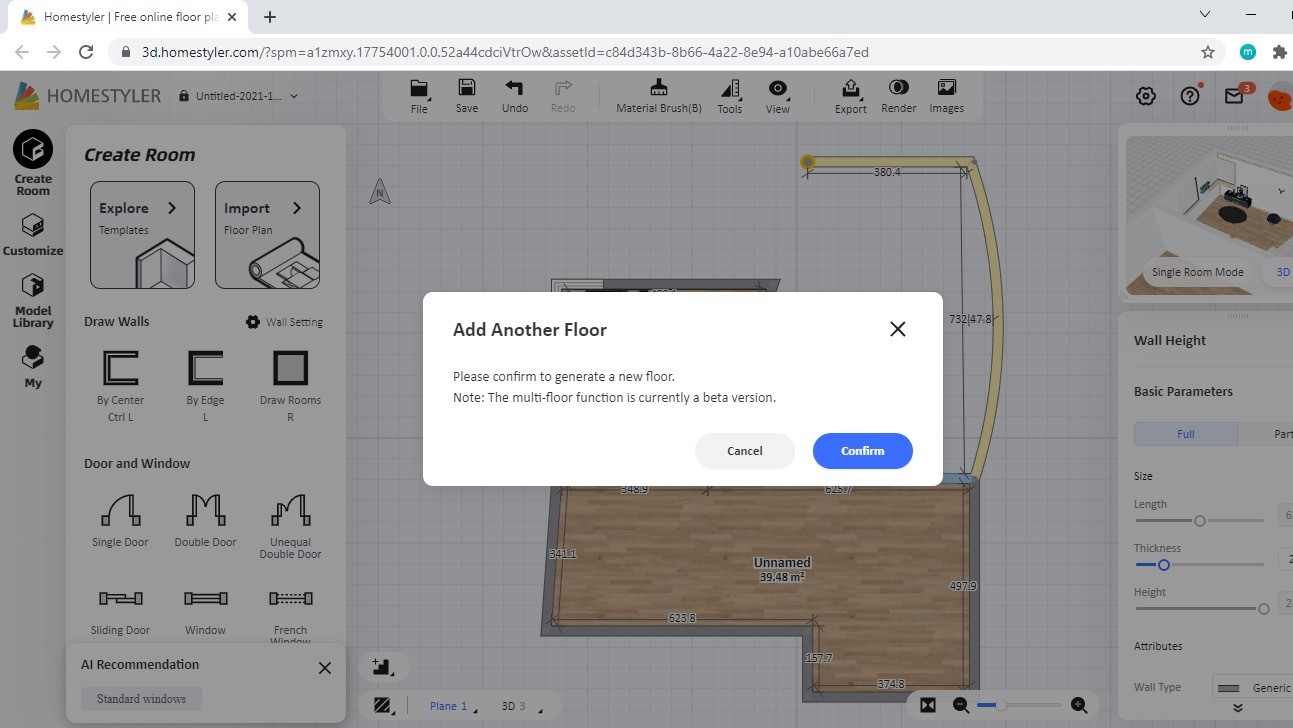
You’re not limited to a single floor either, and are able to create additional levels, including a basement, although be aware this feature is currently only available as a beta.
Customization
Altering your walls, floors and ceilings feels like a work in progress. For instance, you can add various mouldings along the edge of a wall, but don’t seem to be able to just add a skirting. Various cornices are available if you want them.
Altering the floor is interesting, as not only do you have a good selection of patterns, but you can modify its position on the ground, the type of materials used, and you can even select a brand of your choice from the available list.
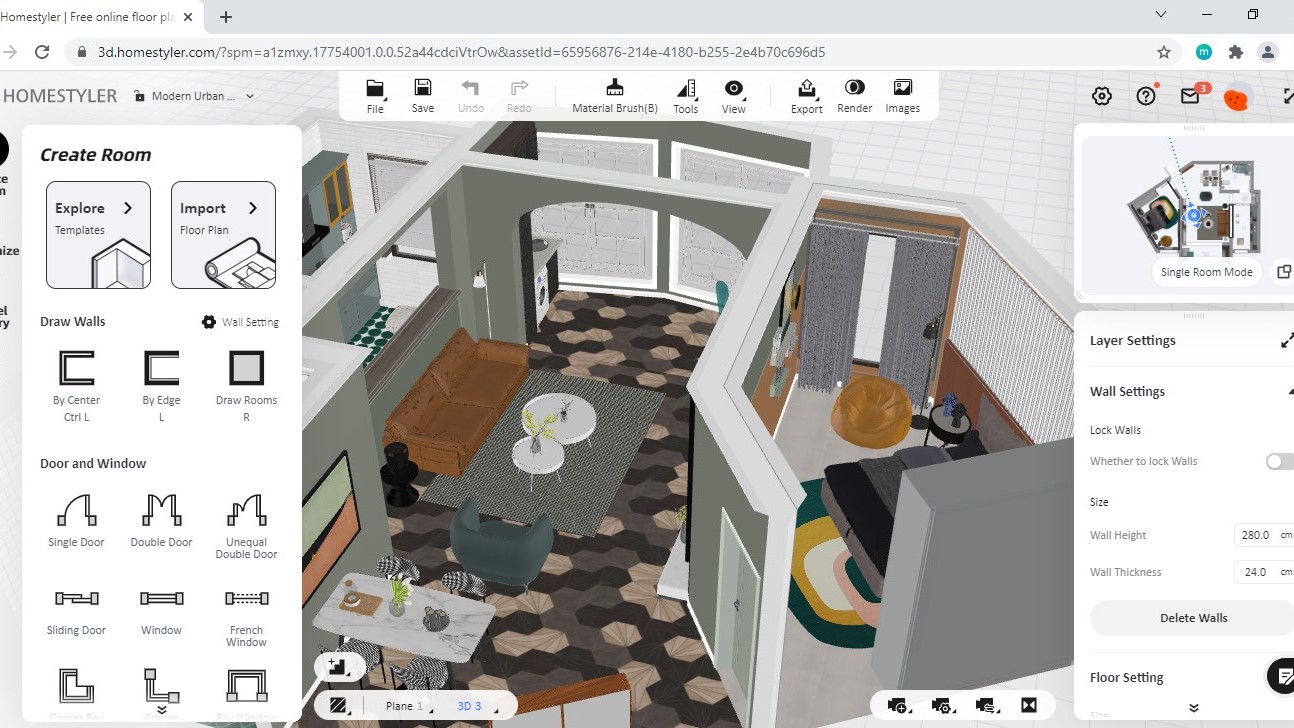
Weirdly though, those changes aren't even reflected in the model, either in 2D or 3D. The same happened to us when we tried the ‘customise floor’ option. We are hoping to create different levels in the floor as the tool’s icon illustrated. Instead though, we were sent back to the ‘Molding’ options.
There does appear to be a few lingering glitches about.
Furniture
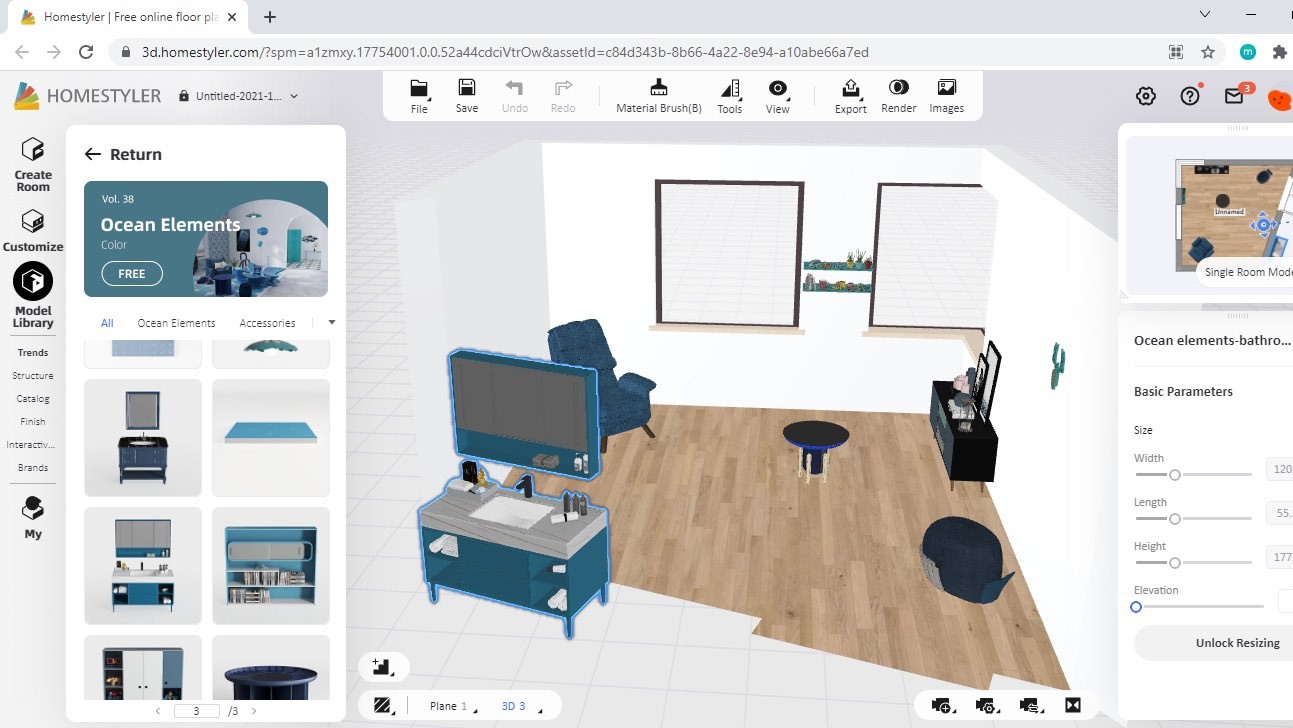
When you’re ready to add some furniture to your model, you’ll find what’s available in the Media Library. You’re able to browse by collection (where various complementary items are grouped together if you wish to keep to a specific style - most of these collections are free), look through various structures (such as different types of doors and windows, columns, stairs, etc), and check the entire catalog, or narrow it down by finish, or brands. Thankfully there’s also a search field to help find what you’re looking for fast.
Adding an item is as easy as choosing it, and dropping it in a room. Once there, large coloured arrows allow you to position it perfectly, and even allow you to rotate the object, or change its elevation. We quite liked that you were also free to resize the item (as long as you click on ‘Unlock Resizing’ first).
Final verdict
Homestyler shows great potential. Creating rooms is a simple matter, the controls are intuitive, and the navigation straightforward. When it comes to the nitty gritty though, there are some glitches, especially when we tried - and failed - to customise the walls and floors. Adding furniture is effortless really, and so it repositioning it in your rooms, and the renders, even the lowest quality 1K renders, looked great. It’s a simple process to set up a shot, although it is slightly annoying that you can’t position a camera inside a wall to get a shot - this being a virtual environment and all that - but hey ho.
It’s definitely a service to try if you don’t mind using Google Chrome, and you’re curious about 3D home design, as you can do a lot for free, and we look forward to revisiting it once a few glitches have been ironed out.
Need help on your next creative project around your home? Check out our roundups of the best home interior design software and the best architecture software
0 comments:
Post a Comment