UPLIFT V2 Standing Desk
Even if you know it or not, sitting at an office desk all day can have detrimental effects on your health even with an ergonomic office chair. This is why more people are making the switch to standing desks that can be raised from sitting height to standing height with the push of a button.
Based in Austin, Texas, UPLIFT Desk has been making standing desks and other office furniture since 2002. When the company’s founder and CEO Jon Paulsen couldn’t find the perfect height-adjustable standing desk, he decided to make his own instead and UPLIFT Desk was born.
Whether you’re working from home or want to equip your employees with a more active way to work, UPLIFT Desk has you covered. In fact, the company offers free design services for offices with four or more desks.
Today we’ll be taking a closer look at the packaging, assembly process, ease of use and features of the UPLIFT V2 to help you decide if it’s the right upgrade for your home workspace or office.
Pricing and availability
The UPLIFT V2 is currently available on the company’s website starting at $599. However, unlike with standing desks from some other office furniture makers, UPLIFT Desk puts a huge emphasis on customization. Before checkout, you’ll configure and customize every aspect of your desk from the desktop to the frame and even the keypad.
While a number of desktop styles made from laminate, including the whiteboard laminate we picked out for our review model, come at no additional cost, desktops made from real or reclaimed wood can end up costing more than the desk itself. For instance, the most expensive option at the time of writing is the Pheasant Wood Live Edge 1.75” which costs a whopping $1,090.
Once you pick out your desktop style, you’ll then need to choose your desktop size. A 42” x 30” desktop is included with the base price but you’ll need to pay extra if you want a wider desktop and UPLIFT Desk has desktops all the way up to 80” x 30” available (Note: you’ll need at least a 70” wide desktop if you want an under-desk hammock). There are also four different frames available in black, white, gray and industrial style with the V2 C-Frame and V2 T-Frame included in the base price
Customizing your desk continues with picking out the type of grommets you want. These grommets allow you to cleanly run cables from a computer under your desk though you can also opt for a storage grommet or even one with a power plug instead. Next up is the keypad, and UPLIFT Desk gives you five different keypads in three different colors to pick from. It’s worth noting that unlike Vari, FlexiSpot or ApexDesk, the company throws in a free cable management tray with every order.
Once you’re done configuring your desk, UPLIFT Desk then allows you to pick out three free accessories to go along with it. These range from desk pads to desk organizers though there is even an option for a standing desk mat. In addition to all of these accessories and customization options, UPLIFT Desk provides a 15-year warranty with each of its standing desks.
Design
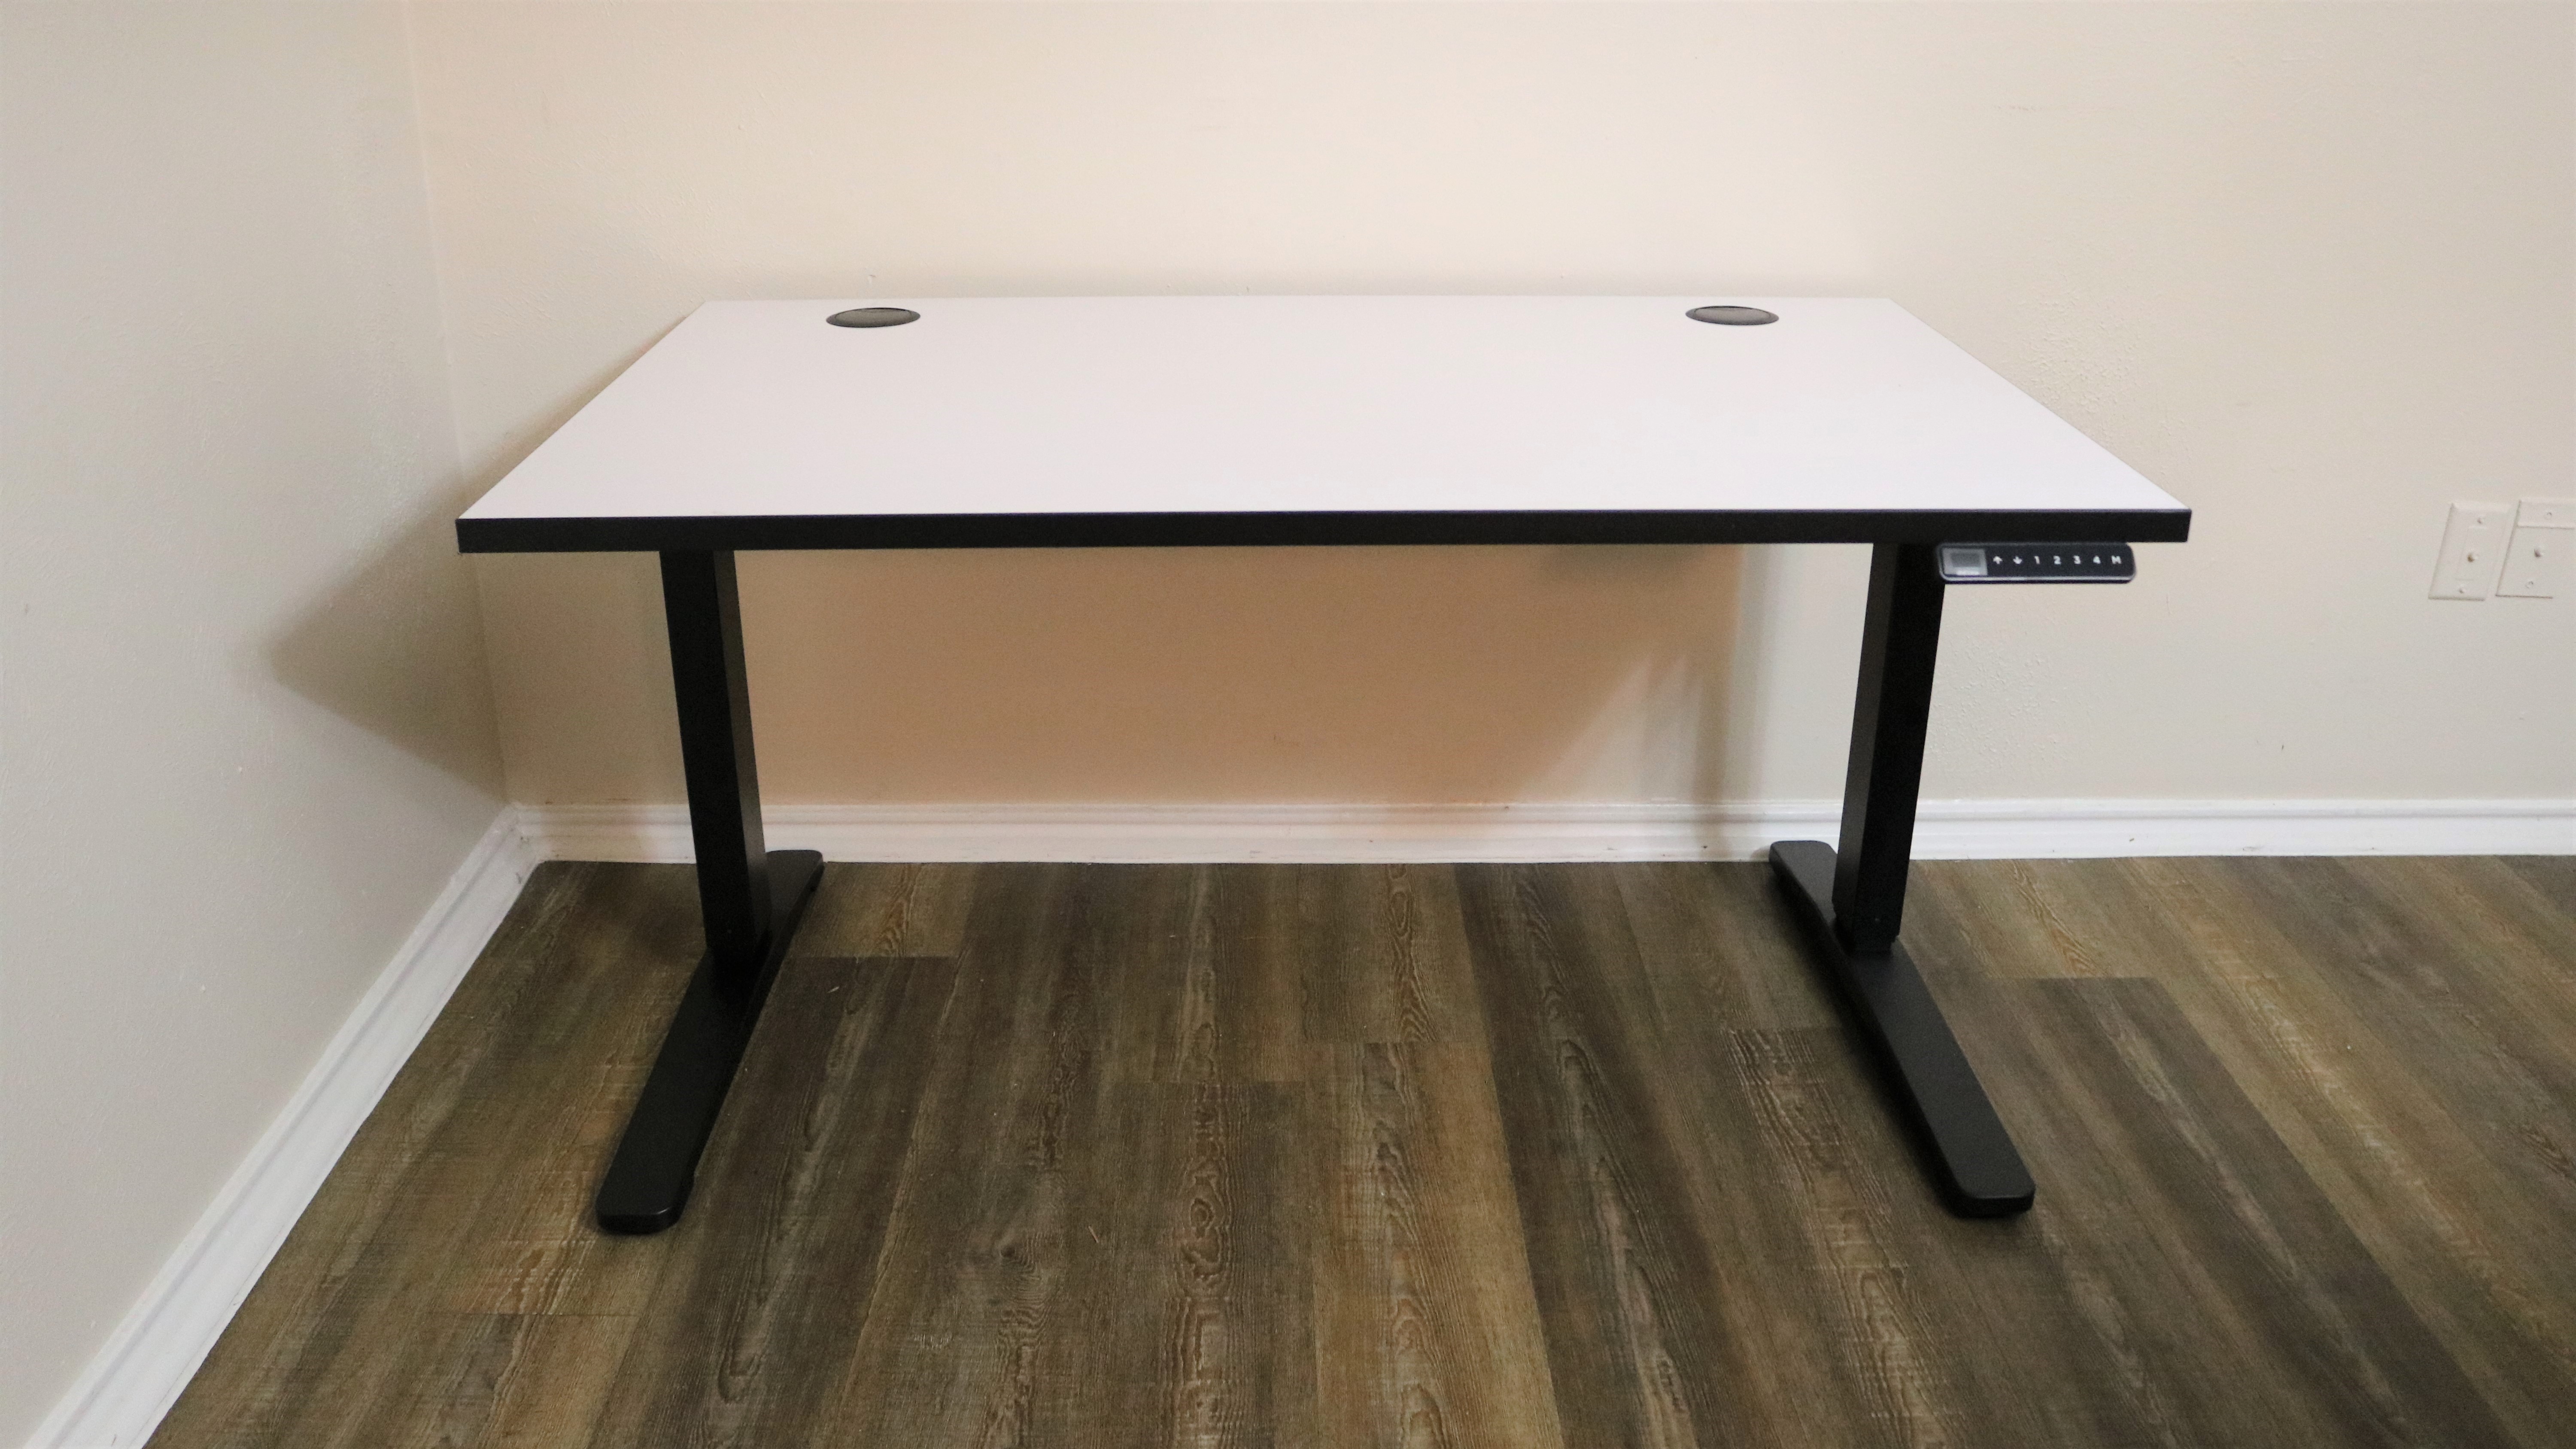
The base model of the UPLIFT V2 is 42” long and 30” inches wide. On either side of the back of the desk, there are holes for cleanly running cables that are covered by two grommet covers. However, they can also be used for storage or to provide power which could be convenient if you plan to use this desk with a laptop.
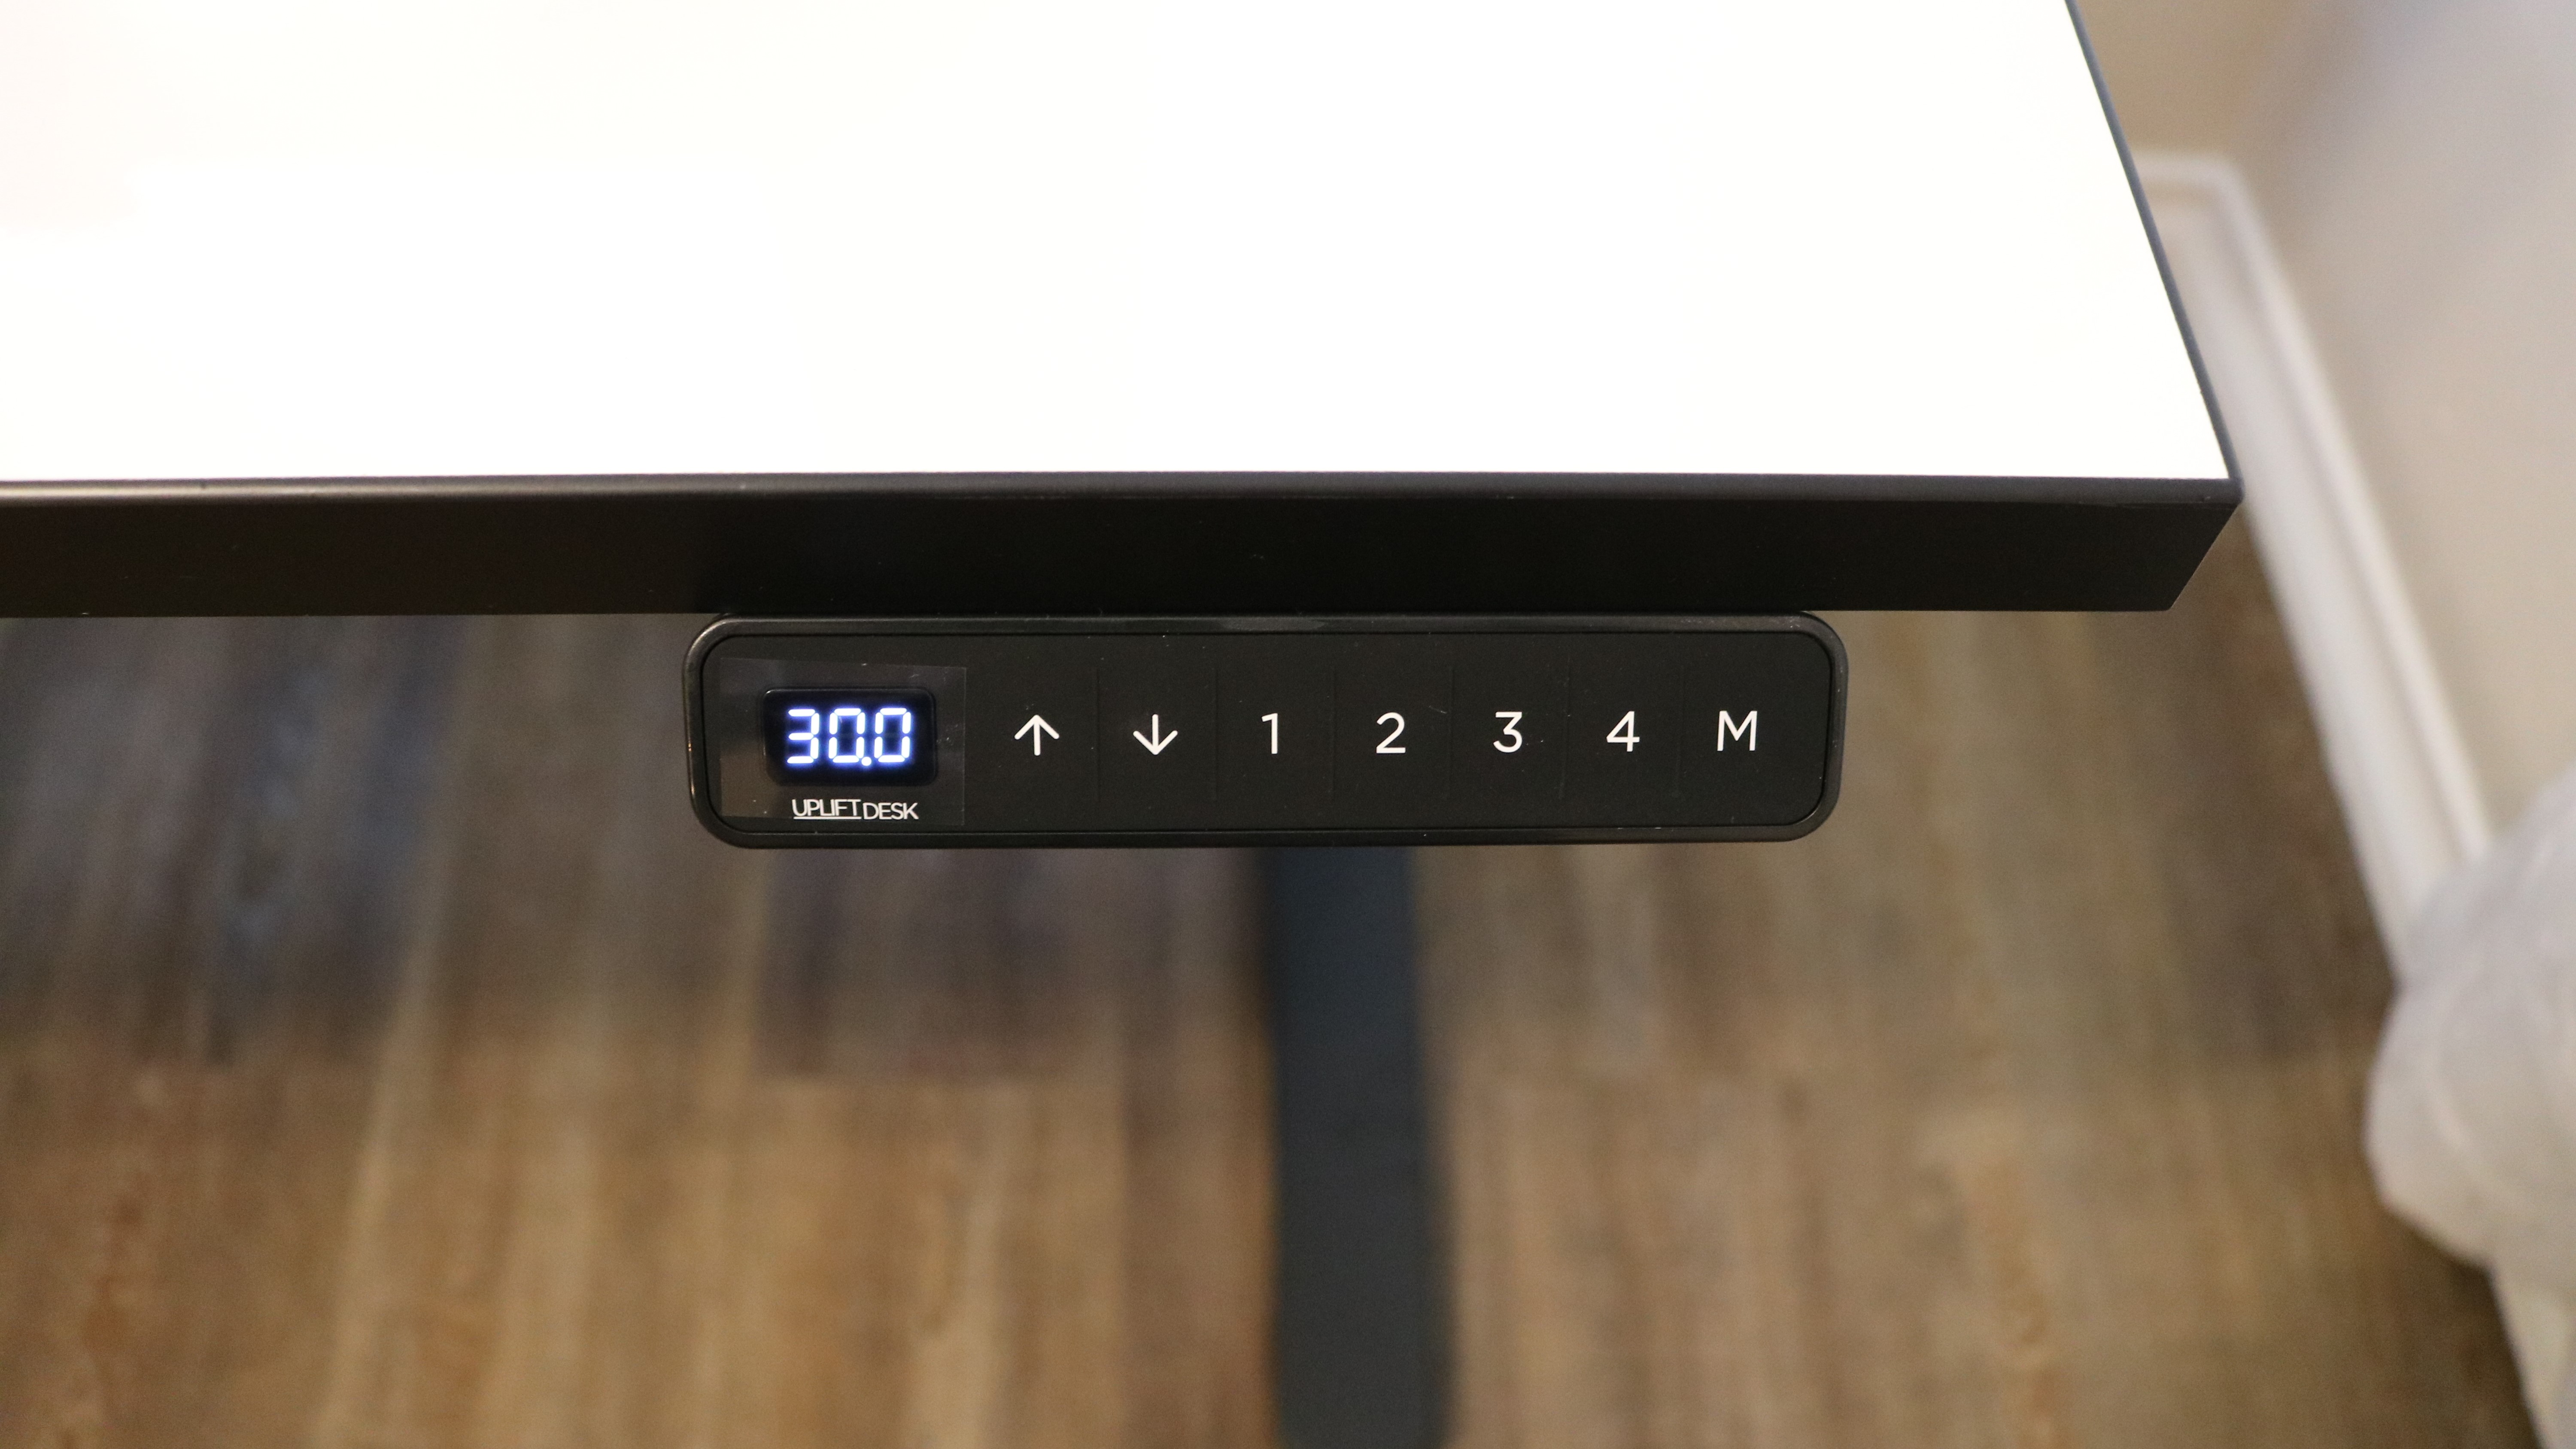
At the front of the desk on either the left or right side (you can choose the placement), you’ll find your keypad. While there are two basic keypads (one with a display and one without), we chose the Advanced Comfort Keypad in black for our desk. It has an LED display on the left to show you the current height of the desk, an up and a down button, four memory present buttons and a “M” button which is used to save your preferred sitting and standing heights. Just like with the desk’s frame, UPLIFT Desk’s keypads are available in black, white or gray, something we’ve yet to see on any other standing desk we’ve reviewed so far.
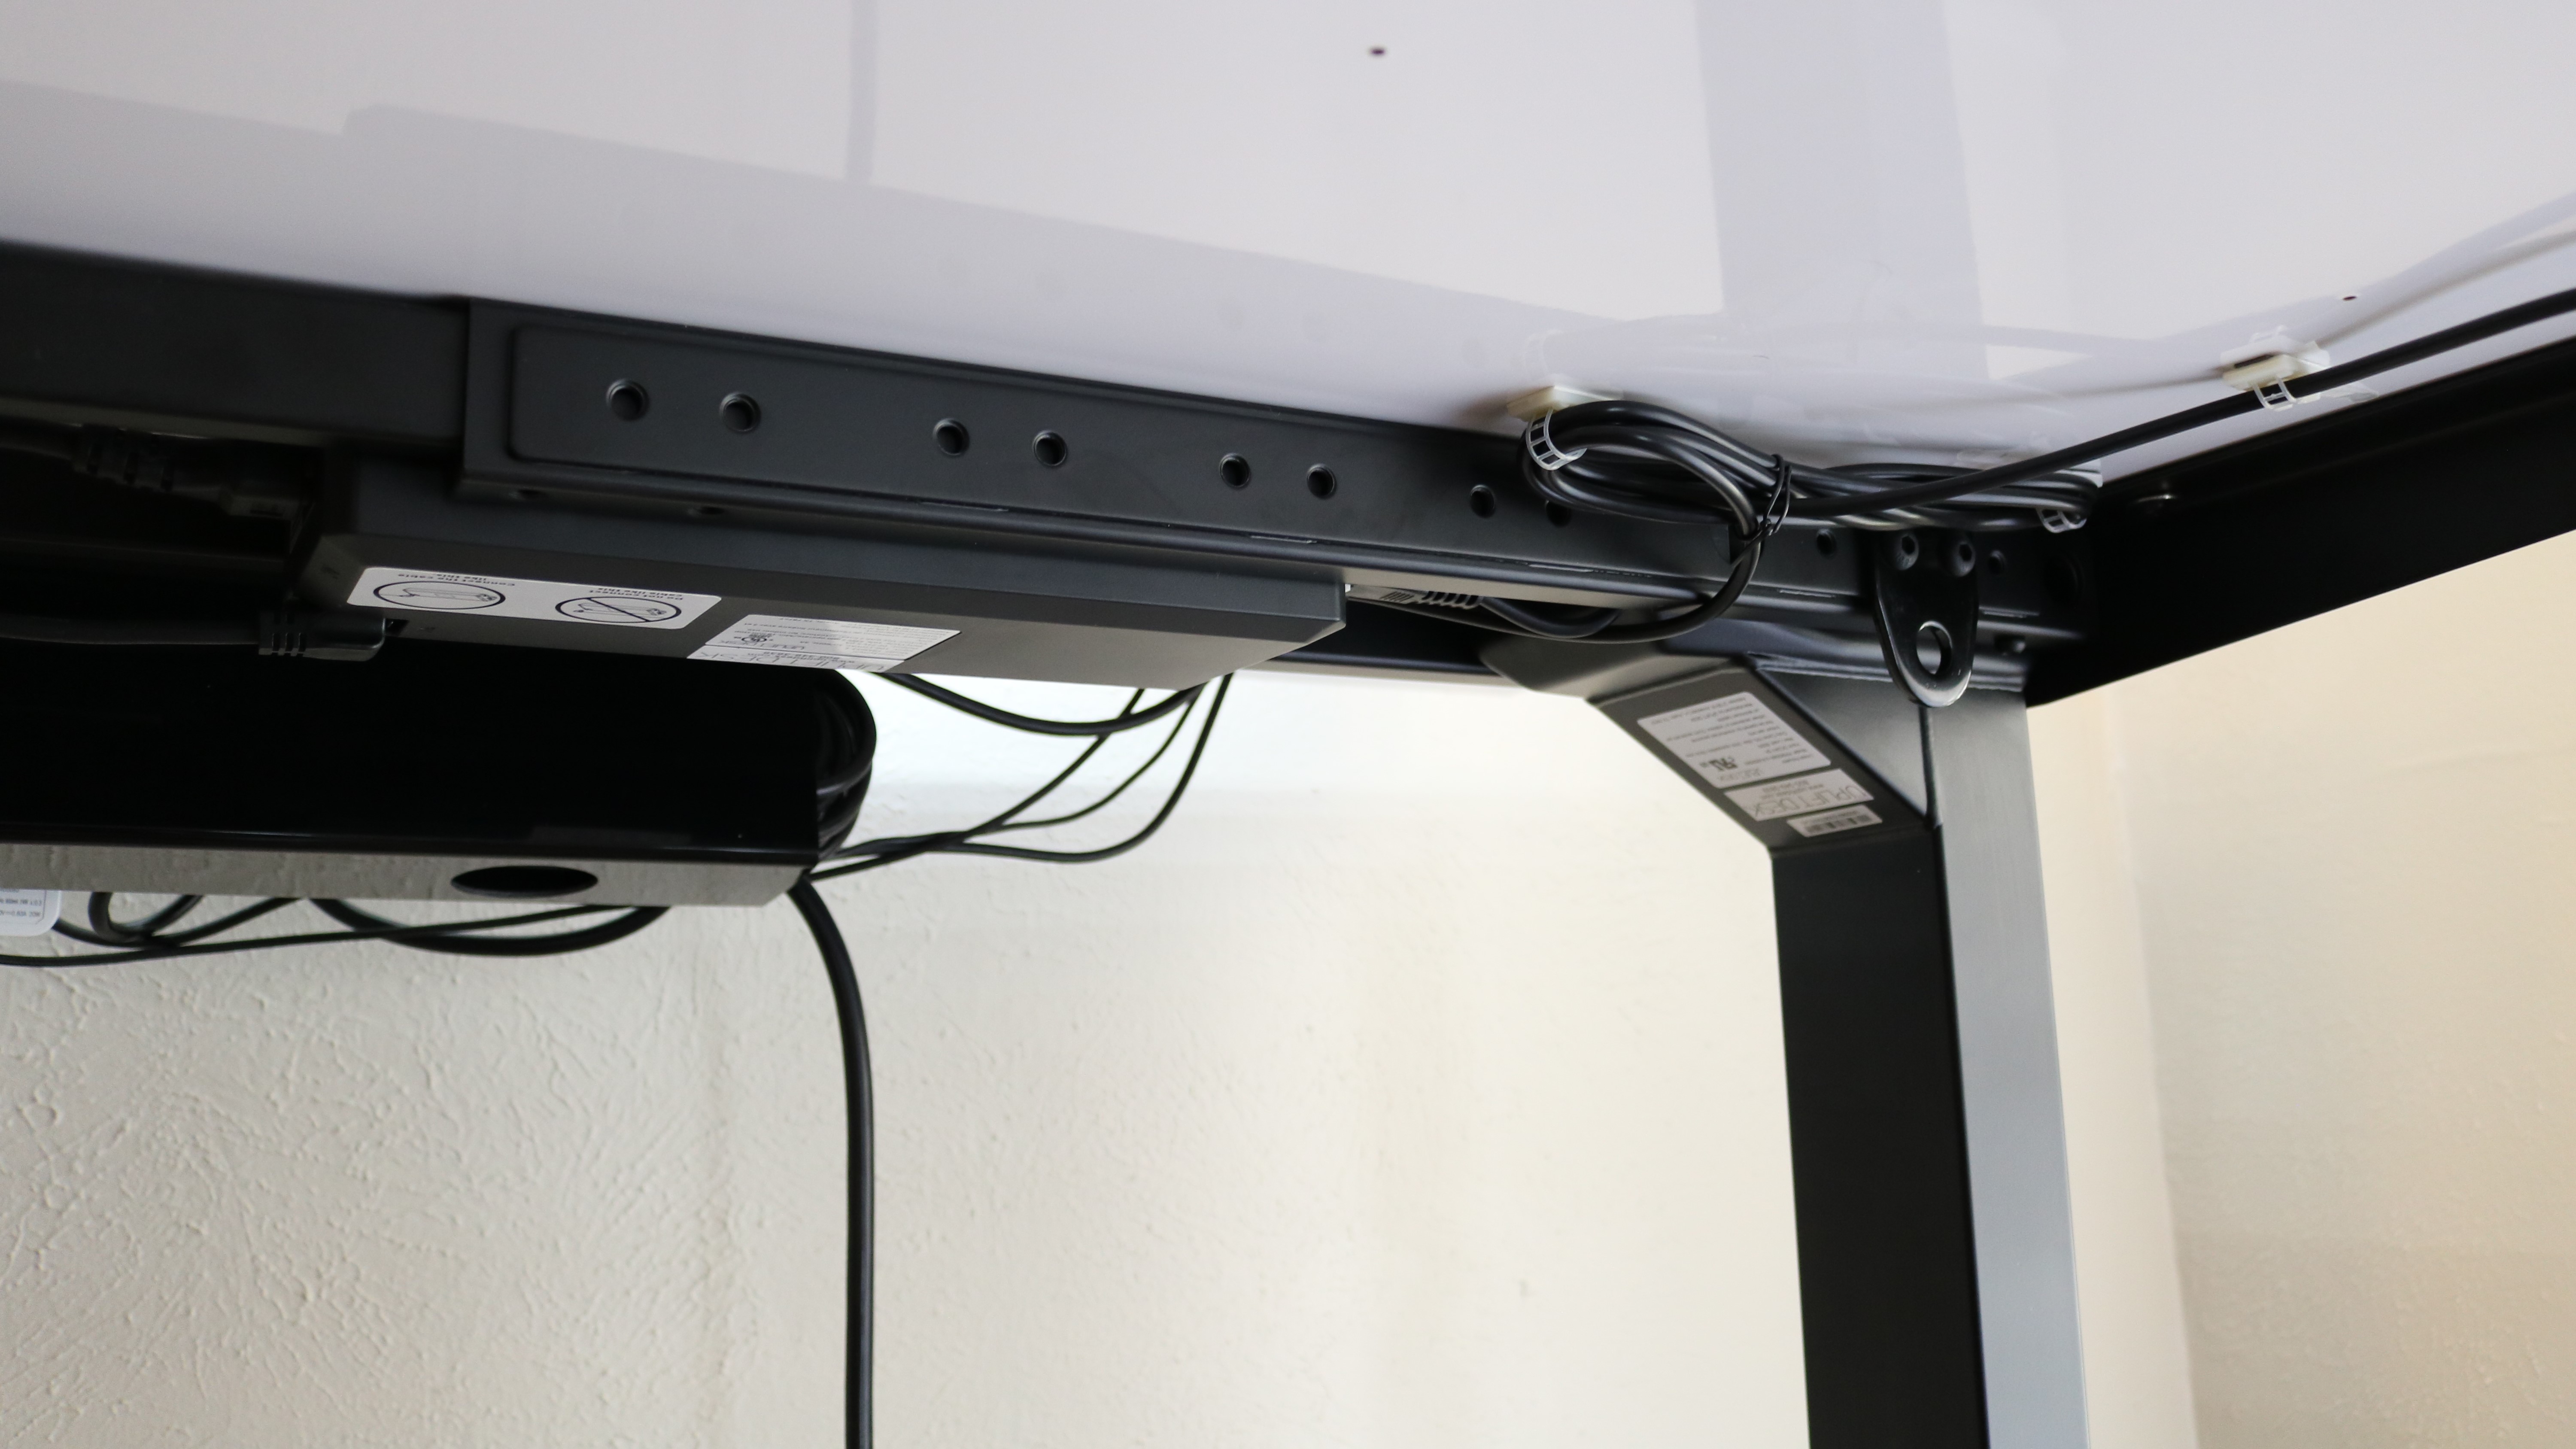
On the underside of the desk, you’ll find the frame which houses the control box where you plug in both legs and the keypad. There are also 48 small holes along both sides of the frame that can be used for mounting accessories like a surge protector or even the under-desk hammock. What’s nice about this is that you can always expand your Uplift V2 with new features and functionality down the road if you want.
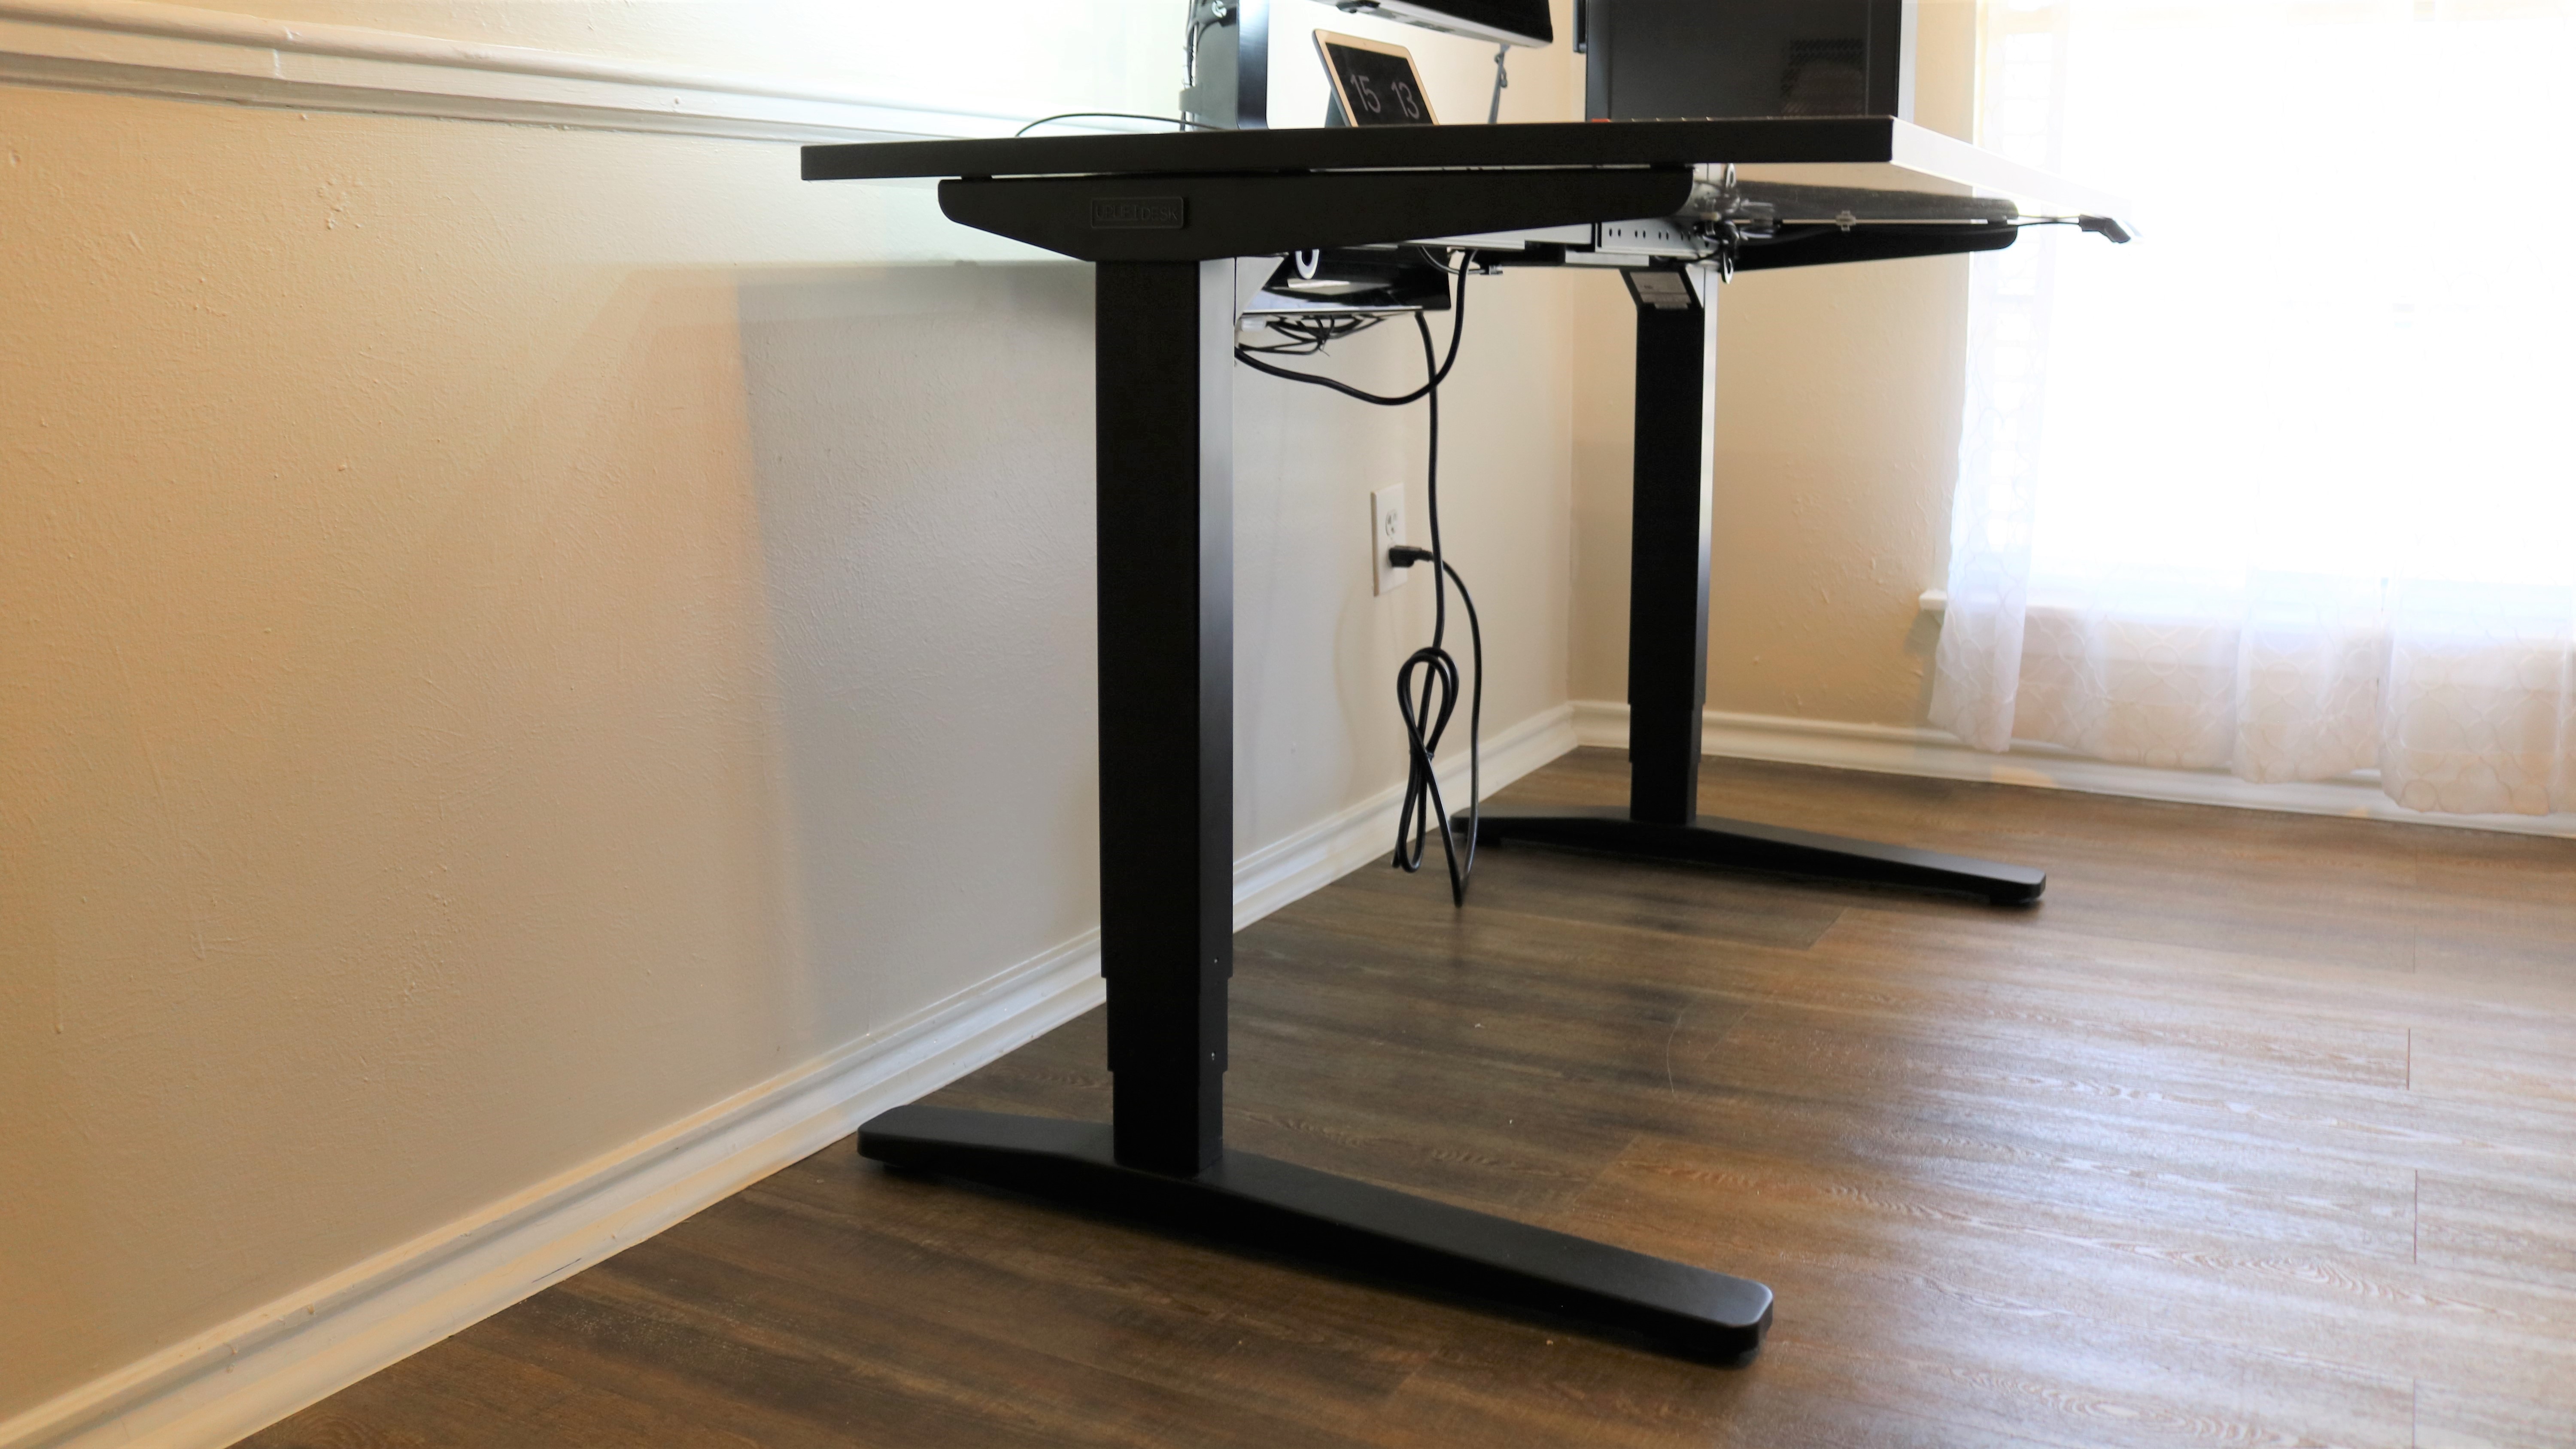
UPLIFT Desk has four different frames available but the main two are the UPLIFT V2 Desk Frame and the UPLIFT V2-Commercial Desk Frame. The main difference between the two is that the UPLIFT V2 Desk Frame has inverted legs and support brackets on either side of the underside of the desk for added stability while the Uplift V2 Commercial Desk Frame has a stability crossbar between the two legs and normal desk legs.
Setup
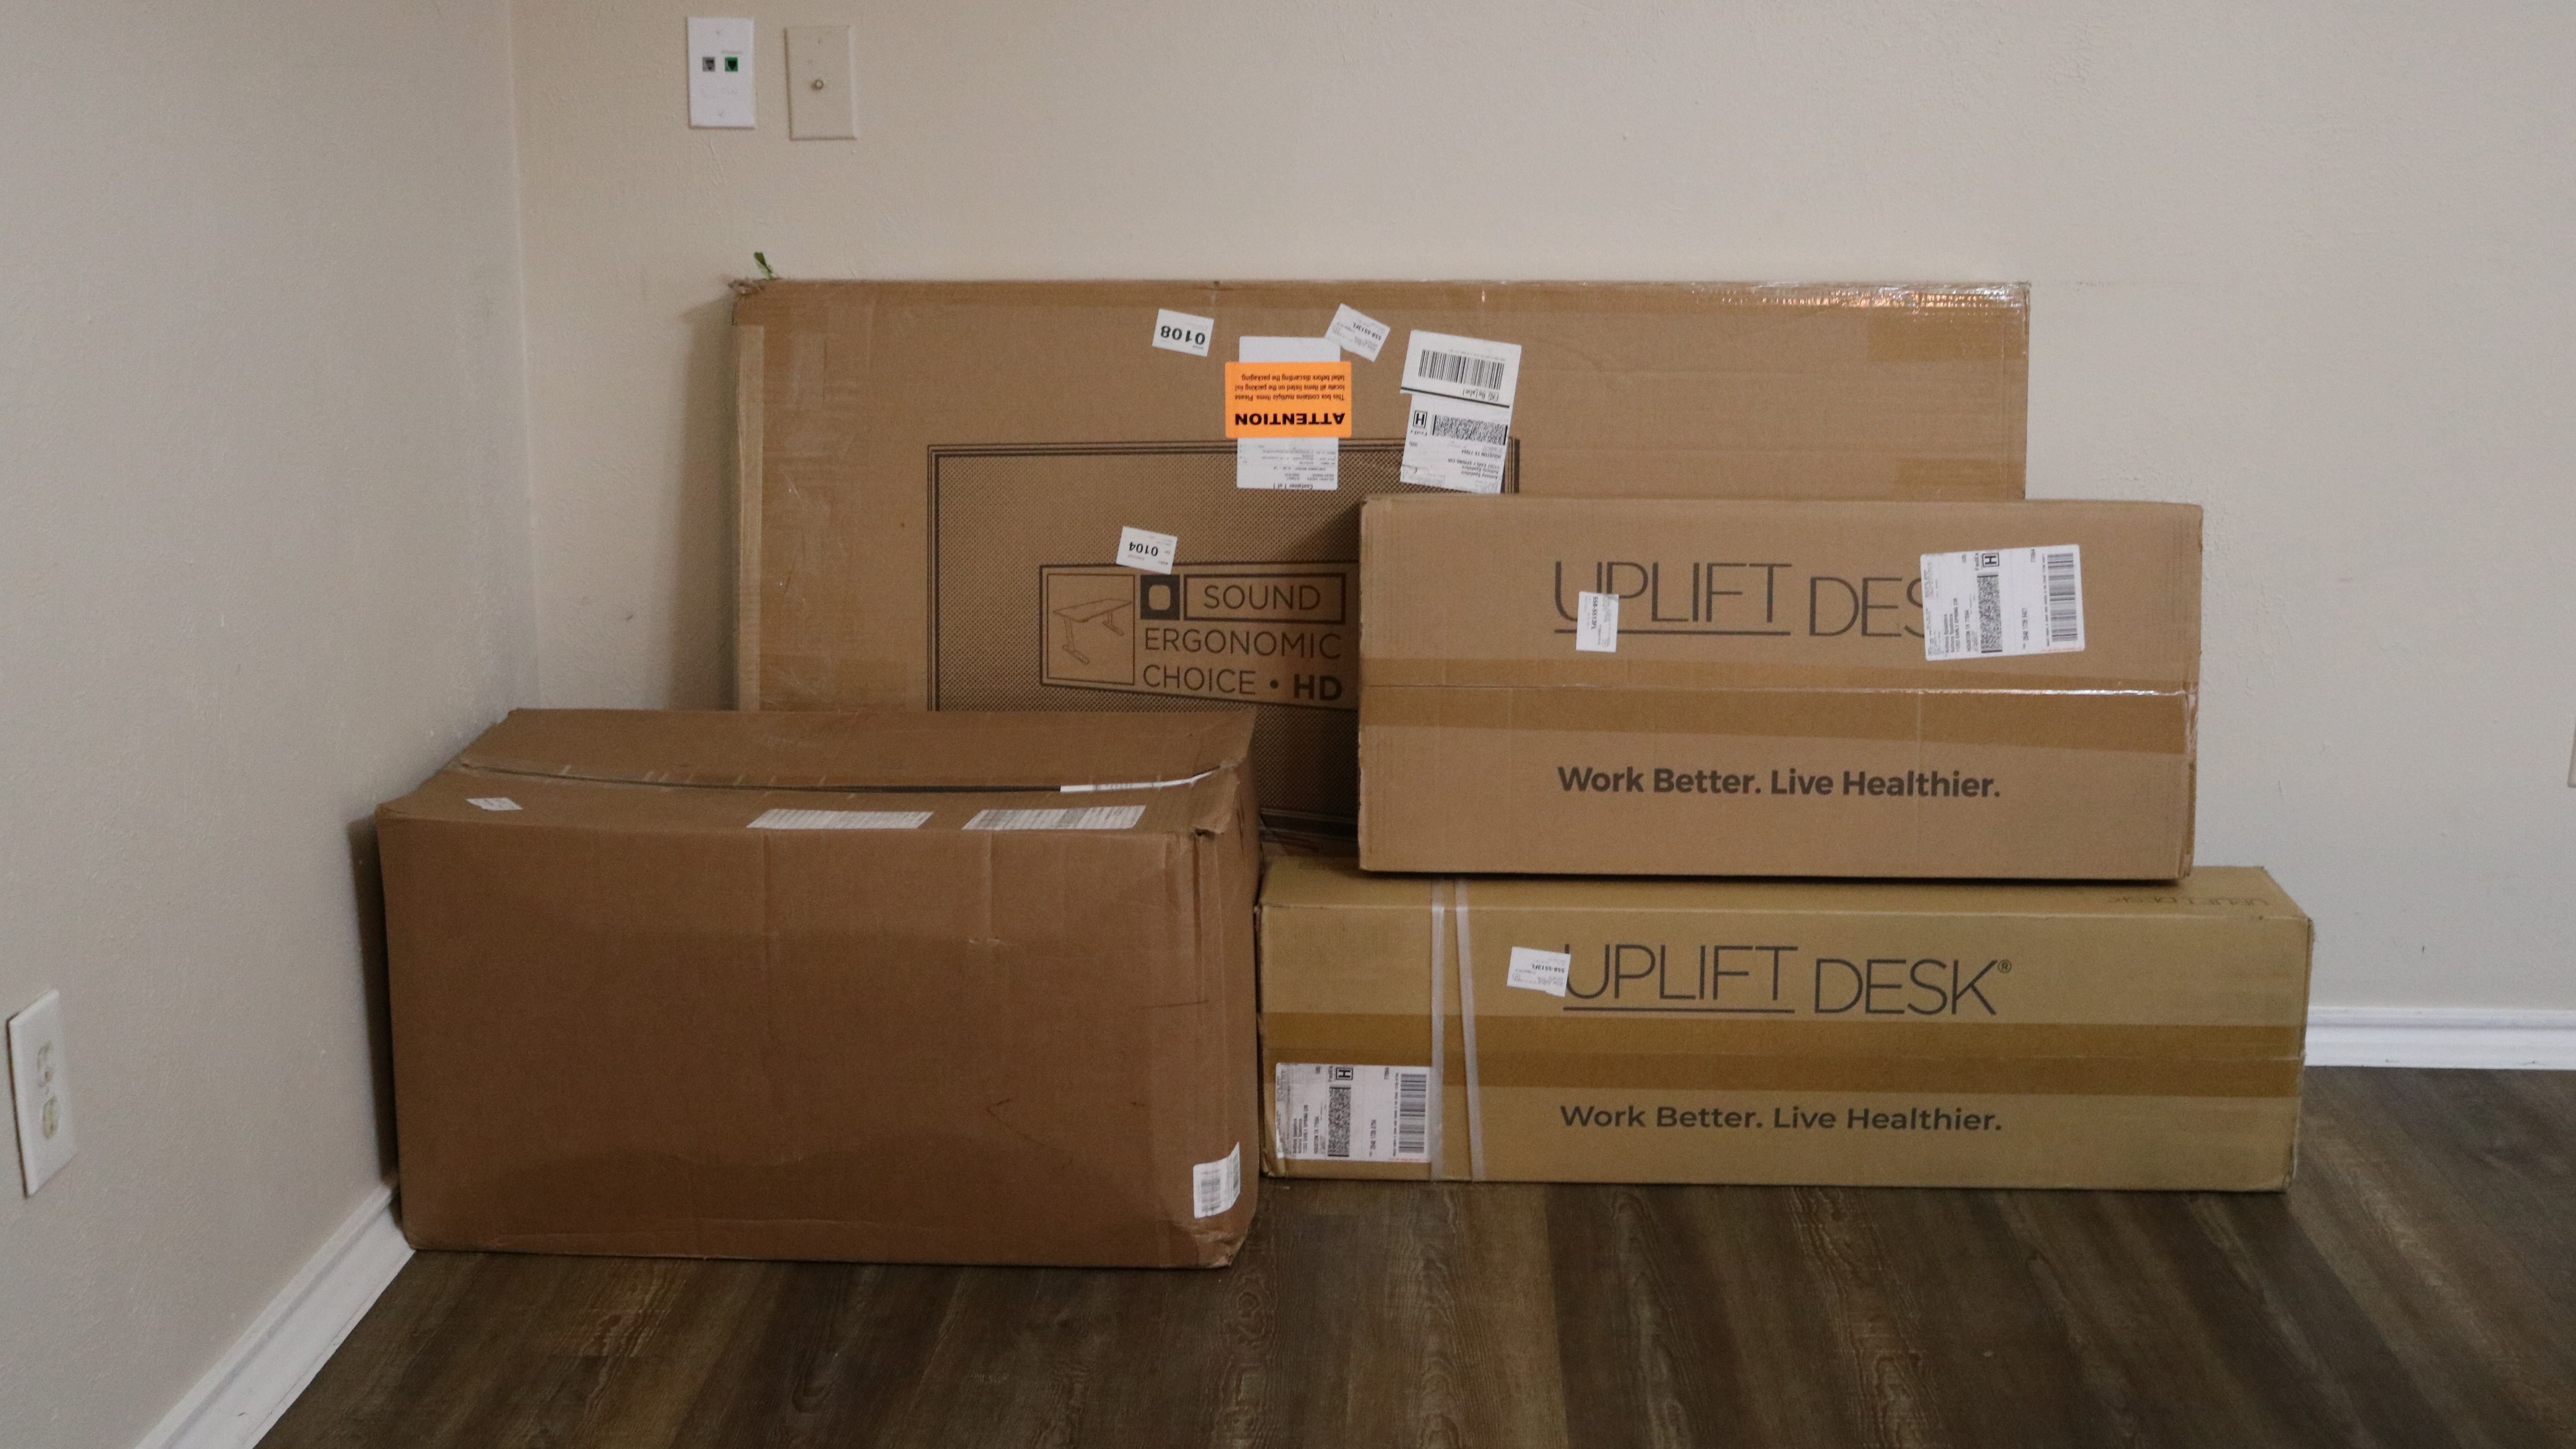
The UPLIFT V2 sent to TechRadar Pro for review arrived in several boxes. This is because UPLIFT Desk sent us a number of additional accessories including a modesty panel with wire management, a desk extension and even a CPU holder. However, for the purpose of this review, we’ll be focusing on the base configuration of the UPLIFT V2.
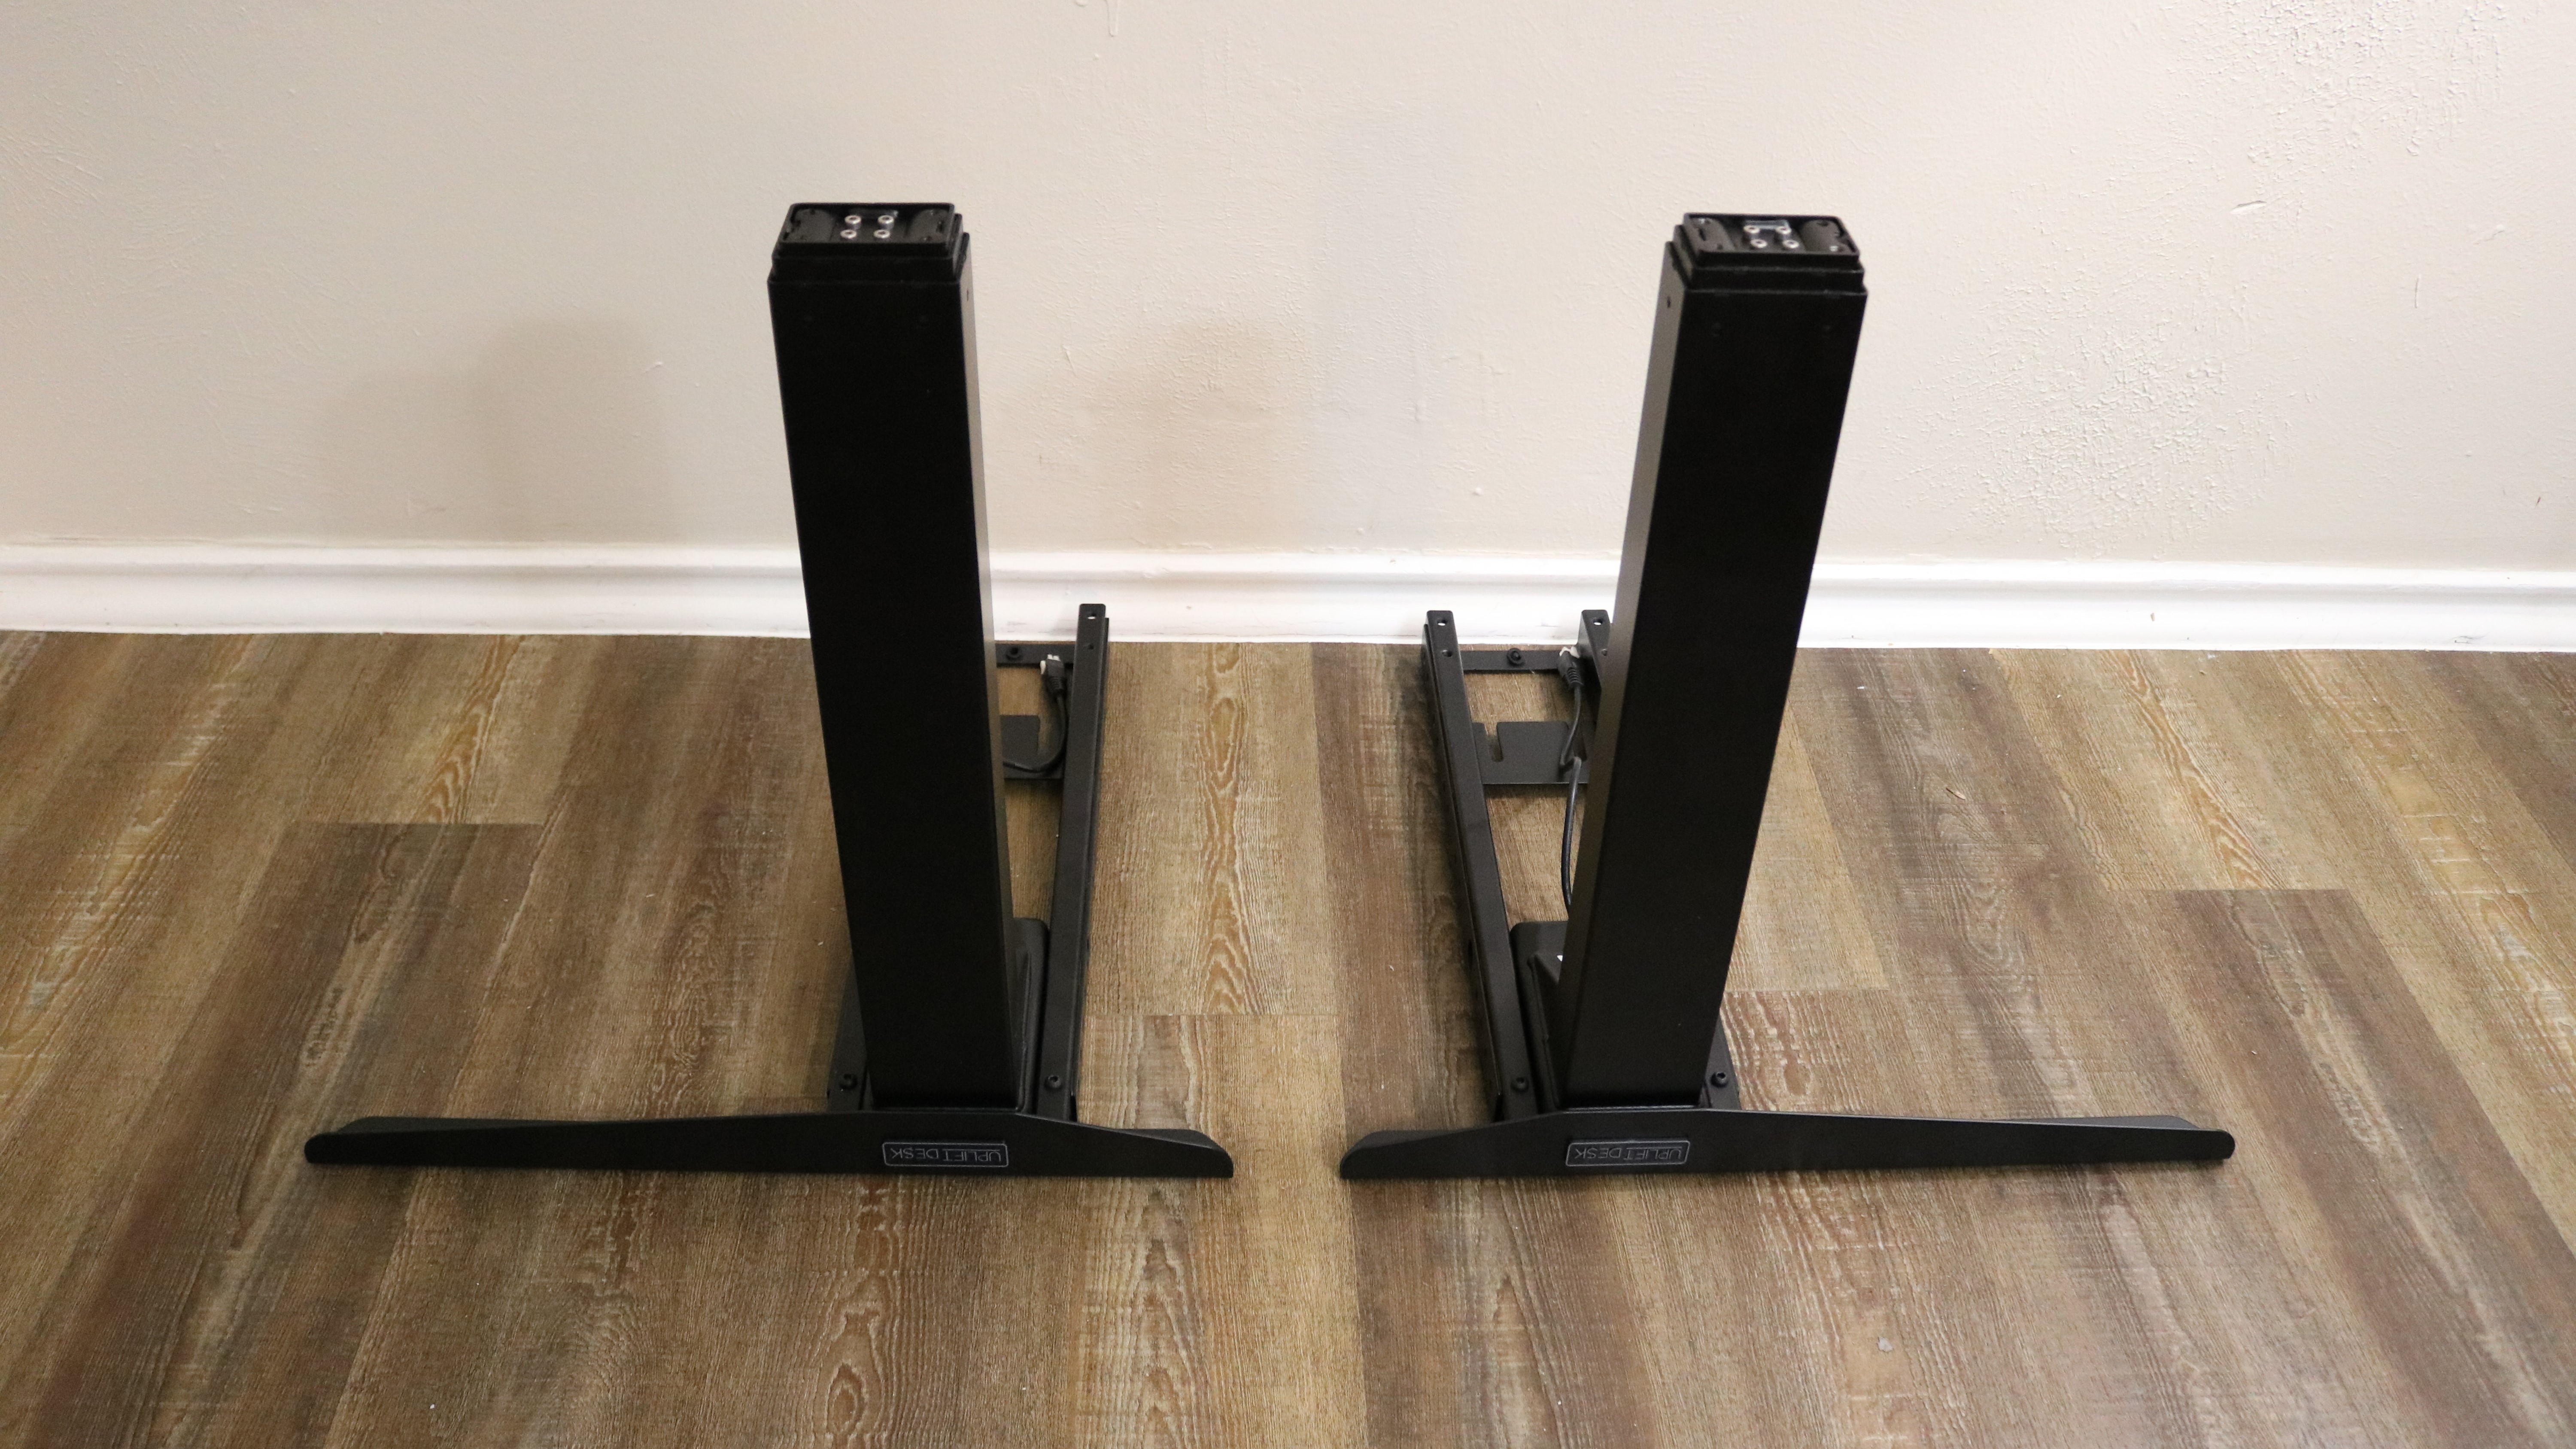
Assembling the UPLIFT V2 begins with inserting both of the desk’s legs into the crossbar ends that make up its frame. The legs are secured to the crossbar ends using four screws and an Allen wrench. From here, you need to slide the side bracket tabs into the crossbar ends for both legs and attach them together using two screws.
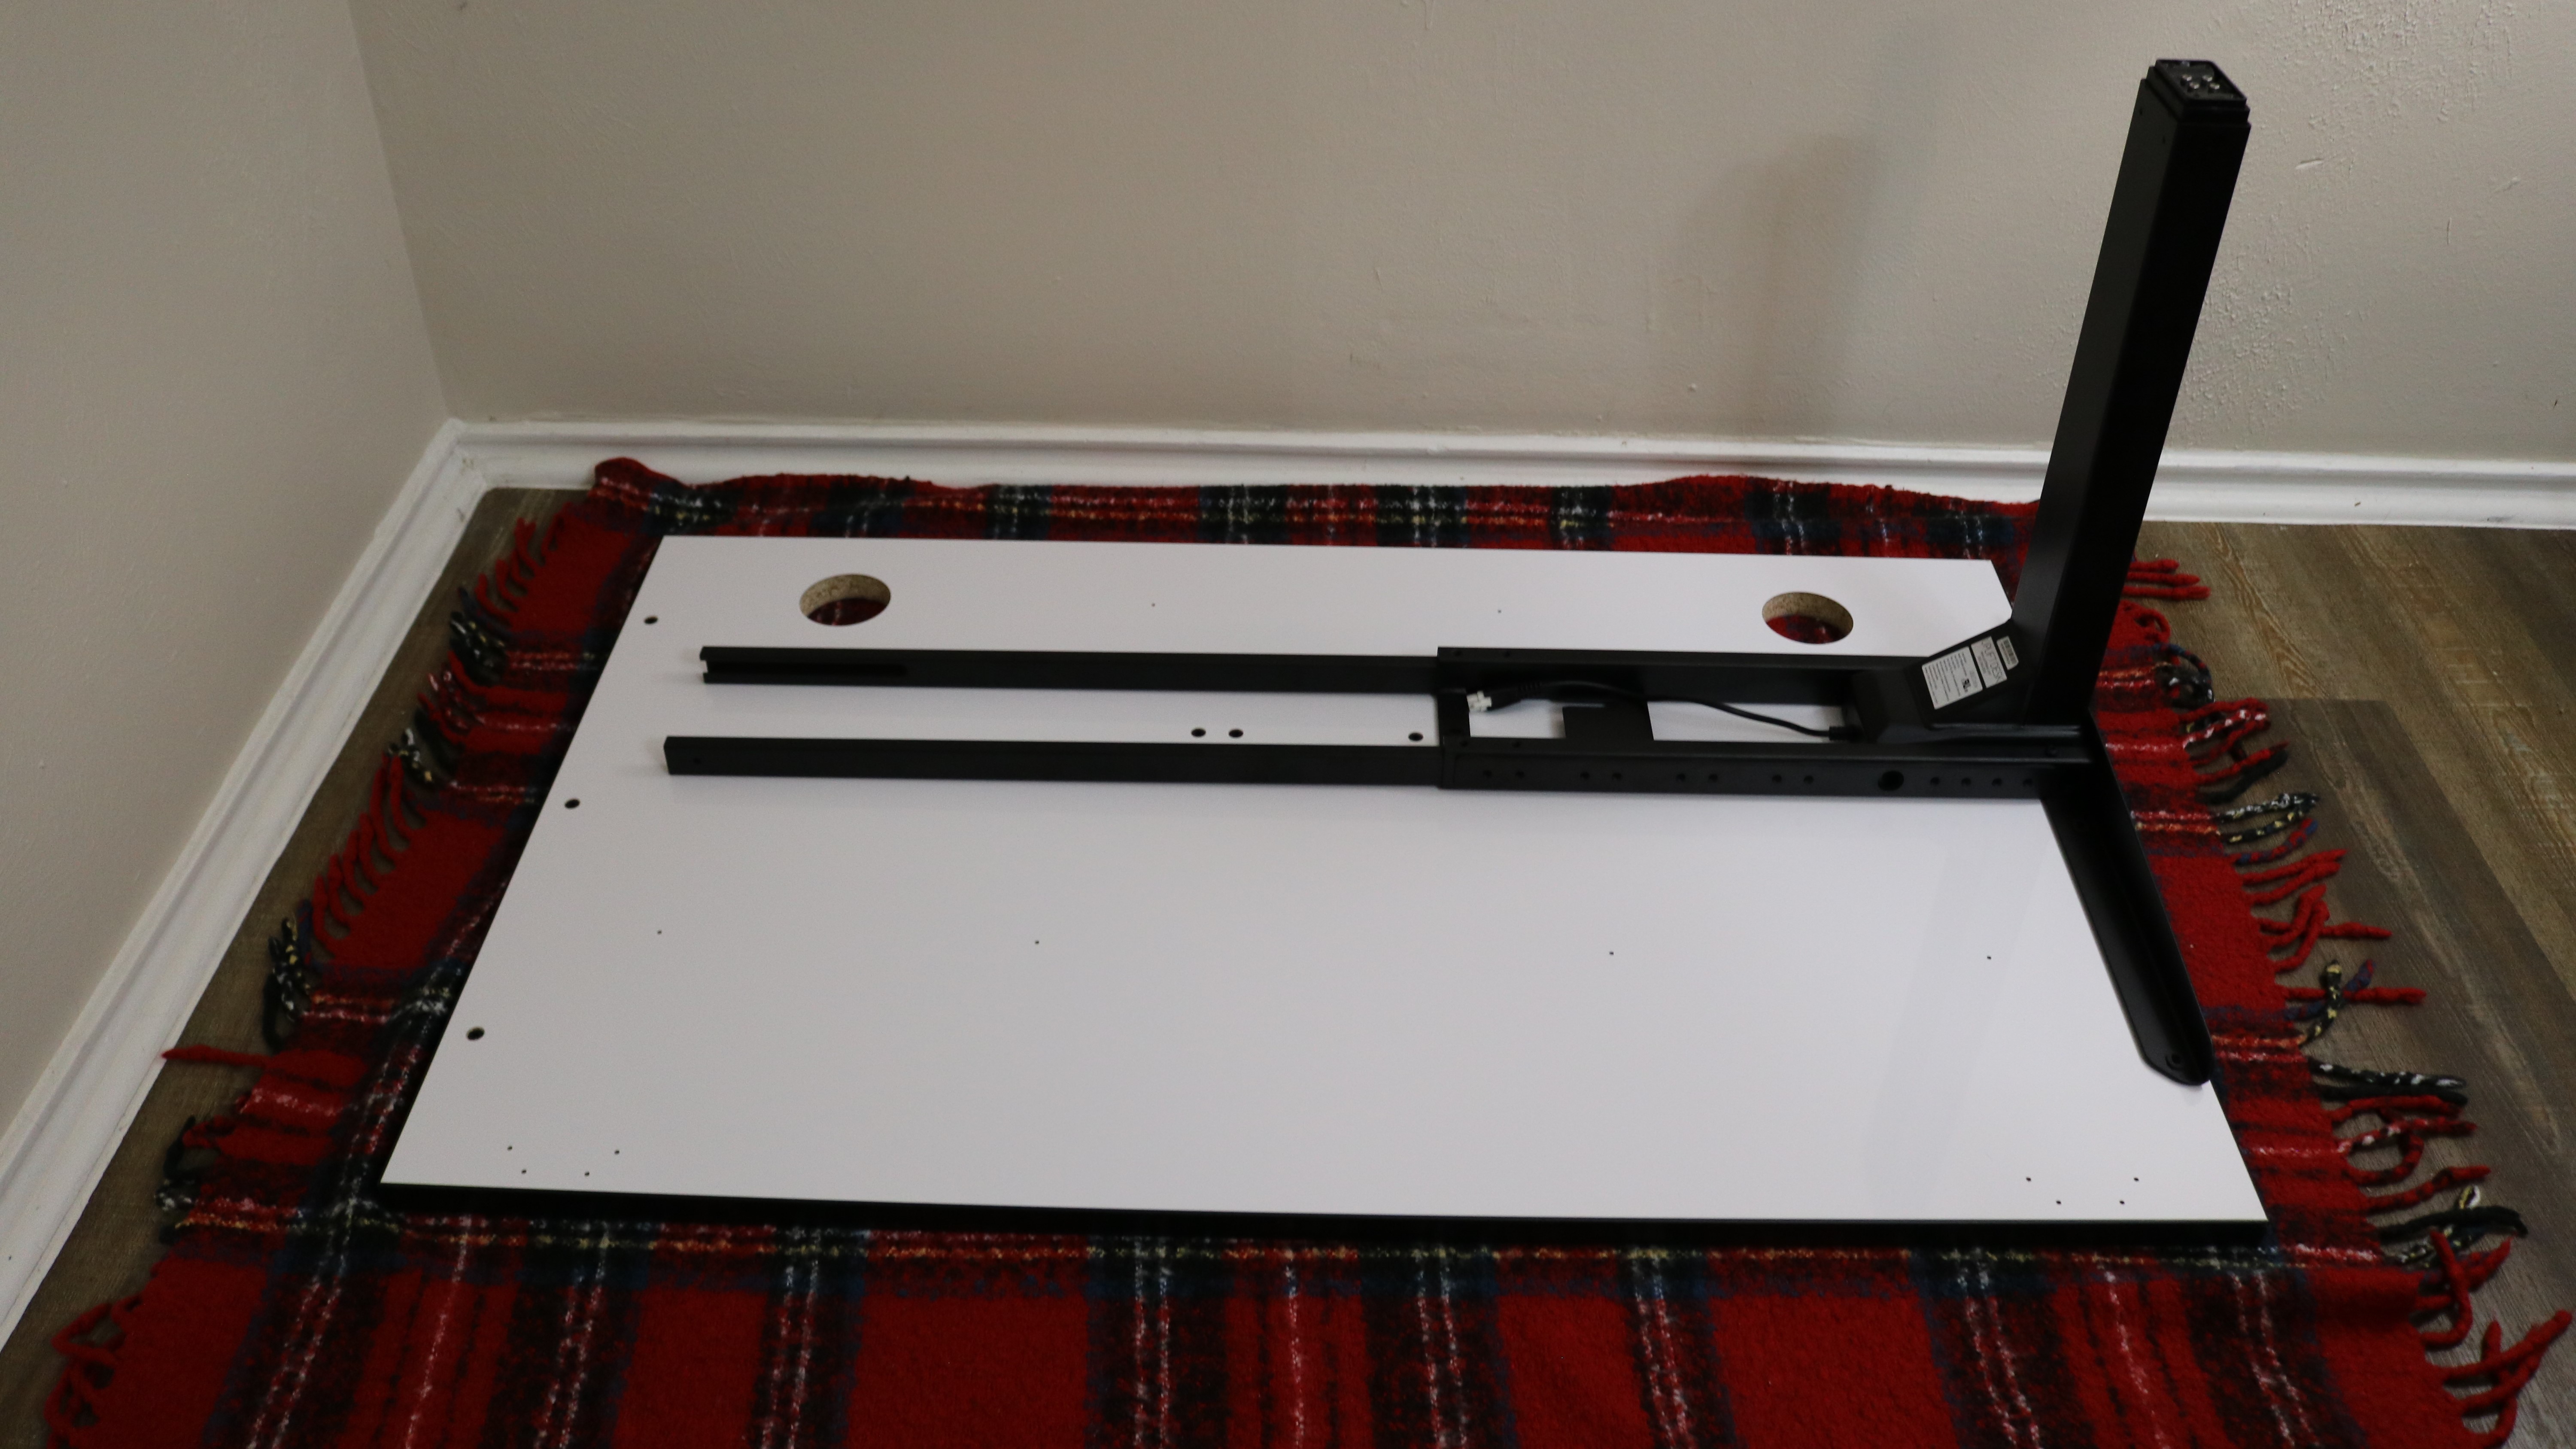
With the legs assembled, you then need to slide the crossbar rails into the crossbar ends on one of the legs. Next up, the leg with the crossbar rails attached needs to be placed on the underside of the desk and attached using four screws. This process then needs to be repeated for the other leg which slides into the crossbar rails.
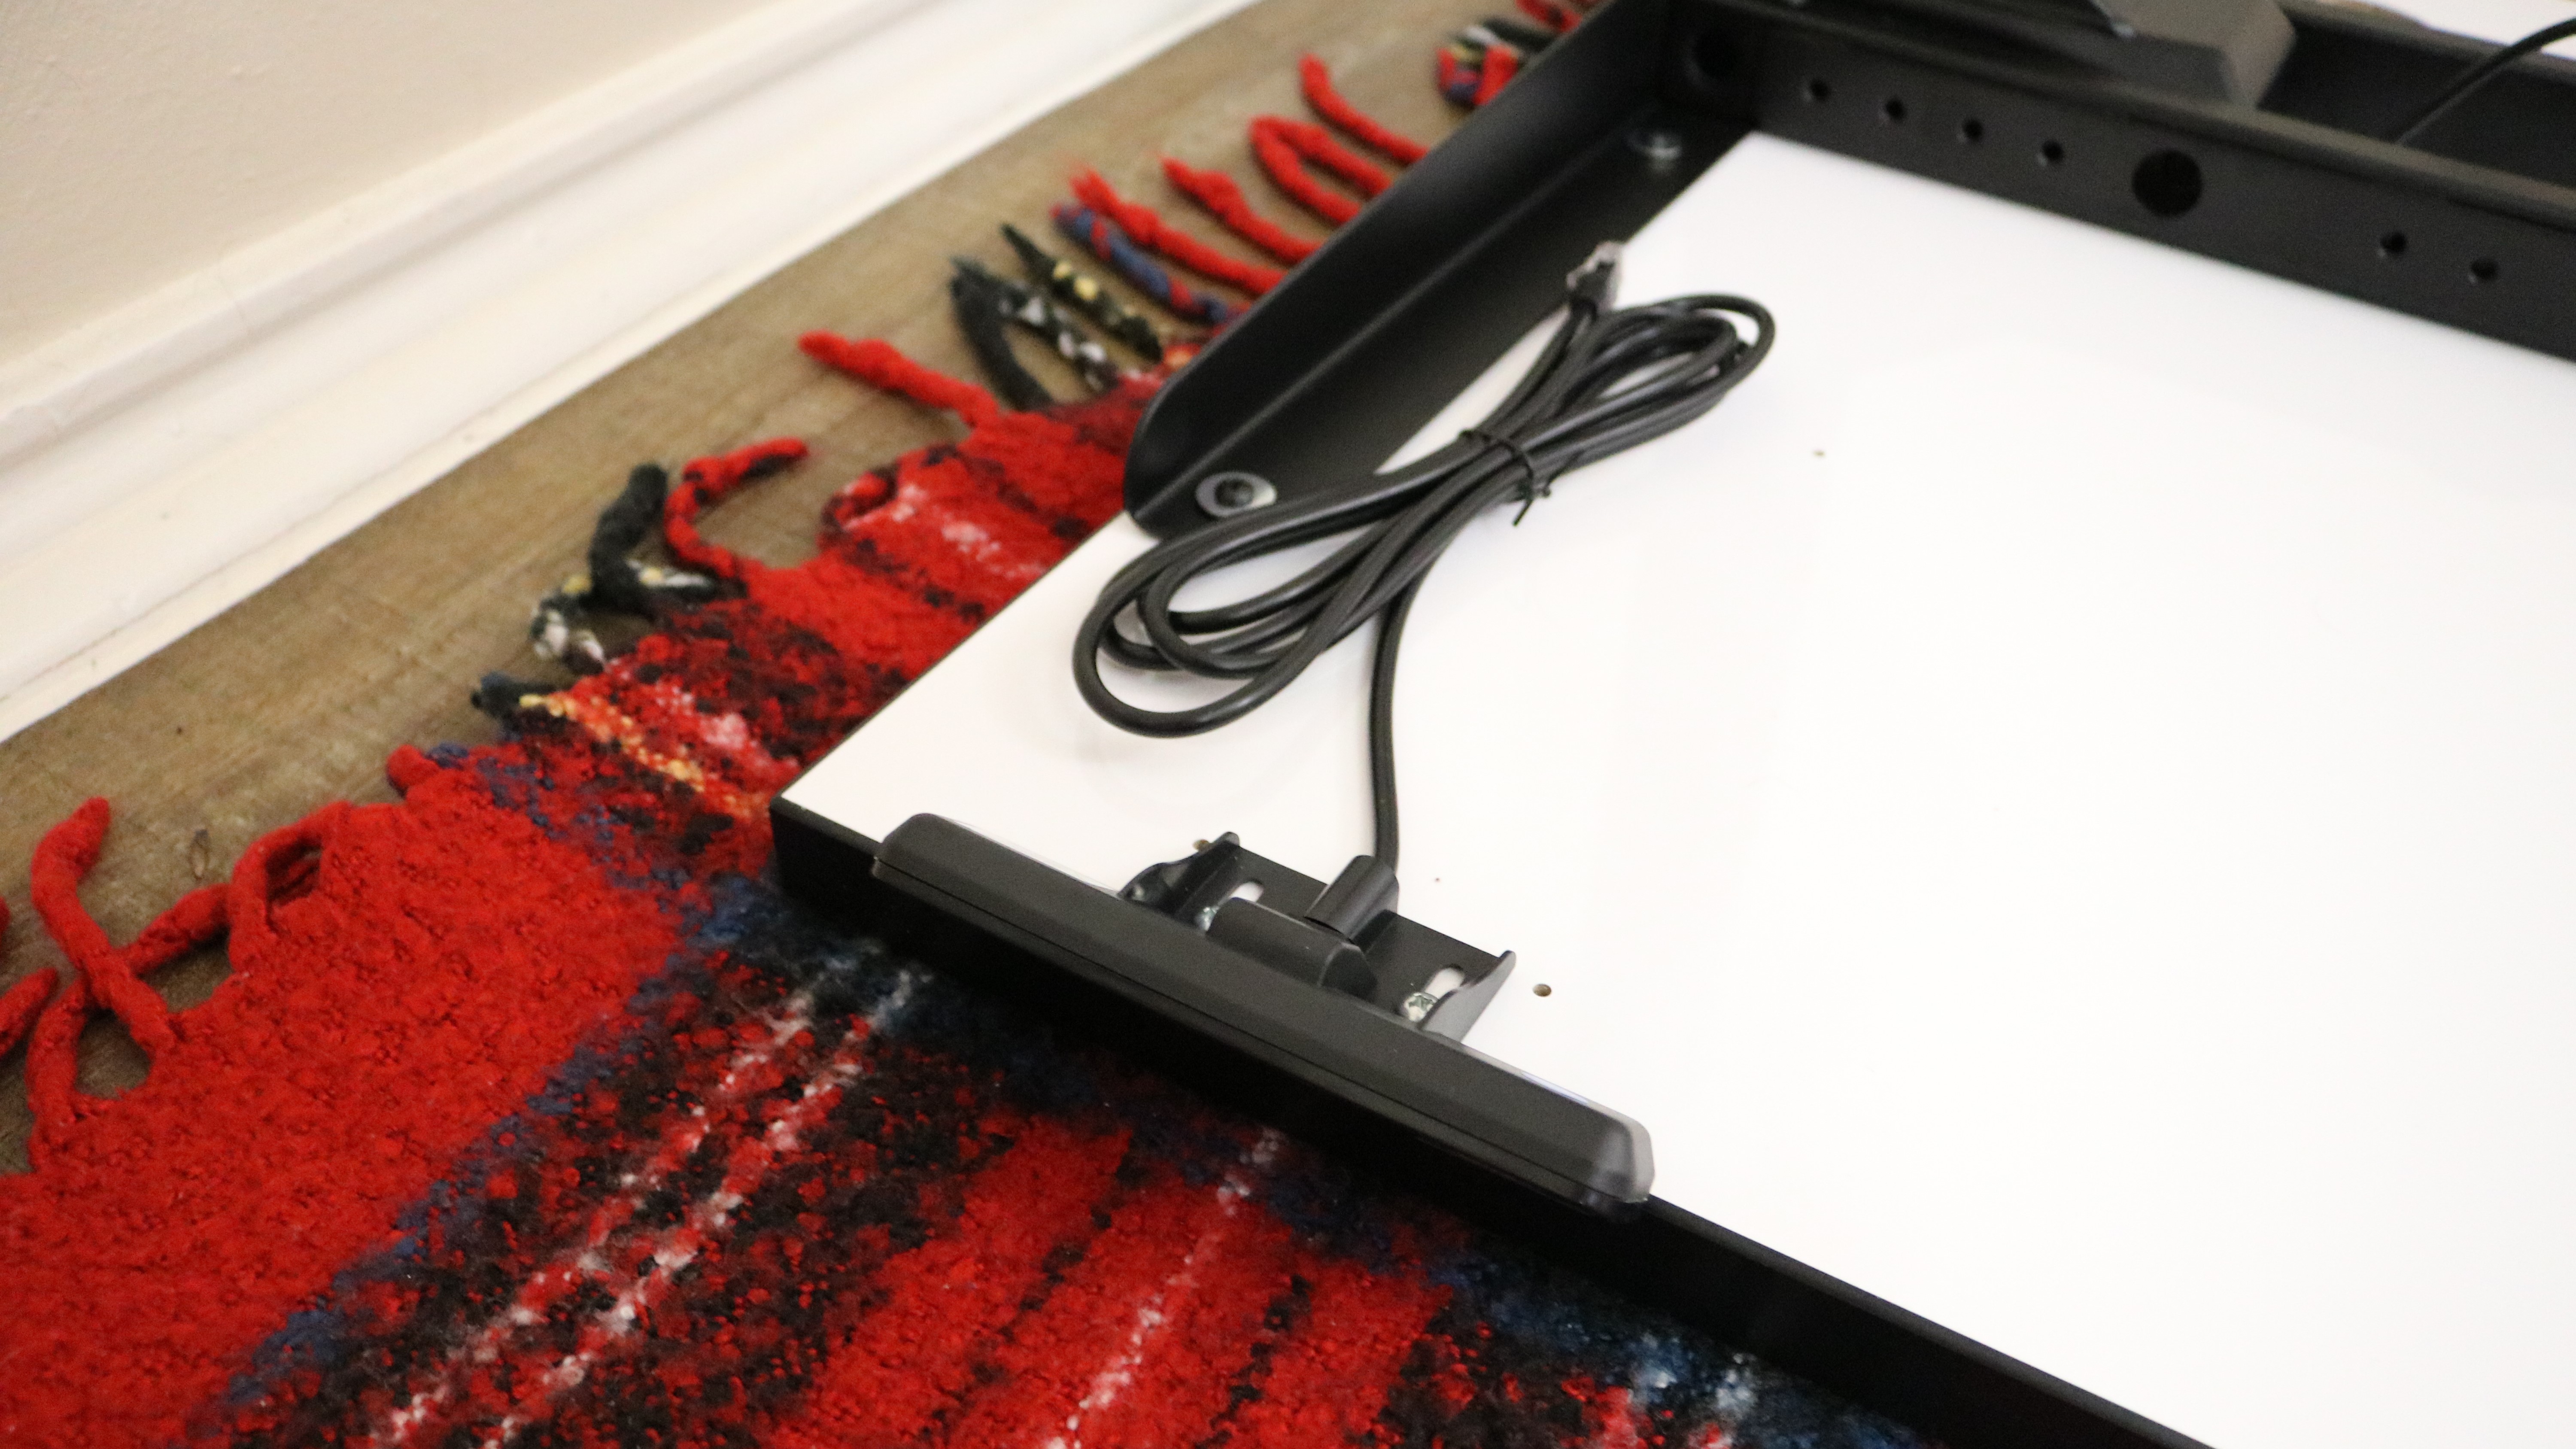
Here you can choose whether you want the keypad on the left or right underside of the desk. Thankfully, there are pre-drilled holes on either side and if necessary, you can always switch the position of the keypad later if it isn’t to your liking.
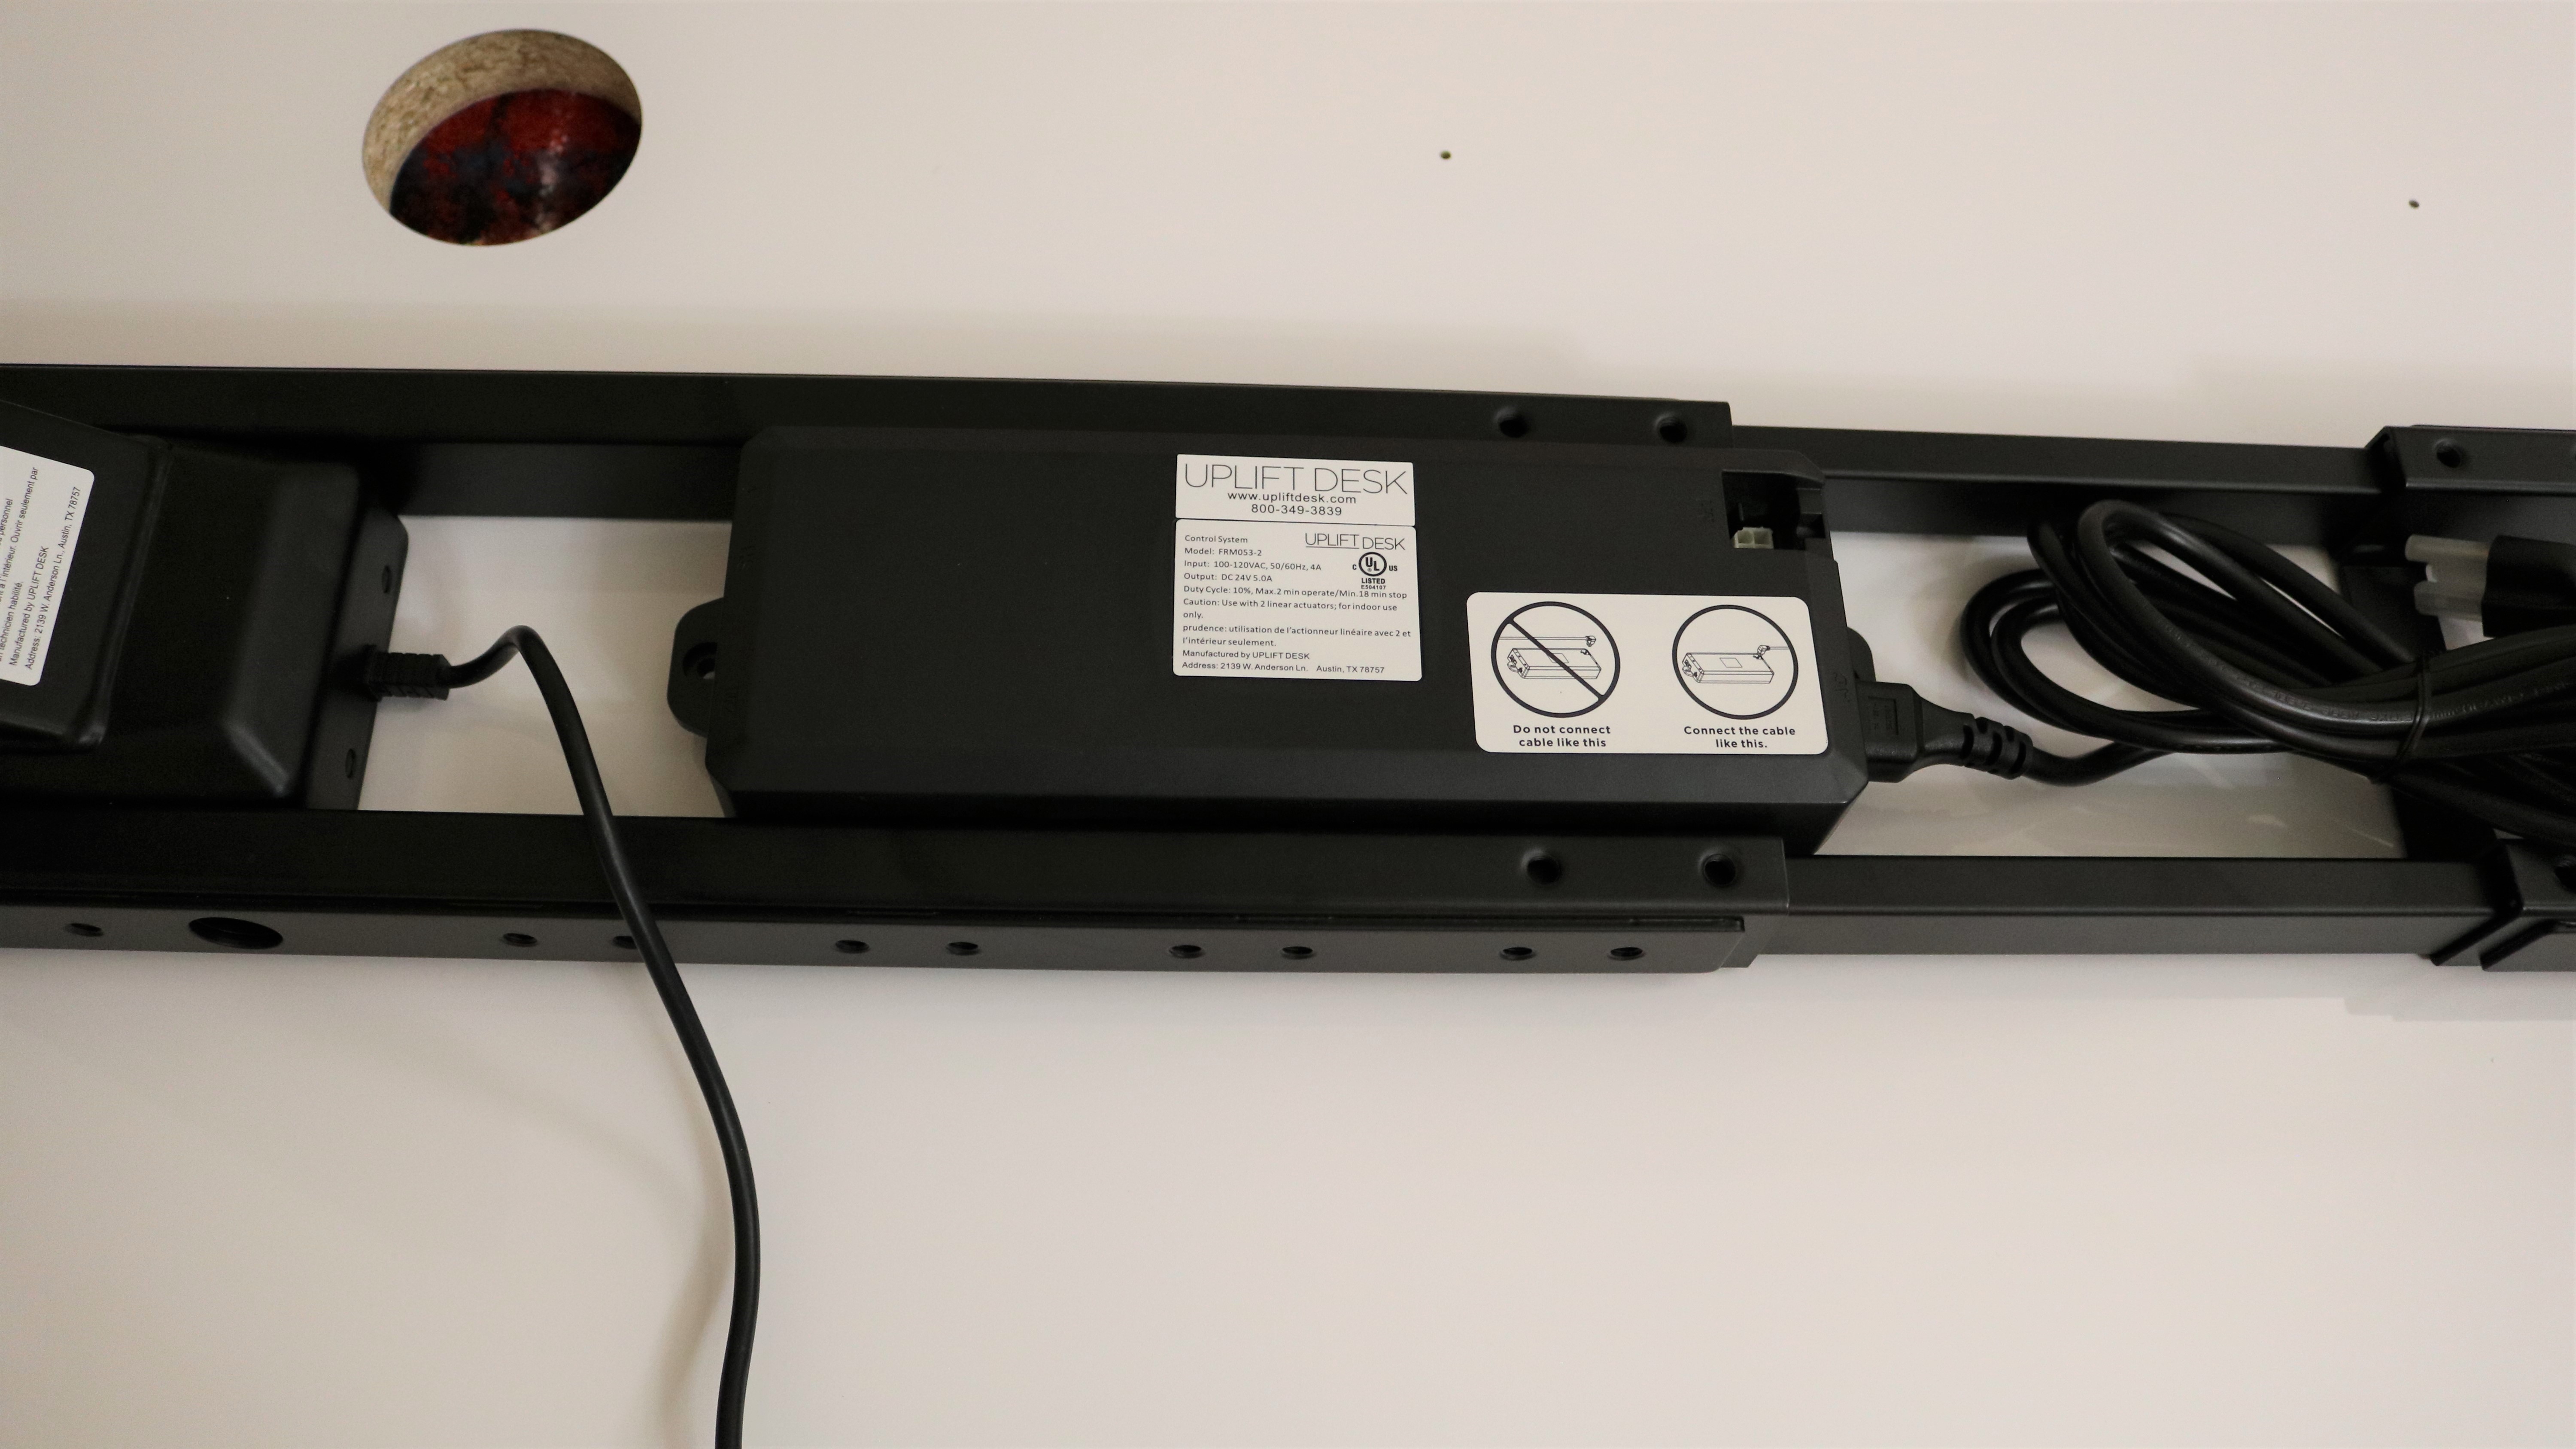
With the keypad installed, you then need to slide the control box into the center of the frame. It can actually be placed on either the left or right side of the frame but UPLIFT Desk recommends having it on the same side as the keypad to make it easier to run and hide the cable from the keypad. At this point, you also need to plug in the cables from each leg to the control box.
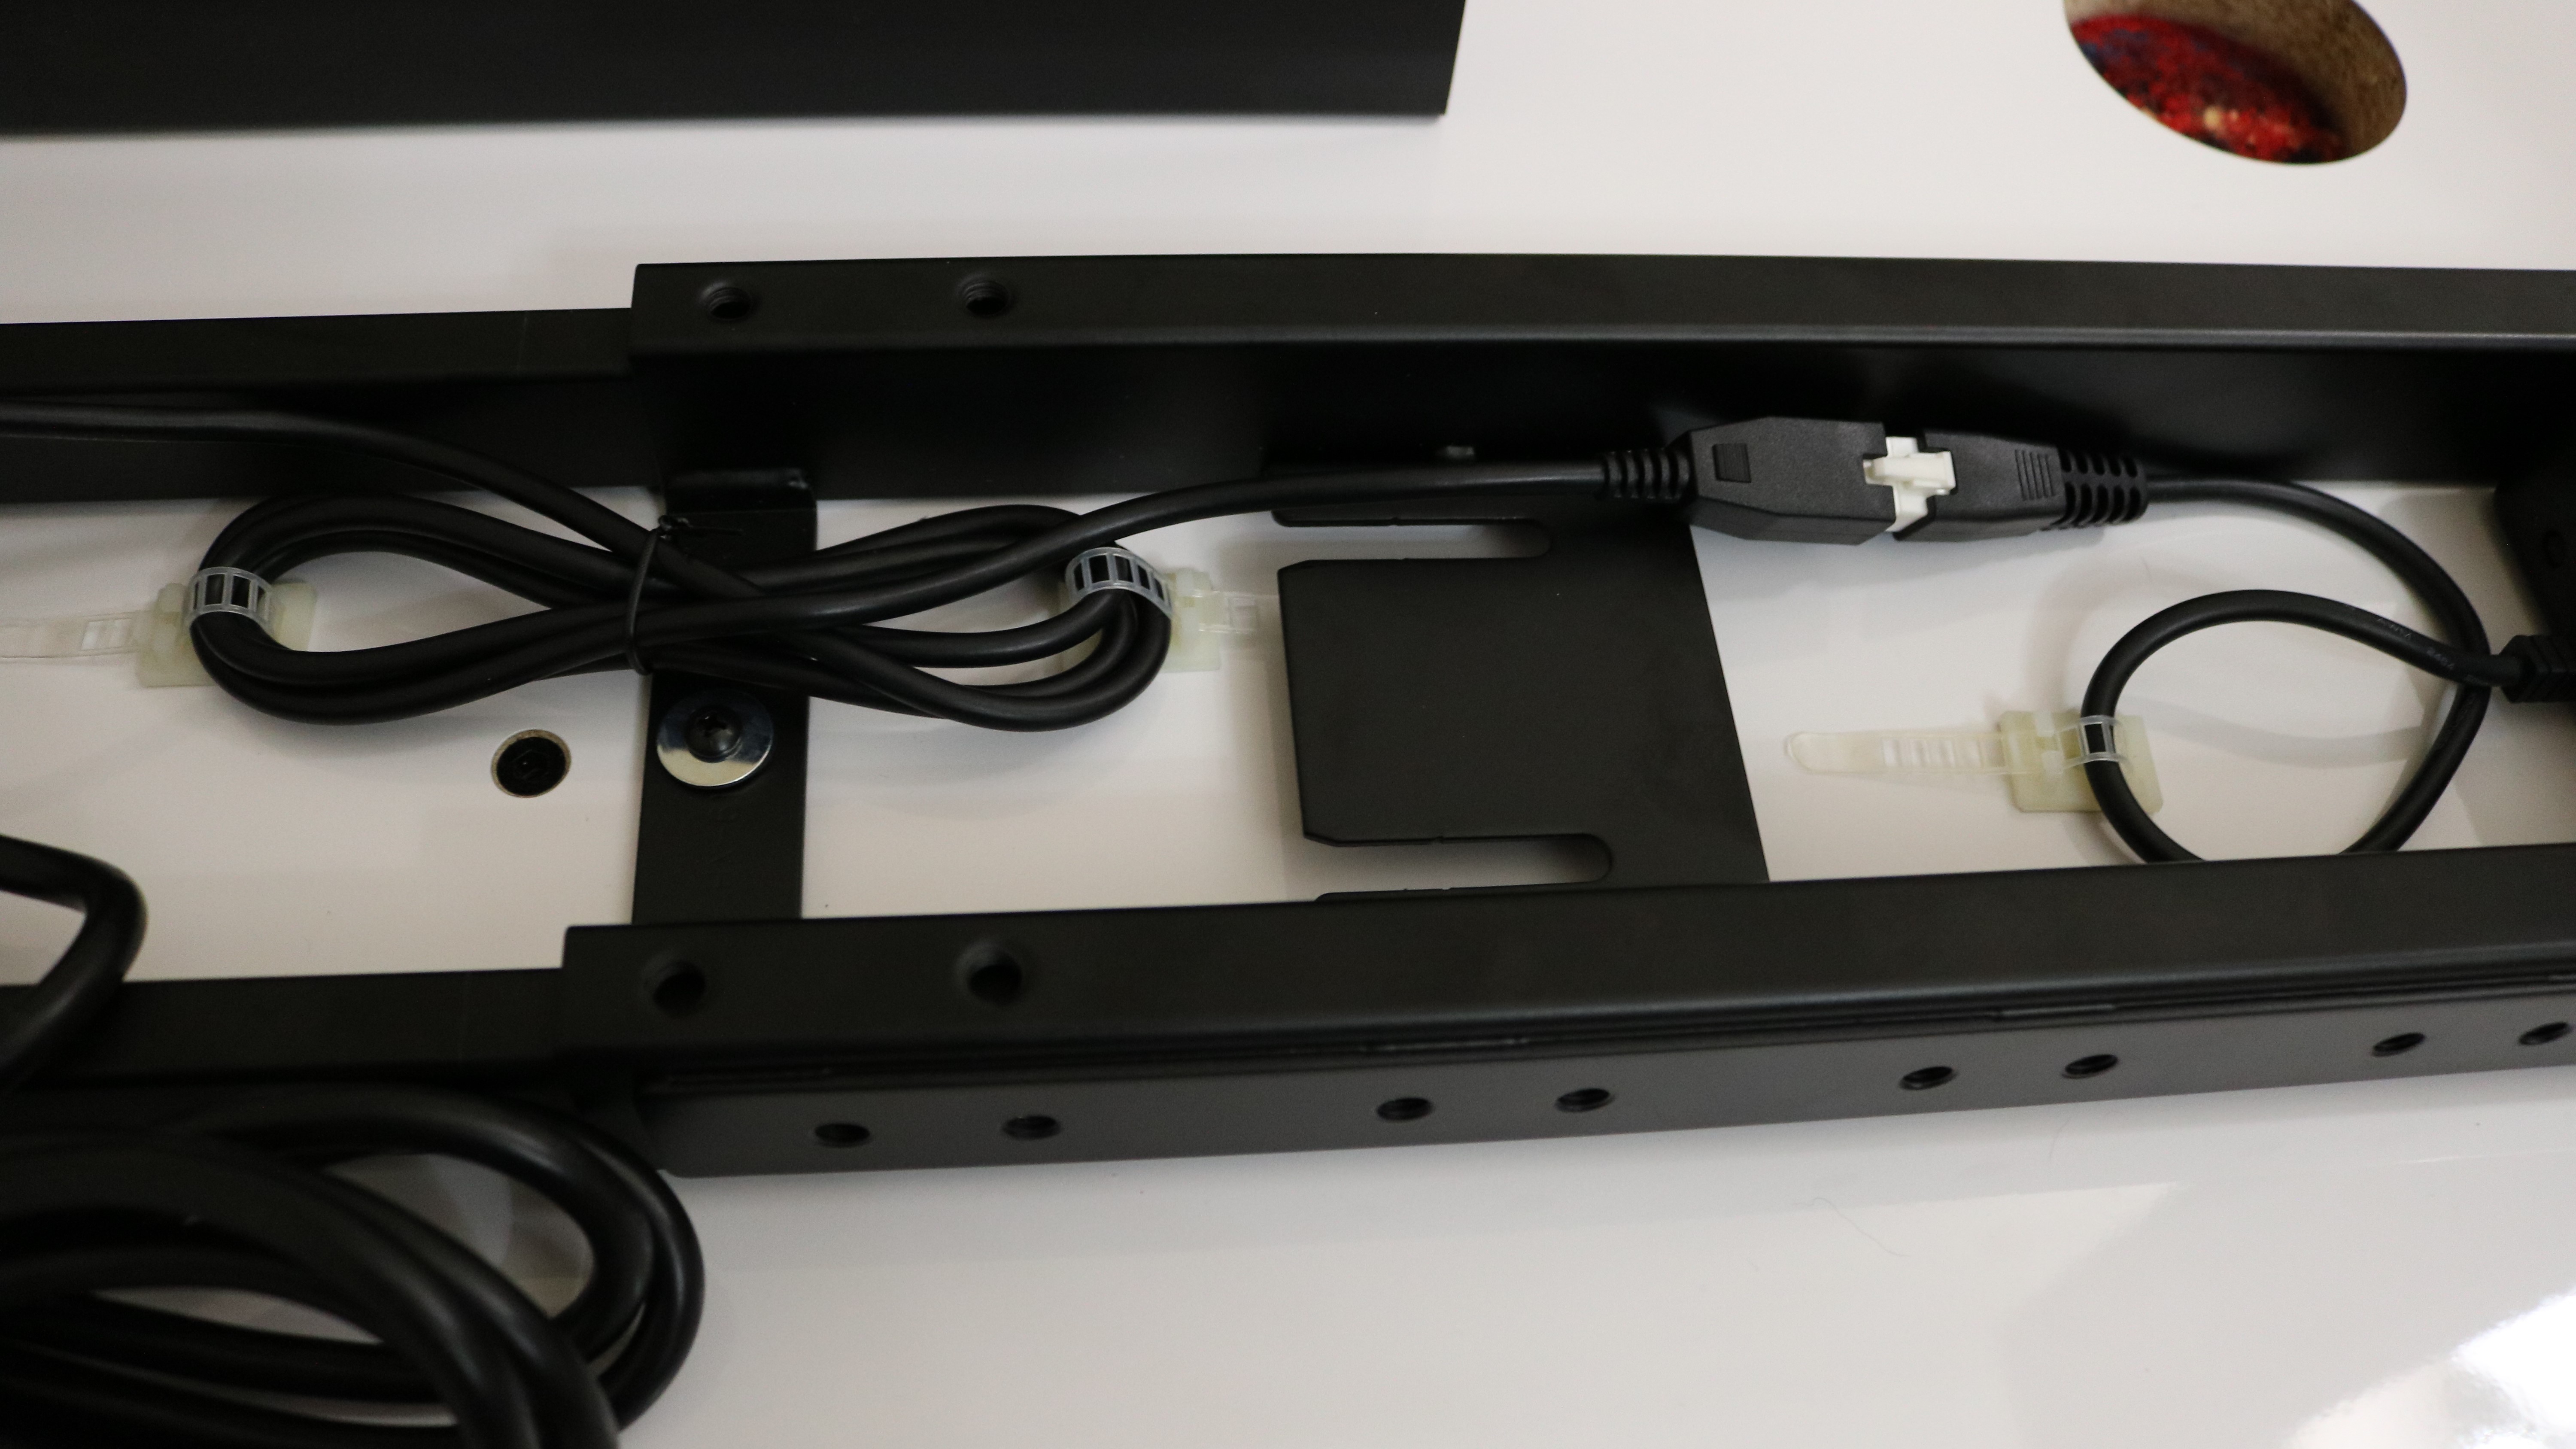
While having the control box in the center of the frame makes it easy to tidy up all of the cables connected to it, UPLIFT Desk also supplies you with several adhesive cable tie mounts so that you can keep the cables secured to the underside of the desk and not dangling.
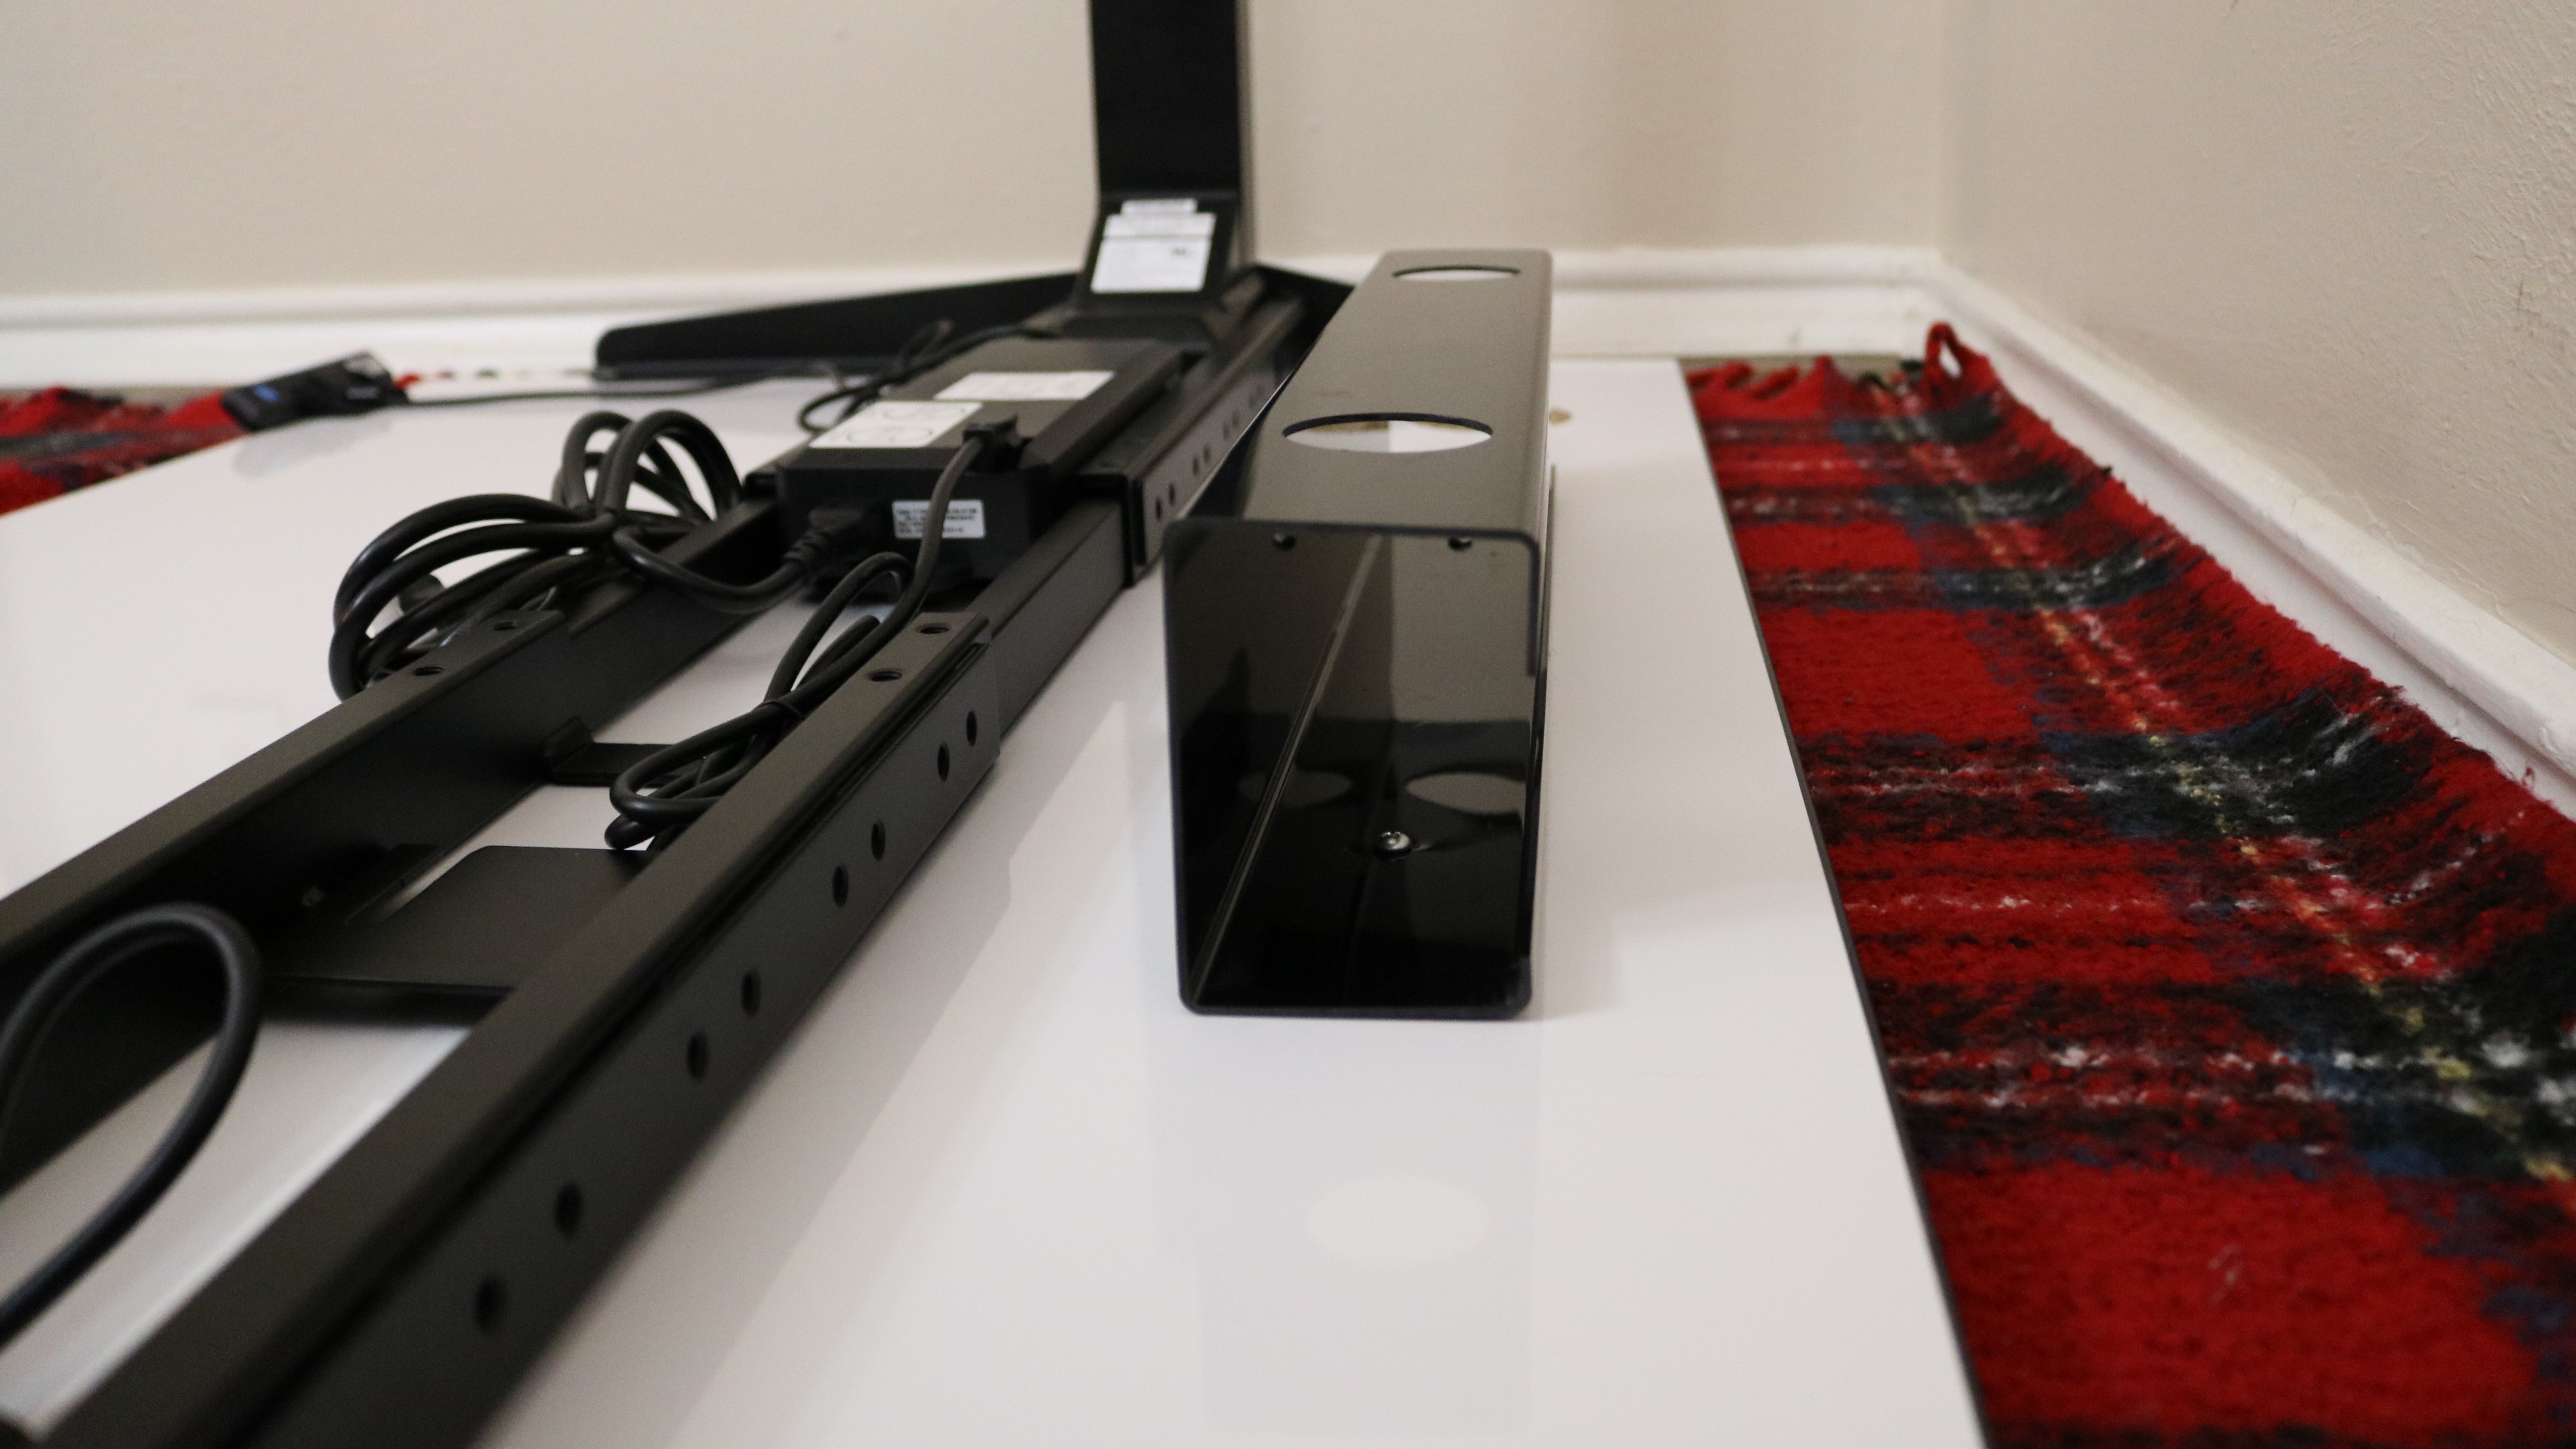
The included cable management tray also needs to be secured to the backside of the desk using two screws. However, due to its design, you’ll need either a long screwdriver or a long drill bit to attach it securely.
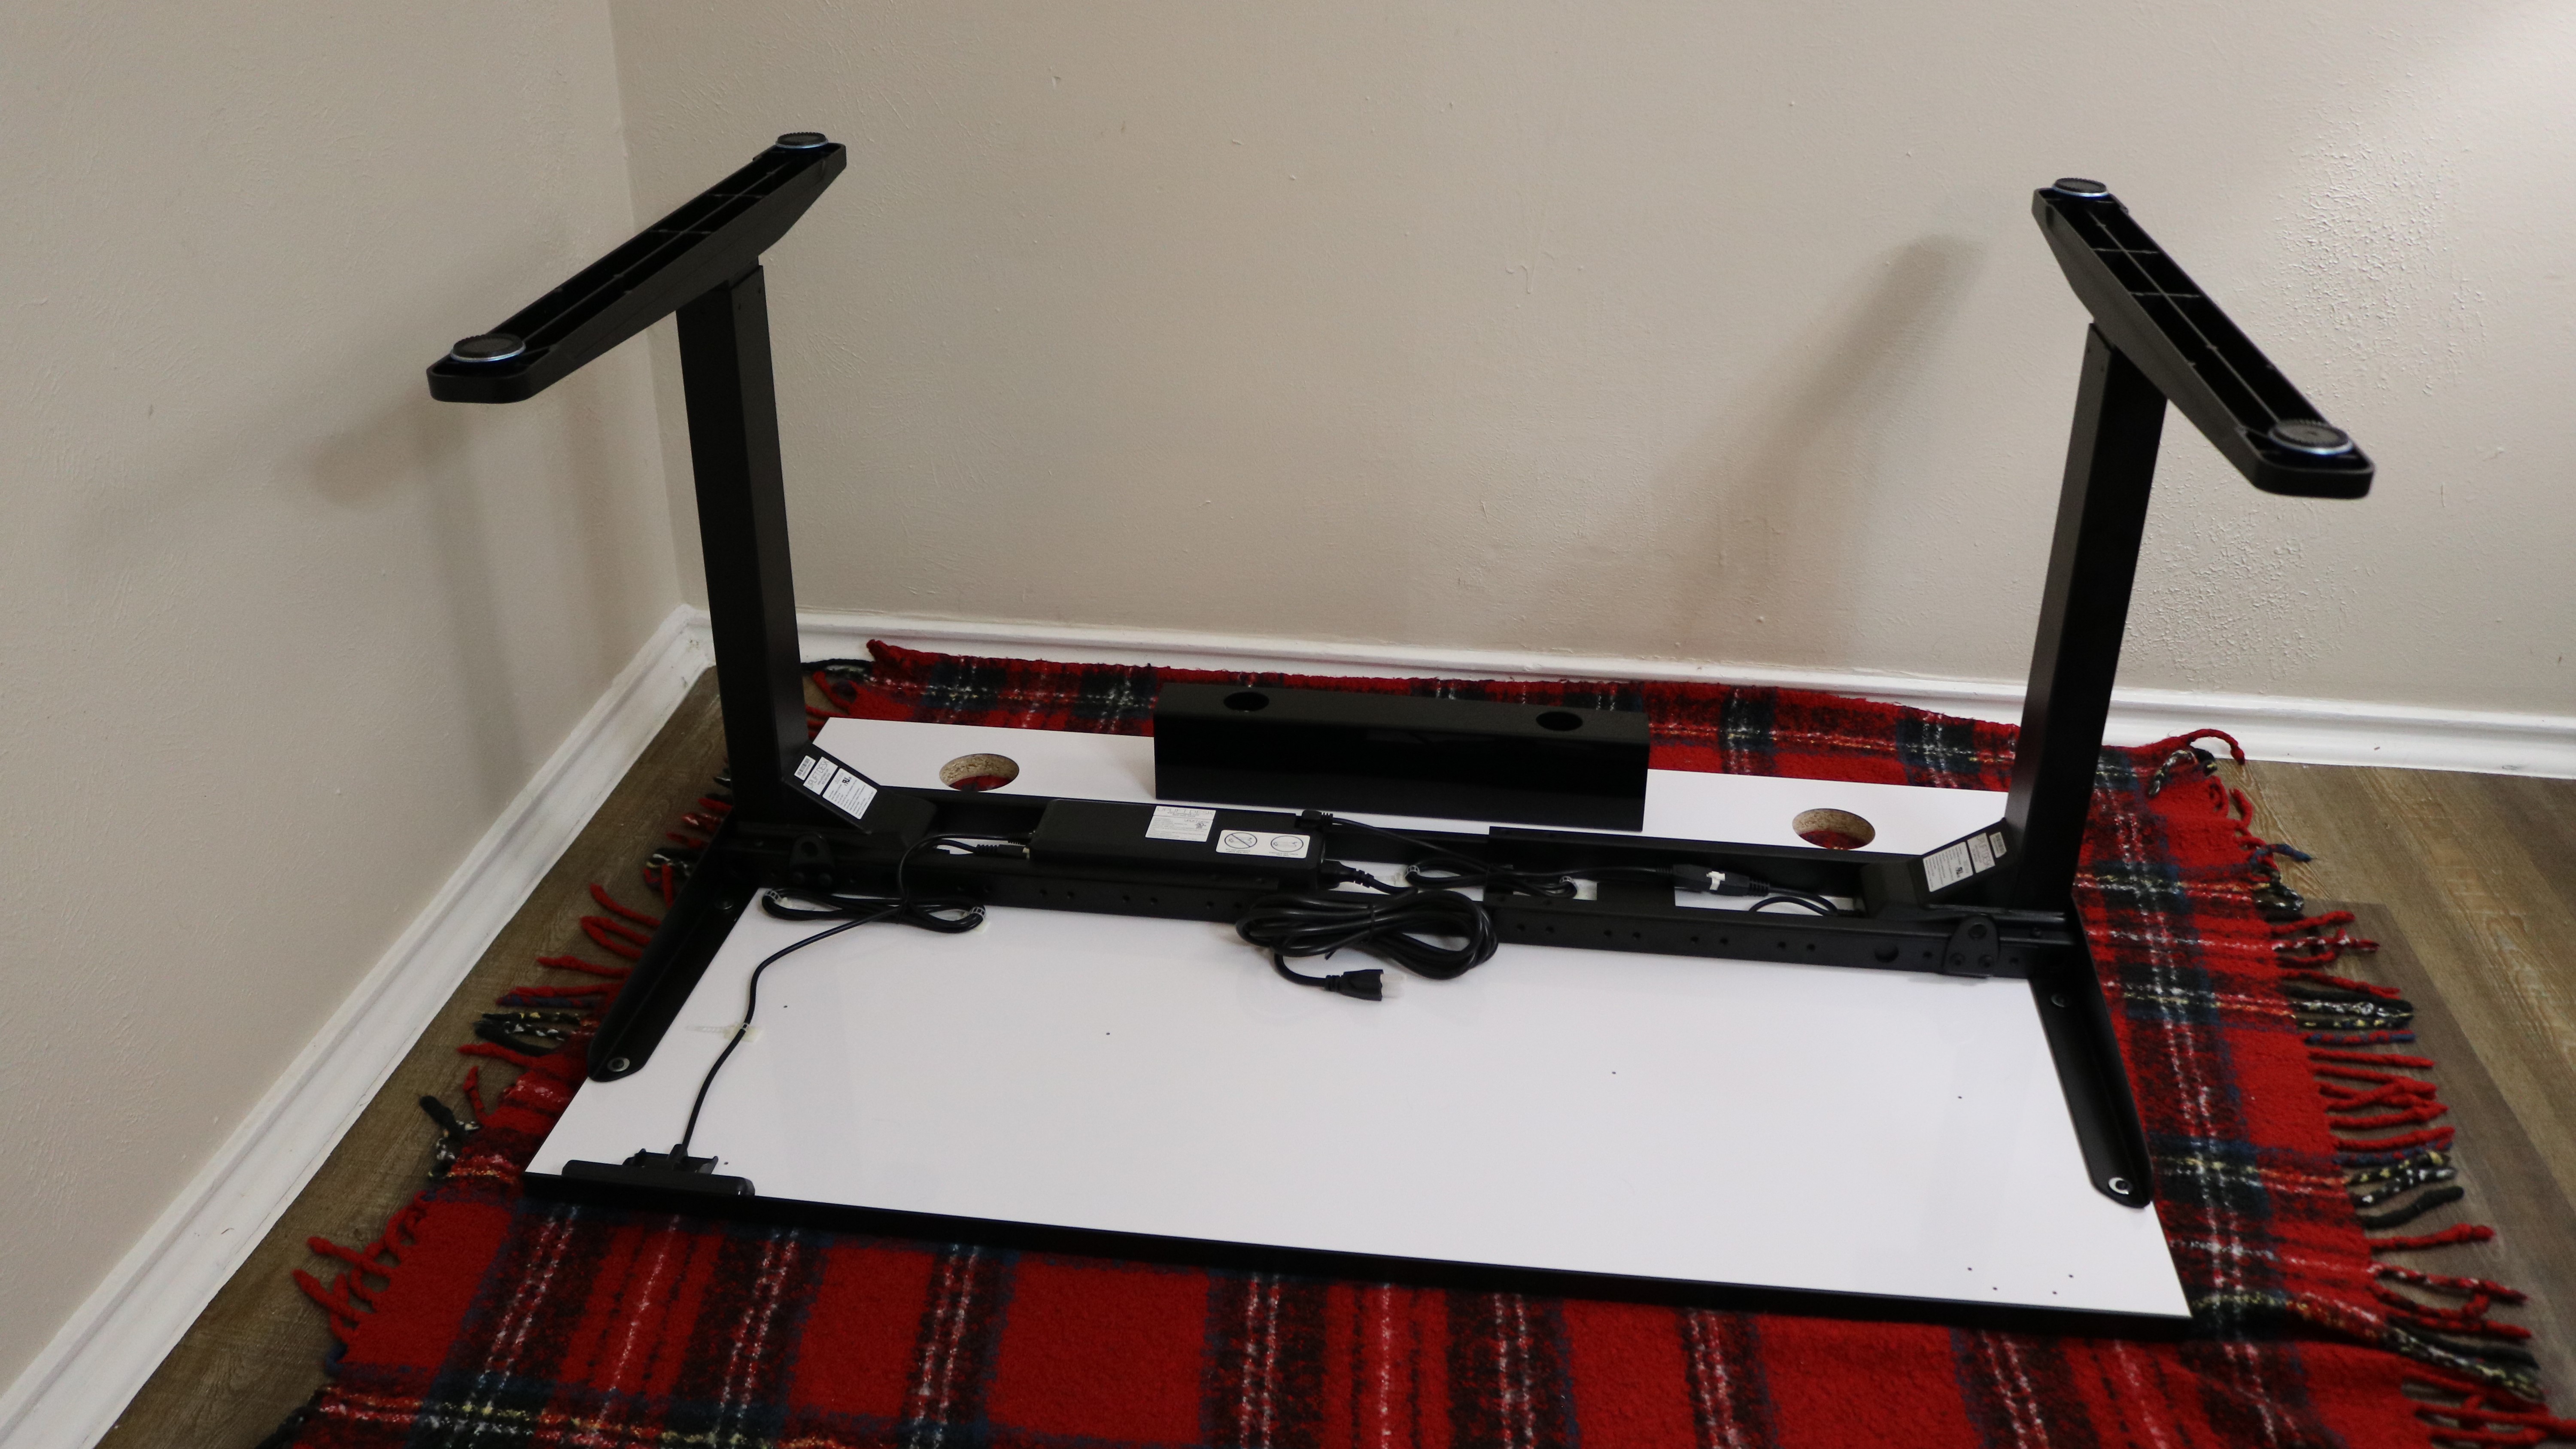
Finally, you need to attach the feet to the legs using four screws and an Allen key on either end of the desk.
With the desk complete, you will need another person to help you flip it over as the UPLIFT V2 is quite heavy. At this point, you need to plug in the desk’s AC cord into an outlet and initialize the desk. This can be done by pressing and holding down the “Down” button for 10 seconds before releasing the button. Repeat this process once more and the desk will lower a little, then rise a little before stopping. Release the “Down” button and your desk is ready to go.
Performance and in use
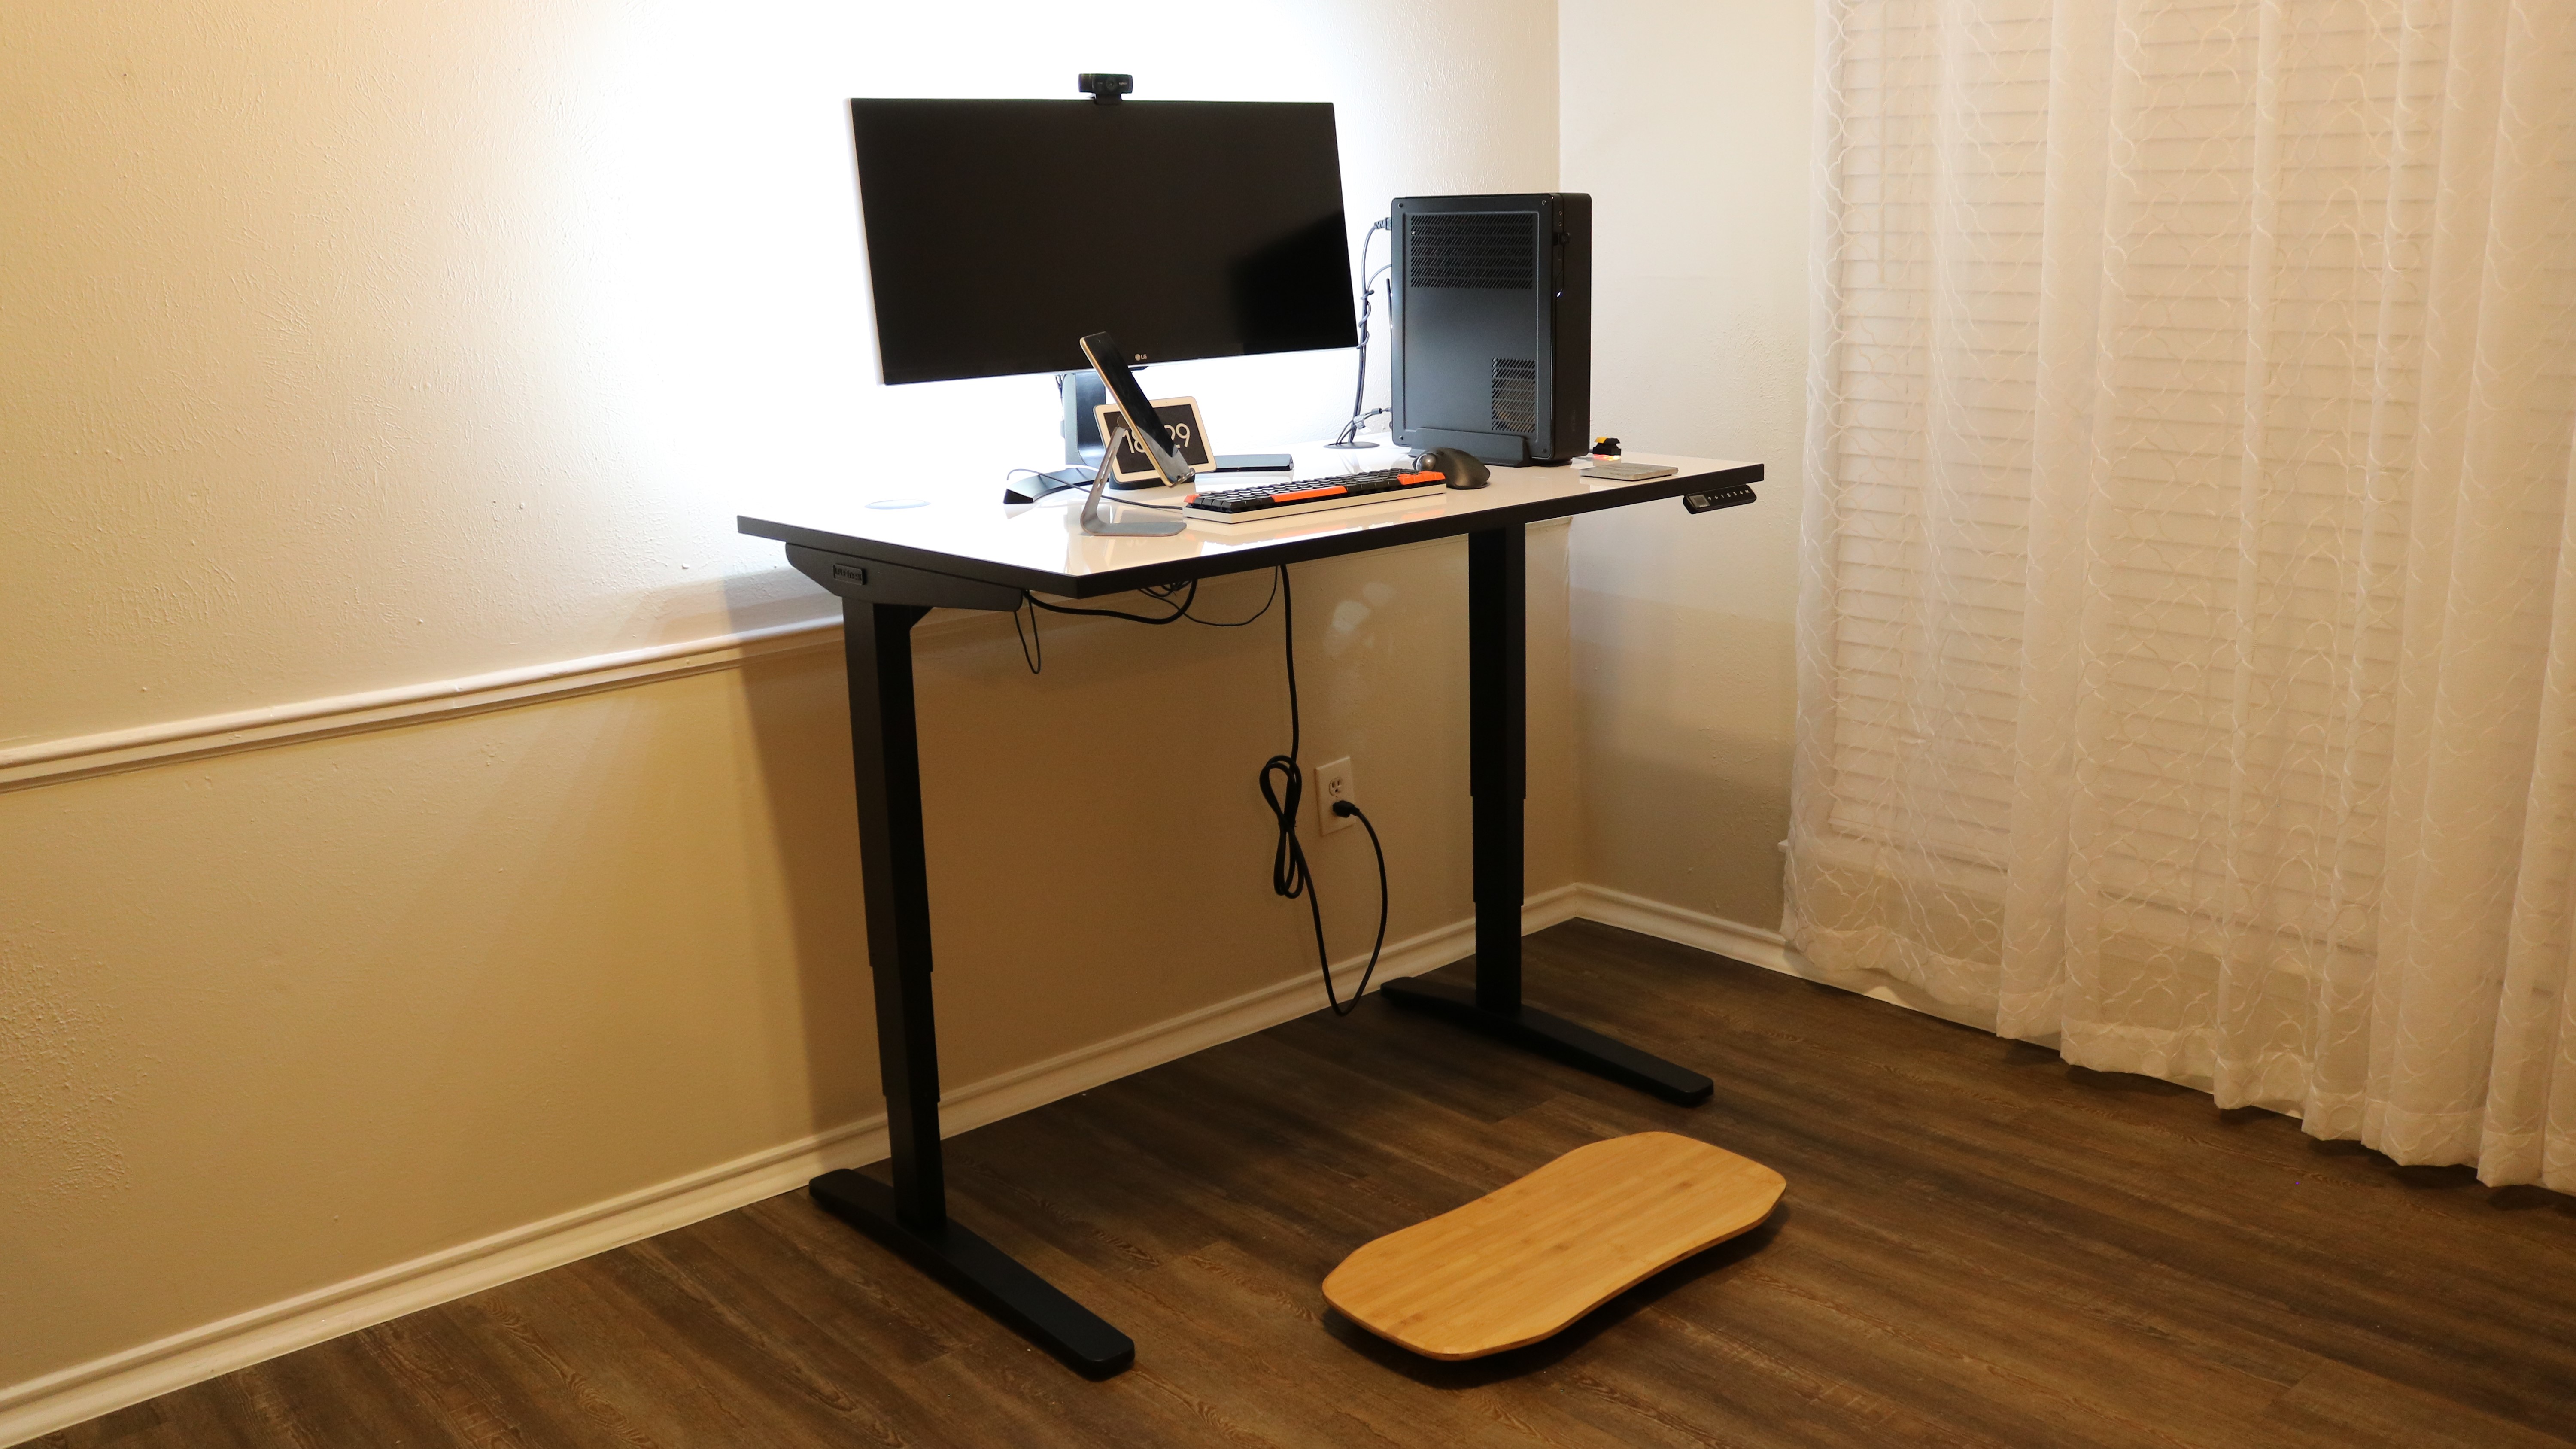
After assembling the UPLIFT V2, we raised and lowered it to our preferred sitting and standing heights and programmed them to the keypad by pressing the “M” button and then the number buttons we wanted them assigned to. The desk itself has a minimum height of 25.3” and a maximum height of 48.7” which means it can accommodate users between 4’11” and 6’5” tall. The desk can also support up to 161kg (355lb) which is more than enough weight capacity for a workstation, multiple monitors and all of the other accessories you might need.
In our case, we put an ultrawide monitor from LG, a small form factor PC, a Nest Display, an MX Ergo mouse from Logitech and a mechanical keyboard on the UPLIFT V2. Even with all of this equipment on the desk, it was still able to rise from our preferred seated height to standing height in just under seven seconds thanks to its powerful yet quiet dual motors. We were also able to place a full cup of coffee on the desk and raise and lower it without spilling a drop.
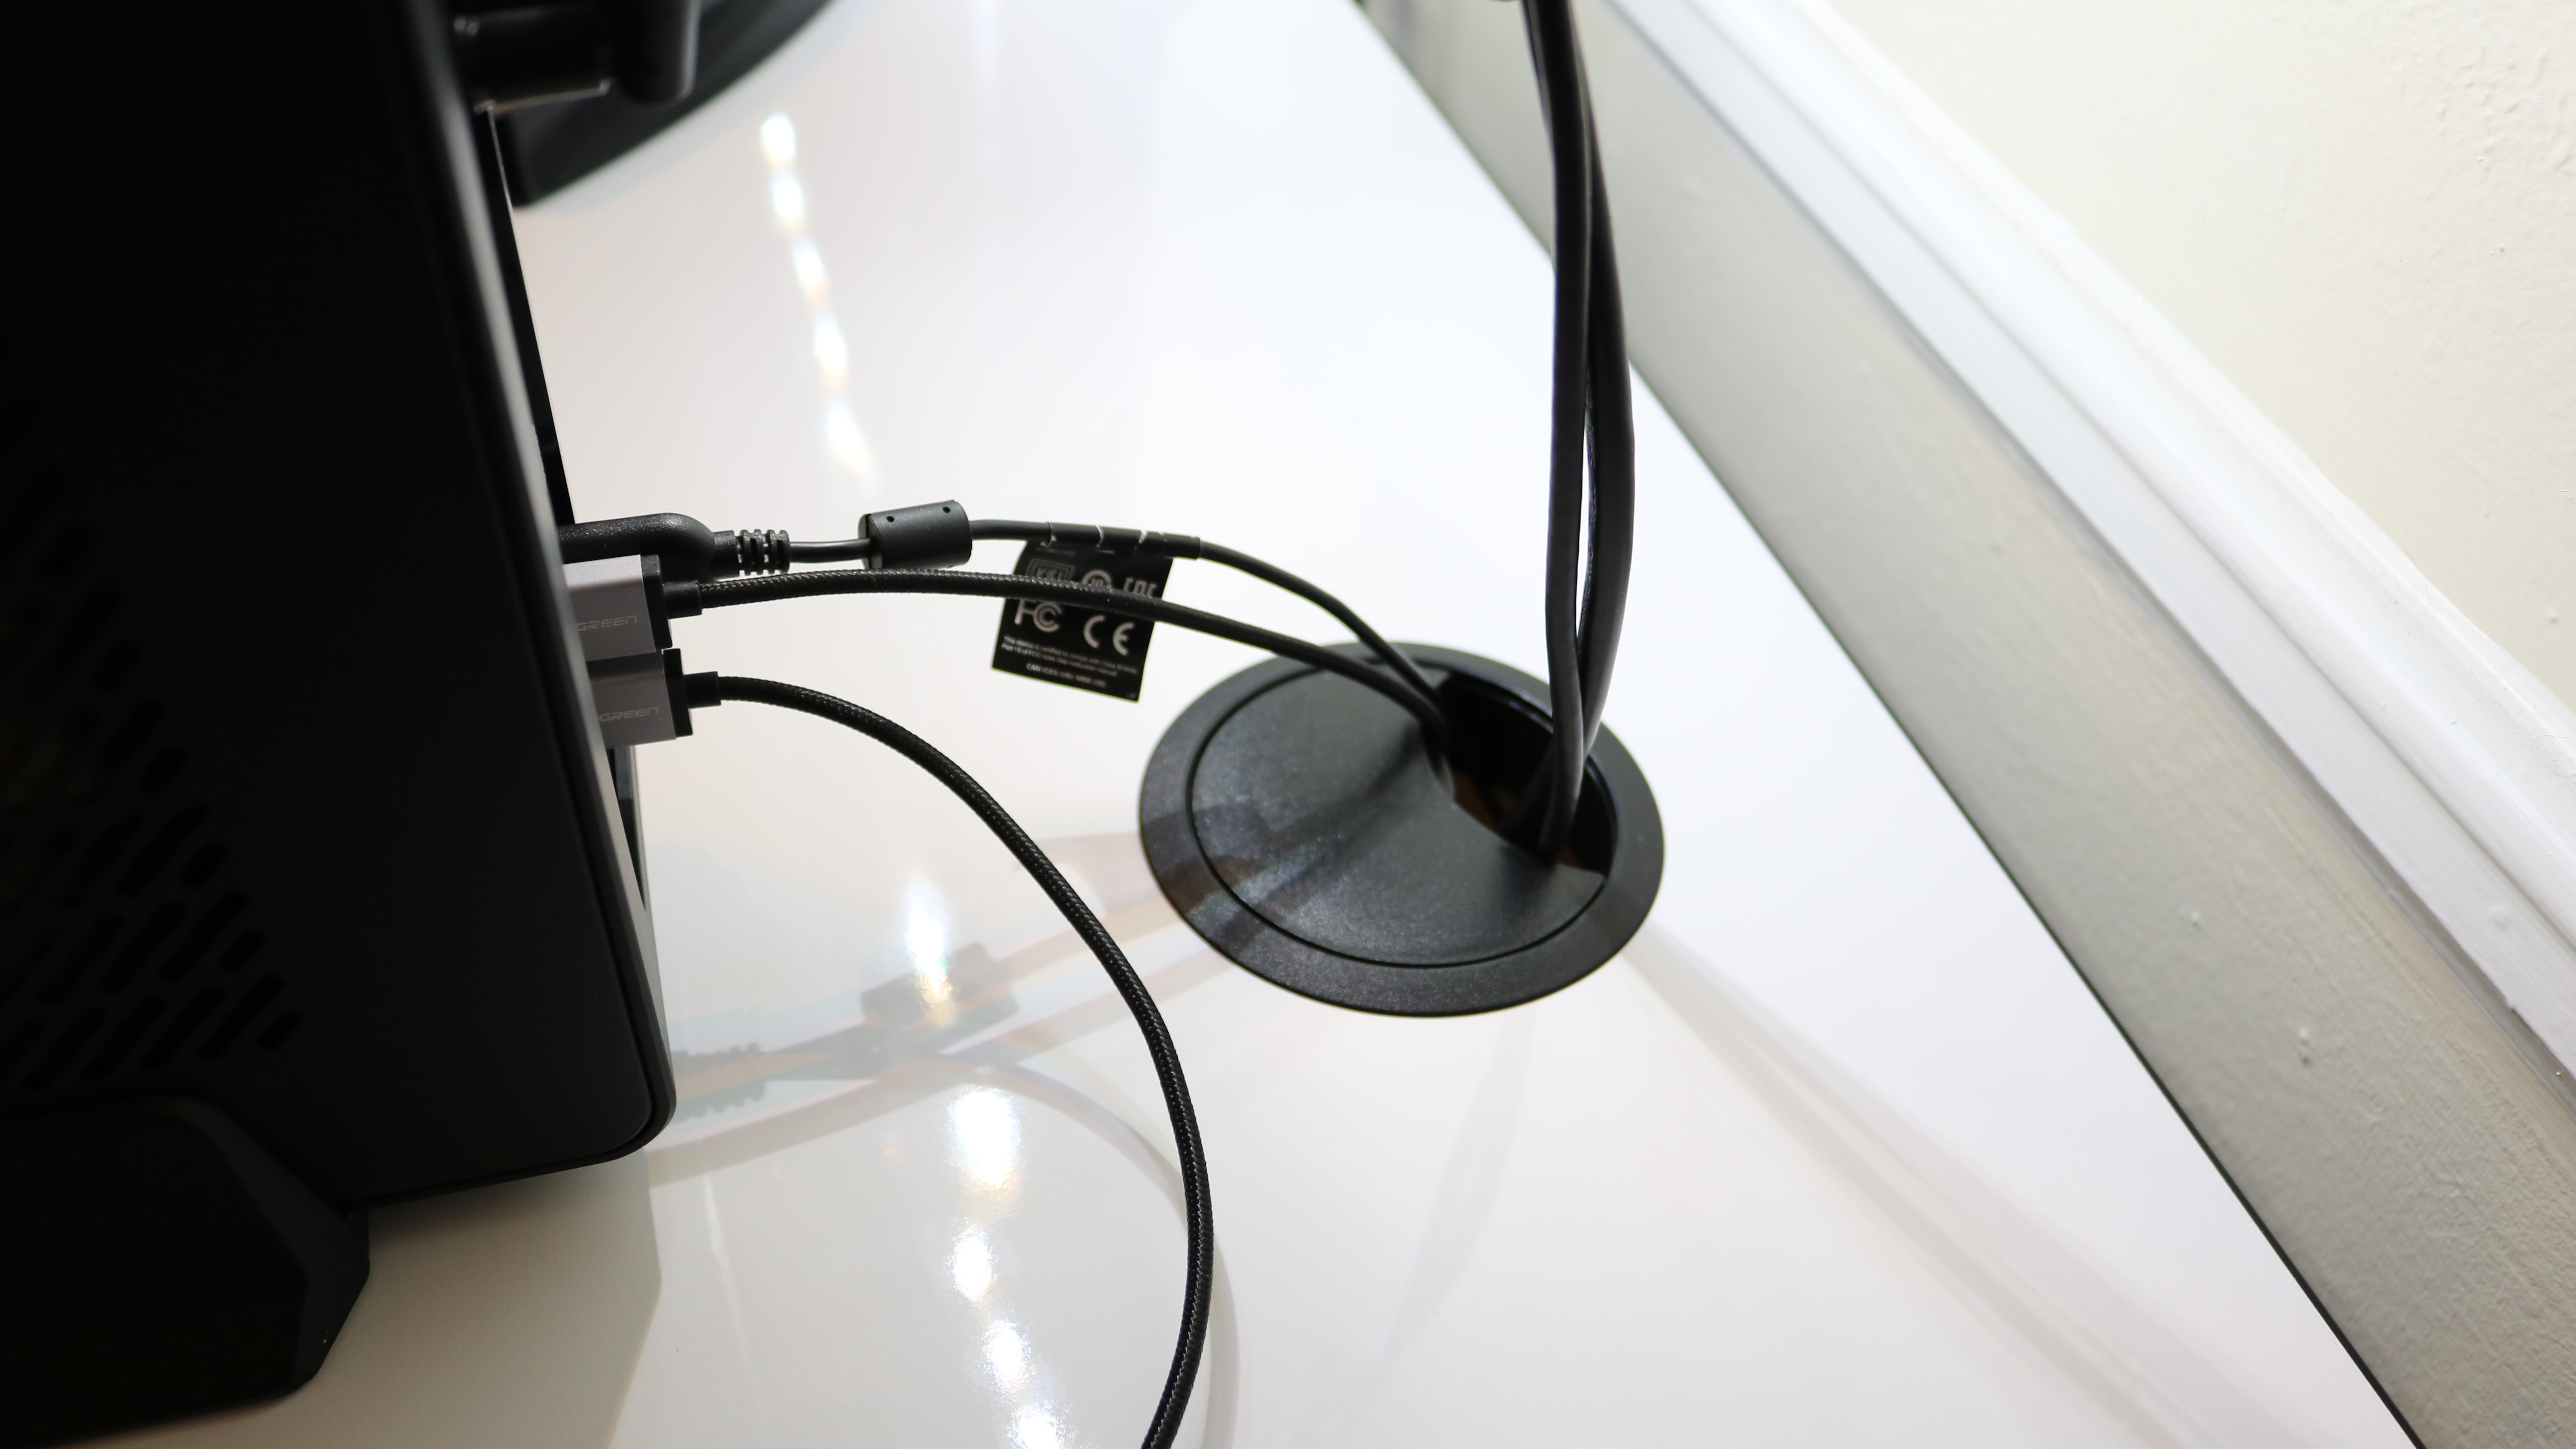
We found that the grommets on either side of the desk made it especially easy to cleanly run the cables from our PC under the desk and to our monitor and surge protector. However, keep in mind that you can also choose the storage grommet to hold USB flash drives and other work accessories.

Although it’s made of plastic, the included cable management tray was able to securely hold a surge protector along with the large power supply for our monitor. UPLIFT Desk also sells an 8-outlet mountable surge protector but unlike the cable management tray, it attaches to the accessory holes on the desk’s frame and you can’t use it to hold a power supply for your monitor or a mini PC.
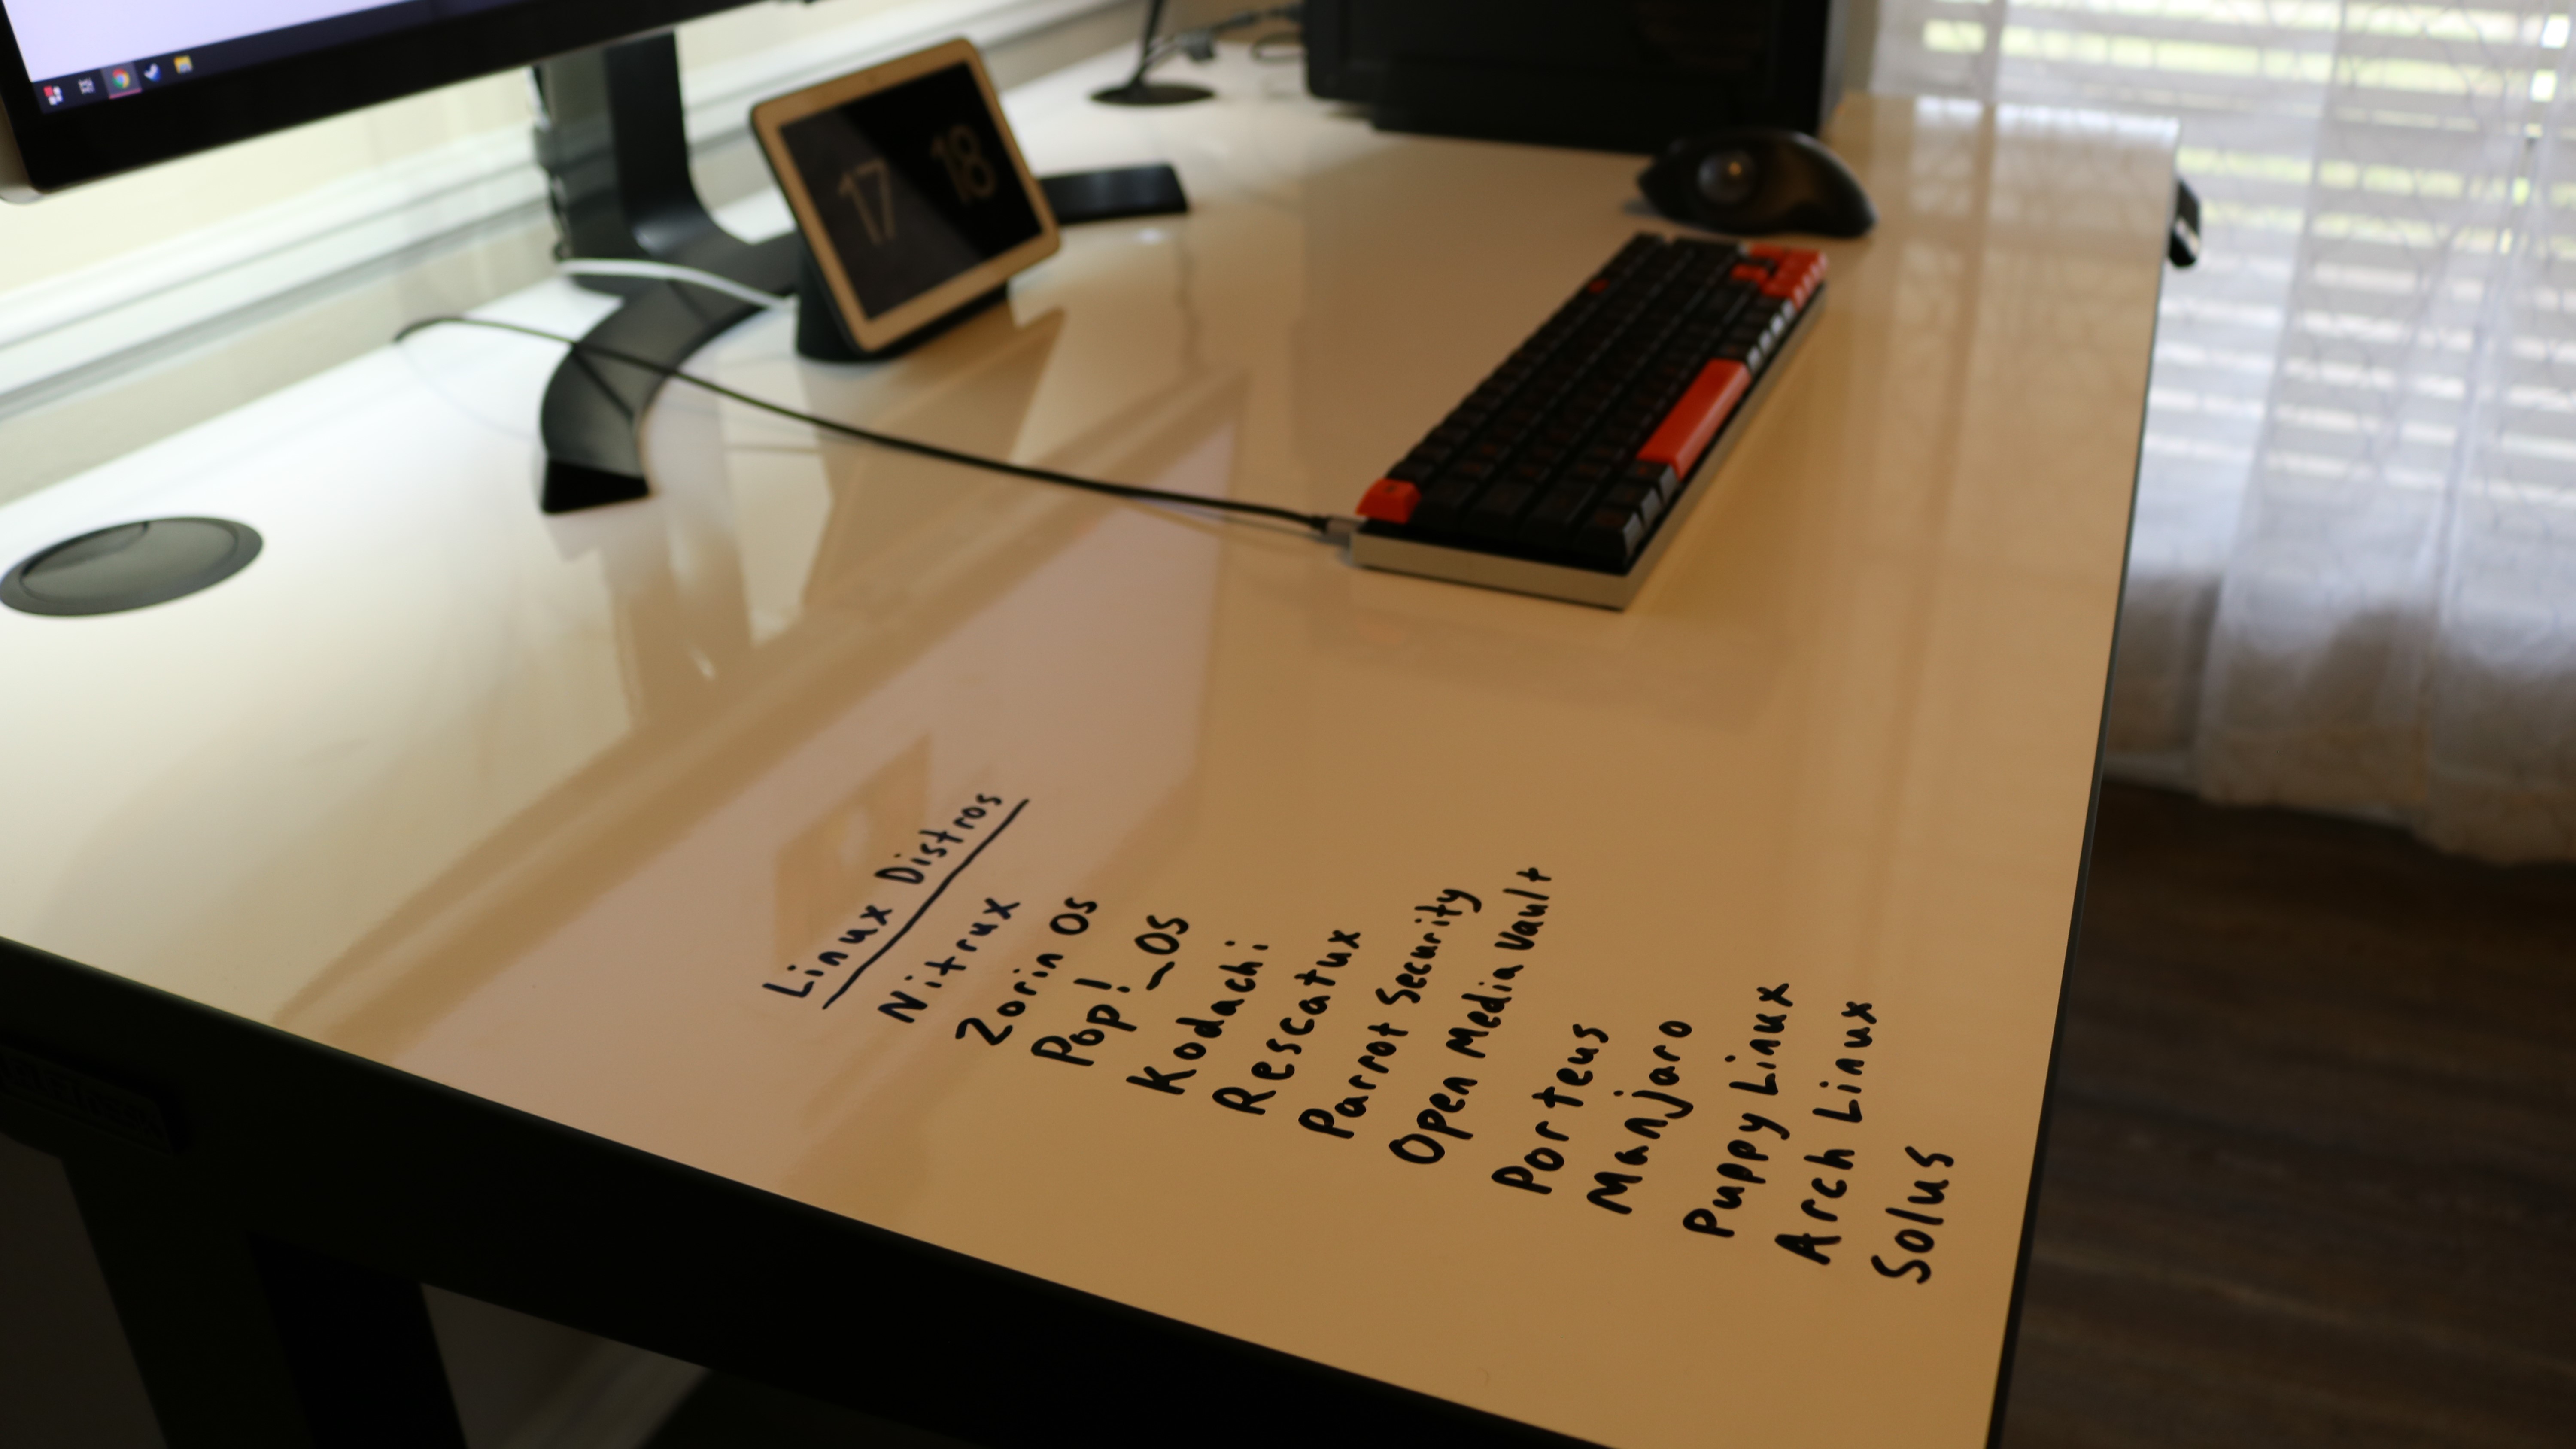
We picked out the desktop with the laminate whiteboard as we haven’t yet seen a standing desk with this option before. Writing on the whiteboard was great for taking notes and making lists but it was also easy to clean.
The UPLIFT V2 thoroughly impressed us during the time we spent testing and reviewing it. The desk’s motors were fast and responsive and programming the keypad with our preferred sitting and standing heights was also easy.
The competition
If you’re in the market for an electric standing desk at around the $600 price point, there are plenty of options. To keep things simple though, we’ve picked out one from Vari and one from FlexiSpot that we’ve reviewed in the past which have similar build quality and features.
The Vari Electric Standing Desk also comes in a variety of sizes with the smaller 48” x 30” model available for $695 and the 30” x 60” model (the same size as the base UPLIFT V2) available for $795. Vari offers five different desktop finishes but you will need to purchase a cable management tray separately. However, what the Vari Electric Standing Desk lacks in customization, it makes up for in ease of assembly. The company’s desks can be assembled in minutes even by someone who rarely puts together office furniture.
FlexiSpot offers a similar desk configuration experience to UPLIFT Desk and you can choose from a number of desktop sizes and colors but this also applies to the desk’s frame. While the Kana Pro Bamboo Standing Desk can’t be customized in the same way as the company’s E7, E5/E3 or E8 models, this desk has a very unique look that will likely turn heads either at your home or in your office. Another really interesting thing about the Kana Pro is the fact that its keypad includes a USB port which can be used to charge either a smartphone or a tablet.
Final verdict
If you’ve been thinking about investing in a standing desk, have used a standing desk converter or even set up your own makeshift standing desk in the past, the UPLIFT V2 is an excellent upgrade. The customization options available allow you to tailor your standing desk exactly to your liking and the 15-year warranty ensures you’ll be able to use it for years to come. In fact, with the 200 desktop choices available from UPLIFT Desk, there are over 200,000 possible configurations. The free accessories are another nice touch while the 48 hole accessory mounting system allows you to add even more to the desk if your needs change.
UPLIFT Desk also includes free shipping and if you aren’t happy with the desk configuration you’ve picked out, the company offers free returns with free shipping. The UPLIFT V2 is an excellent standing desk suitable for people of a wide variety of heights. However, we recommend that you pay close attention during the configuration process as the additional upgrades can add up fast.
We've also featured the best standing desk
0 comments:
Post a Comment