Filmora 11.0.9
Wondershare’s Filmora is positioning itself as an “alternative to Windows Movie Maker & iMovie”.
We’ve reviewed the tool before, and were quite impressed by this video editing software. So, let’s see how it stacks up now.

Getting started
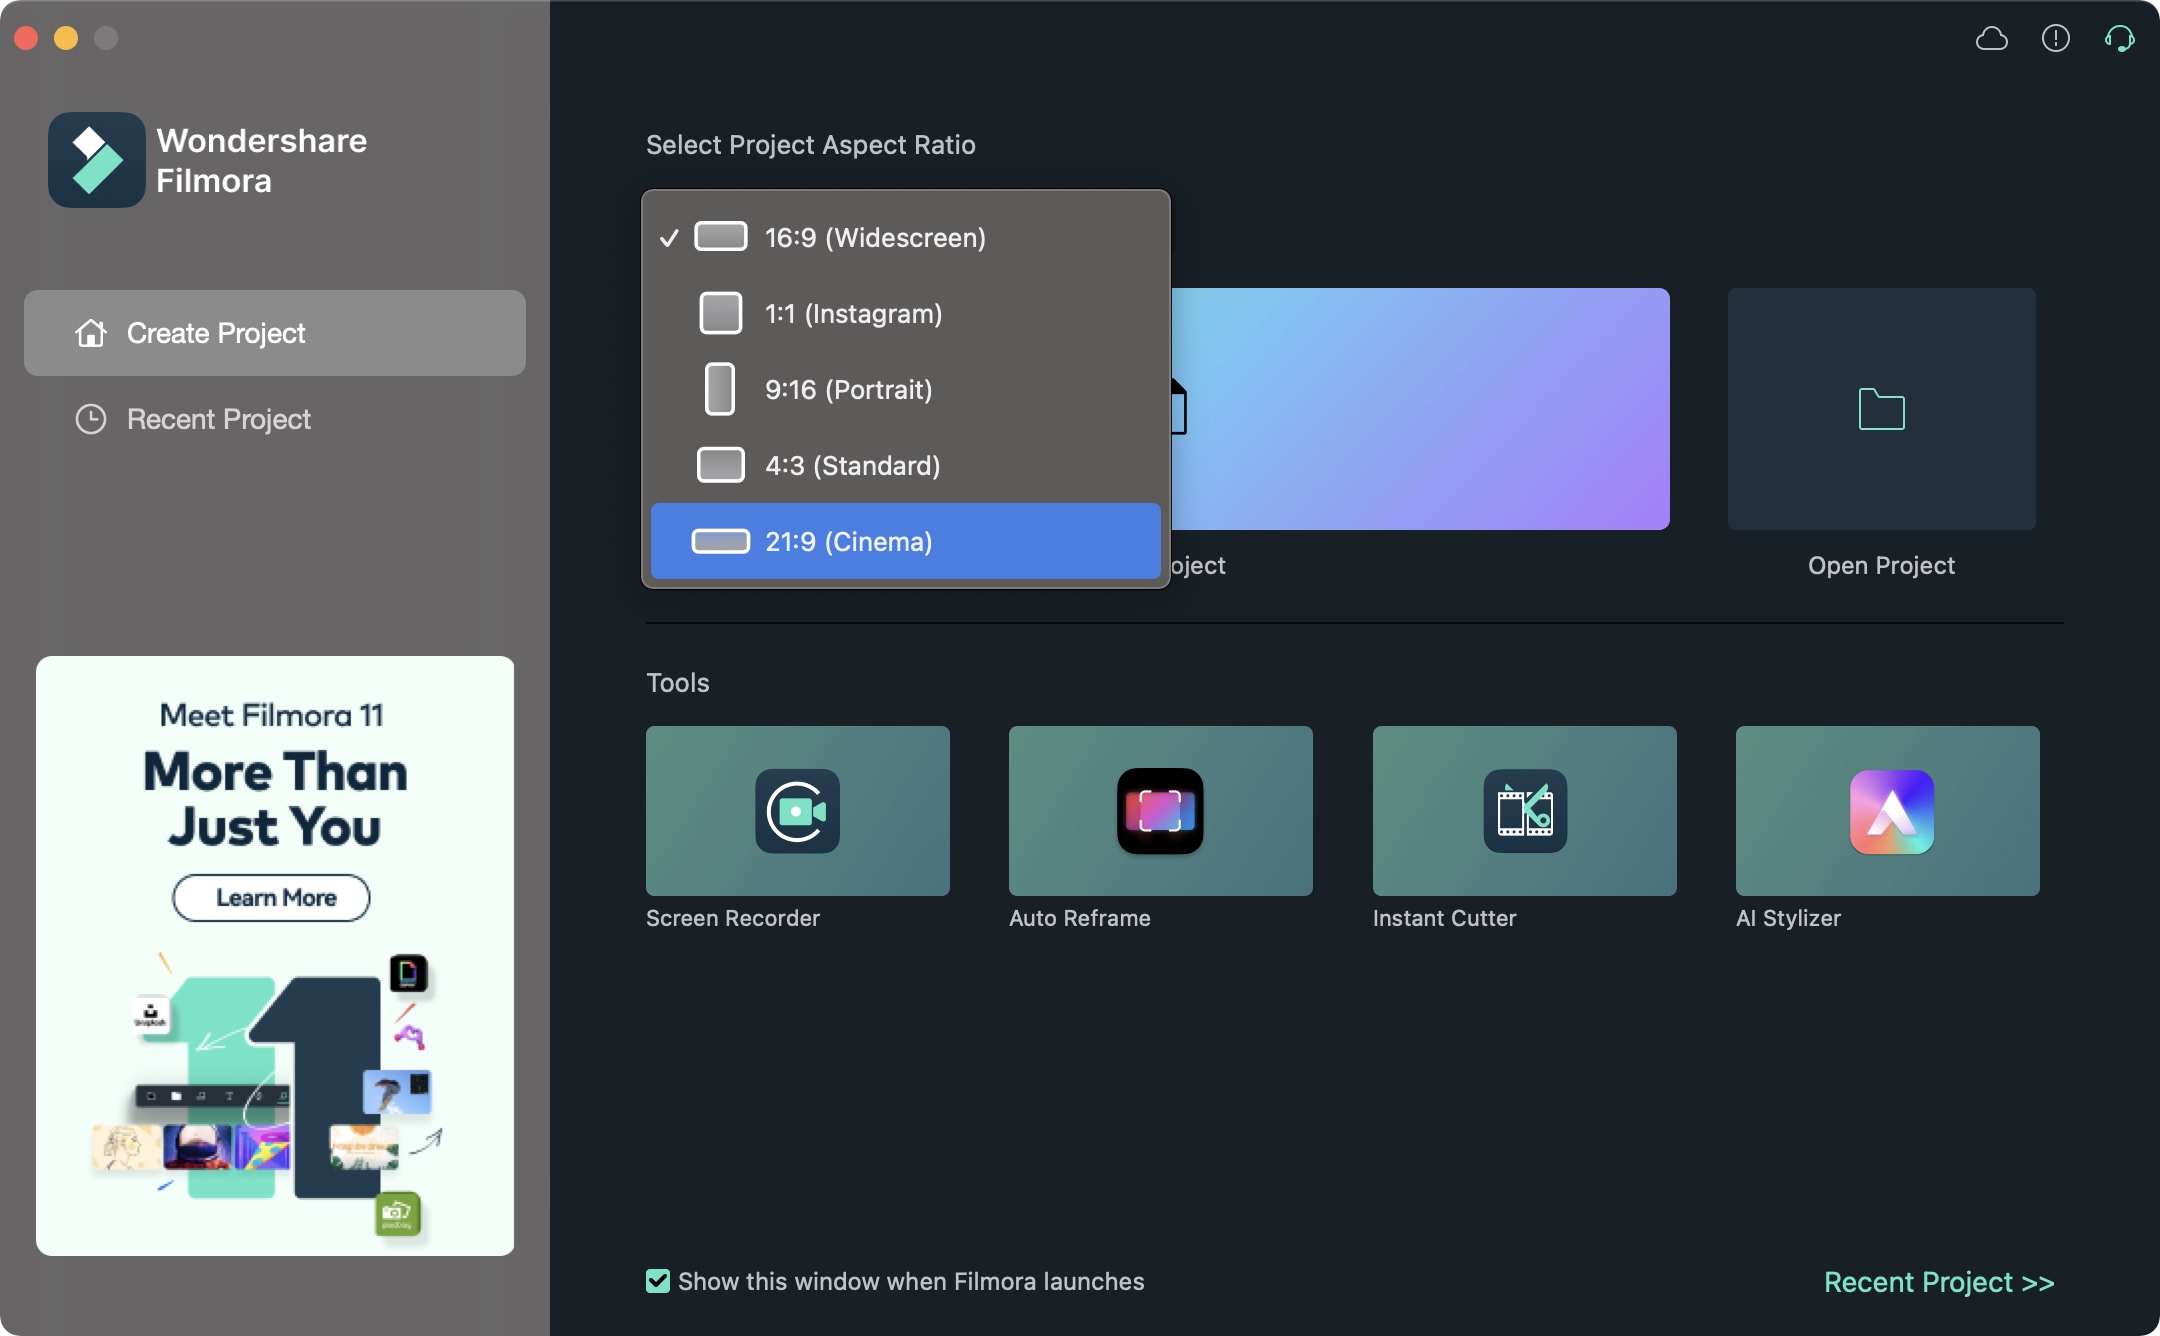
Launch Filmora and you’re graced with a ‘Welcome’ screen. You could click on the biggest button to start a new project straight away, but it’s worth taking a few seconds to see what else that page offers.
For instance, you’ve got an aspect ratio menu. By default it’s set to 16:9, likely the one most would choose anyway.
However, you can select other popular formats, including 1:1 (for places such as Instagram), 9:16 (a favorite among TikTokers), and also 4:3 (the standard format for photos) and 21:9 (for a more cinematic feel).
But what we found more interesting are the Tools. These allow you to perform actions without actually starting a fresh new project.
Screen Recorder is pretty self explanatory: you can record everything that you see on your computer’s display. Auto Reframe automatically changes a clip’s format for you, based on your chosen preference (see the list of aspect ratios above). Instant Cutter trims the starts and ends of a selected clip, and AI Styliser allows you to add a filter to a clip instantly.
You’re offered a list of 20 (some need to be downloaded before you can use them); click on one and it’s applied.
These are great options if you don’t require any editing but would like to tweak your shot and have a little fun with it at the same time.
But this is barely scratching the surface. In order to enjoy the full power of Filmora, you need to create a project and do some ‘proper’ editing.
A helping hand
Filmora is obviously designed with novices in mind.
As you import new clips, drag them onto the timeline, or perform any action for the first time, a handy little animation window pops up suggesting what you can do next.
This type of handholding is a very light touch. It doesn’t reappear if you perform the same action again, and it’ll be most welcome if you’re new to video editing.

Editing overview
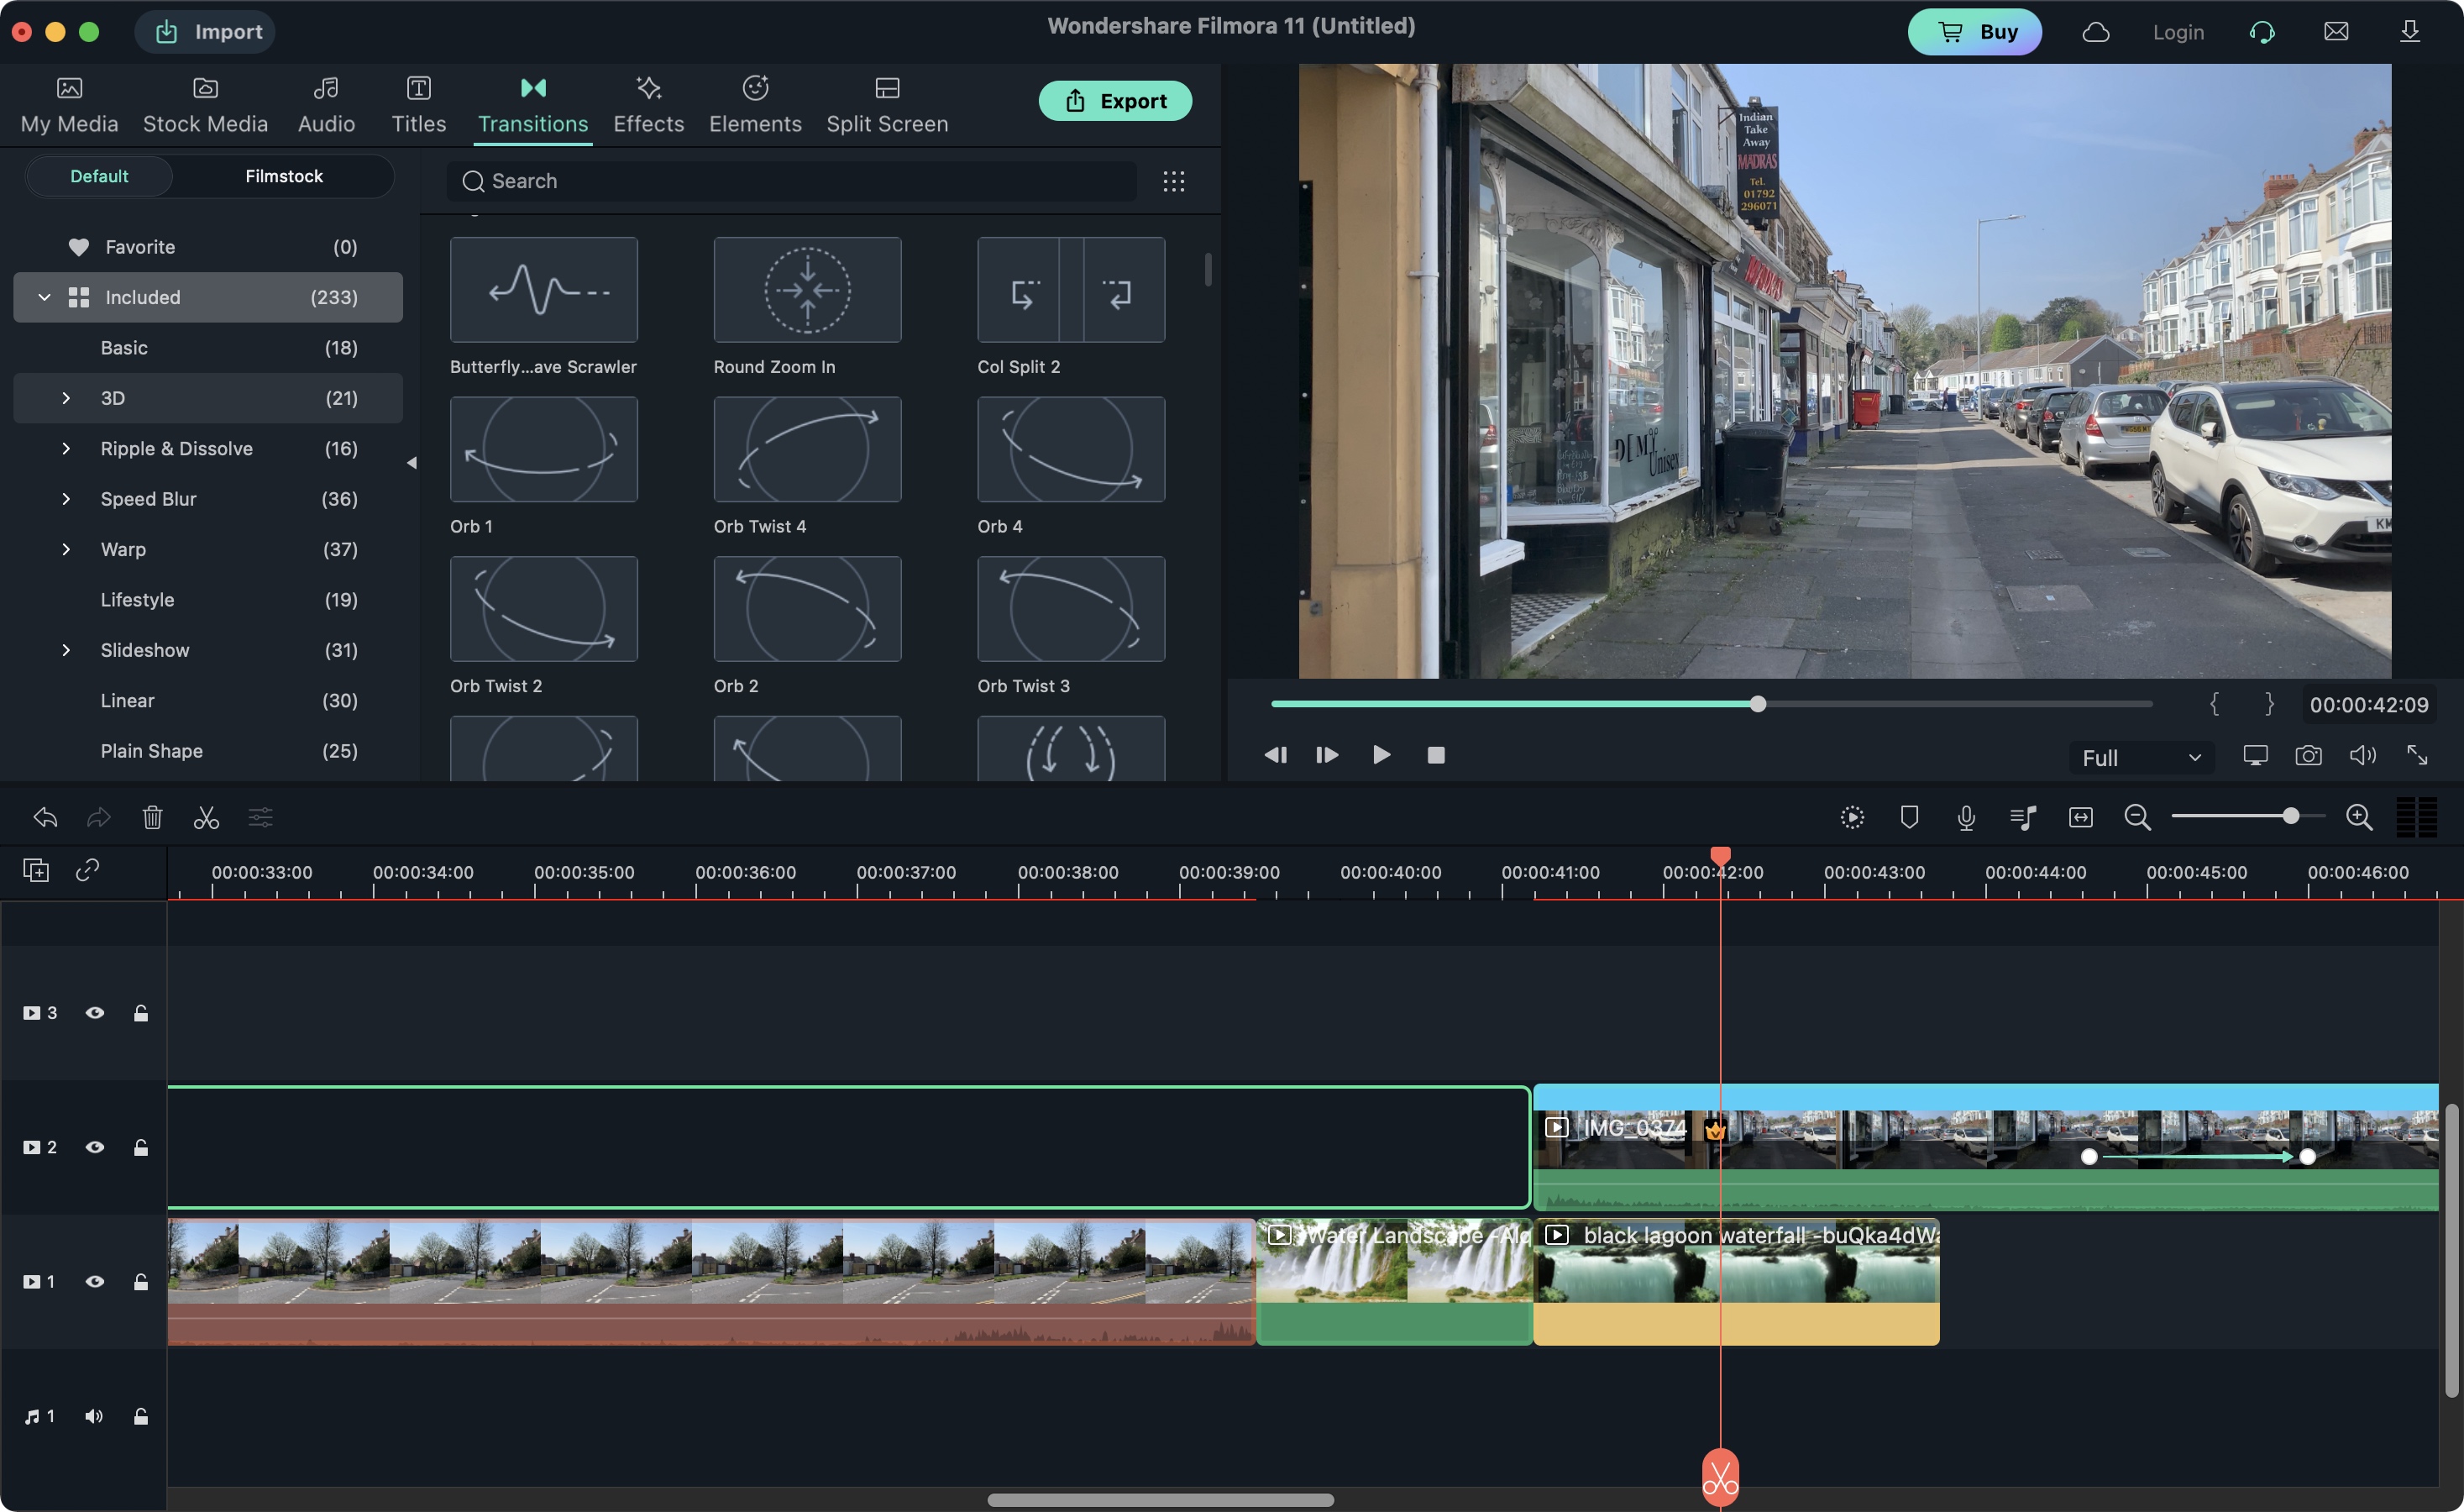
The editing process is very straightforward: adding a clip to your project is done either by clicking its ‘+’ icon (which will insert it wherever the playhead is situated in your timeline), or by dragging its thumbnail and dropping it in its desired location - which could also be on another video layer.
There doesn’t seem to be a way to set in and out points prior to doing this, but trimming the clip once placed is a pretty trivial affair. The only downside to the editing we could find is that it’s hard to discern when clips begin and end.
We do appreciate that it’s possible to recolour clips to make this easier, but it’s a little time-consuming to manually do this and, really, it shouldn’t be this difficult to find your way around your own edit.
In addition to your own media, you also have access to the libraries of Giphy, Pixabay and Unsplash straight from Filmora’s interface.

This can really save you some time if you like making use of royalty-free stock photo and stock video collections. There’s also a bunch of bundled music samples and sound effects which you’ll find in the Audio section.
Titles, Transitions, Effects, and Elements is where you’ll find all the add-ons you’ll need to fine tune and polish your edit.
We were quite impressed with the number of included transitions, and their quality. No more boring crossfades for you, when you have a choice of over two hundred, including Color Distance, Warp, Roll, and Twirl.
Unfortunately, you can’t manipulate a transition’s parameters. When it comes to effects, the most you can control is their intensity via an opacity filter. It’s not too much of a problem inmost instances, but it would’ve been nice to have more options.
Thankfully, you get tons with Titles. And you can control and customize many aspects of the one you choose you include in your work.
Advanced features
Despite its focus on novices, Filmora comes with a good number of advanced features.
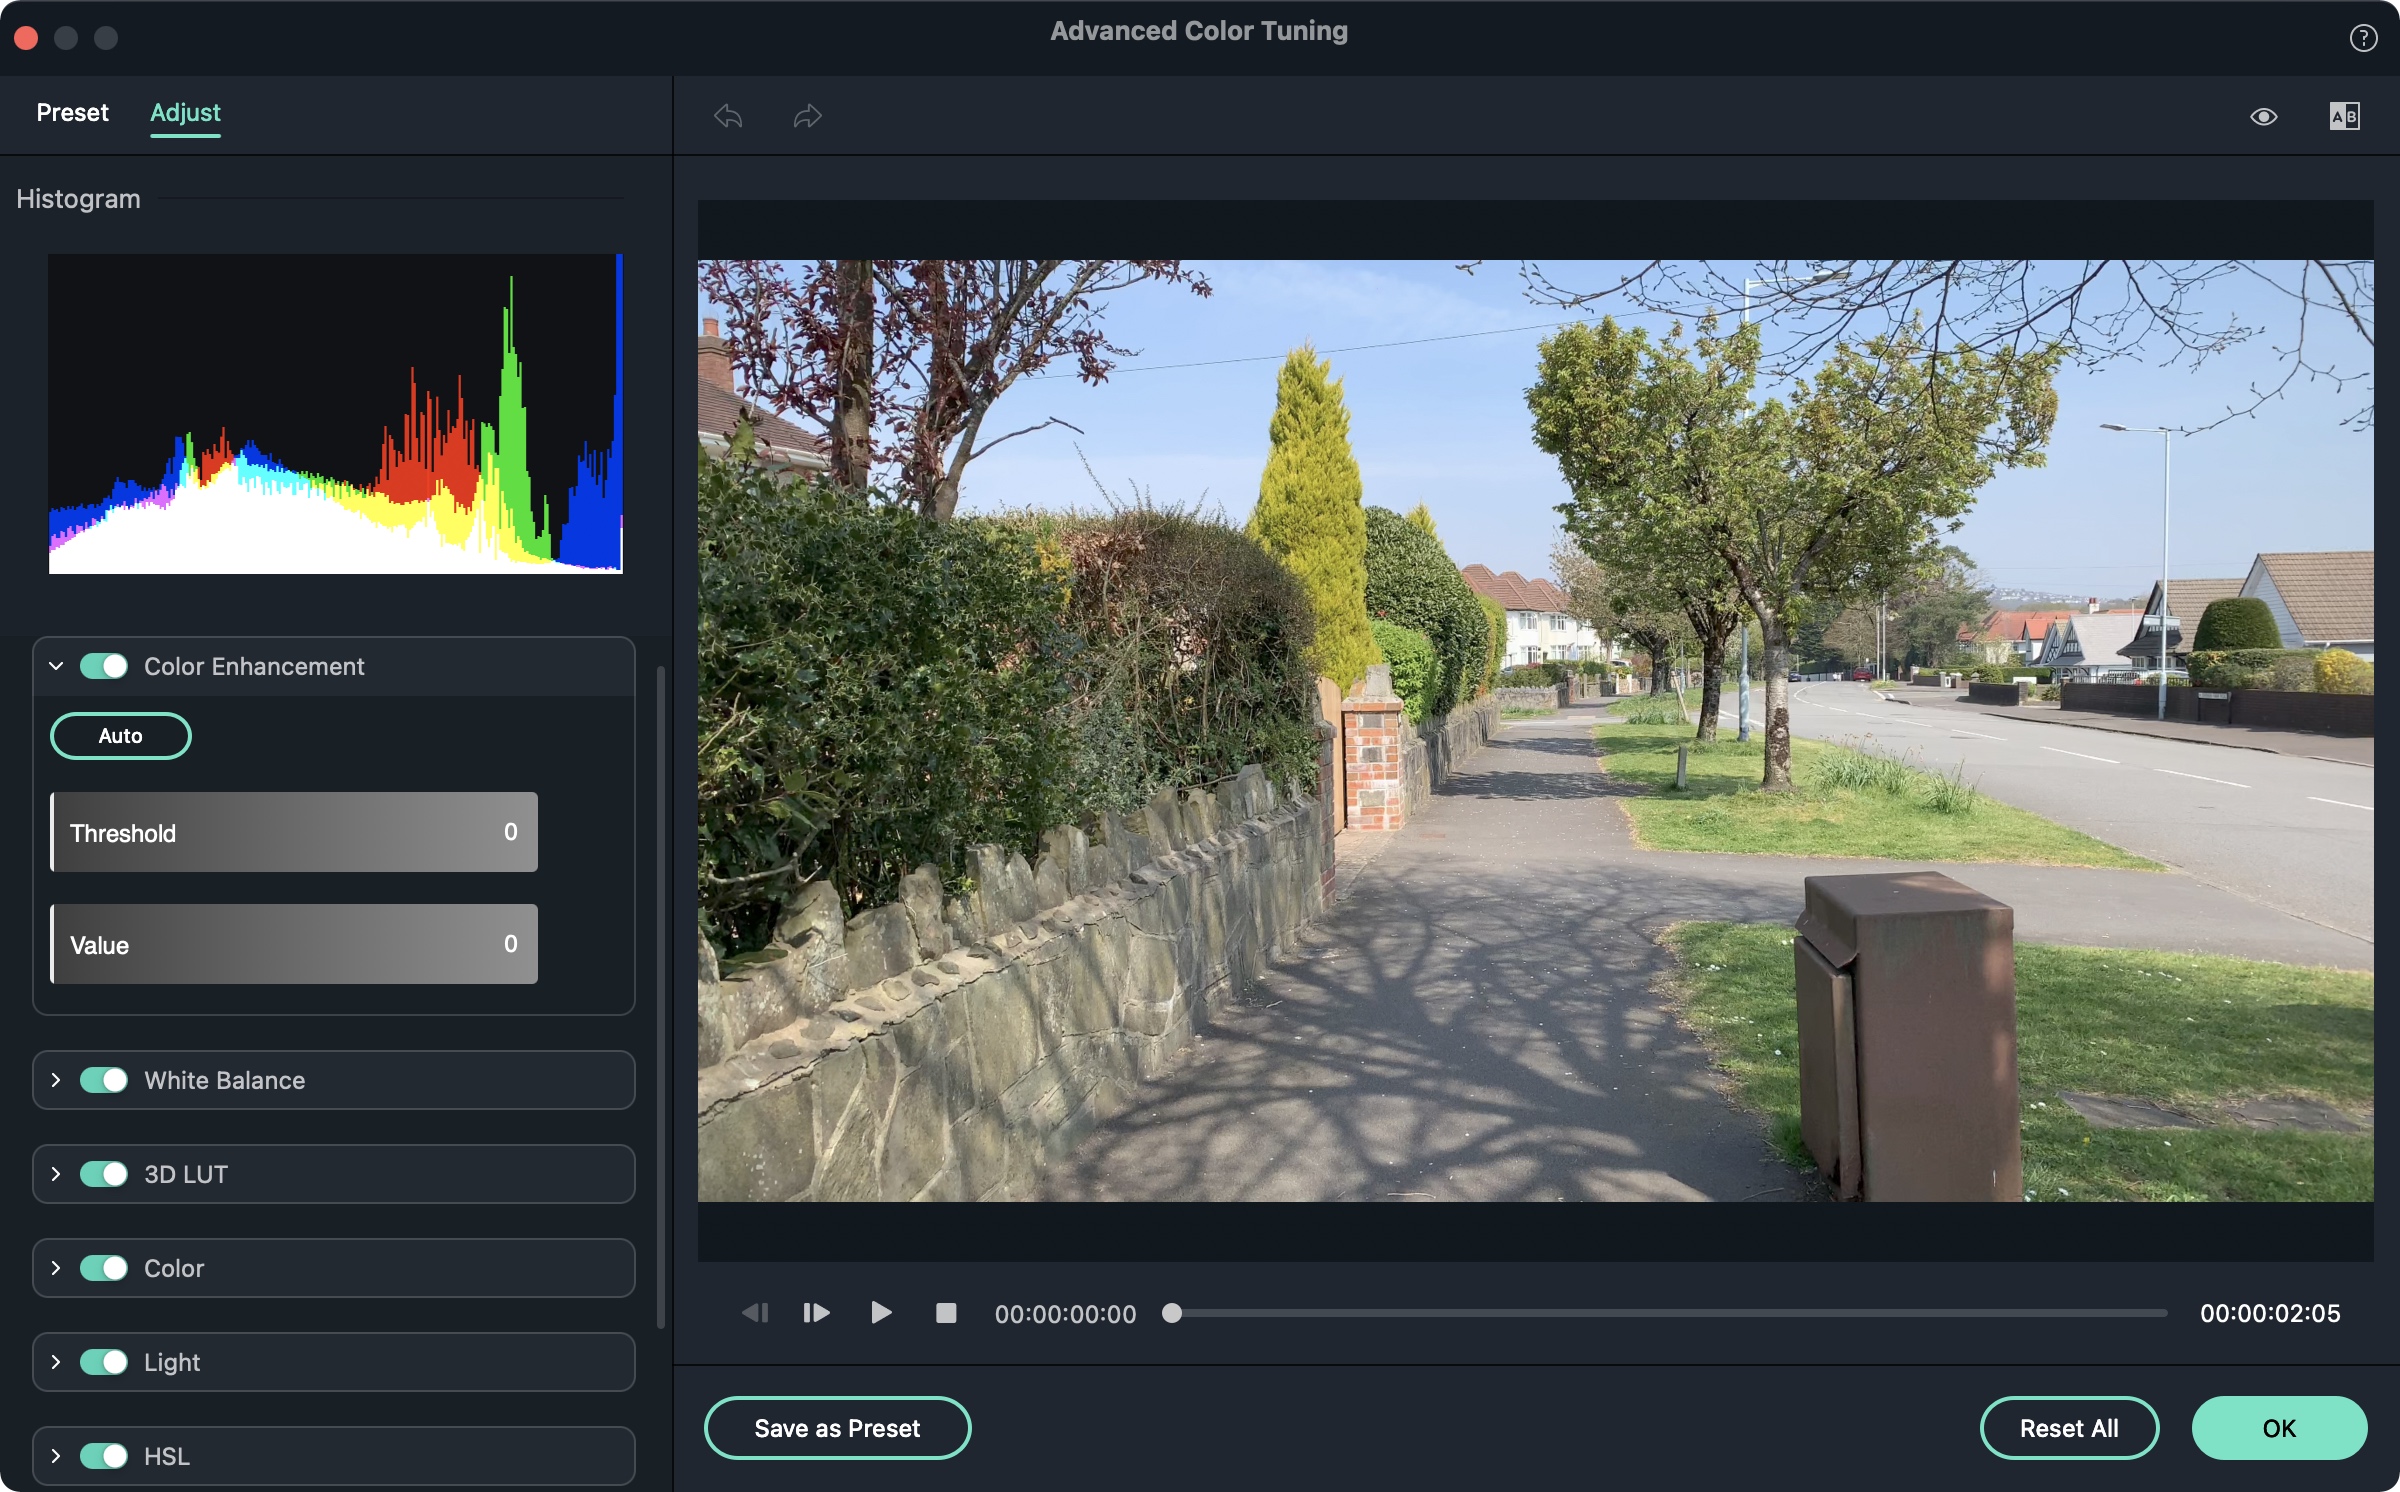
Actually, maybe chroma keying (green screen) isn’t considered an advanced feature anymore. Nor is color correction for that matter,. But they're both present and correct. Other top tools include video stabilization and split screens. And these are well worth experimenting with to see what you can produce.
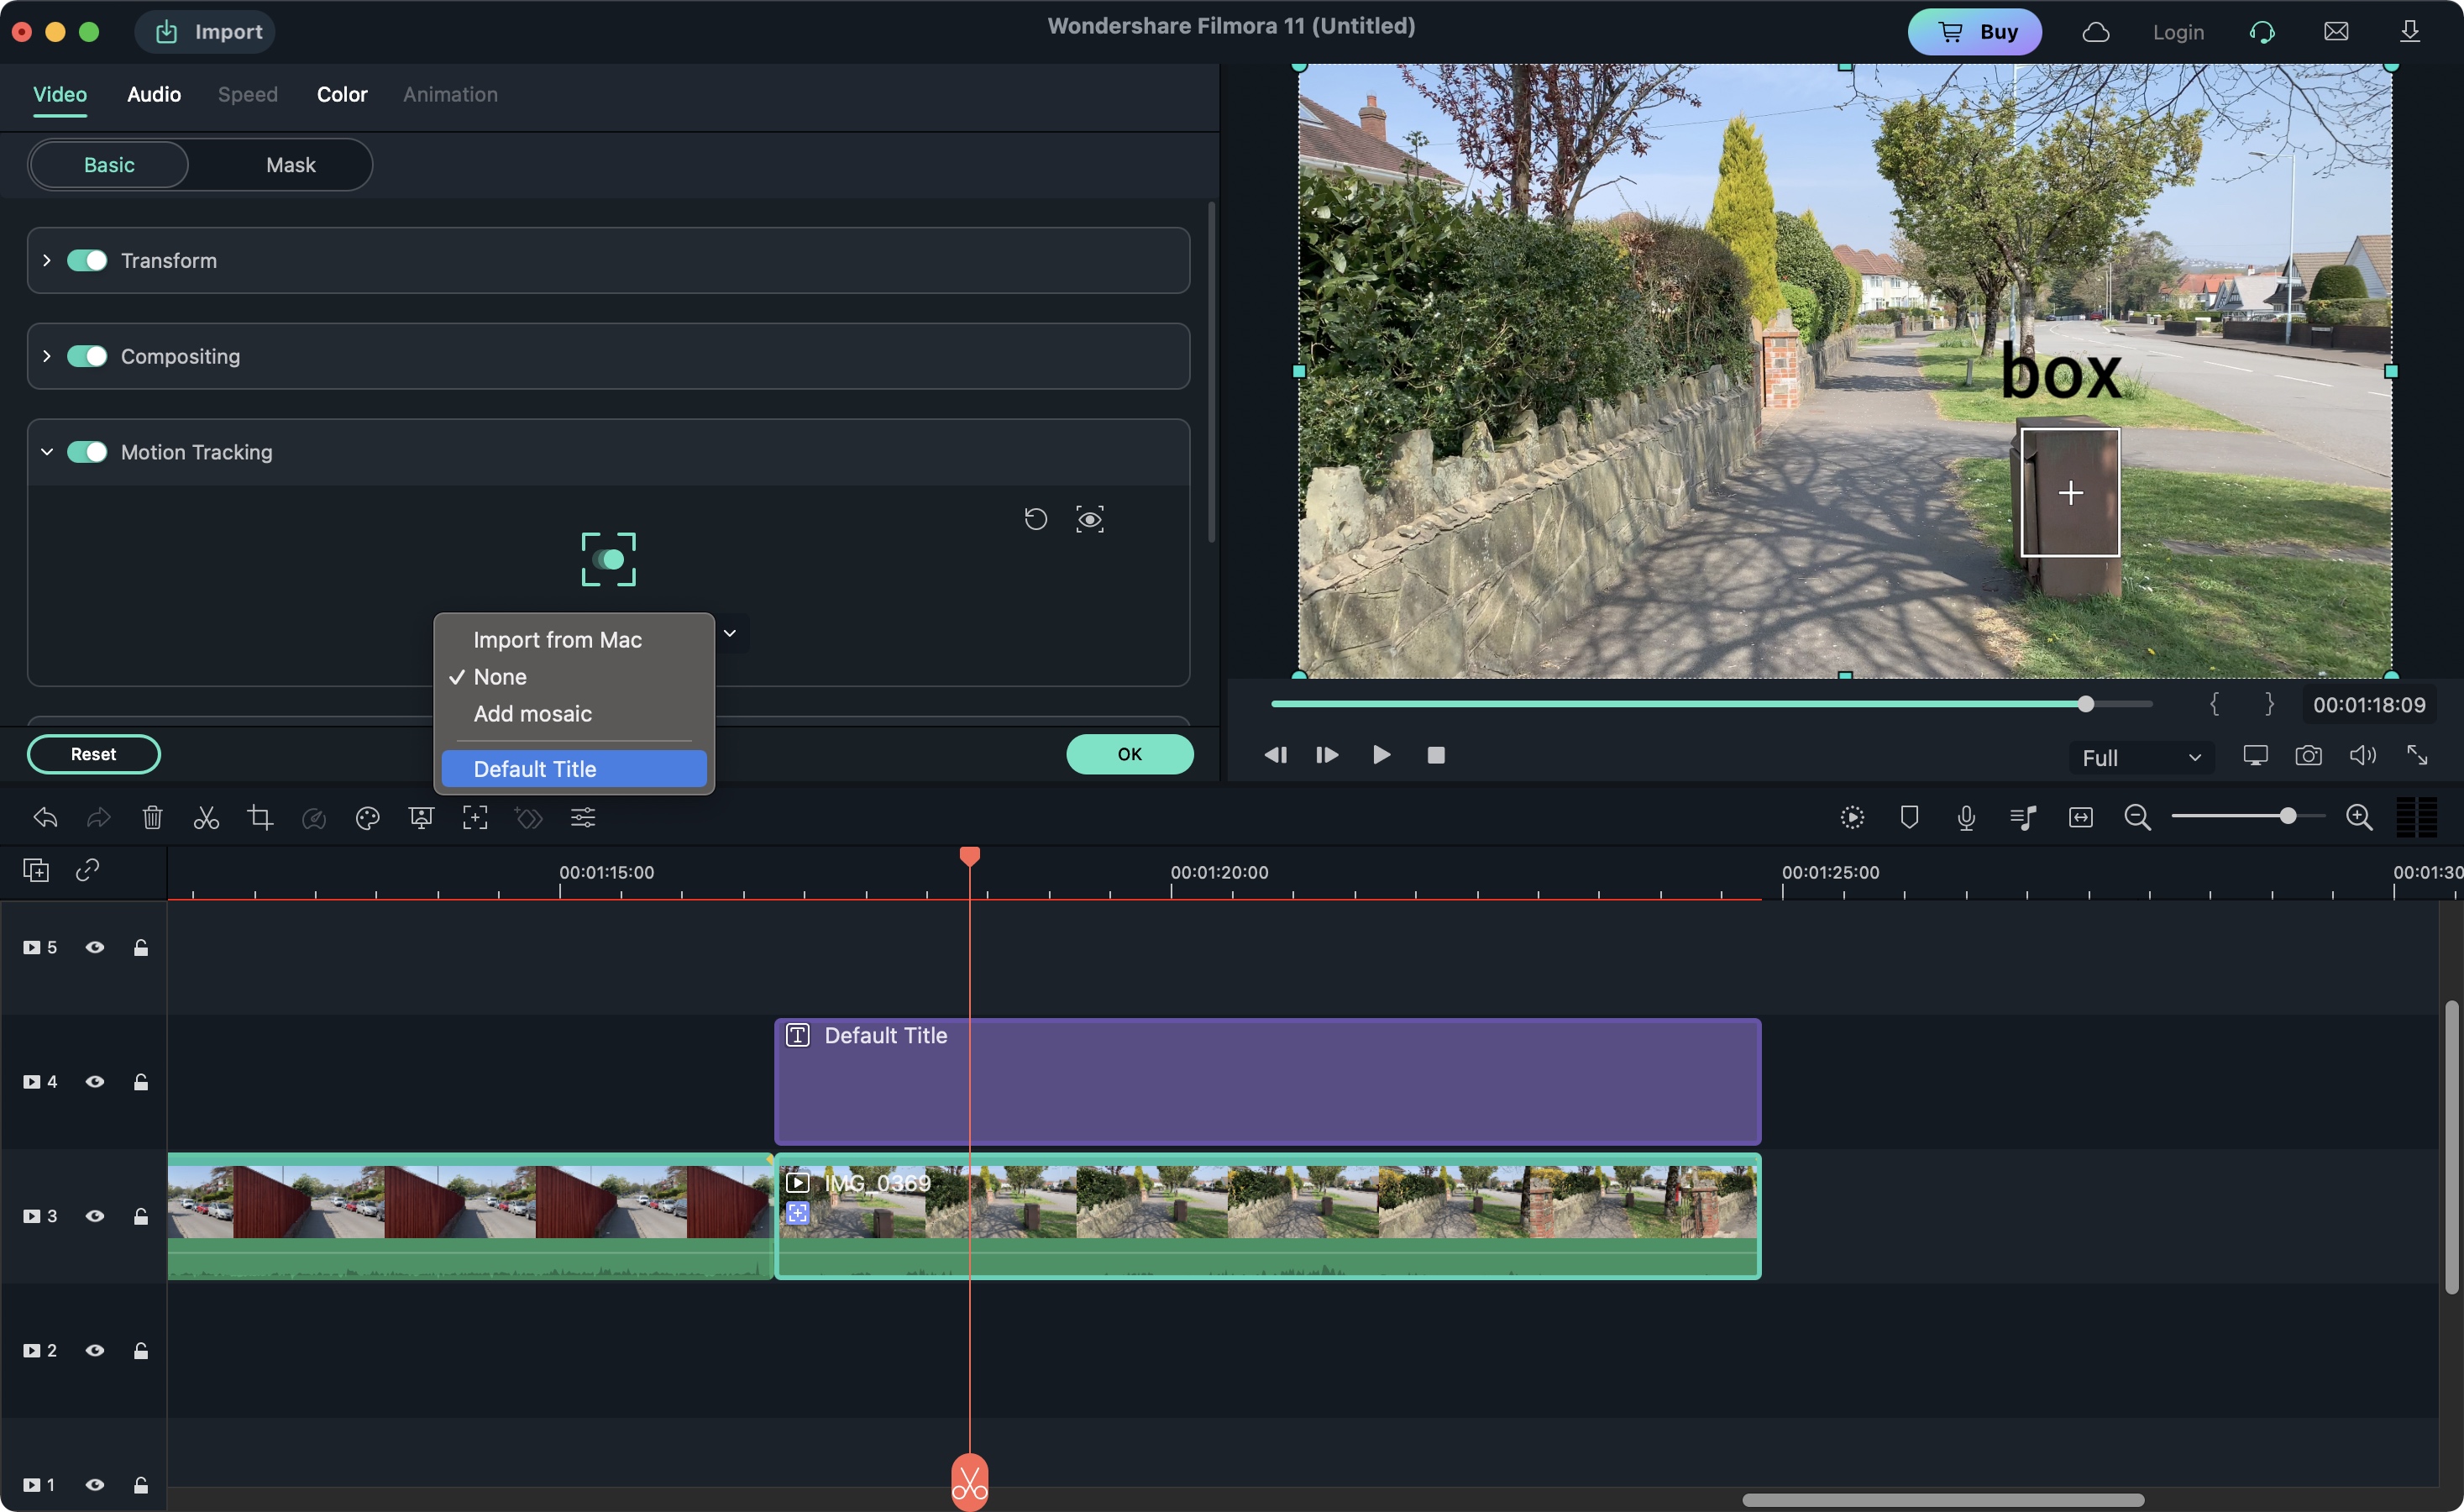
Even better is Motion Tracking, which has been available for a couple of revisions now. It’s implemented really well and works as expected, as long as you start the analysis at the start of the clip.
If you wish to animate a clip - making it move across the screen, say, or grow and shrink over time - this can be done via the use of keyframes.
Time remapping is another cool feature, and with it you’re able to slow down, speed up, and even reverse time in any segment of a selected clip.

Cost
If you’d like to try Filmora for yourself, you’ll be pleased to hear that a free version is available.
Most features are included, but the biggest limitation is that your exported product will be plastered with a pretty large watermark, and the instructions state that you need to keep an internet connection open in order to use the software, although we were able to work without one somehow. Still, it’s a great way to see what this software is all about.
Buying options come in two flavors - an Annual plan charged each year, or a Perpetual license. With the former, you’ll gain access to every update as they’re released. The latter allows you only one per year.
There’s also a business and team option for Windows users only, and the price depends on how many seats you need.
A couple of advantages the business option has over the others is that no attribution is required when sharing any work you created with Filmora, and legally, that version is covered for company use.
Final verdict
Wondershare Filmora is a great video editing app for Mac and Windows. It’s designed with beginners in mind. But it has a lot of power behind it, including some impressively advanced tools, which will please more experienced editors, too.
0 comments:
Post a Comment