Saturday, September 29, 2018

HomeGuard Wireless Full HD CCTV Kit

HomeGuard launched in 2007, a Chinese brand which sells a broad range of security devices in 30 territories that includes the UK (after being reintroduced here this year). The company has put together this all-in-one solution for easy and instant four-way surveillance suitable for a small to medium-sized business.

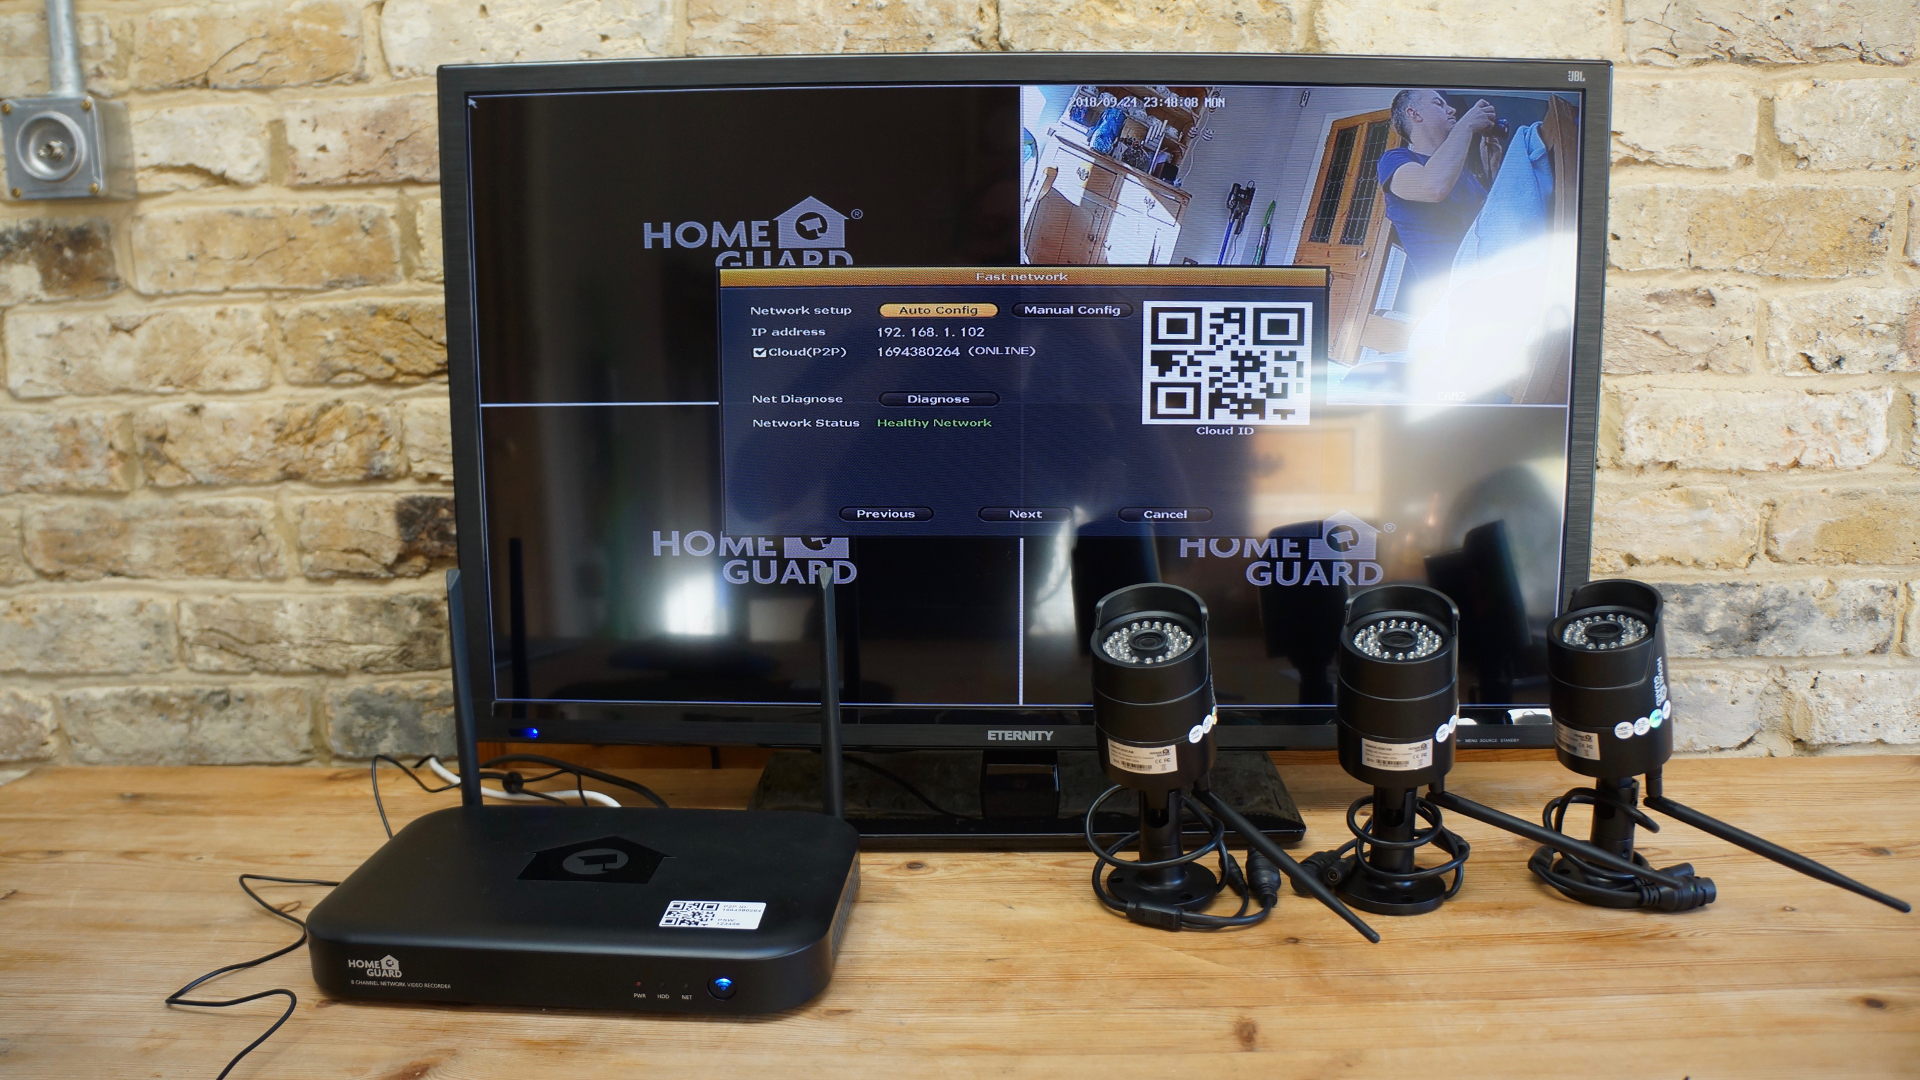
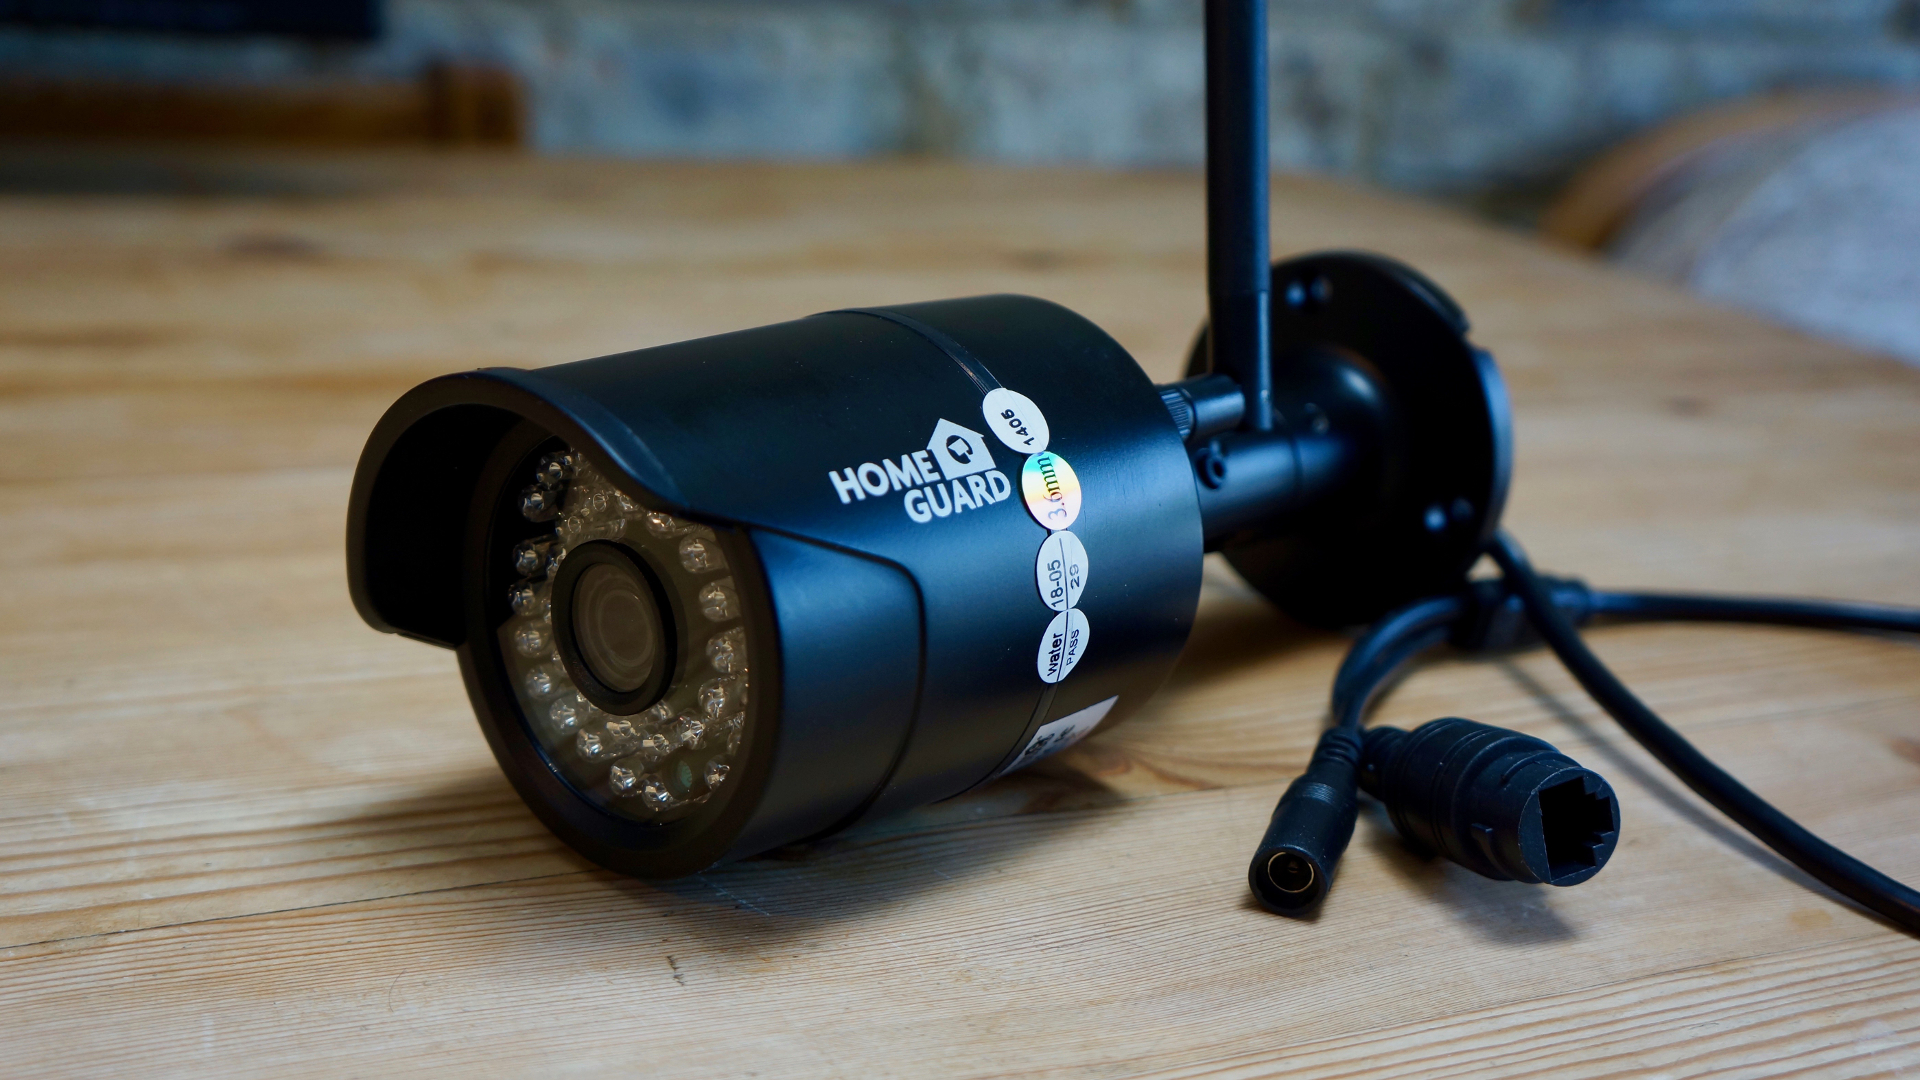
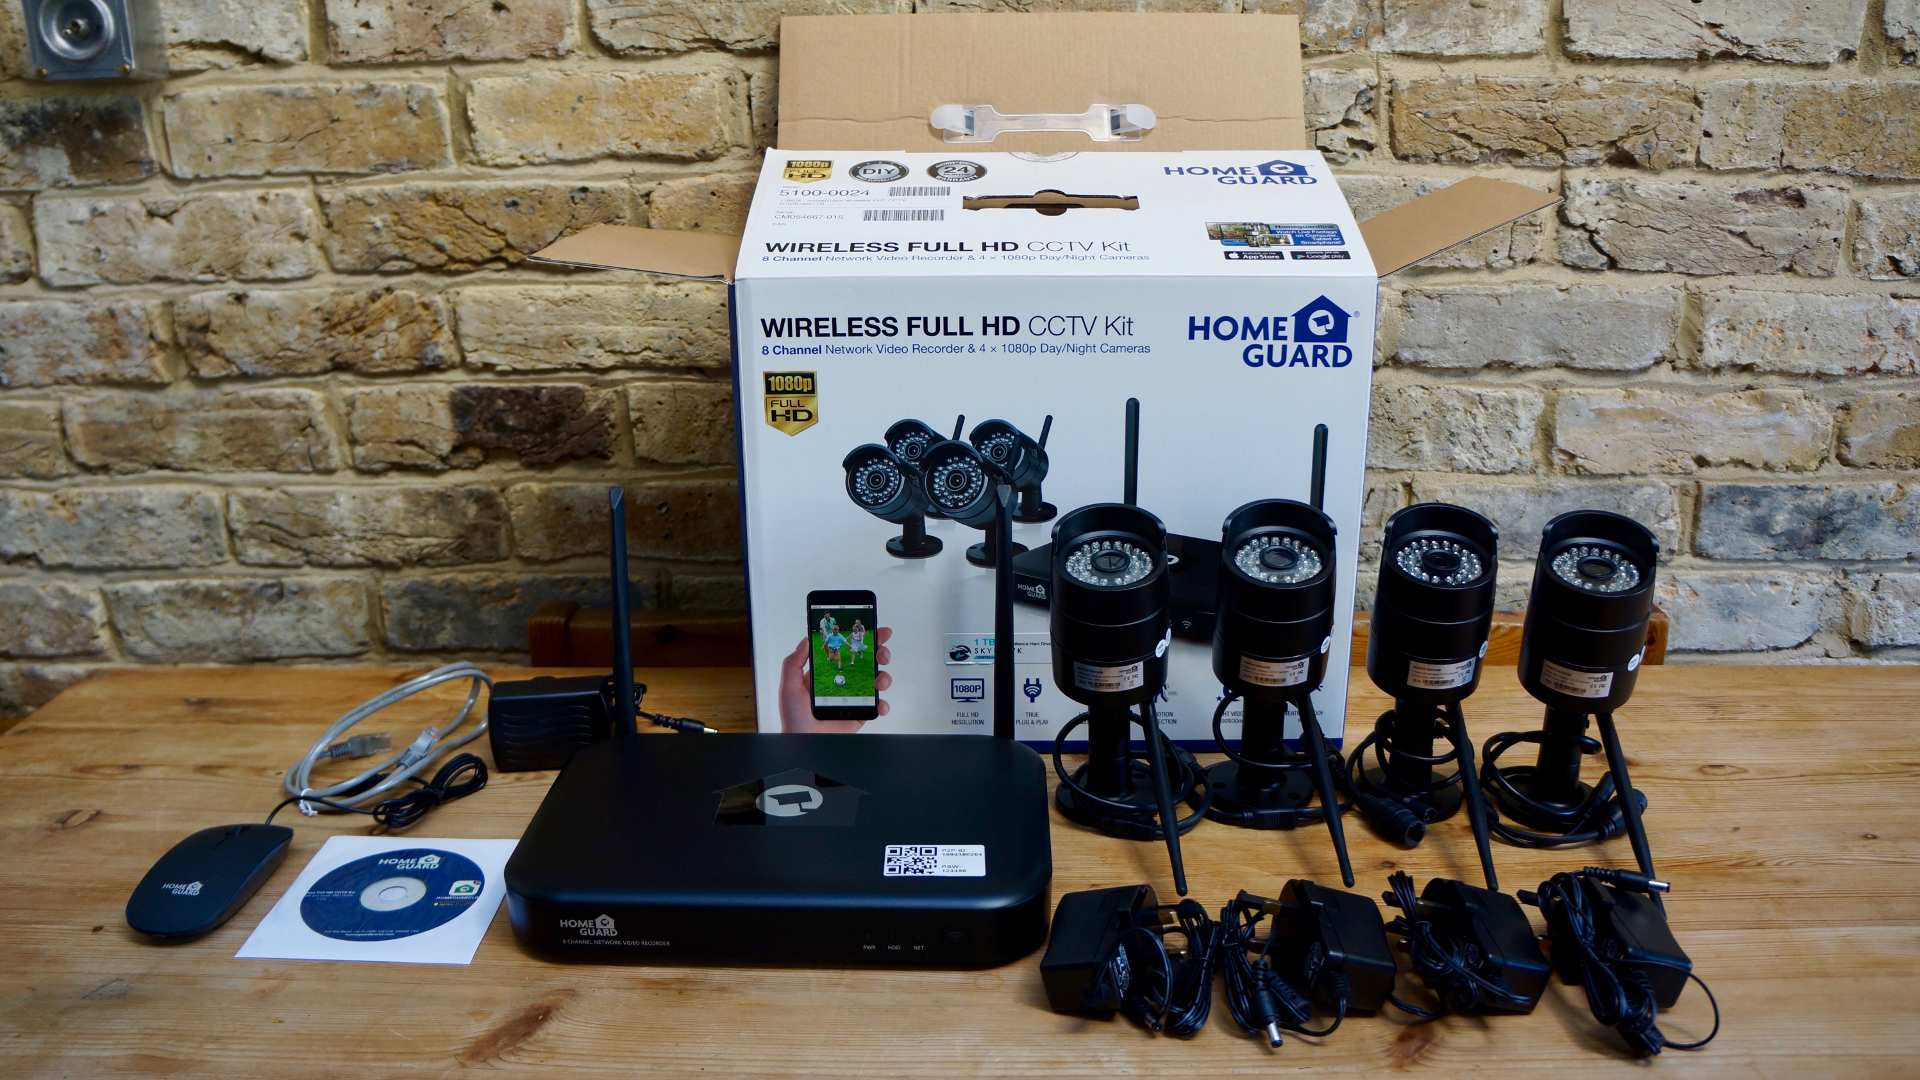
The HomeGuard Wireless Full HD CCTV Kit (HGNVK88304) comprises of four waterproof bullet cameras with Wi-Fi built into each one. There’s also an NVR (network video recorder) with 1TB of internal storage, negating the need to take out a subscription for a cloud-based recording service.

HomeGuard Wireless Full HD CCTV Kit

HomeGuard has even included the screws you need to attach the camera brackets to a wall or ceiling. This system is also expandable to eight video channels by purchasing up to four more IP cameras.

The hardware can be either wired, or wireless with instant Wi-Fi connectivity, and video is captured in Full HD as the product name suggests, which makes the price of £499.99 (around $660, AU$910) look almost too good to be true.

Design

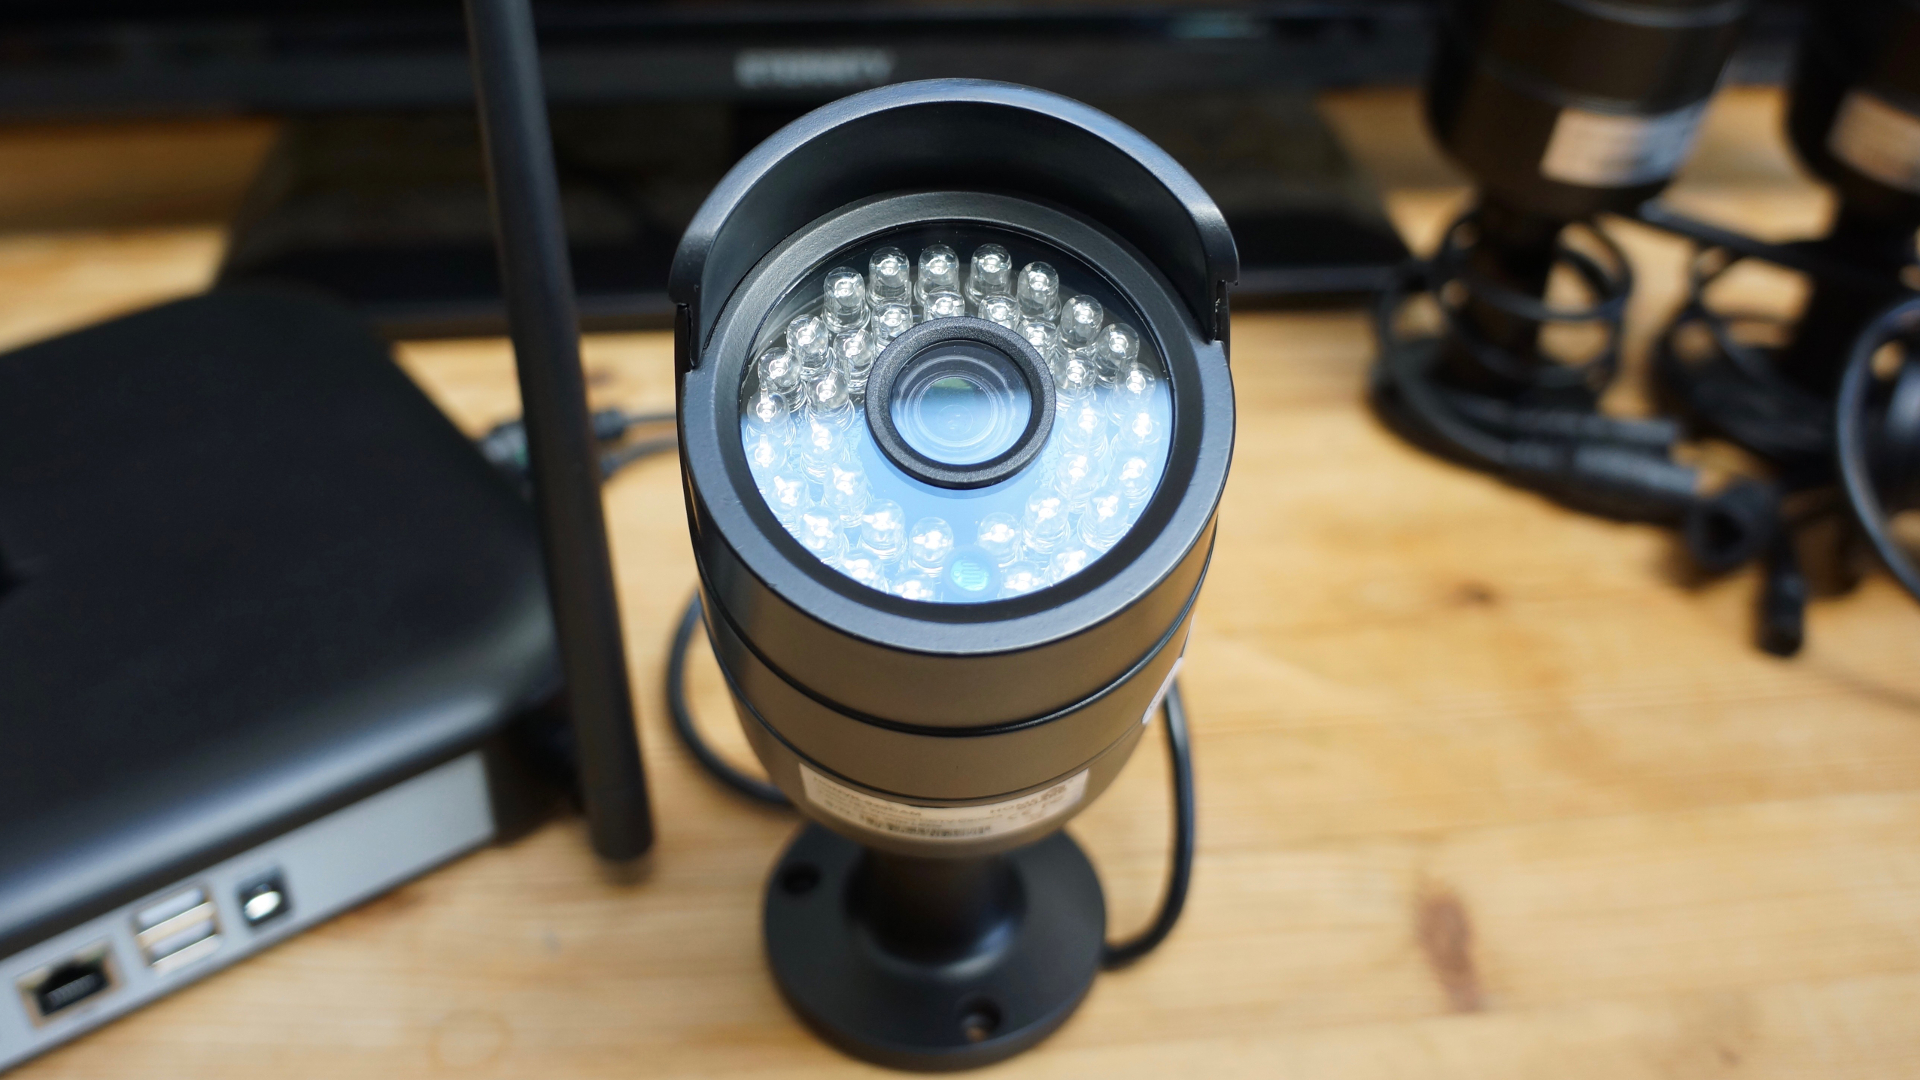
The four bullet cameras are a familiar form factor and appear well-made with their steel casing and metal hinged brackets. They measure 182 x 64 x 64mm and weigh 363g. A metal hood keeps the sun’s glare and the worst of the rain away from the glass lens cover, and the cable runs inside the metal tube of the bracket to make the design fairly tamperproof.

HomeGuard Wireless Full HD CCTV Kit

The only vulnerable part is the plastic antenna of the Wi-Fi module, which is essential for giving you a fairly wide (900m) Wi-Fi range. Each camera has two cables dangling from it, one for power and one for Ethernet if you prefer not to rely on Wi-Fi. They are not compatible with PoE (Power over Ethernet) so you will need to use the 12V power supplies – which have frustratingly short cables.

HomeGuard Wireless Full HD CCTV Kit

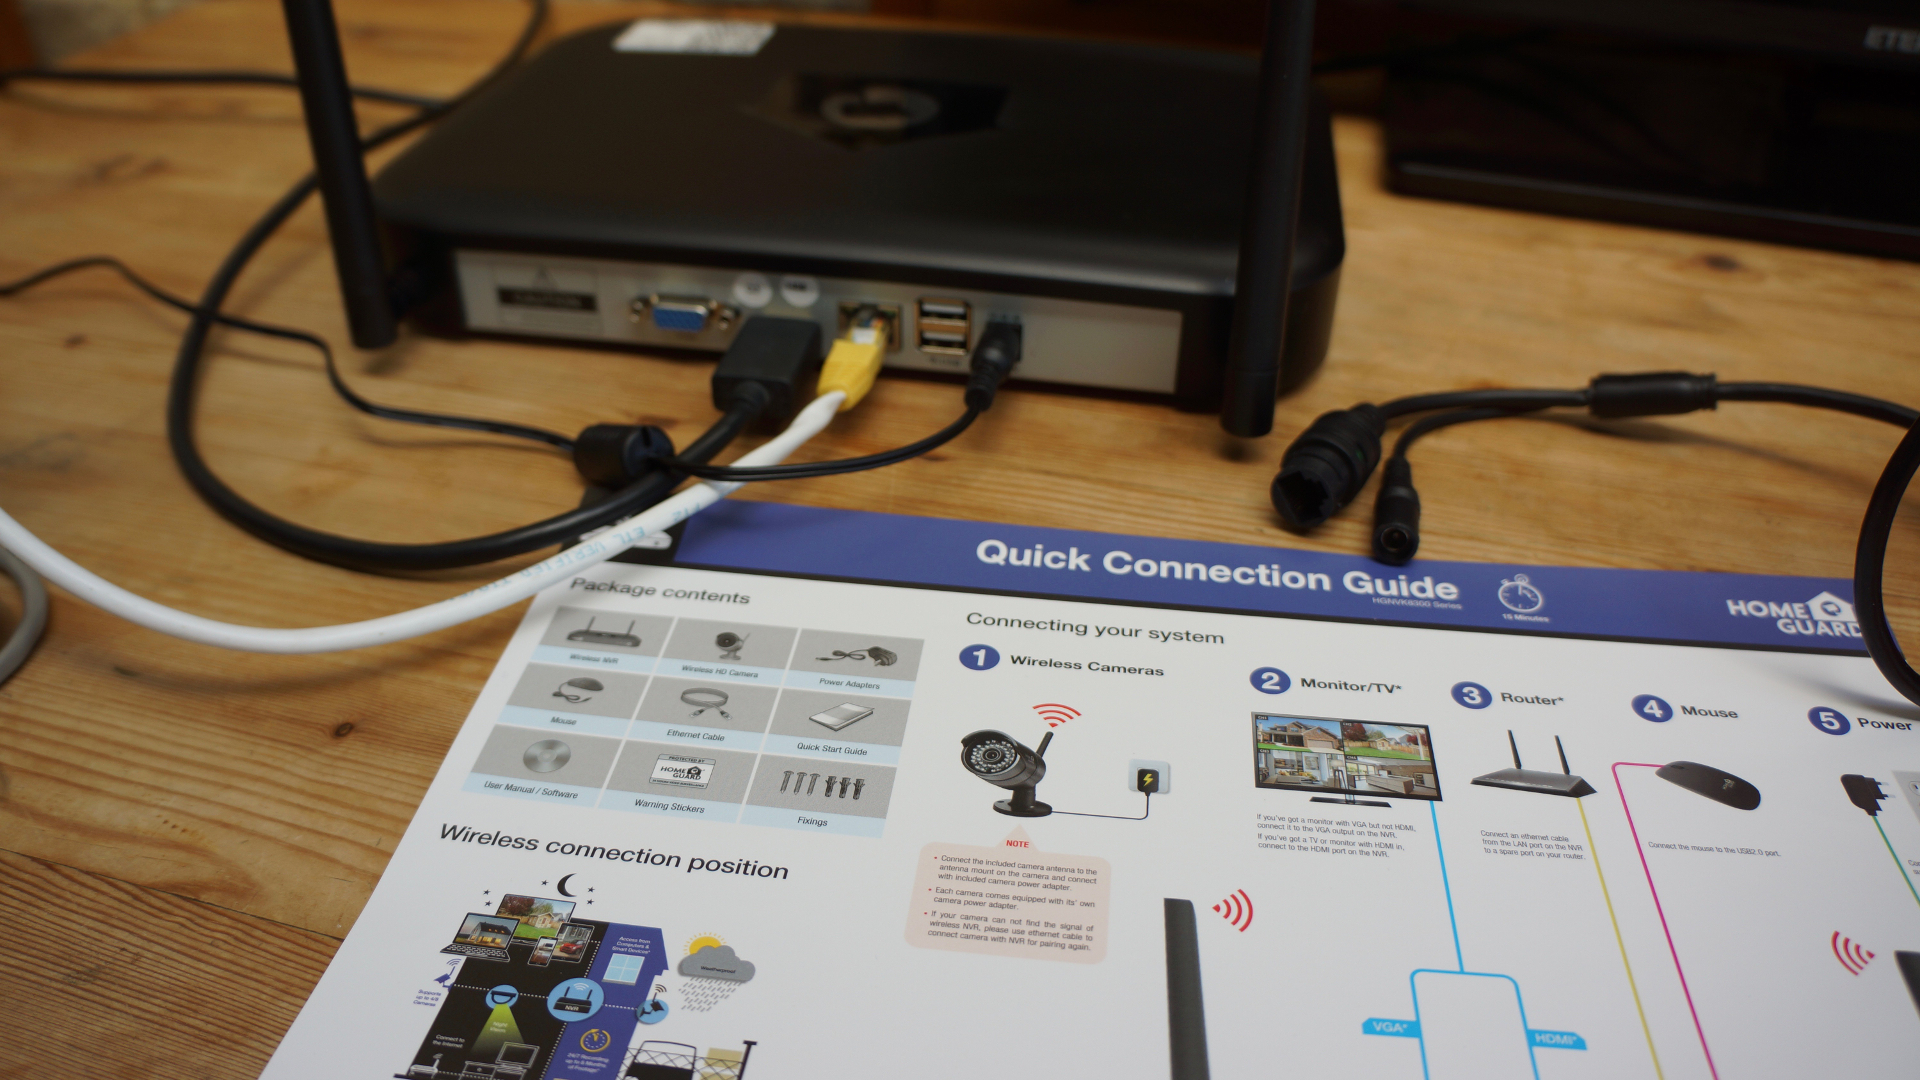
The NVR is a plain black box that contains a 1TB Seagate hard drive and a Wi-Fi module for connecting up to eight cameras. It looks like a router at first glance, and you will need to position it quite close to your existing router in order to connect the bundled Ethernet cable, which is rather short.

The plastic case is rather flimsy and when we pressed the reset button on the front, it caved in. The button still worked perfectly well, fortunately, but it’s clear the NVR doesn’t have the same level of build quality as the cameras.

HomeGuard Wireless Full HD CCTV Kit

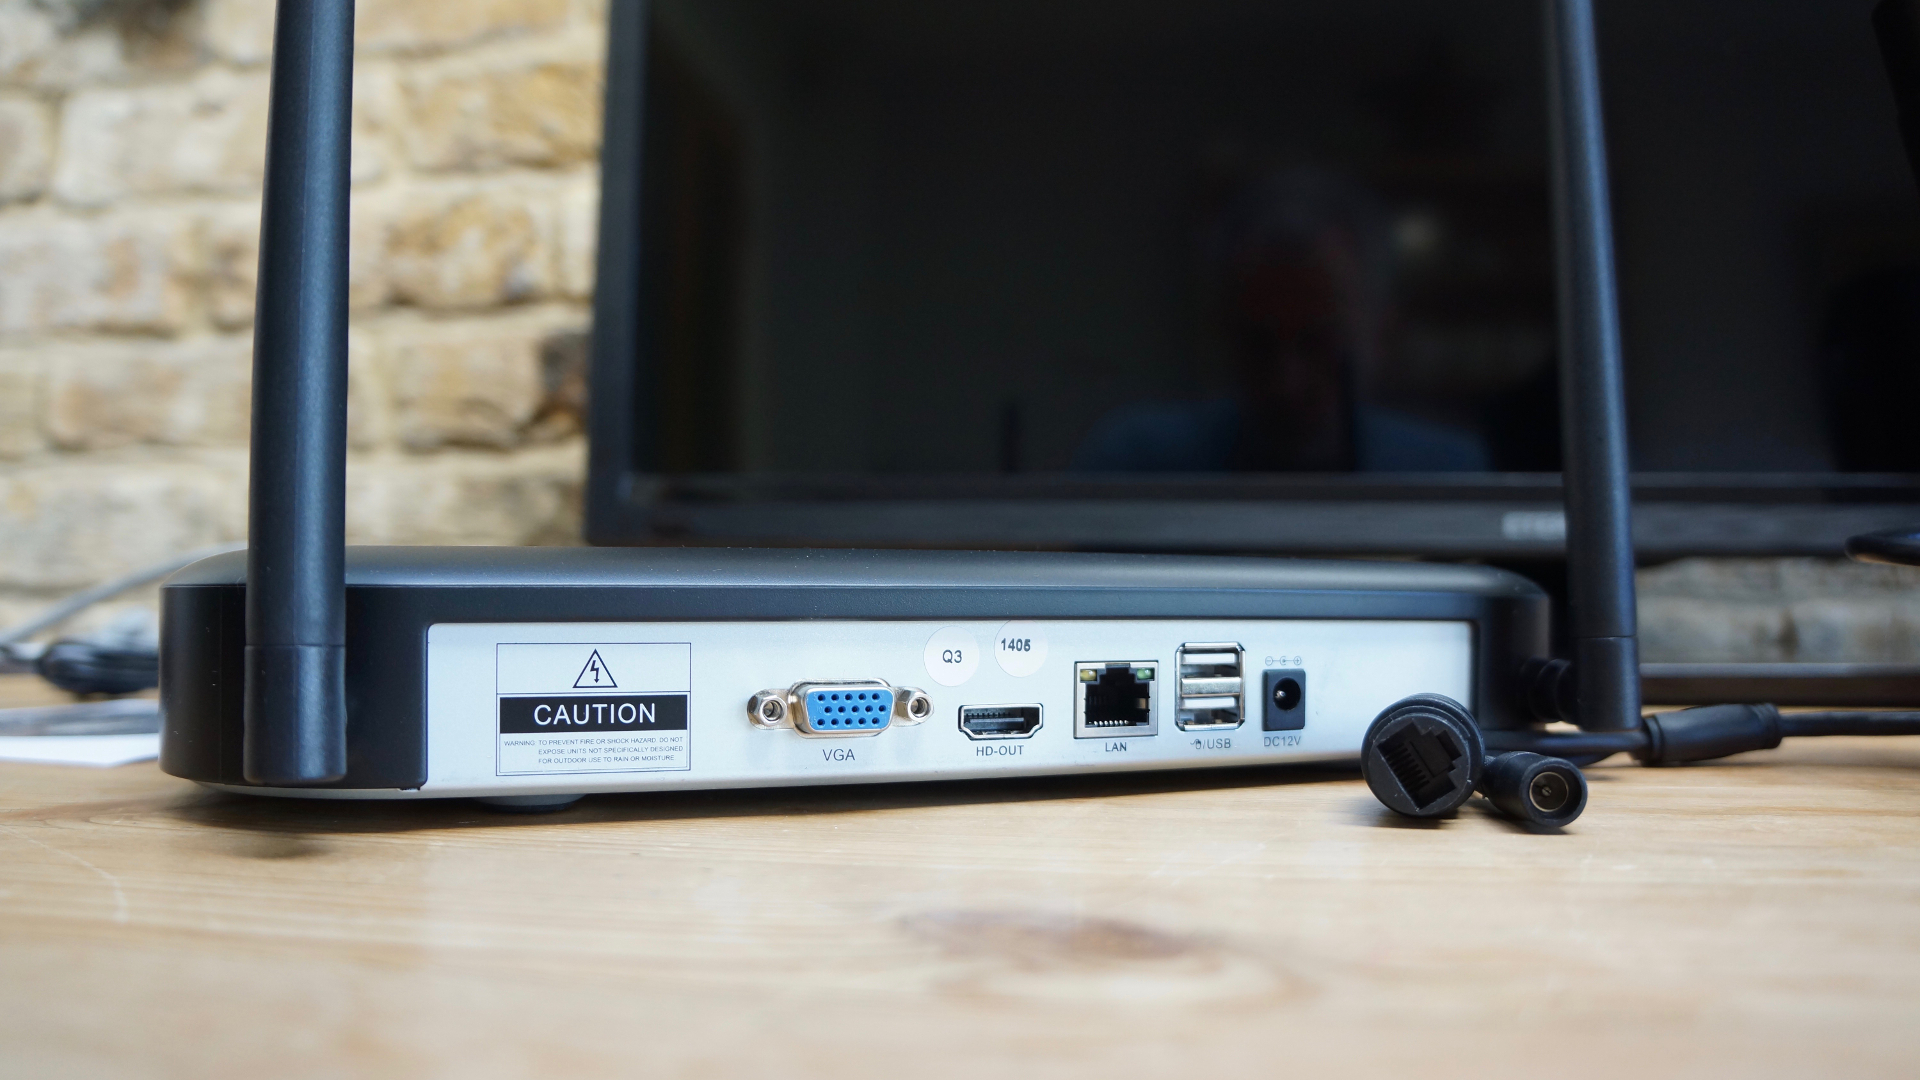
At the rear of the NVR you will find ports for connecting your router and monitor (via HDMI or VGA), a power source, and two USB devices. One of these devices is the bundled mouse which is how you control the GUI via a monitor, and the other is for backing up recordings onto your own external USB memory.

Features

Each camera has an IP66 rating – meaning they can cope with being drenched by rain – and the LEDs clustered around the lens enable a claimed night vision range of up to 30m. Their resolution is 1920 x 1080, which is impressive, although the frame rate is only 15 fps (frames per second), which sounds rather limiting, while the sensor is a measly 2-megapixels.

The NVR is fitted with a 1TB Seagate drive, as mentioned, which can record up to eight days of continuous footage on all four cameras in standard definition. However, we would recommend that you record in HD, so if you need more space, you can fit your own SATA drive of up to 4TB.

Live footage from the four cameras can be viewed on a monitor or TV in up to 1080p resolution, and by using the included mouse to navigate the on-screen menu, you can record H.265 data onto the internal hard drive.

Setup

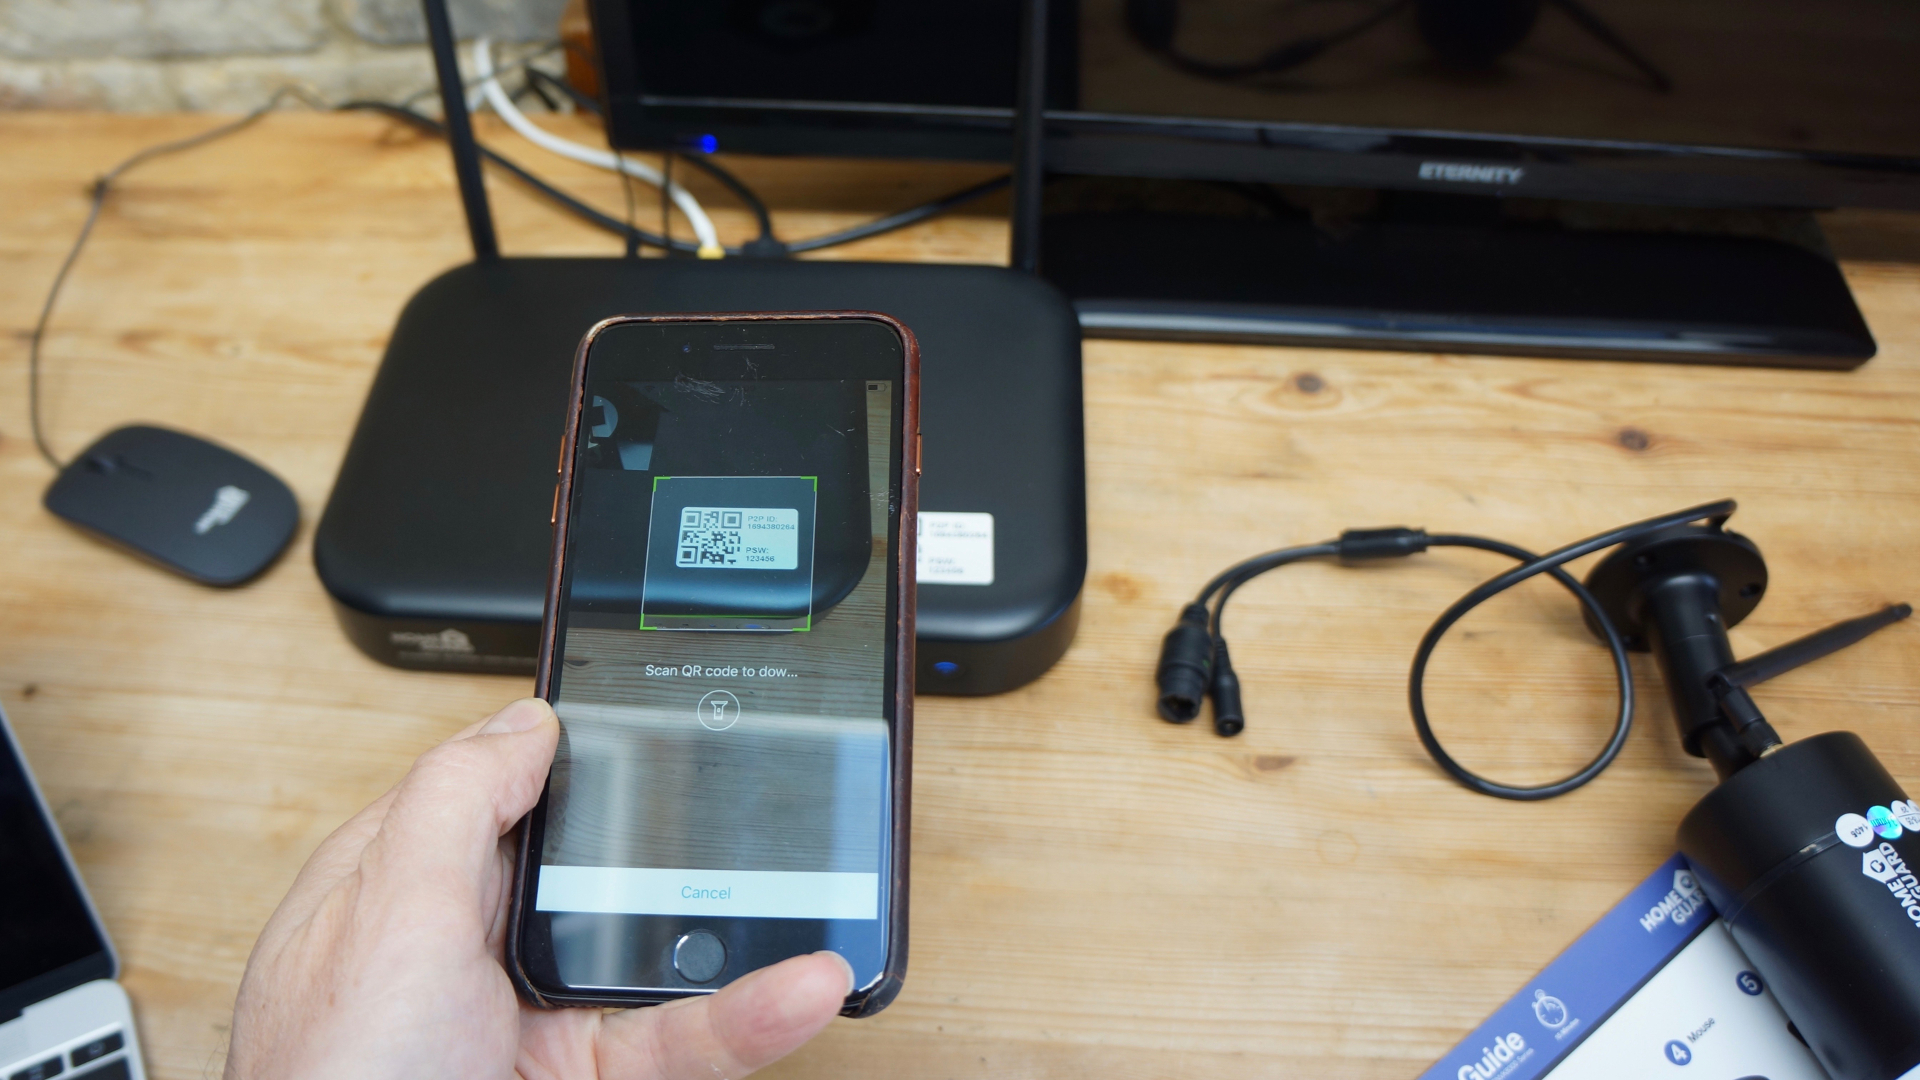
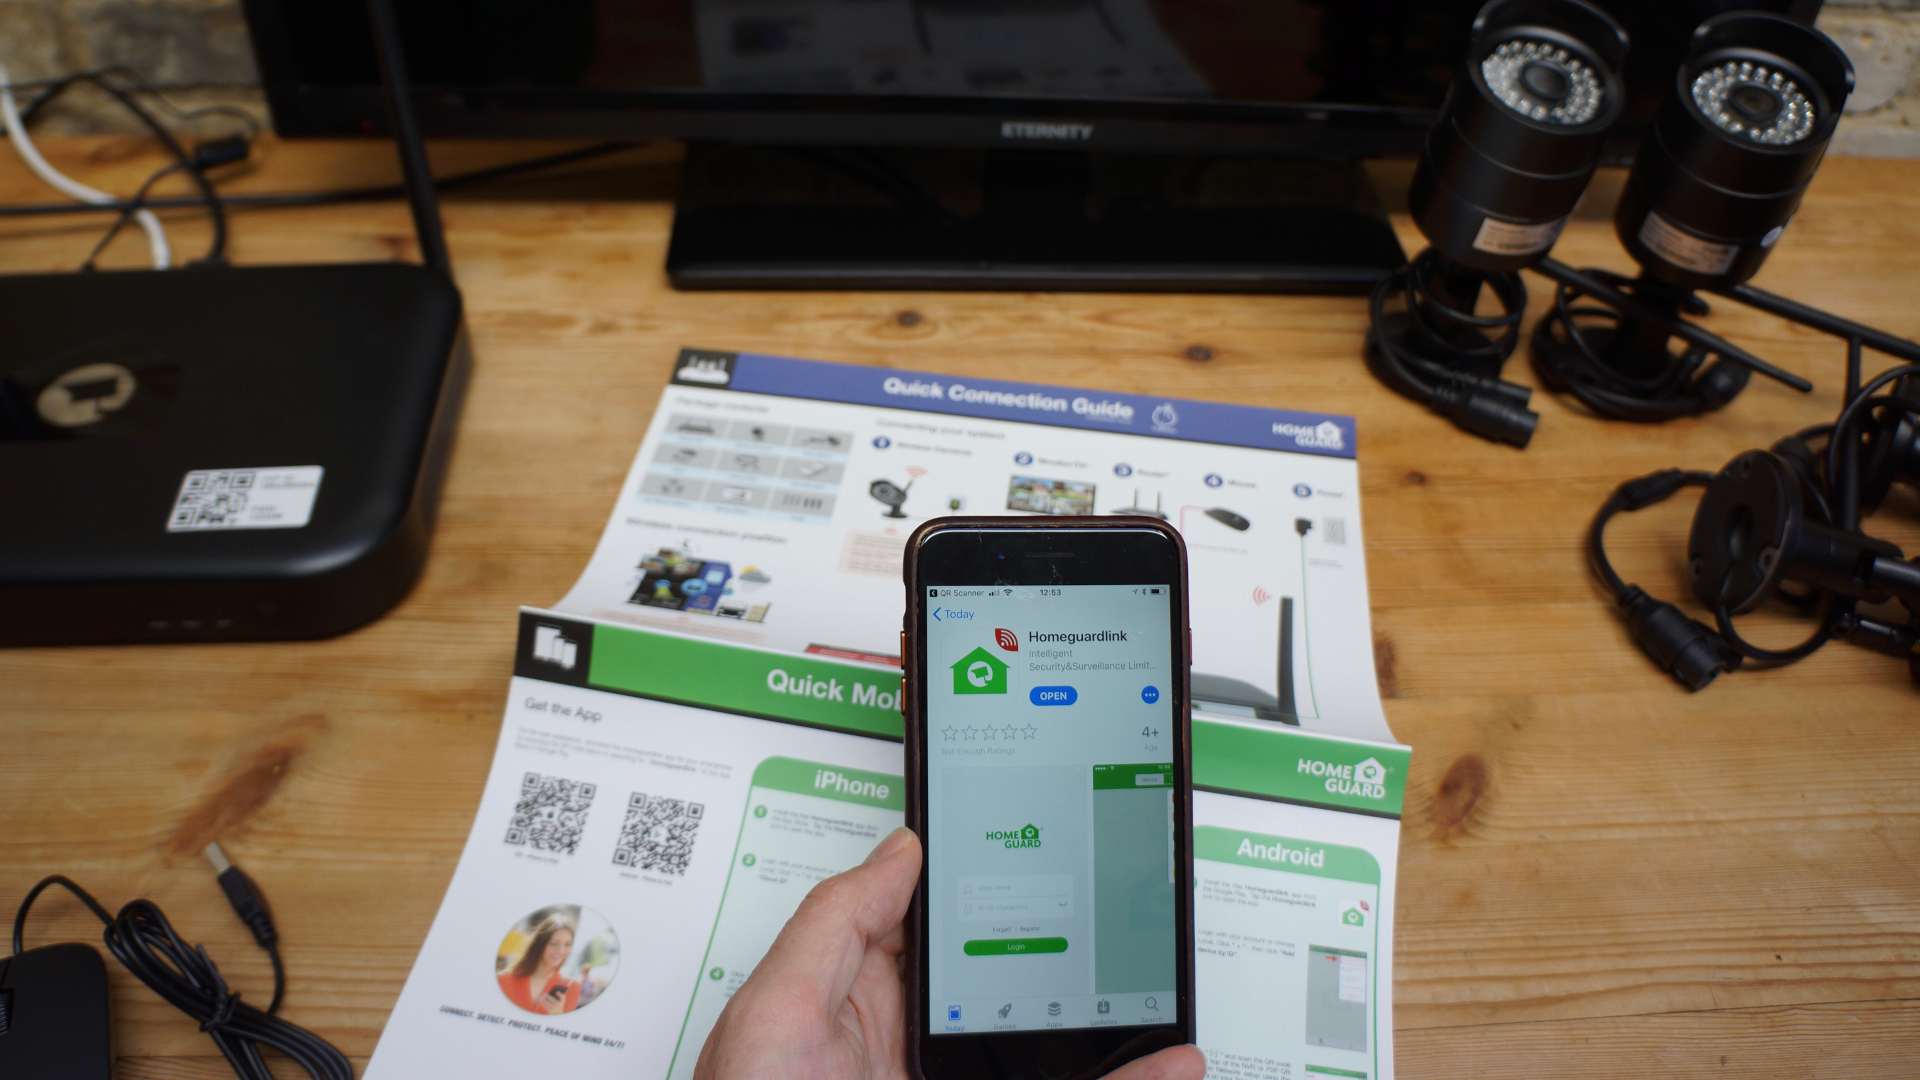
Installing the HomeGuard kit is particularly easy thanks to the use of a smartphone app, handy QR code readers and Auto-Pair technology – or at least it should be. We found that the iOS companion app couldn’t read the QR code printed on top of the NVR, which meant we couldn’t go any further using the app.

HomeGuard Wireless Full HD CCTV Kit

However, the NVR also generates a QR code which appears on your monitor and this time, the HomeGuard app recognized it, so the rest of the installation was a breeze. With Auto-Pair making an instant Wi-Fi connection between the NVR and each of the four cameras, you don’t need to type in any passwords. It’s just a case of connecting their power leads and positioning.

The interface is navigated using the bundled mouse and we found that it wasn’t especially user-friendly in that it took us some time to work out how to set all of the parameters and recording schedules.

HomeGuard Wireless Full HD CCTV Kit

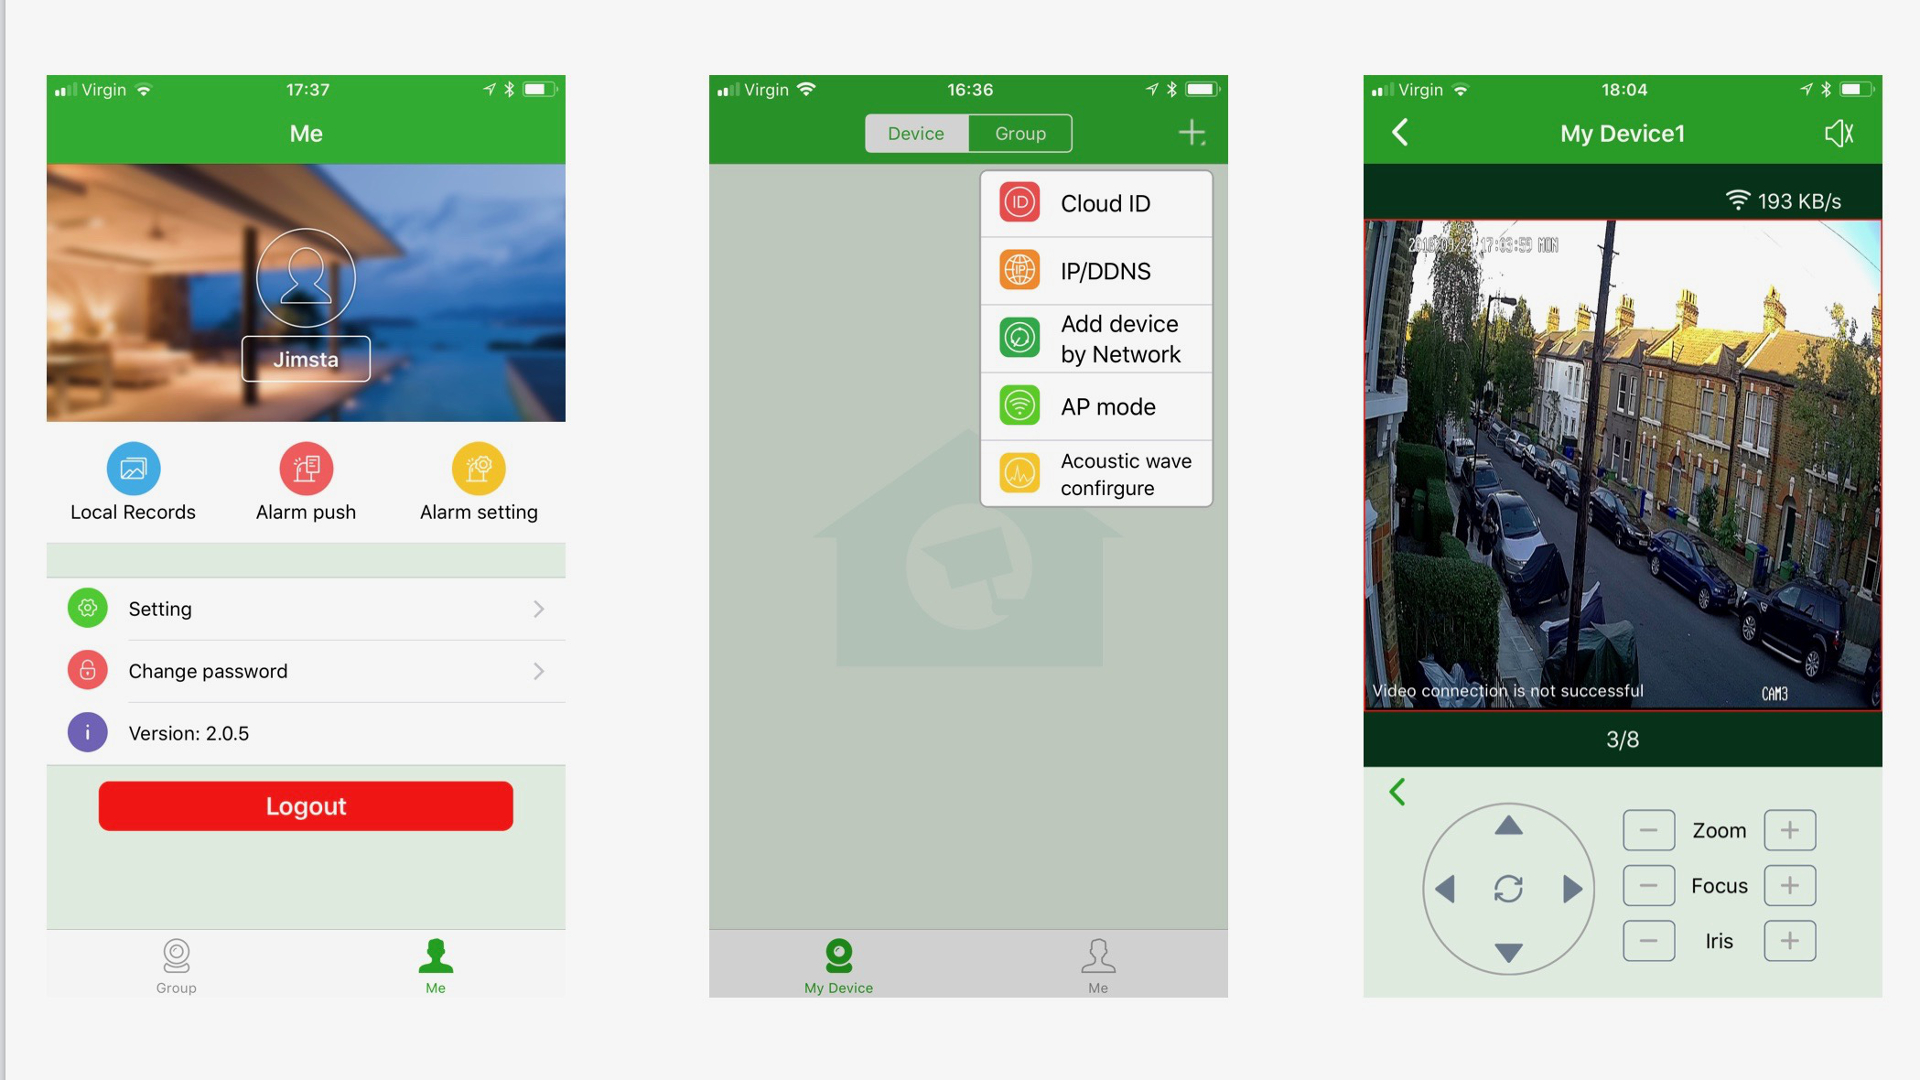
The iOS and Android apps are a little more intuitive although still littered with functions that do not apply to this product. The same apps are designed for use with systems that include two-way audio and lens movement, which are of no use to these particular cameras.

HomeGuard Wireless Full HD CCTV Kit

Performance

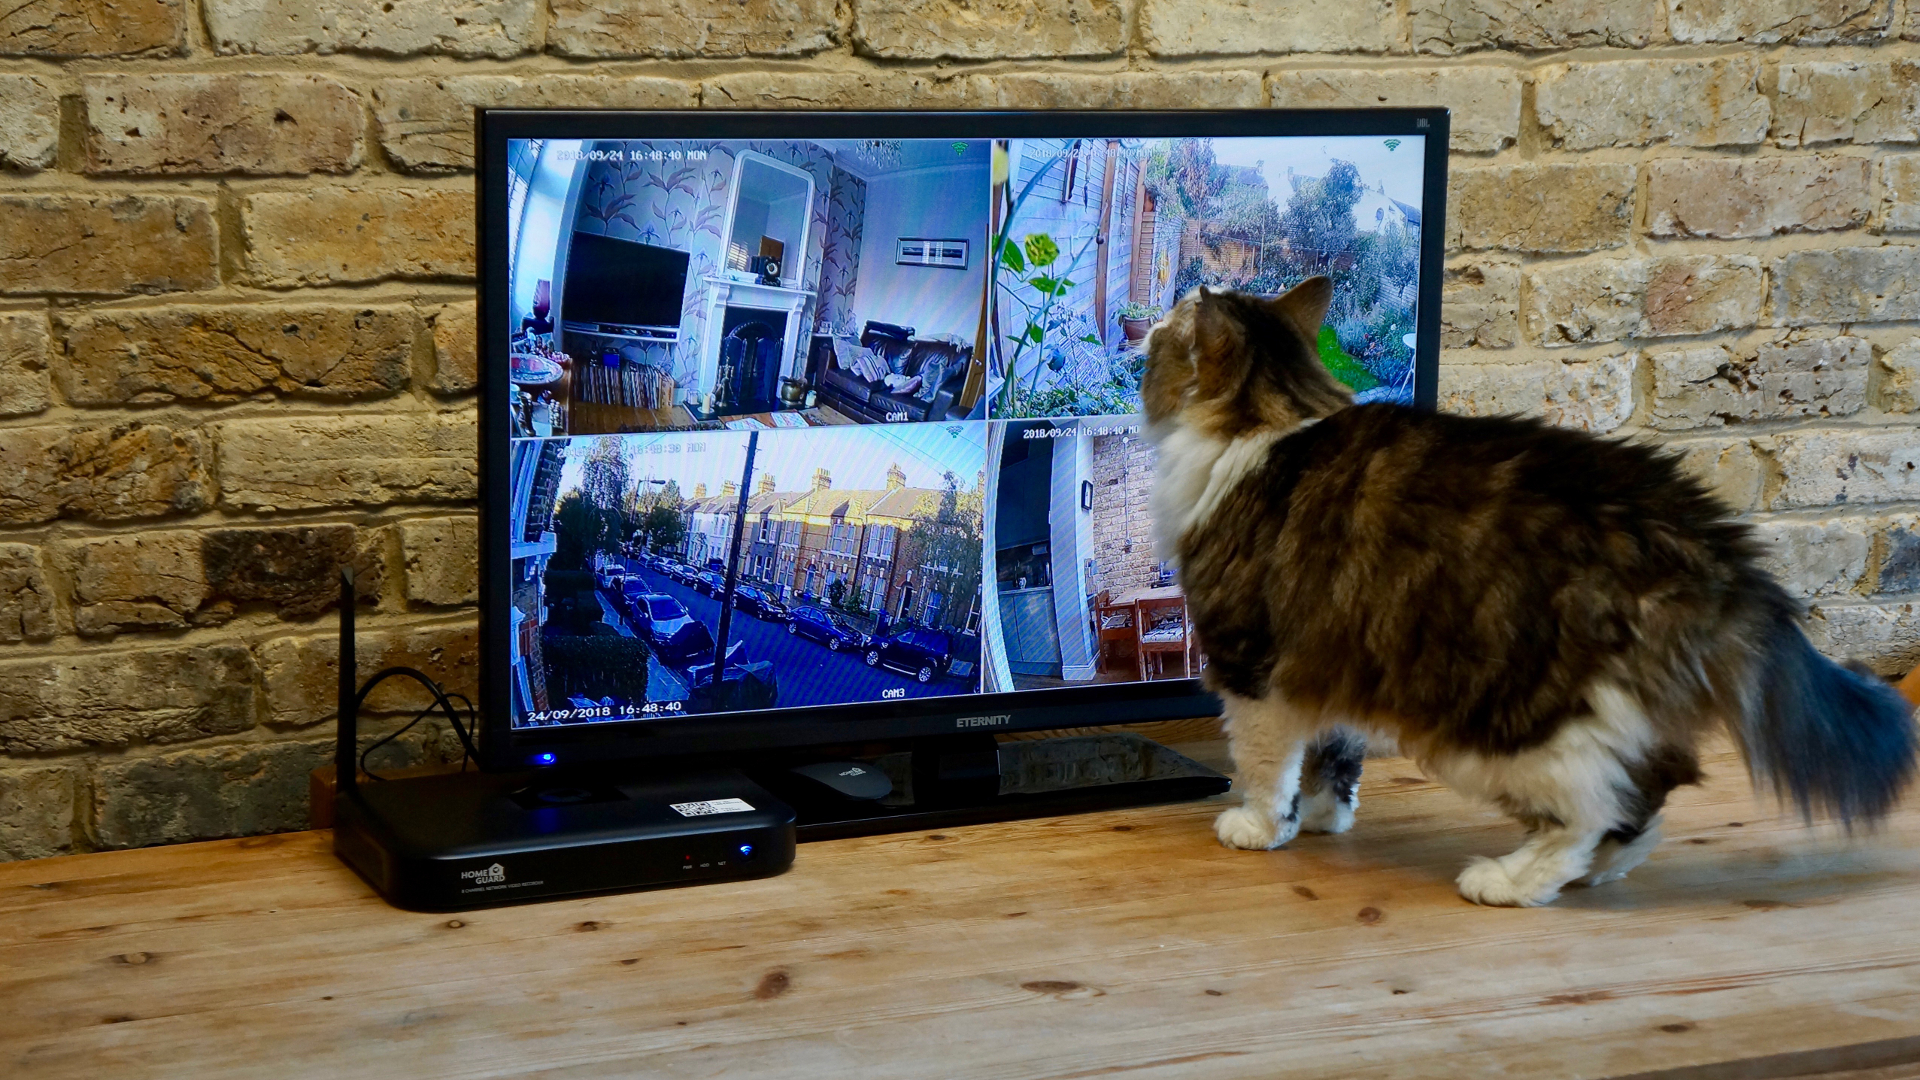
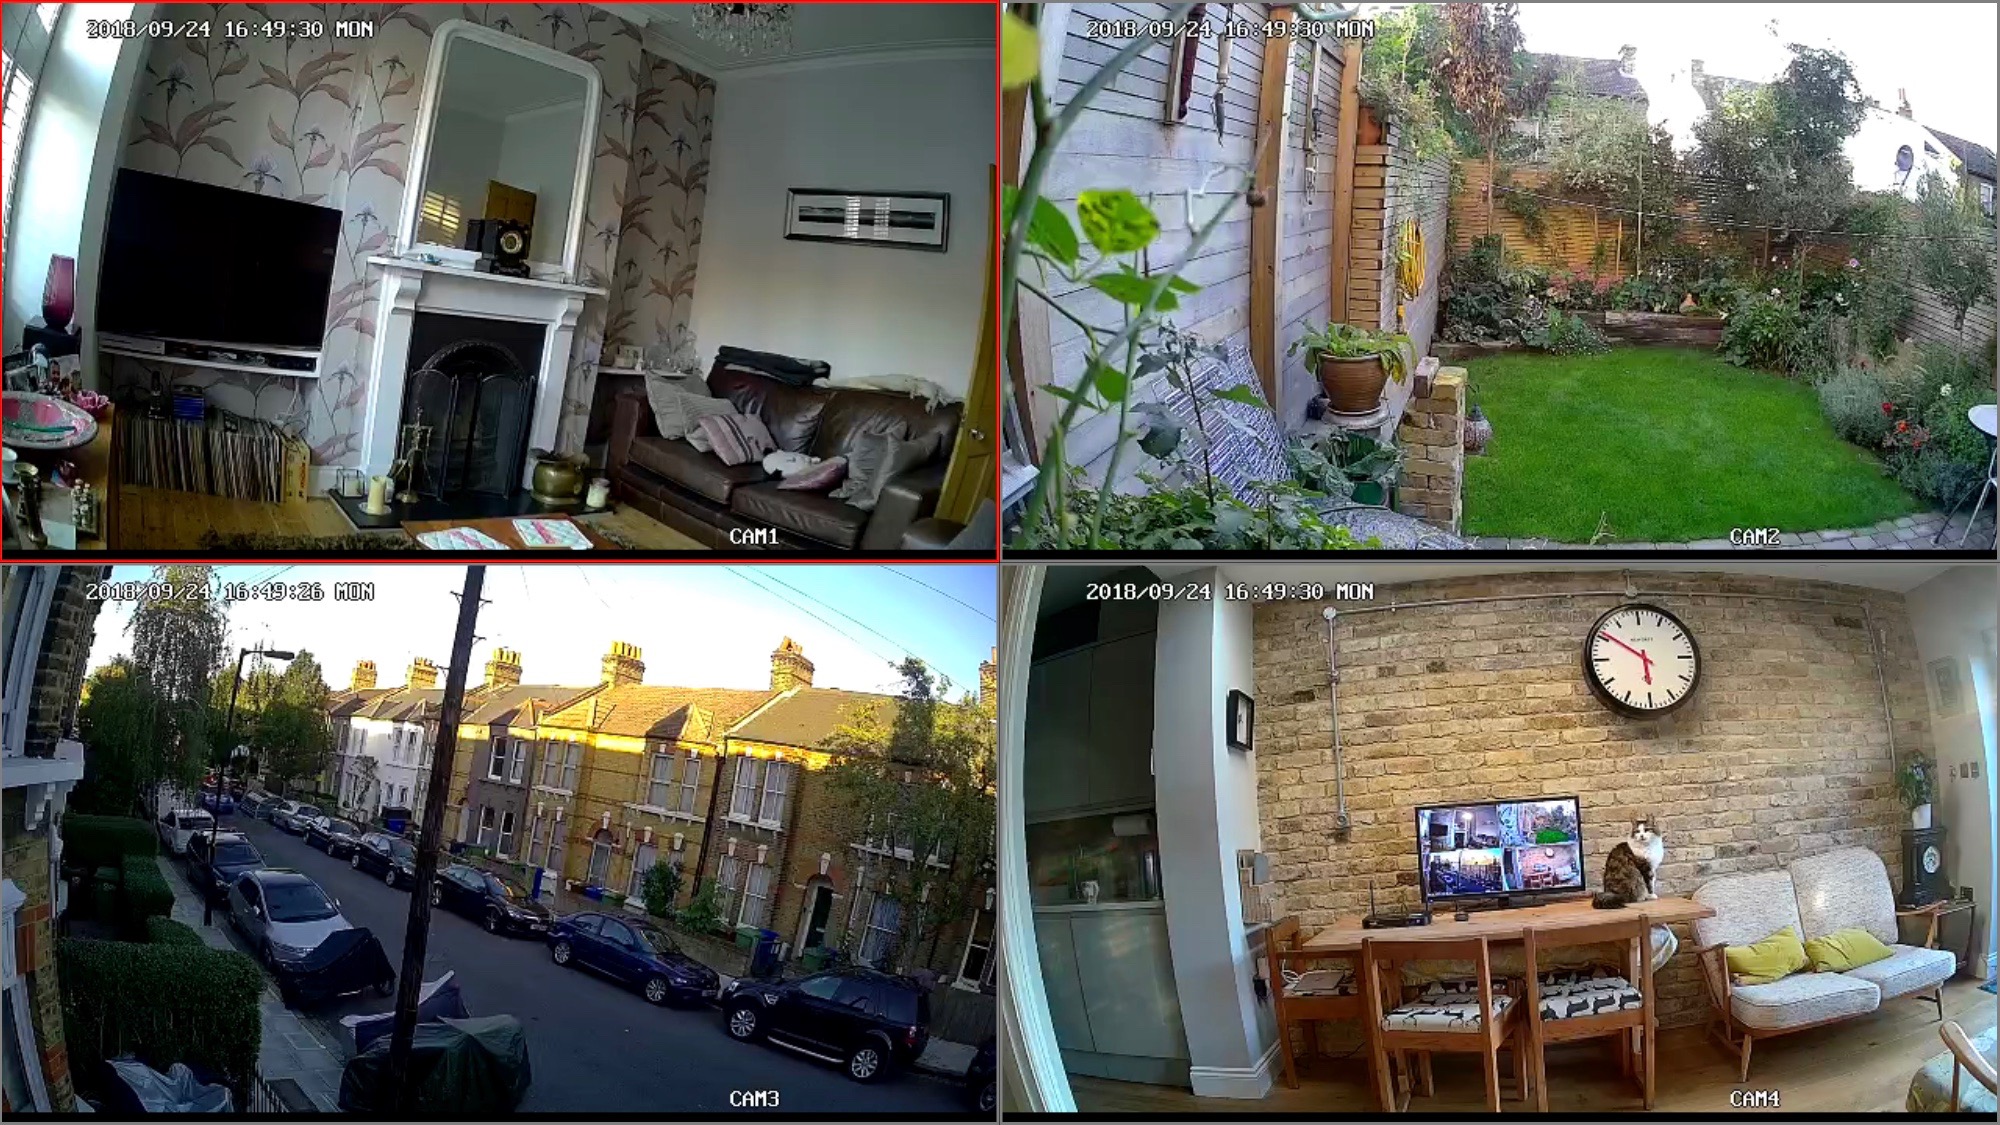
Usually, wireless CCTV systems take some setting up and tweaking to get going, but the HomeGuard system worked as expected right out of the box. The default mode is standard definition, but if you switch to HD using either the app or the on-screen interface, you will see four fairly bright and vivid images from your four video feeds. You can view one screen at a time, or all four in split-screen, and you can zoom in on any image using the mouse to draw a rectangle around the area you’re interested in.

Crucially, this system can record at 1080p resolution, which is the minimum you should consider when buying a surveillance system – but that doesn’t mean your security cam footage looks like an HDTV broadcast. The image here is blocky, pixelated and very juddery. It is good enough to see the detail you need, but no more.

HomeGuard Wireless Full HD CCTV Kit

HomeGuard claims that you can read car license plates, and you can, but only in daylight and only if they are within about 10m. Even then, the image is so indistinct that it’s hard to decipher, whereas if you look out of the window yourself, you could read the numbers and letters at a glance. With a moving car, you have no chance.

In low light conditions, the results are worse (naturally) and the claimed 30m night vision is something of a stretch. Night-time footage is black and white, car number plates are nothing more than a white oblong, and it’s difficult to tell men from women, let alone recognize the face of anyone passing by 30m from the camera.

HomeGuard Wireless Full HD CCTV Kit

The image quality is limited not only by the camera’s very small sensor (2MP) but also a very slow frame rate (15 fps). Moving objects like a walking person are given an odd staccato effect. Now, we’re not expecting a movie-like picture performance, but most cameras claiming Full HD quality look better than this.

That said, the HomeGuard system worked fairly well overall and captured video that is good enough for surveillance purposes, so long as you aren’t expecting much detail in your overnight footage.

The companion app is better implemented than many other CCTV systems and it gives you quick access to recordings while you’re away. You can access them on your PC too, although doing so on a Mac browser is a little more convoluted.

HomeGuard Wireless Full HD CCTV Kit

Final verdict

Overall, the HomeGuard Wireless Full HD CCTV Kit is a very immediate and affordable way to protect your premises without the expense of a professional installation, or a cloud subscription.

Everything you need is in the box and with Auto-Pair making all of the wireless connections for you, it really is easy to set up. It is quite easy to use too, thanks largely to the companion app, and 1TB of data storage is just about enough for most people’s needs.

The cameras record in Full HD, although their quality is limited by small sensors and slow frame rates, so don’t expect TV-quality playback. It’s just enough for effective surveillance.

Our only other niggles are the frustratingly short power cables that limit the placement options of the cameras, and the feeble reset button on the NVR, along with that unreadable QR code sticker. However, these minor flaws aren’t going to stop us recommending the HomeGuard CCTV Kit to any SMB looking to install its own security system on a modest budget.

Friday, September 28, 2018

Hive Active Heating 2

For many people, the prospect of turning their regular, boring home into a smart one still seems a little bit scary and very time-consuming. Luckily, the Hive Active Heating 2 is looking to change all of that and make upgrading your home easier, quicker and worth it in the long-run.

One of the main reasons why building up your smart home can seem scary is because there's an assumption that you have to go 'all in' and upgrade everything to really see the benefits. This isn't how it works. At least not anymore. 

Smart systems like Hive allow you to start off small and then gradually add some smarter devices to your home one step at a time. That means you don't blow your budget and can choose the products that suit you - rather than being caught up in the hype.

A key component to any smart home, in our opinion, is a smart heating system. Over the years we've seen a number of these hit the market – including, most famously, the Nest series of smart thermostats – and each brings something new to the table.  

Like the others, Hive is a smart heating system – however, over the past few years, the brand has been expanding to offer up a whole-home smart setup. 

It’s this modular approach to creating a smart home that all users will benefit from: you can use Hive to heat your house, exclusively, or you can allow it to take control of lights, sensors and more, all of which are easy to control through the accompanying Hive app.
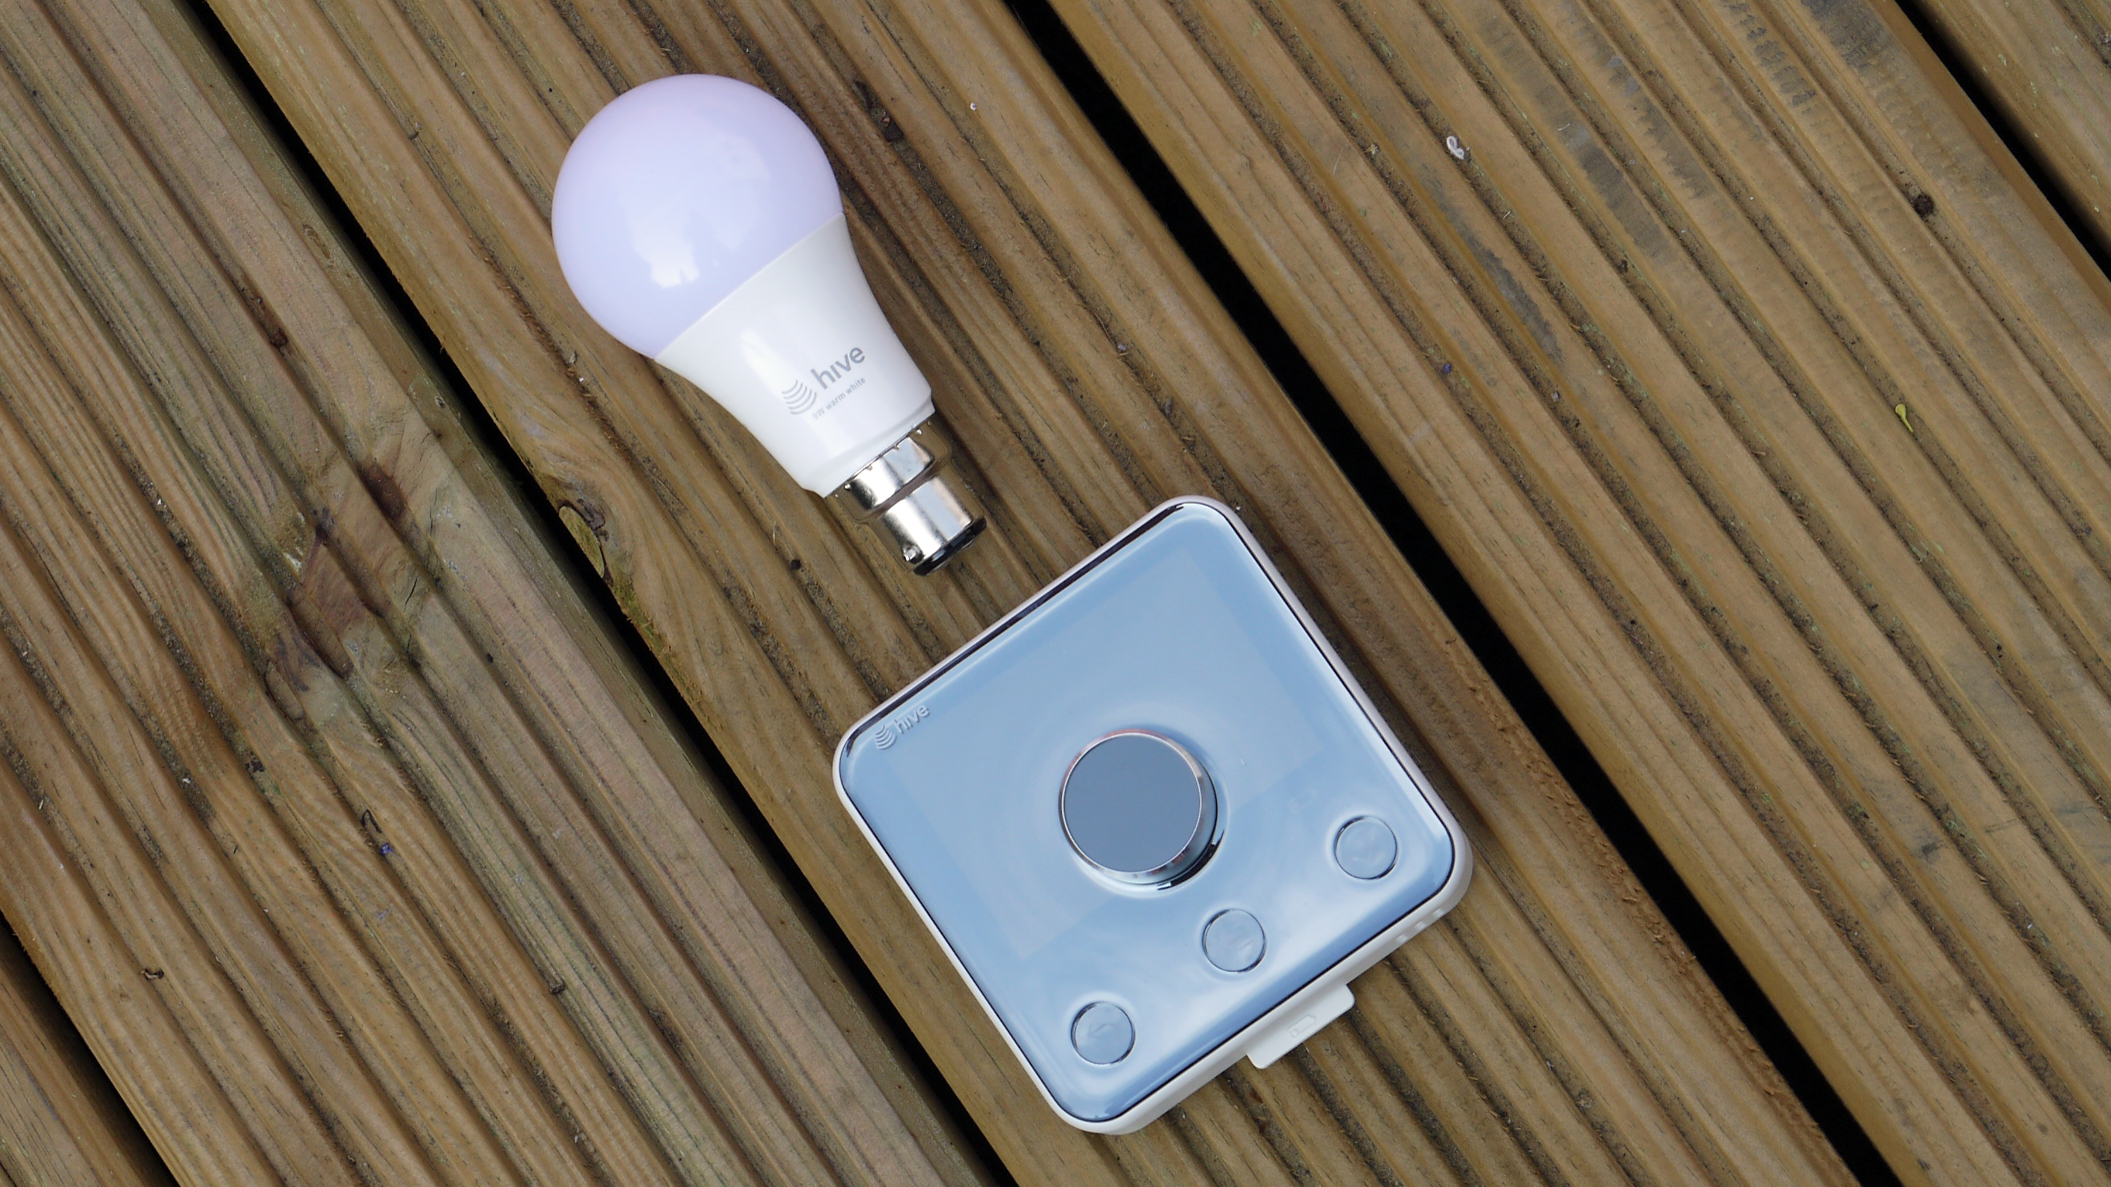
The initial installation is the hardest part of the Hive setup but it’s something you don’t actually need to do yourself. Hive's British Gas connection means that once you purchase the product the installation of Hive is included, although it's worth noting that you don't have to be a British Gas customer to use the smart home system. 

For its initial price you get a wireless thermostat controller, the Hive hub, a receiver that connects up your boiler to the controller and a person to come install the thing. 

Yes, the price is a little steep but the technology you are buying into - more on this later in the review - is worth it. 

Hive is also boasting on its website, that by using its system over the course of a year you can save hundreds on your heating bills. 
The installation was hassle-free on our part. We have a combi boiler - two boilers in a house can also work, you just have to choose the multi-zone package which allows you to control the boilers separately - and already had a rudimentary wireless system attached. The installer simply replaced this with Hive and the whole process took under an hour. 
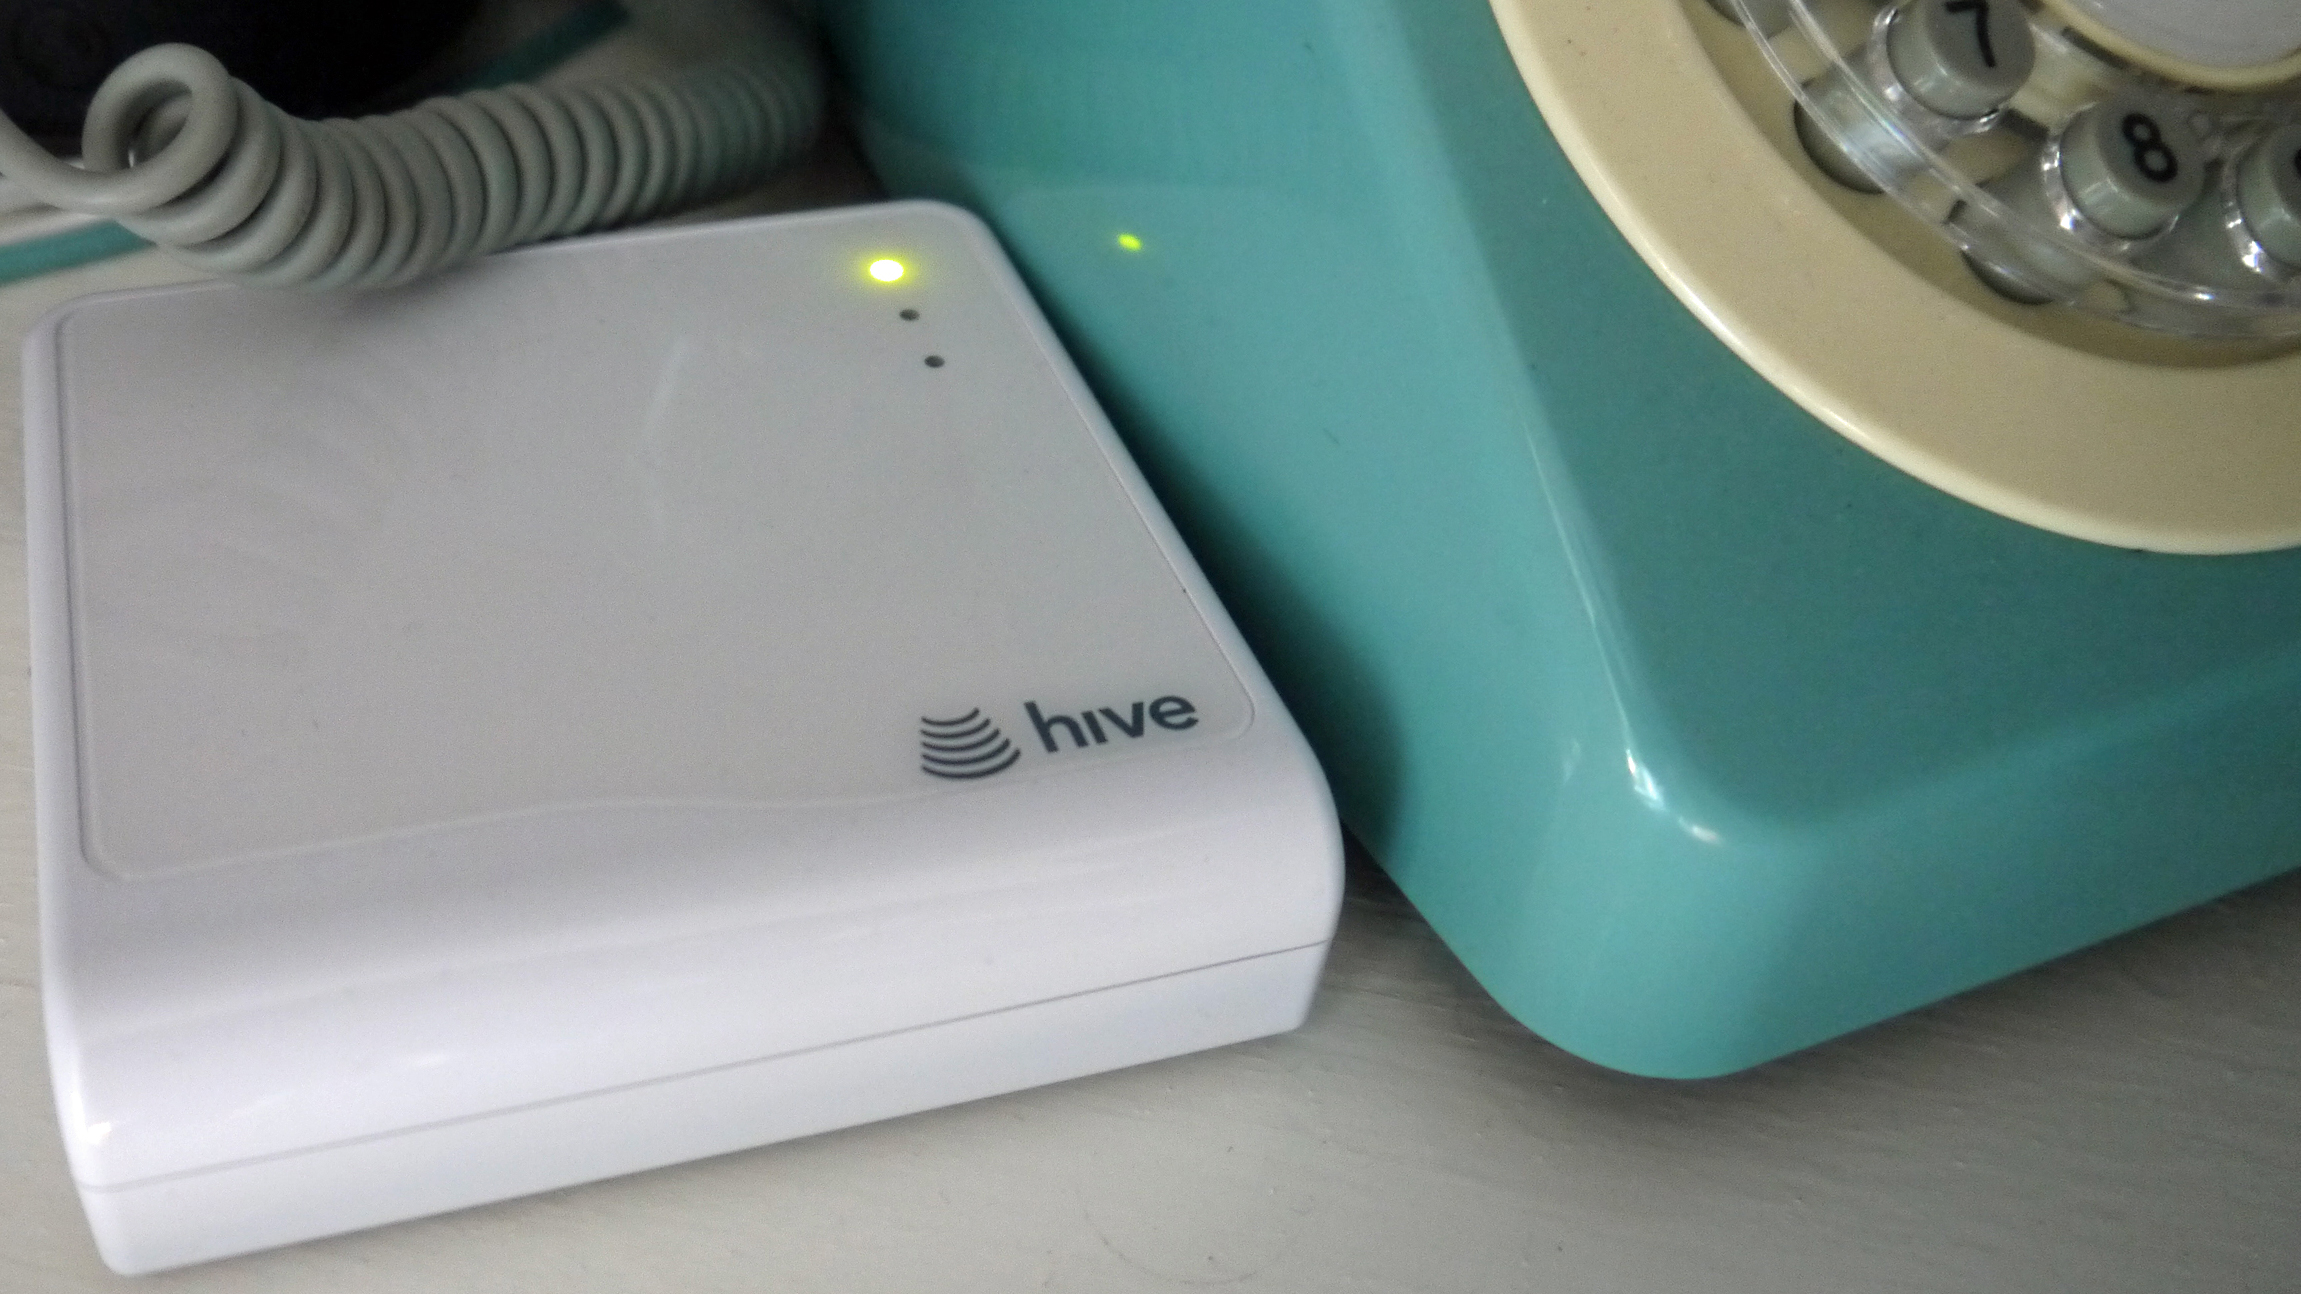
The Hive hub was also set up in this time. The hub is the beating heart of Hive. It connects up to your router and is the thing that each Hive product connects to. Again, setup for this was within that hour time, and included a walkthrough of the app.

Features and performance

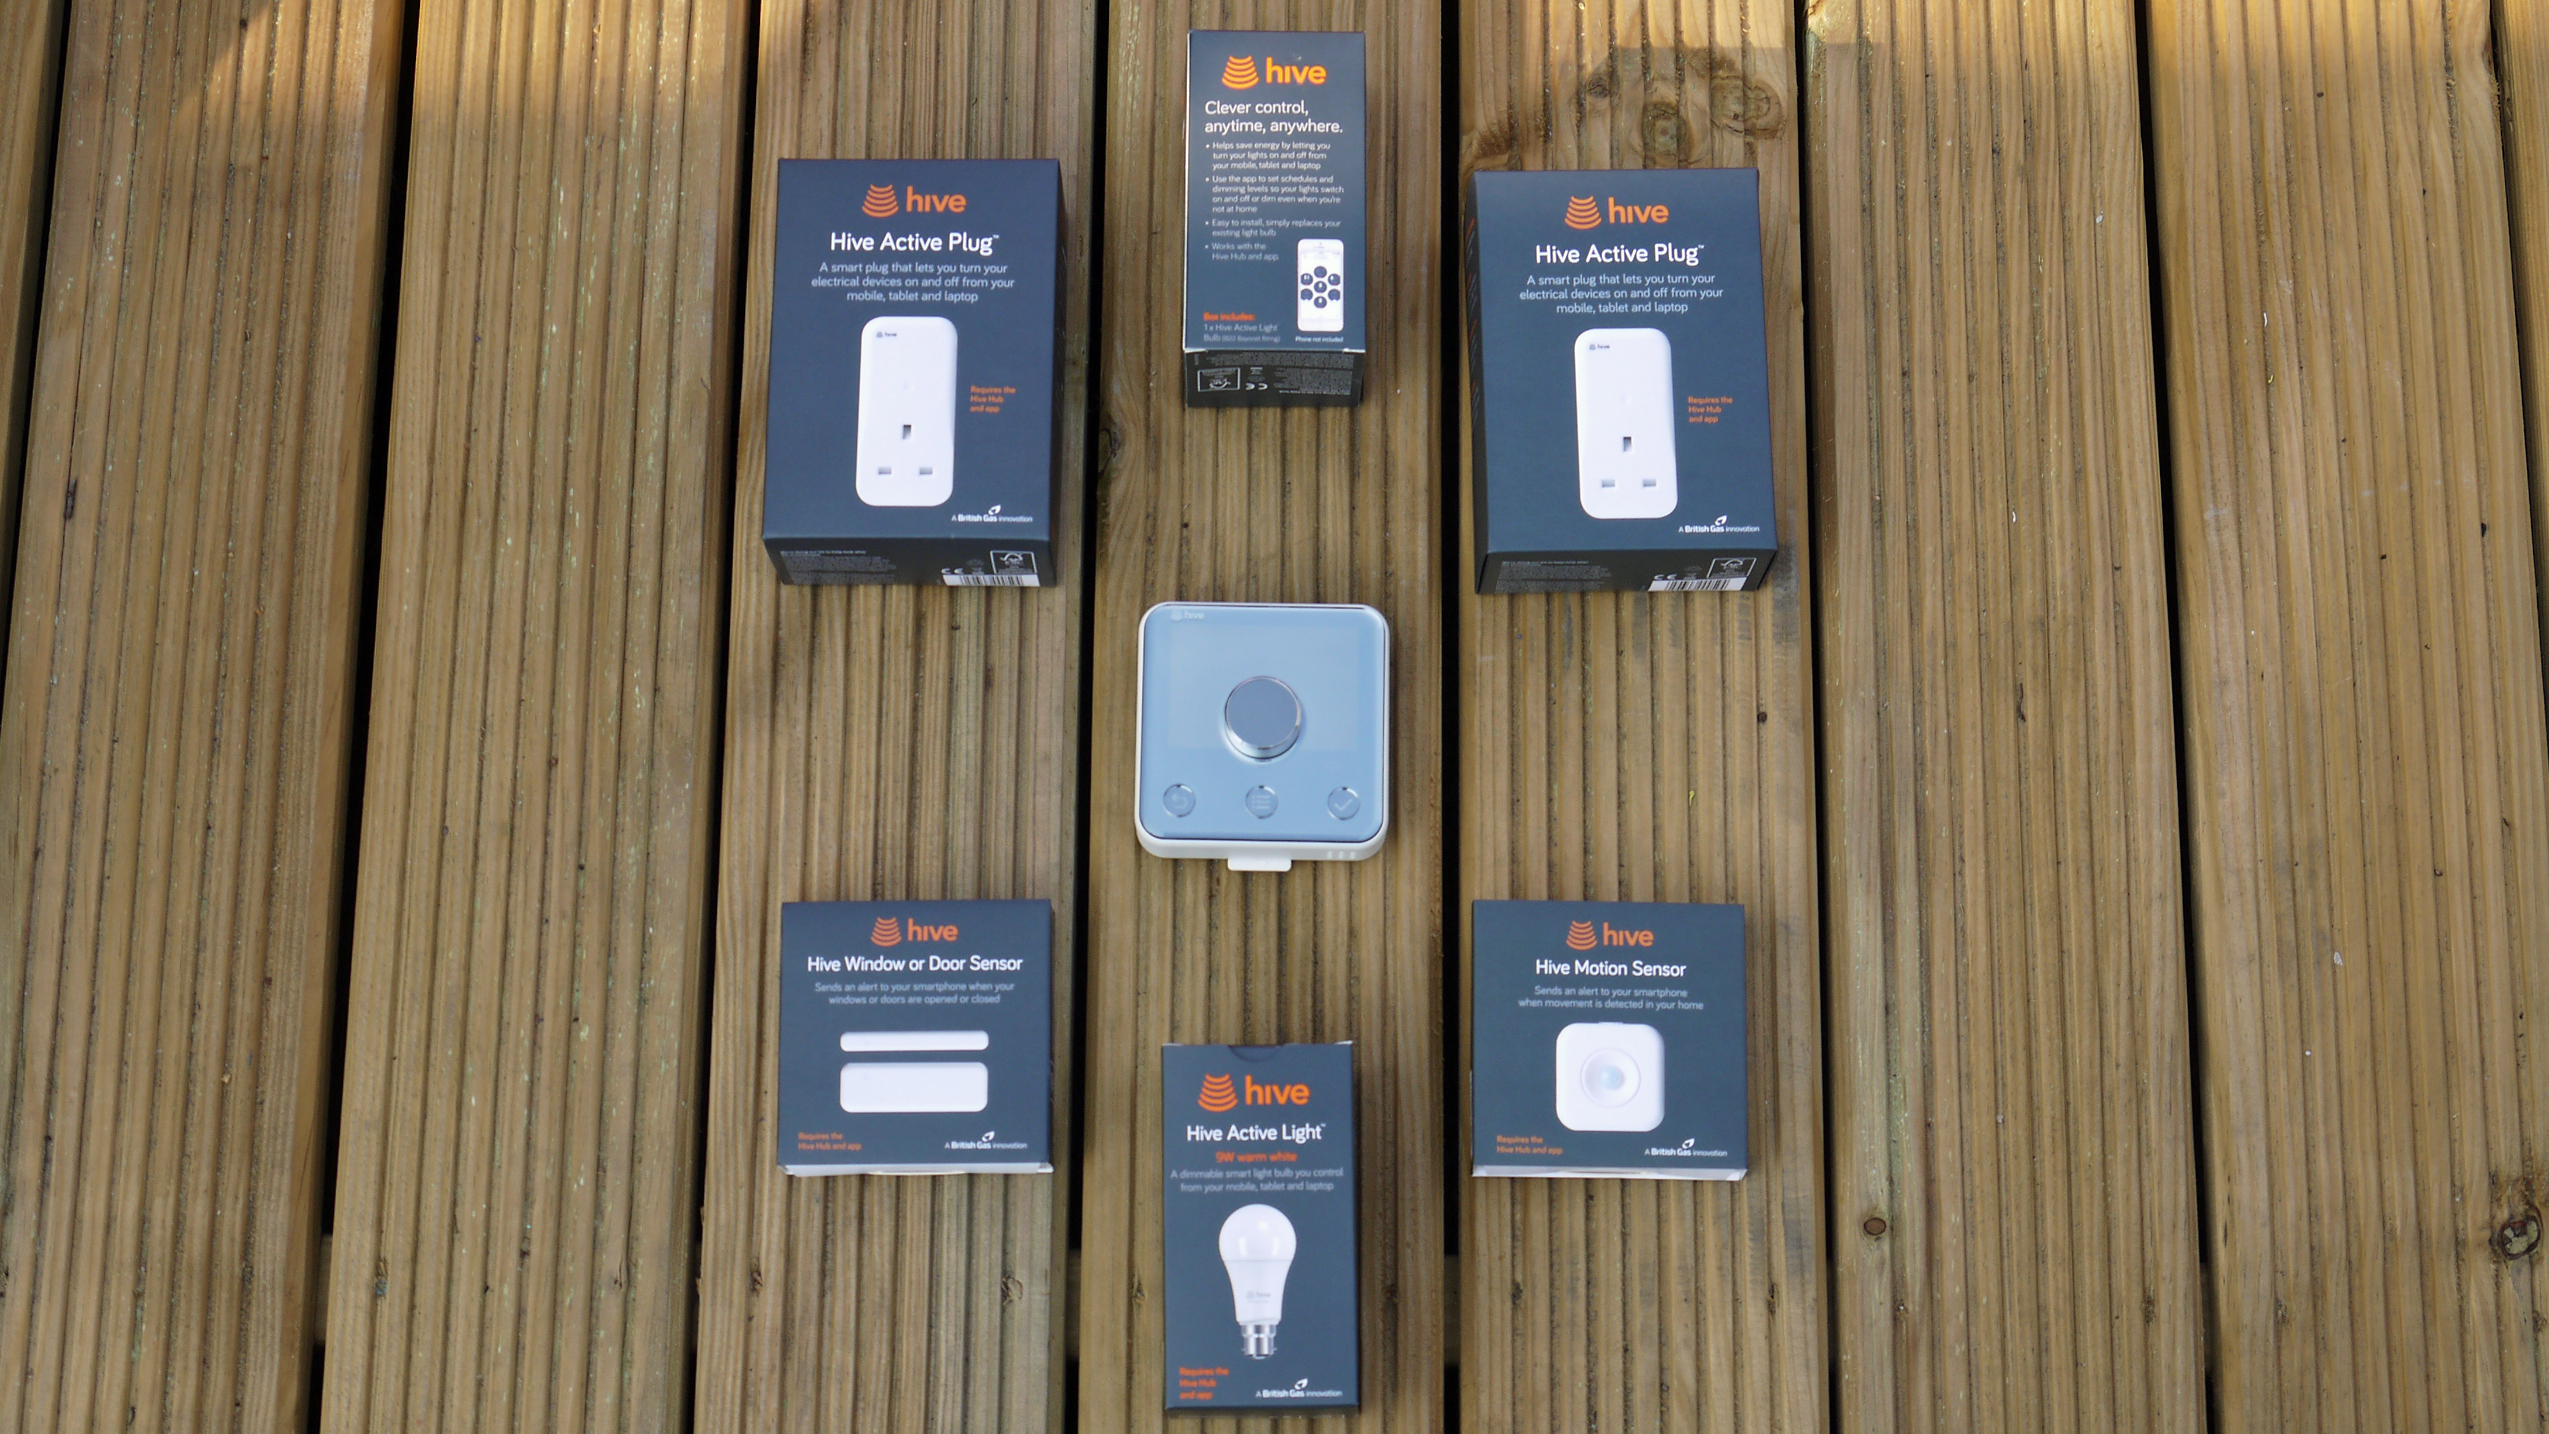
To try out Hive, we didn’t just road test the thermostat for over a month but added a bunch of extras, too. A few years ago, Hive was just a connected thermostat but the service has since expanded to include smart plugs, sensors and connected lights. All of these are also controlled by the Hive app and can be used in a number of ways. 

Let's start with the thermostat. 

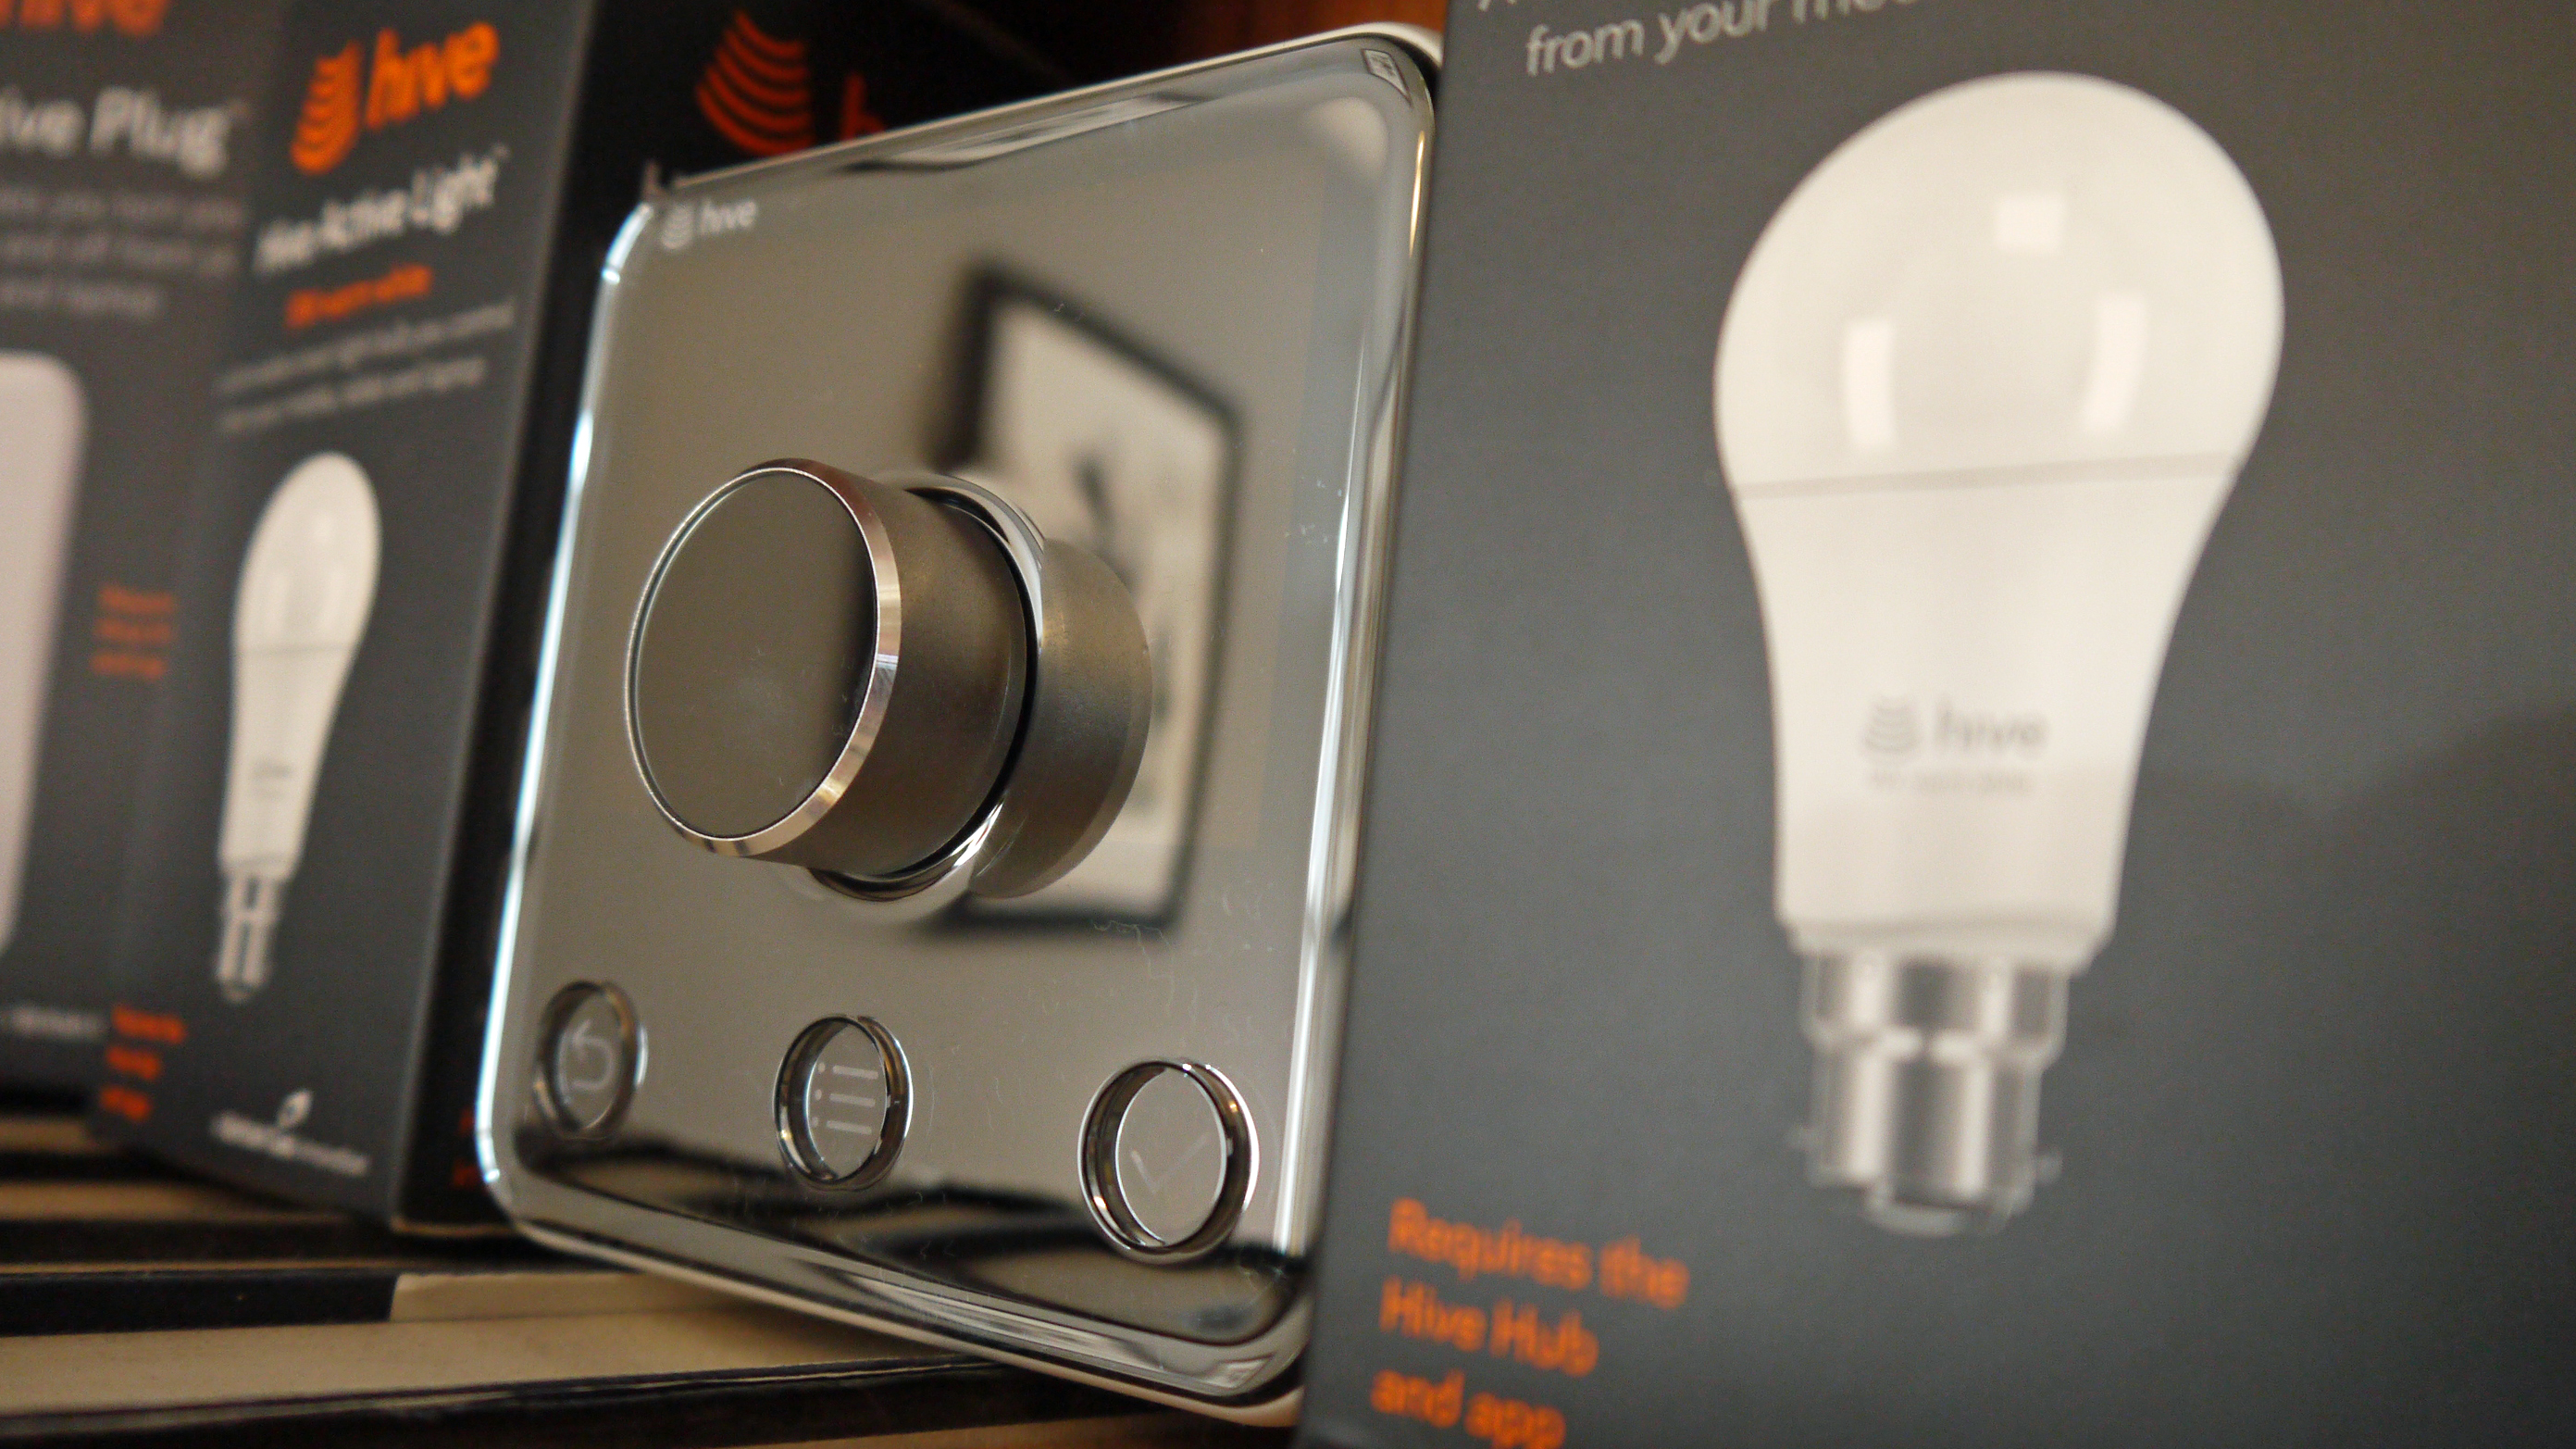
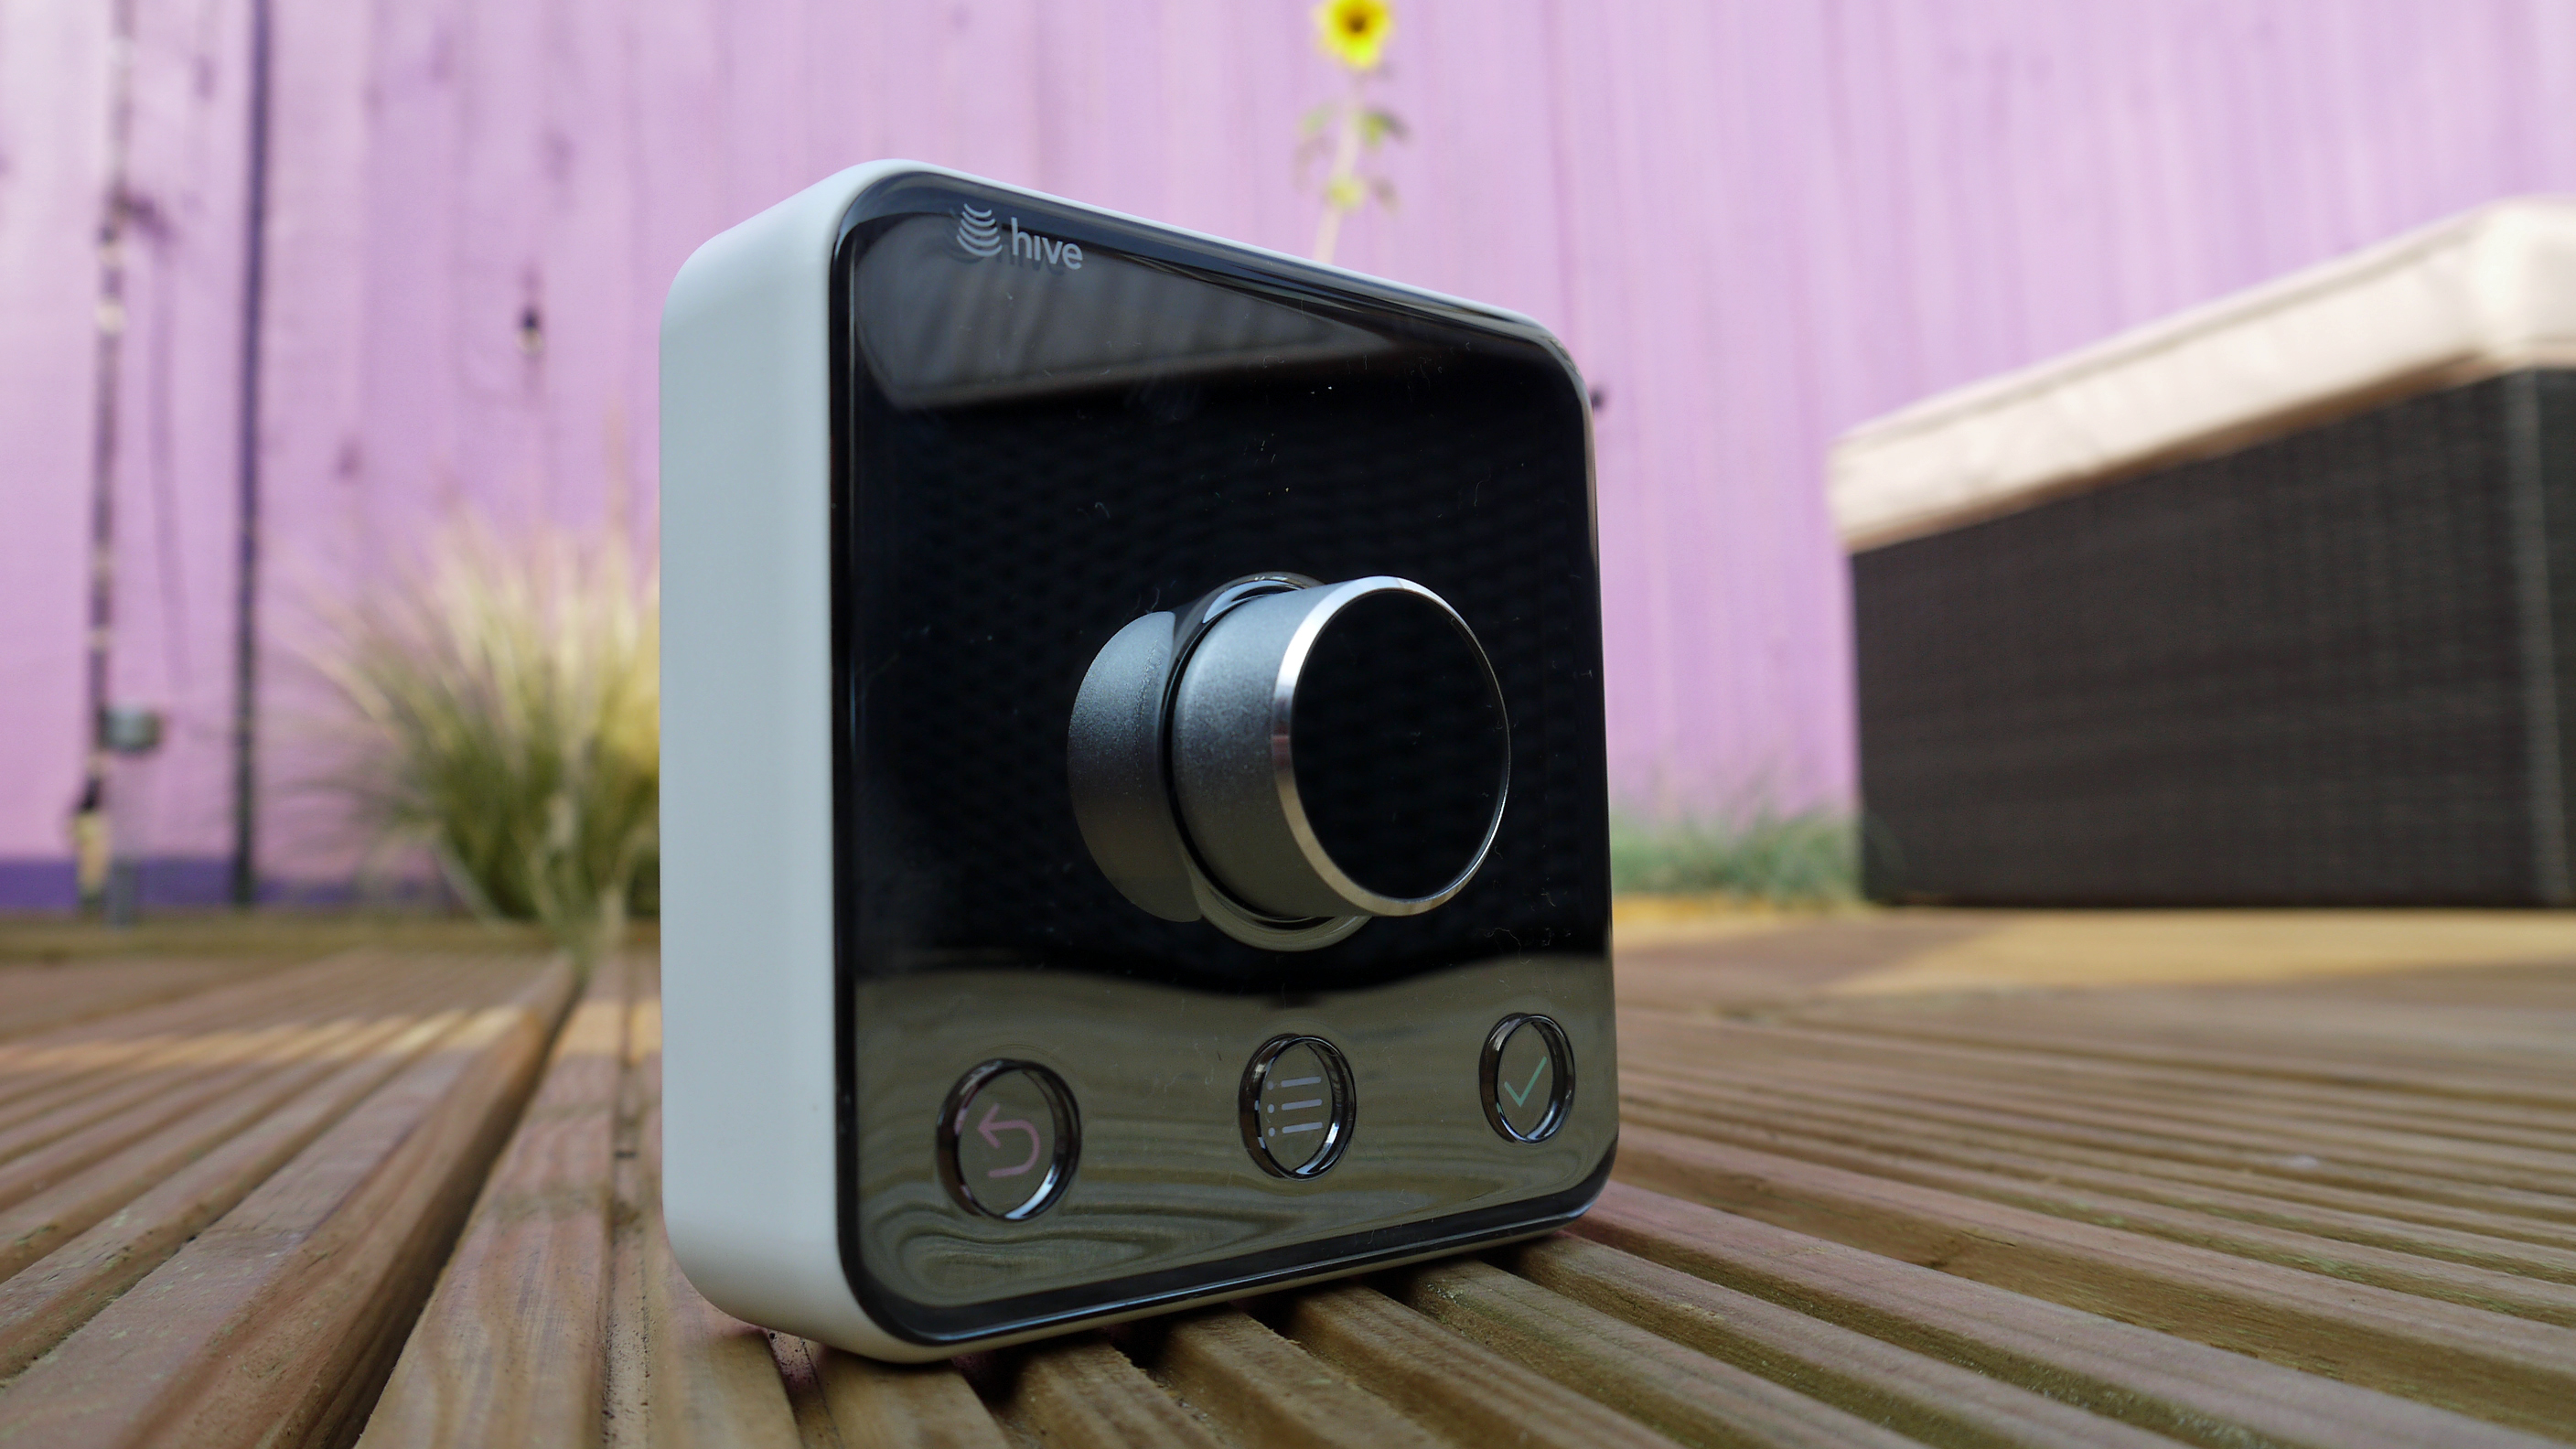
The Hive thermostat is one of the best-looking controllers we have seen for smart heating. It has a physical dial in the centre of the device, which you can move clockwise or anti-clockwise to turn the temperature up or down.

That’s pretty much it. 

The controller is dormant until you turn that dial - once turned it will show on the left-hand side the ‘target’ temperature and on the right the ‘actual’ temperature. If your house has hit the target temperature, then the heating will stay off until it drops, then will turn back on again. 

If you feel the need to boost the temperature a little then there’s a physical button on the top, press this and you can choose how long you want the heating to stay on for, regardless of whether or not you've hit your optimum temperature. 
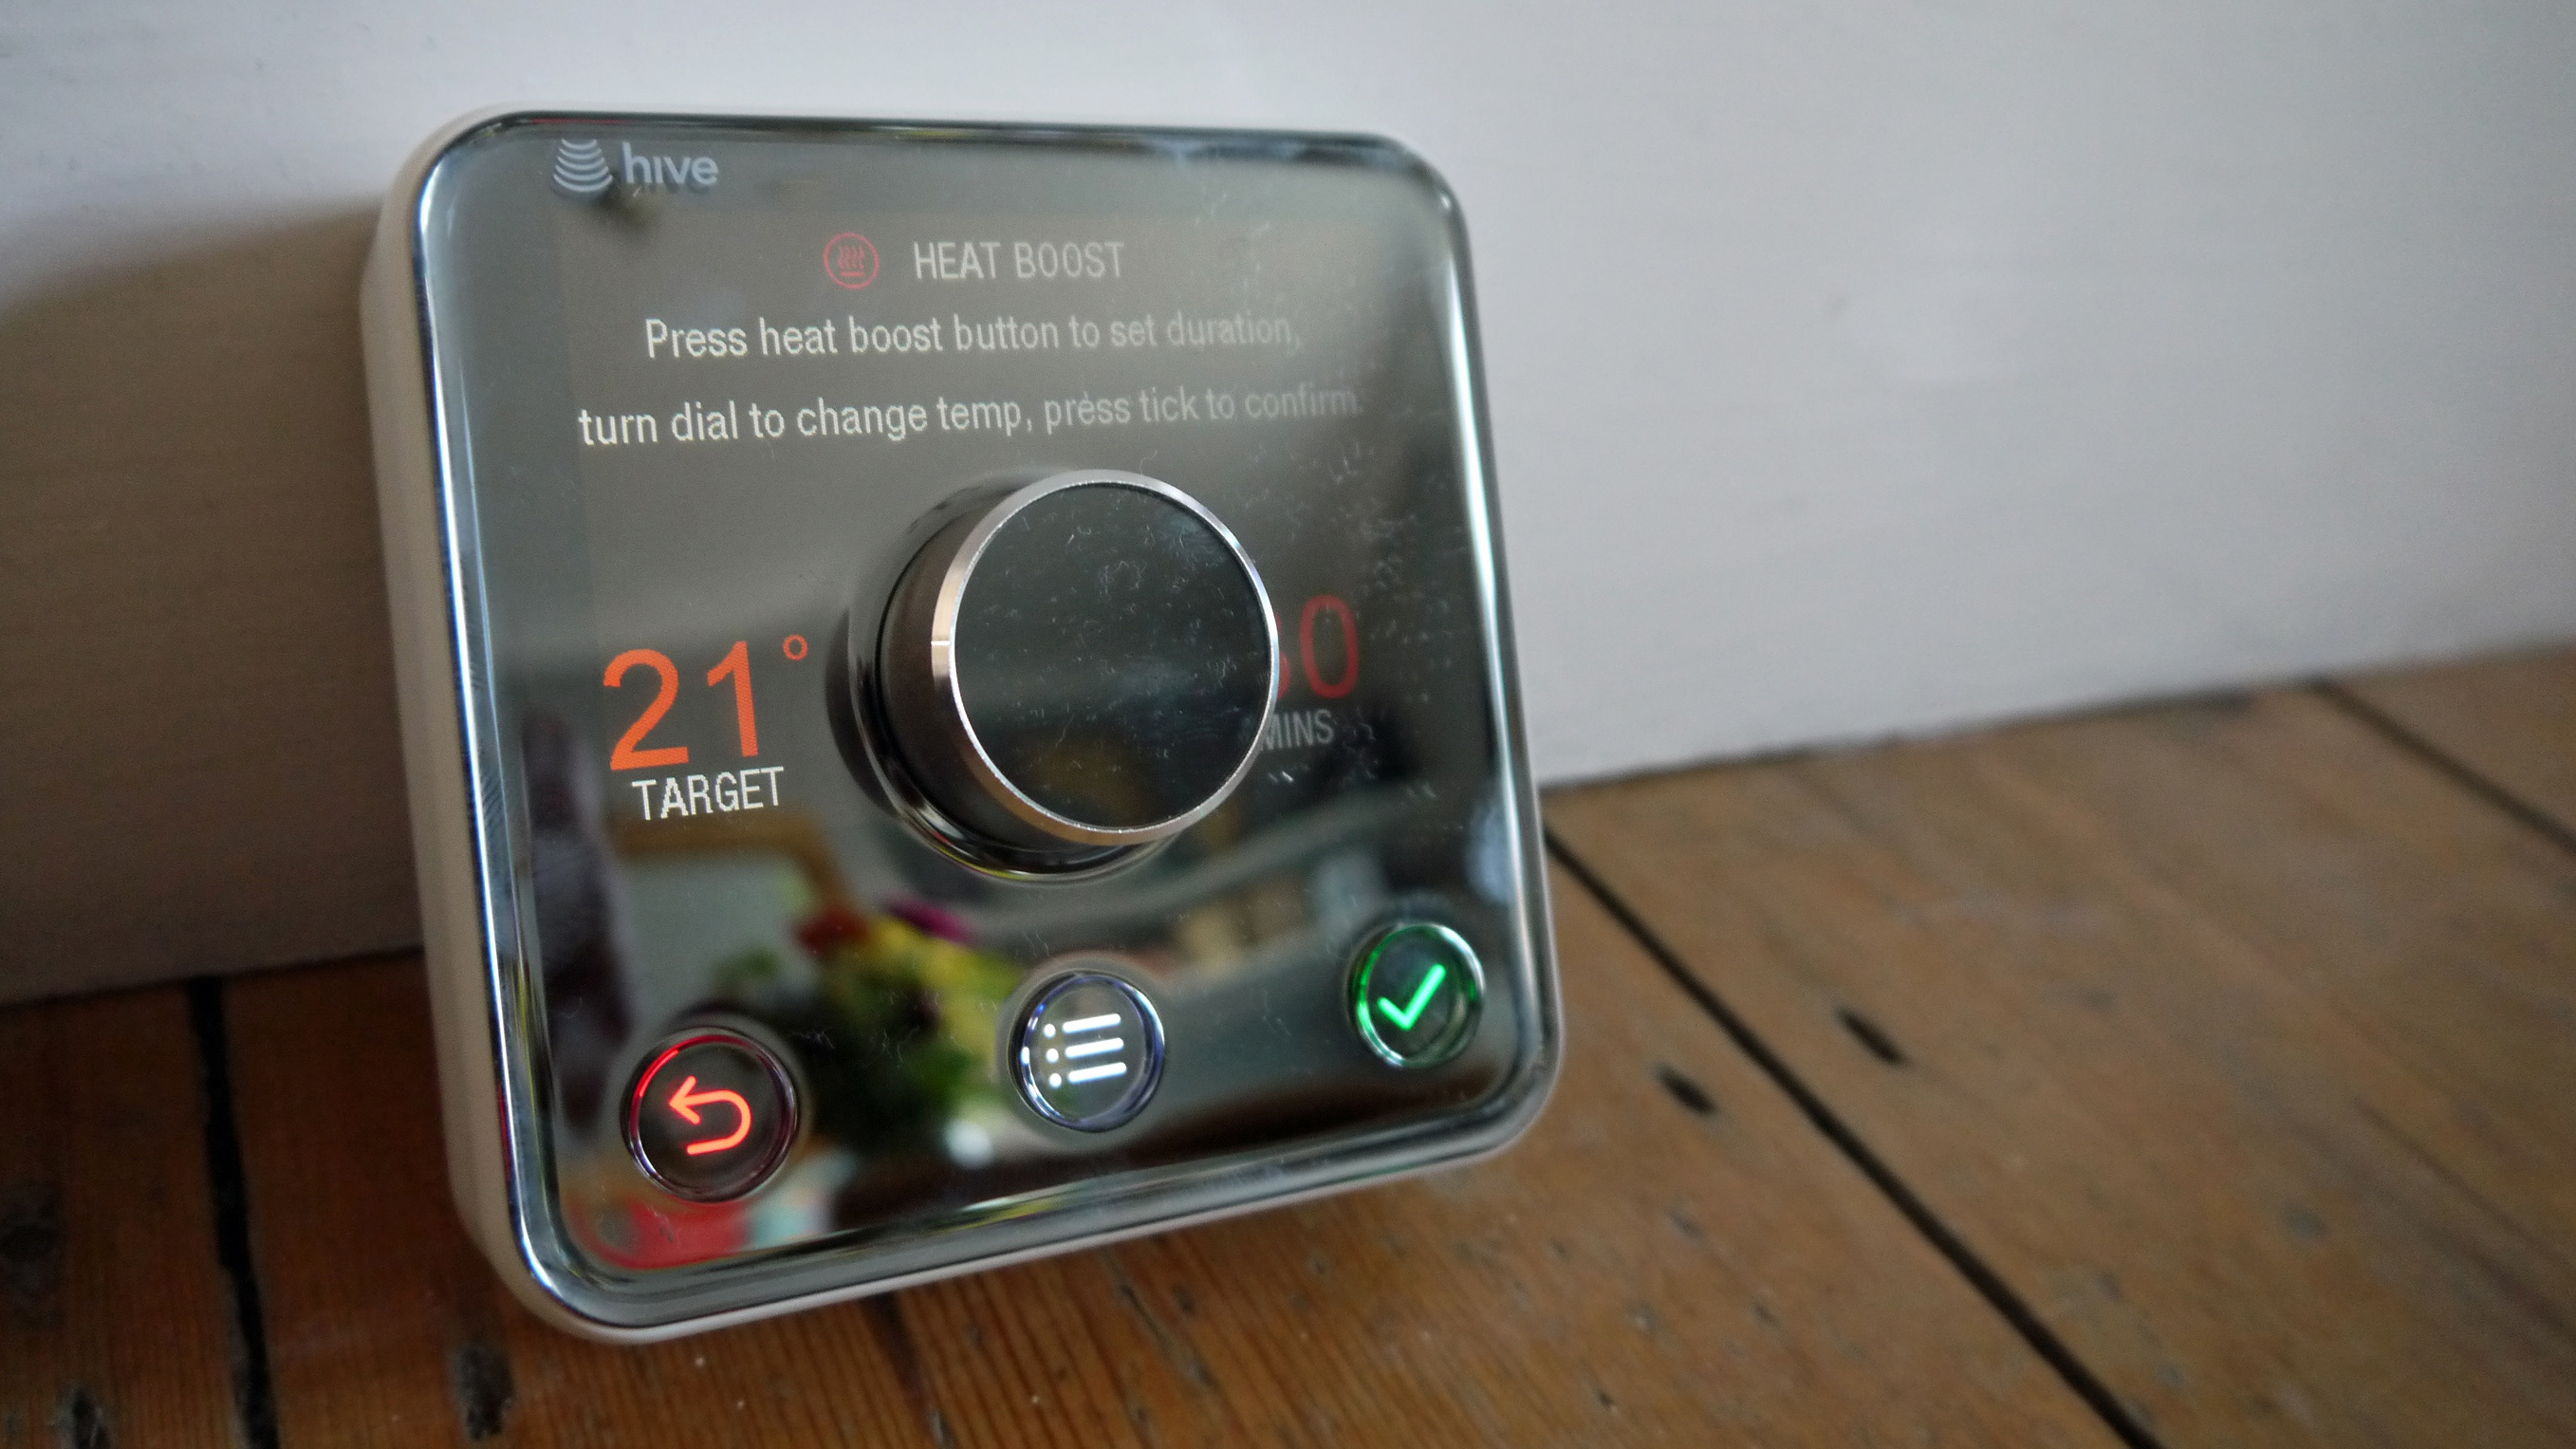
There are three clickable buttons below the dial as well. The middle one brings up extra settings - child lock and frost protection - on the left of this is a back button and on the right a confirm button. 

It’s really easy to use and has been deliberately made this way. After all British Gas is a company that’s been in the heating business for years, and clearly they've learnt a thing or two in that time. If you want more heating control, then you head to the app. 

The Hive app is well designed and a joy to use. The more Hive products you have the more circles you have to press on the main screen - heating always remains in the centre though. If you don’t fancy the visual layout, then you can also look at all your Hive products in list form - at a glance you will be able to see which are online, what status they are in and any schedules you may have sorted. 

We struggled a little with scheduling our heating through the app but did get there in the end. Click into heating and what you get is a quick-fix boost button, a circle telling you what the temperature is and another telling you what you want it to be. You can move the temperature with a flick of the thumb. 
At the bottom there are a few options: Schedule, Manual and off. Schedule is where you can tell your thermostat when to go on and off during the day. The layout is simple enough, but it’s actually a little fiddly to do. It offers up six time slots - click on one of them and you can change what the temperature will be for that time. It’s all fine, until you start changing the times - sometimes the app gets confused with the start and end points of when you want the heating to be on. 

It's a far cry from the Nest app with its granular 15 minute increments and ability to learn intelligently how you like your heating set up. 

Persevere, though, and the Hive app does eventually sort itself out. 

Once you have got one day sorted you can copy that schedule for the rest of the days of the week, if you so wish. Once this is done, you’ll find the app is so easy to use that you’ll hardly touch the actual thermostat - controlling your heating with your phone is much more fun. 
The Hive app also has a neat geolocation tool. Use it and it will tell you if you have left your heating on when you are out of your house and send you reminders to switch it on before you get back home, so the place will be toasty for you. It’s not a feature you will use if you have rigidly sorted the schedule but it’s a worthy addition nonetheless. And if you go on holiday, there is a mode for this too, which essentially keeps your heating dormant until you return.

Unfortunately the thermostat doesn't support any kind of motion sensing (like that found in the Nest), so it has to rely solely on this geolocation tool to work out if you're home or not. It's a shame that this feature has been omitted, since it's a feature that makes the Nest a much more effortless experience. 

Hive: the centre of your smart home

Installing other devices to your Hive setup is simple too. As mentioned before, we also installed motion sensors in our home, window sensors and smart, dimmable bulbs. 
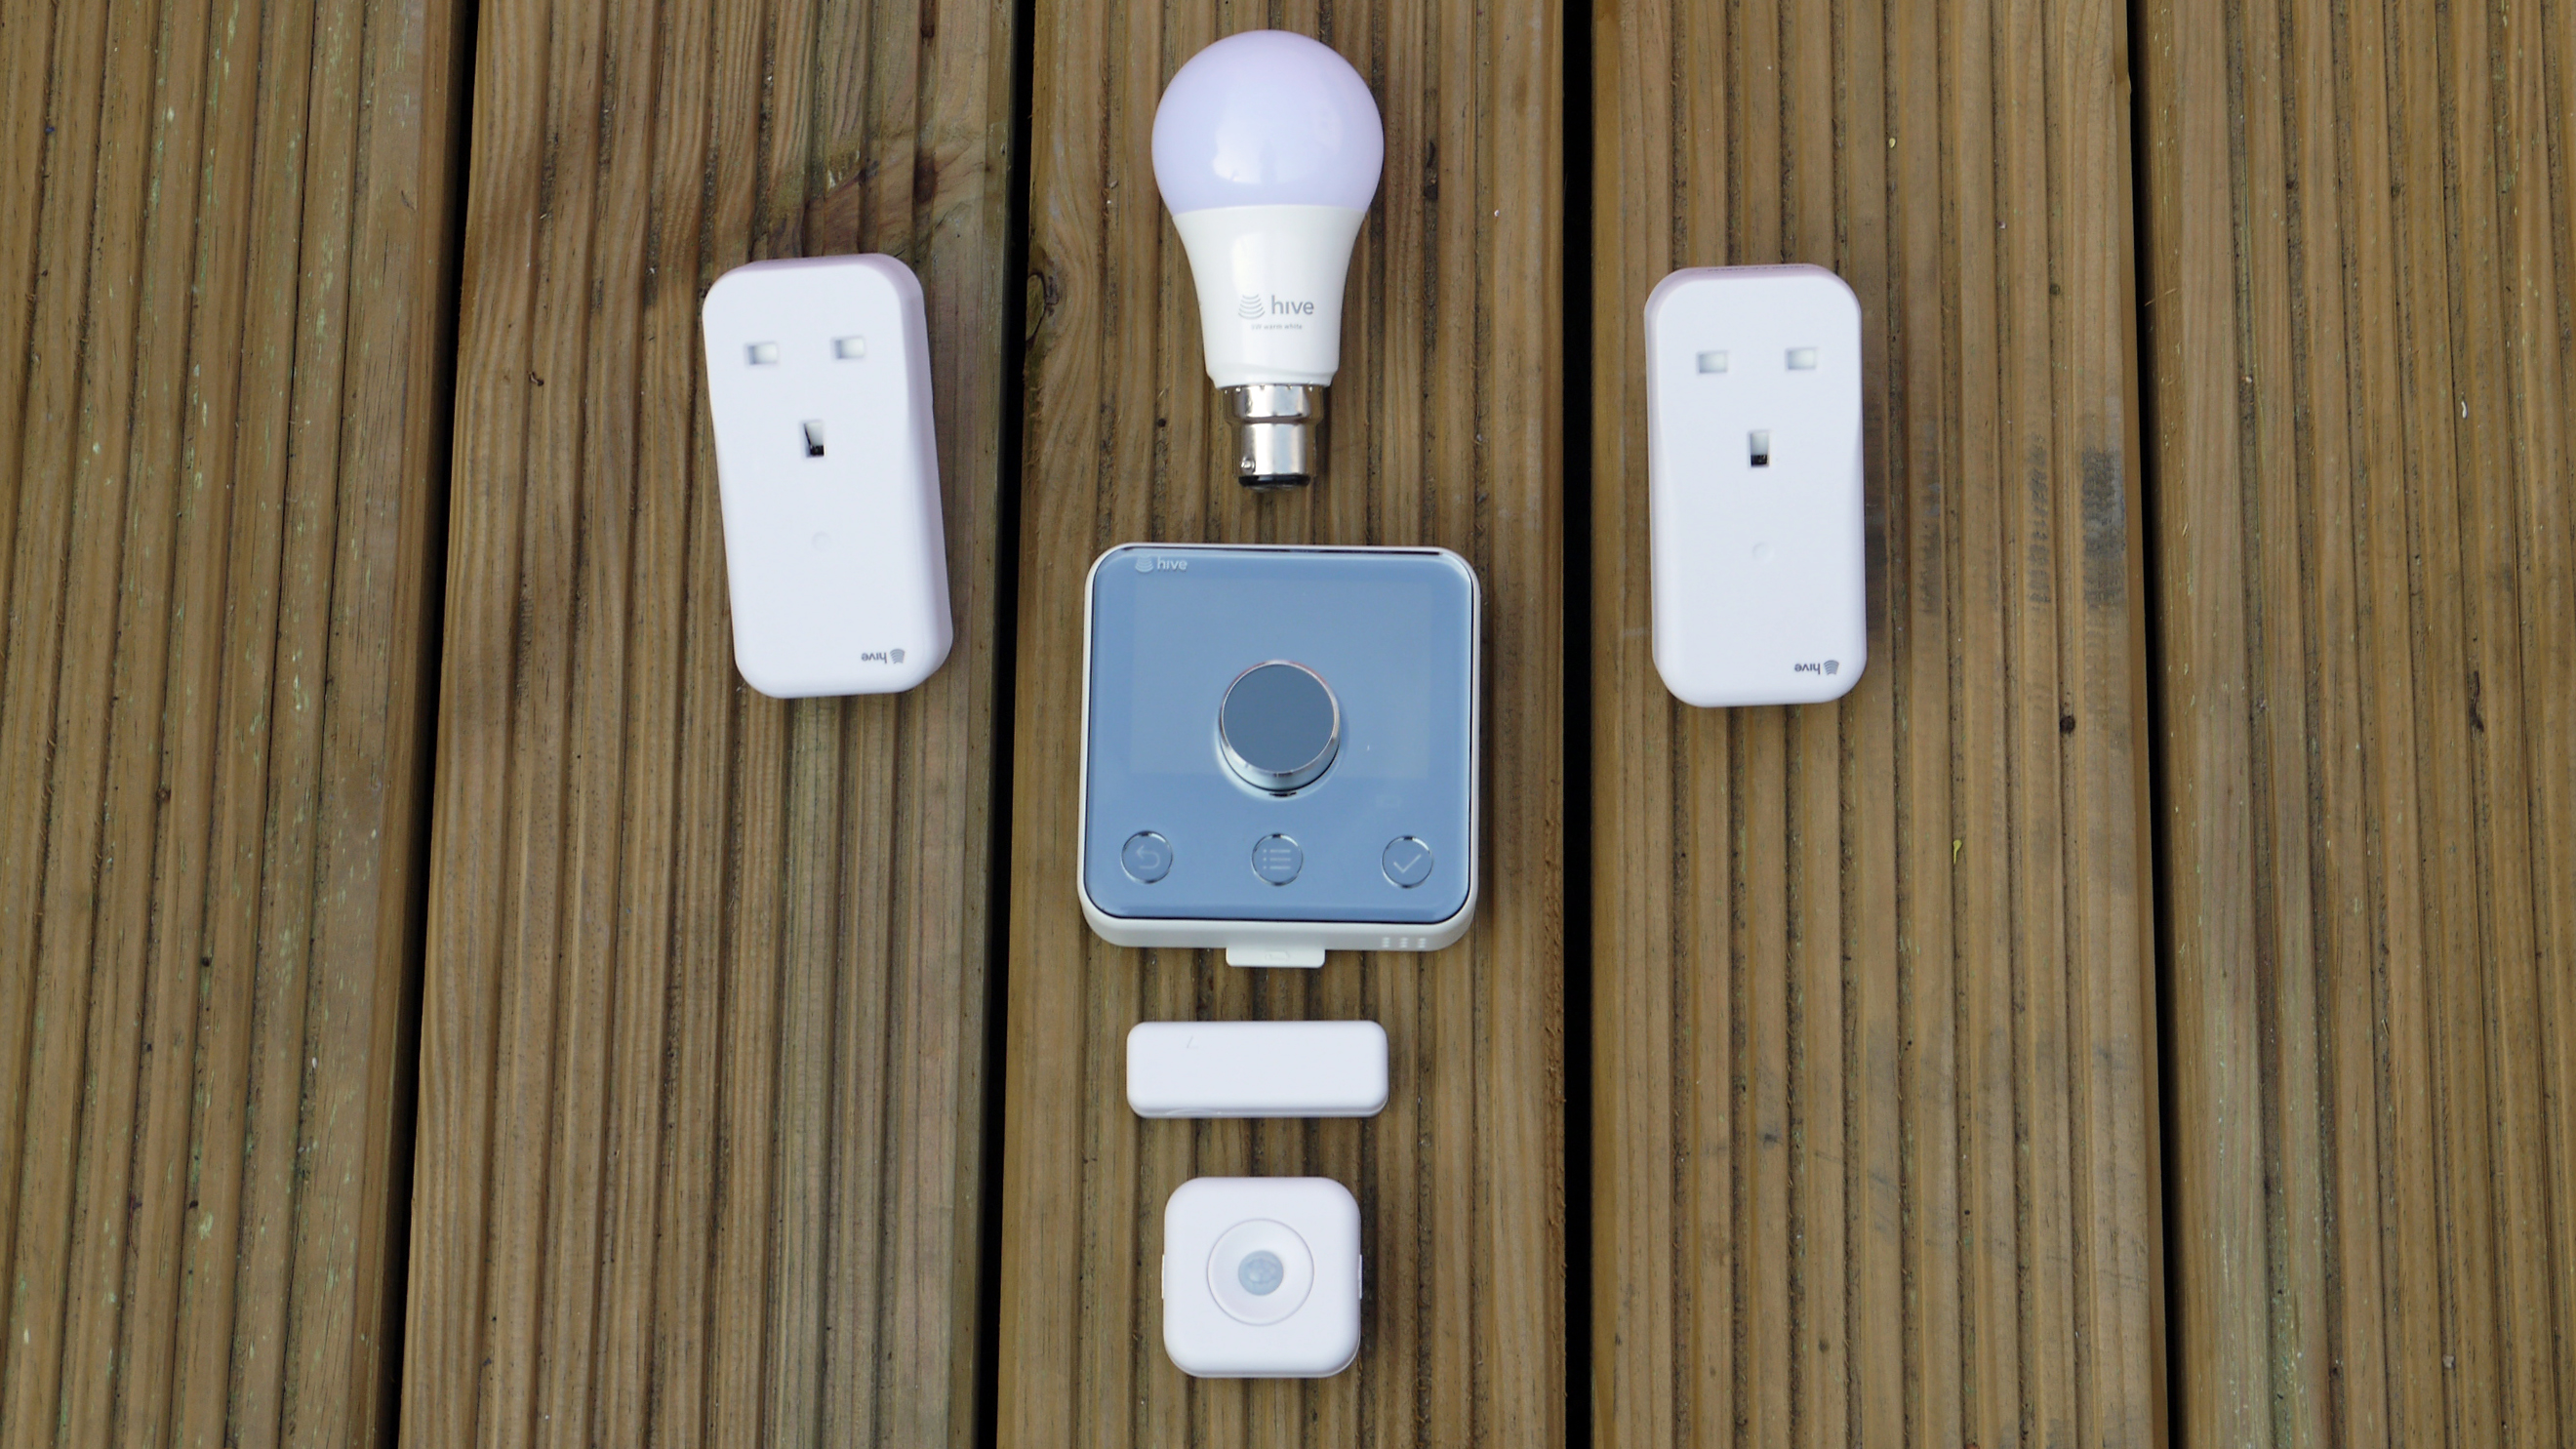
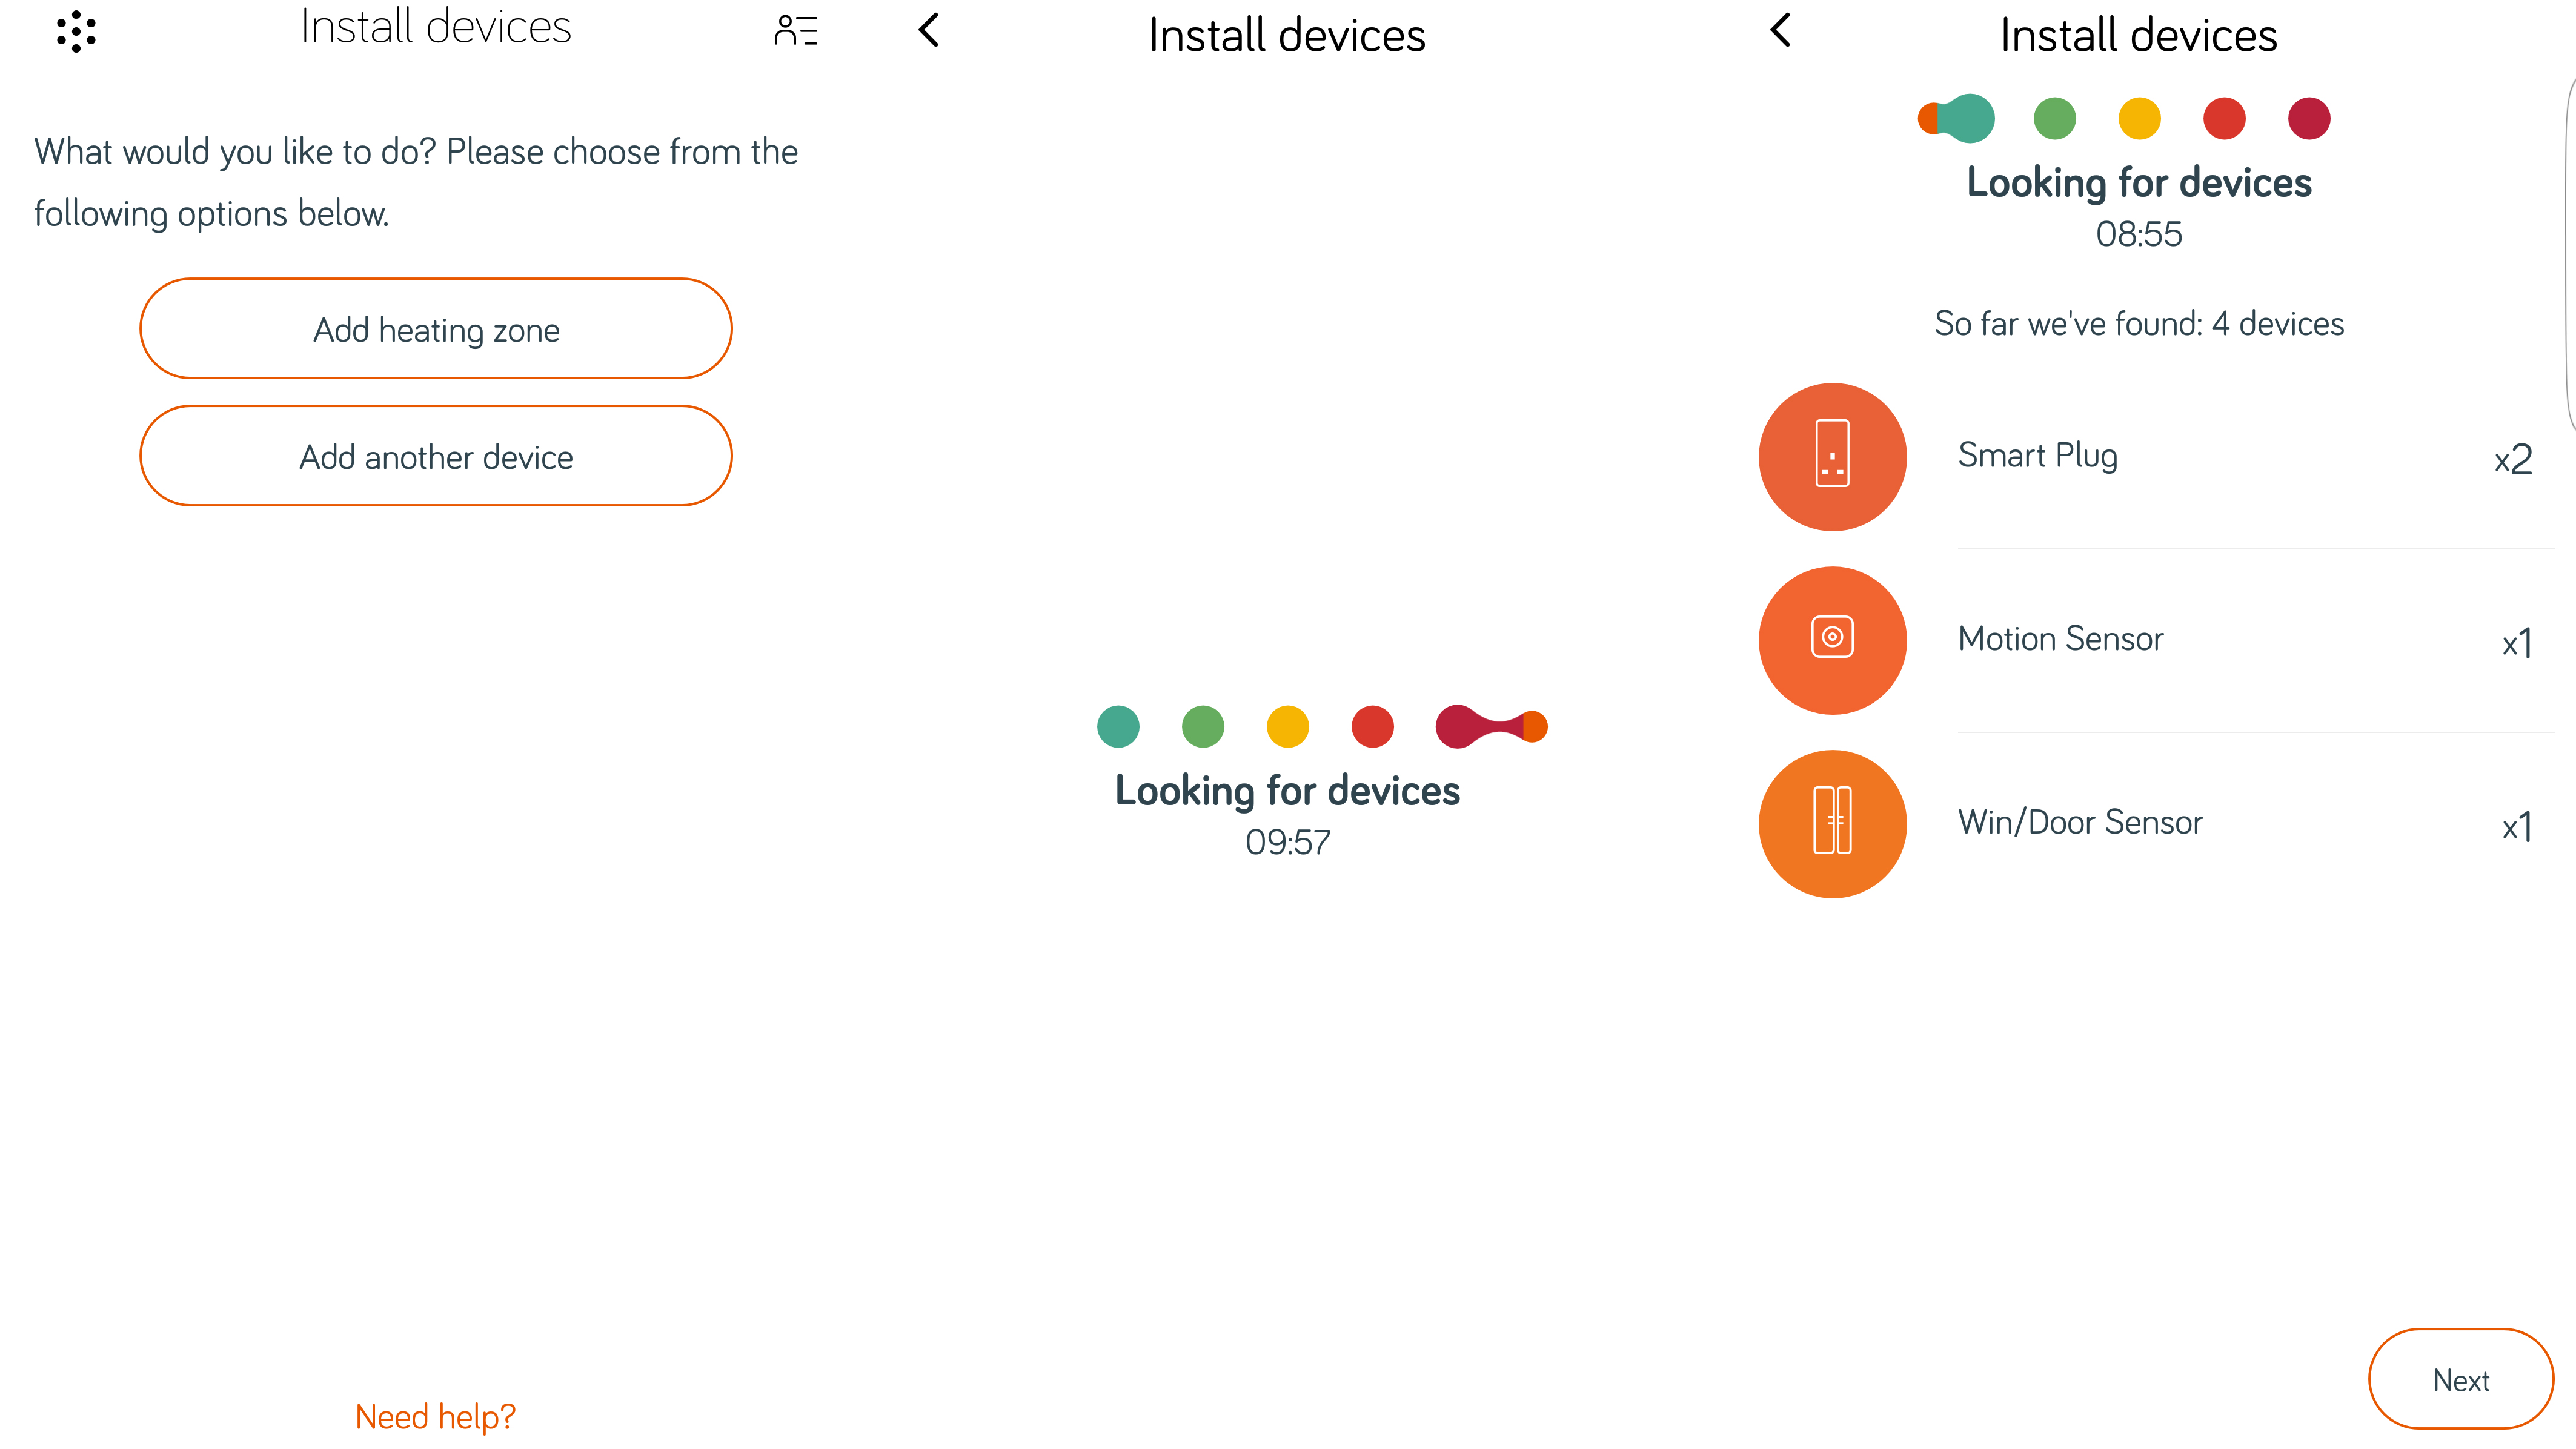
To install these, you connect them as per the simple instructions on their box, then click on the Install Devices section of the app. It will ask you to Add a Heating Zone or Add Another Device. Add Another Device will automatically push the app to search for any devices in your home. There is a time limit of 10 minutes on this, but each one of our devices were found in under a minute. 
Once found they will be labelled rather generically Plug One, Light One etc. You can easily rename them which helps massively if you have a few of them dotted around your house. 

Controlling these is simple. With the lights, you just have to make sure that your light switches are always on, and then turn the lights off through the app. 

Through the app you can dim them by a percentage each time - there’s a slight delay in telling the app to do this and it actually happening but it’s mere seconds.

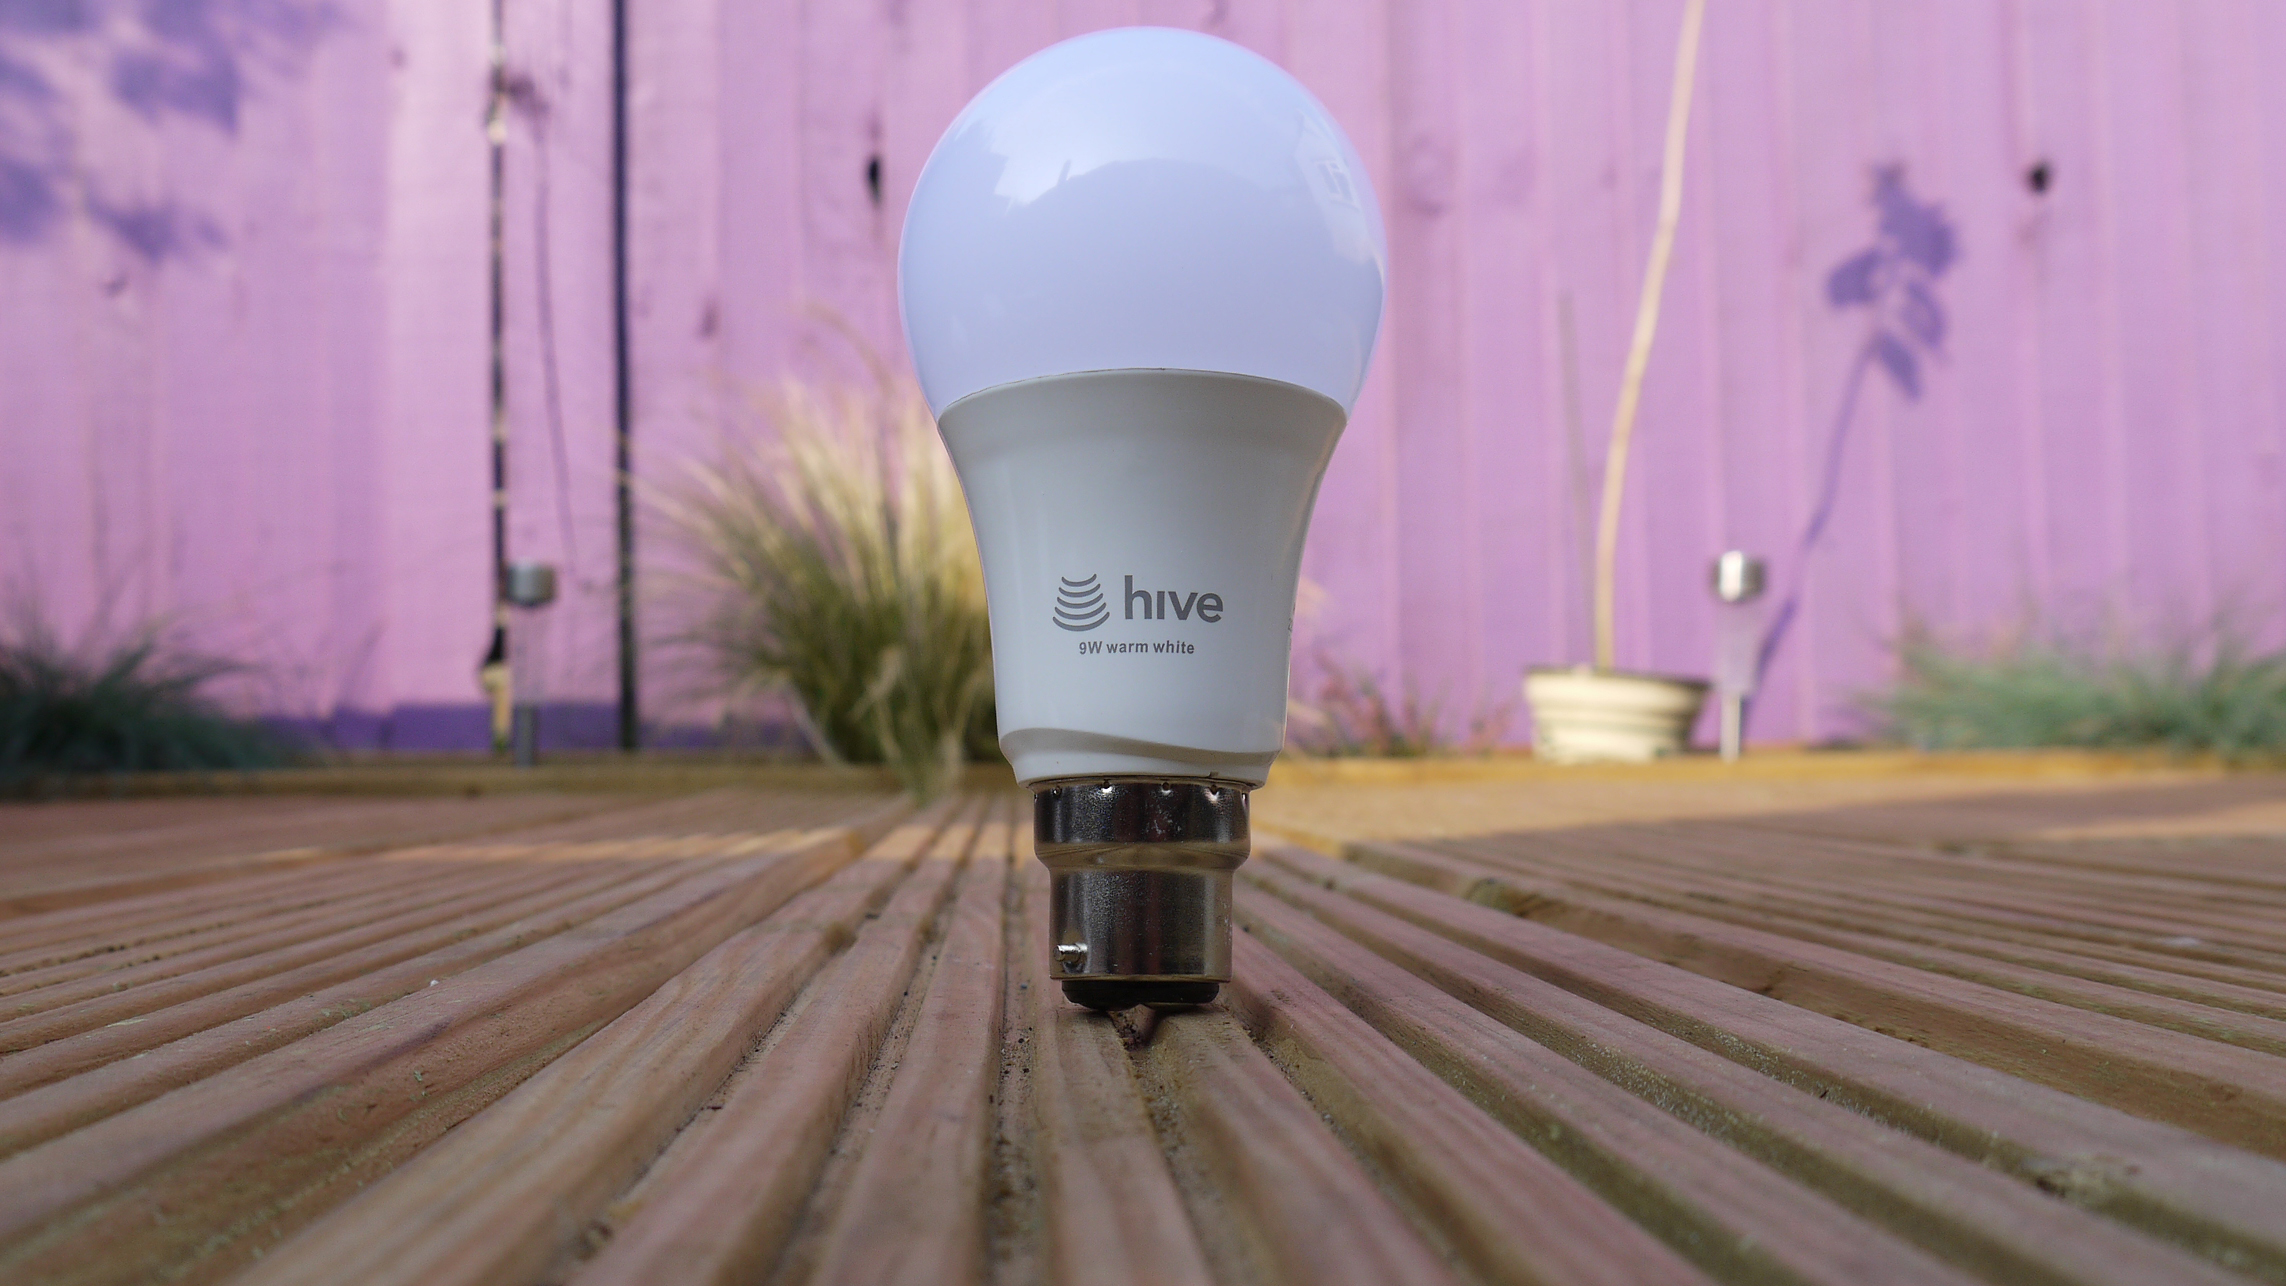
Hive has also introduced colour-changing bulbs. These work really well. For our tests, we installed one in our nursery and it worked a treat. Like with the standard smart bulbs, the idea is that you switch the lights to 'on' all the time, then turn the light on and off with the app. If you don't do this, you will notice a weird flash that lasts around half a second when you turn the light on from the switch. It takes some getting used to and may make you jump so best to keep the light switched on and work within the app.

Much like the standard lights, the app is setup so you can change the look of the light in increments. As well as being able to choose how dim the light is, you can also change the colour - by pressing the pipet icon. The colour choice goes from red to orange, yellow, blue, purple and back to red again. There is also the option to have them simply as 'white'.

We had a lot of fun with the bulbs but at £44.99 they are more than double the price of the standard bulbs.  
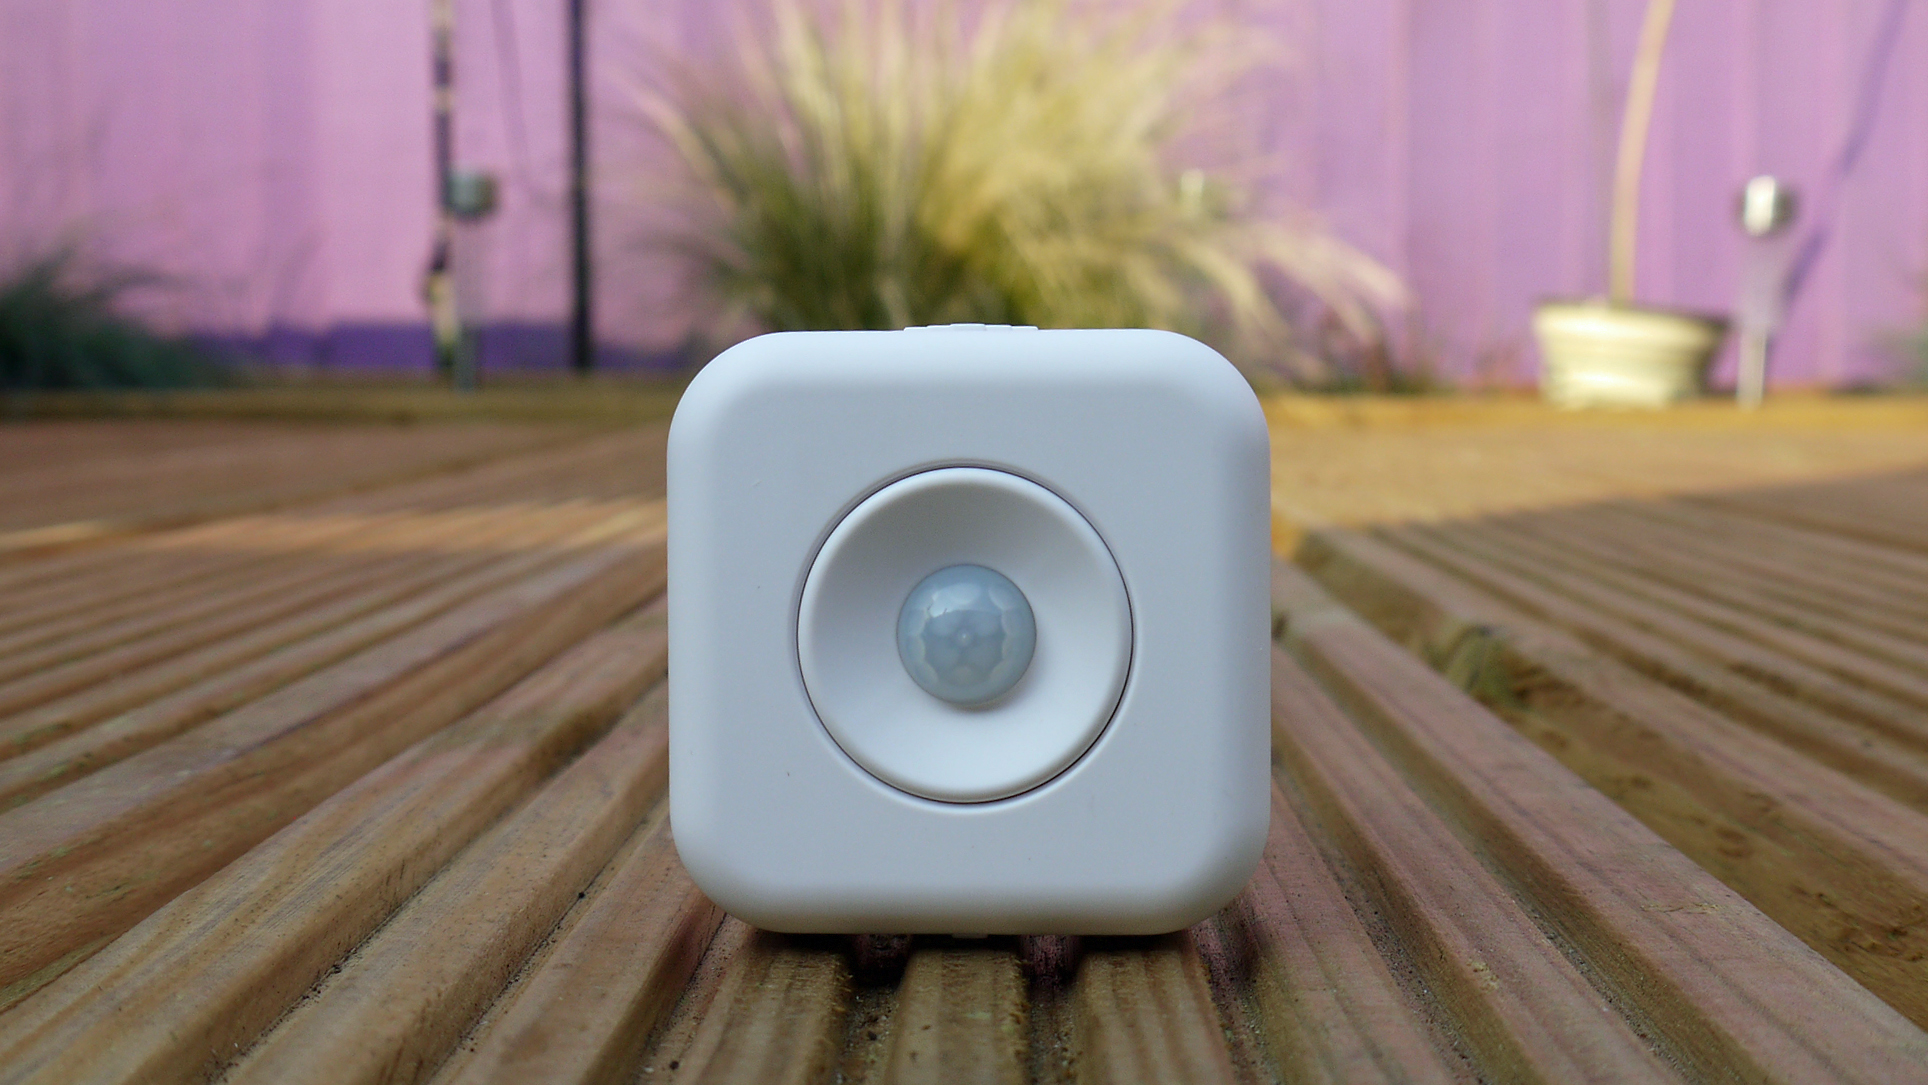
When it comes to the motion sensors, for some reason notifications are switched off to begin with. So, even through your motion detectors will detect motion, the only way you will know about it is by looking at the activity log in the app. 

Switching notification on is just a couple of clicks away and - and you have the choice of how to be notified, through push notifications, text or by email. In our trials, it took around five seconds for the motion to be detected and the notification to be sent. When it comes to the smart plugs, these work well as light timers - add one to any light in the house and you can schedule them to go on and off. We added it to one of our outside lights - which has a plug on the inside - and it worked great. 

Frustratingly, there's no option to hook the motion sensor up to your thermostat, so you won't be able to have your thermostat automatically know that you're home just from sensing your motion. 

Since we reviewed Hive, the sensors have been redesigned. We will be trying out the new sensors, although they should work the same as the ones we have reviewed - they've just been given an updated look. 
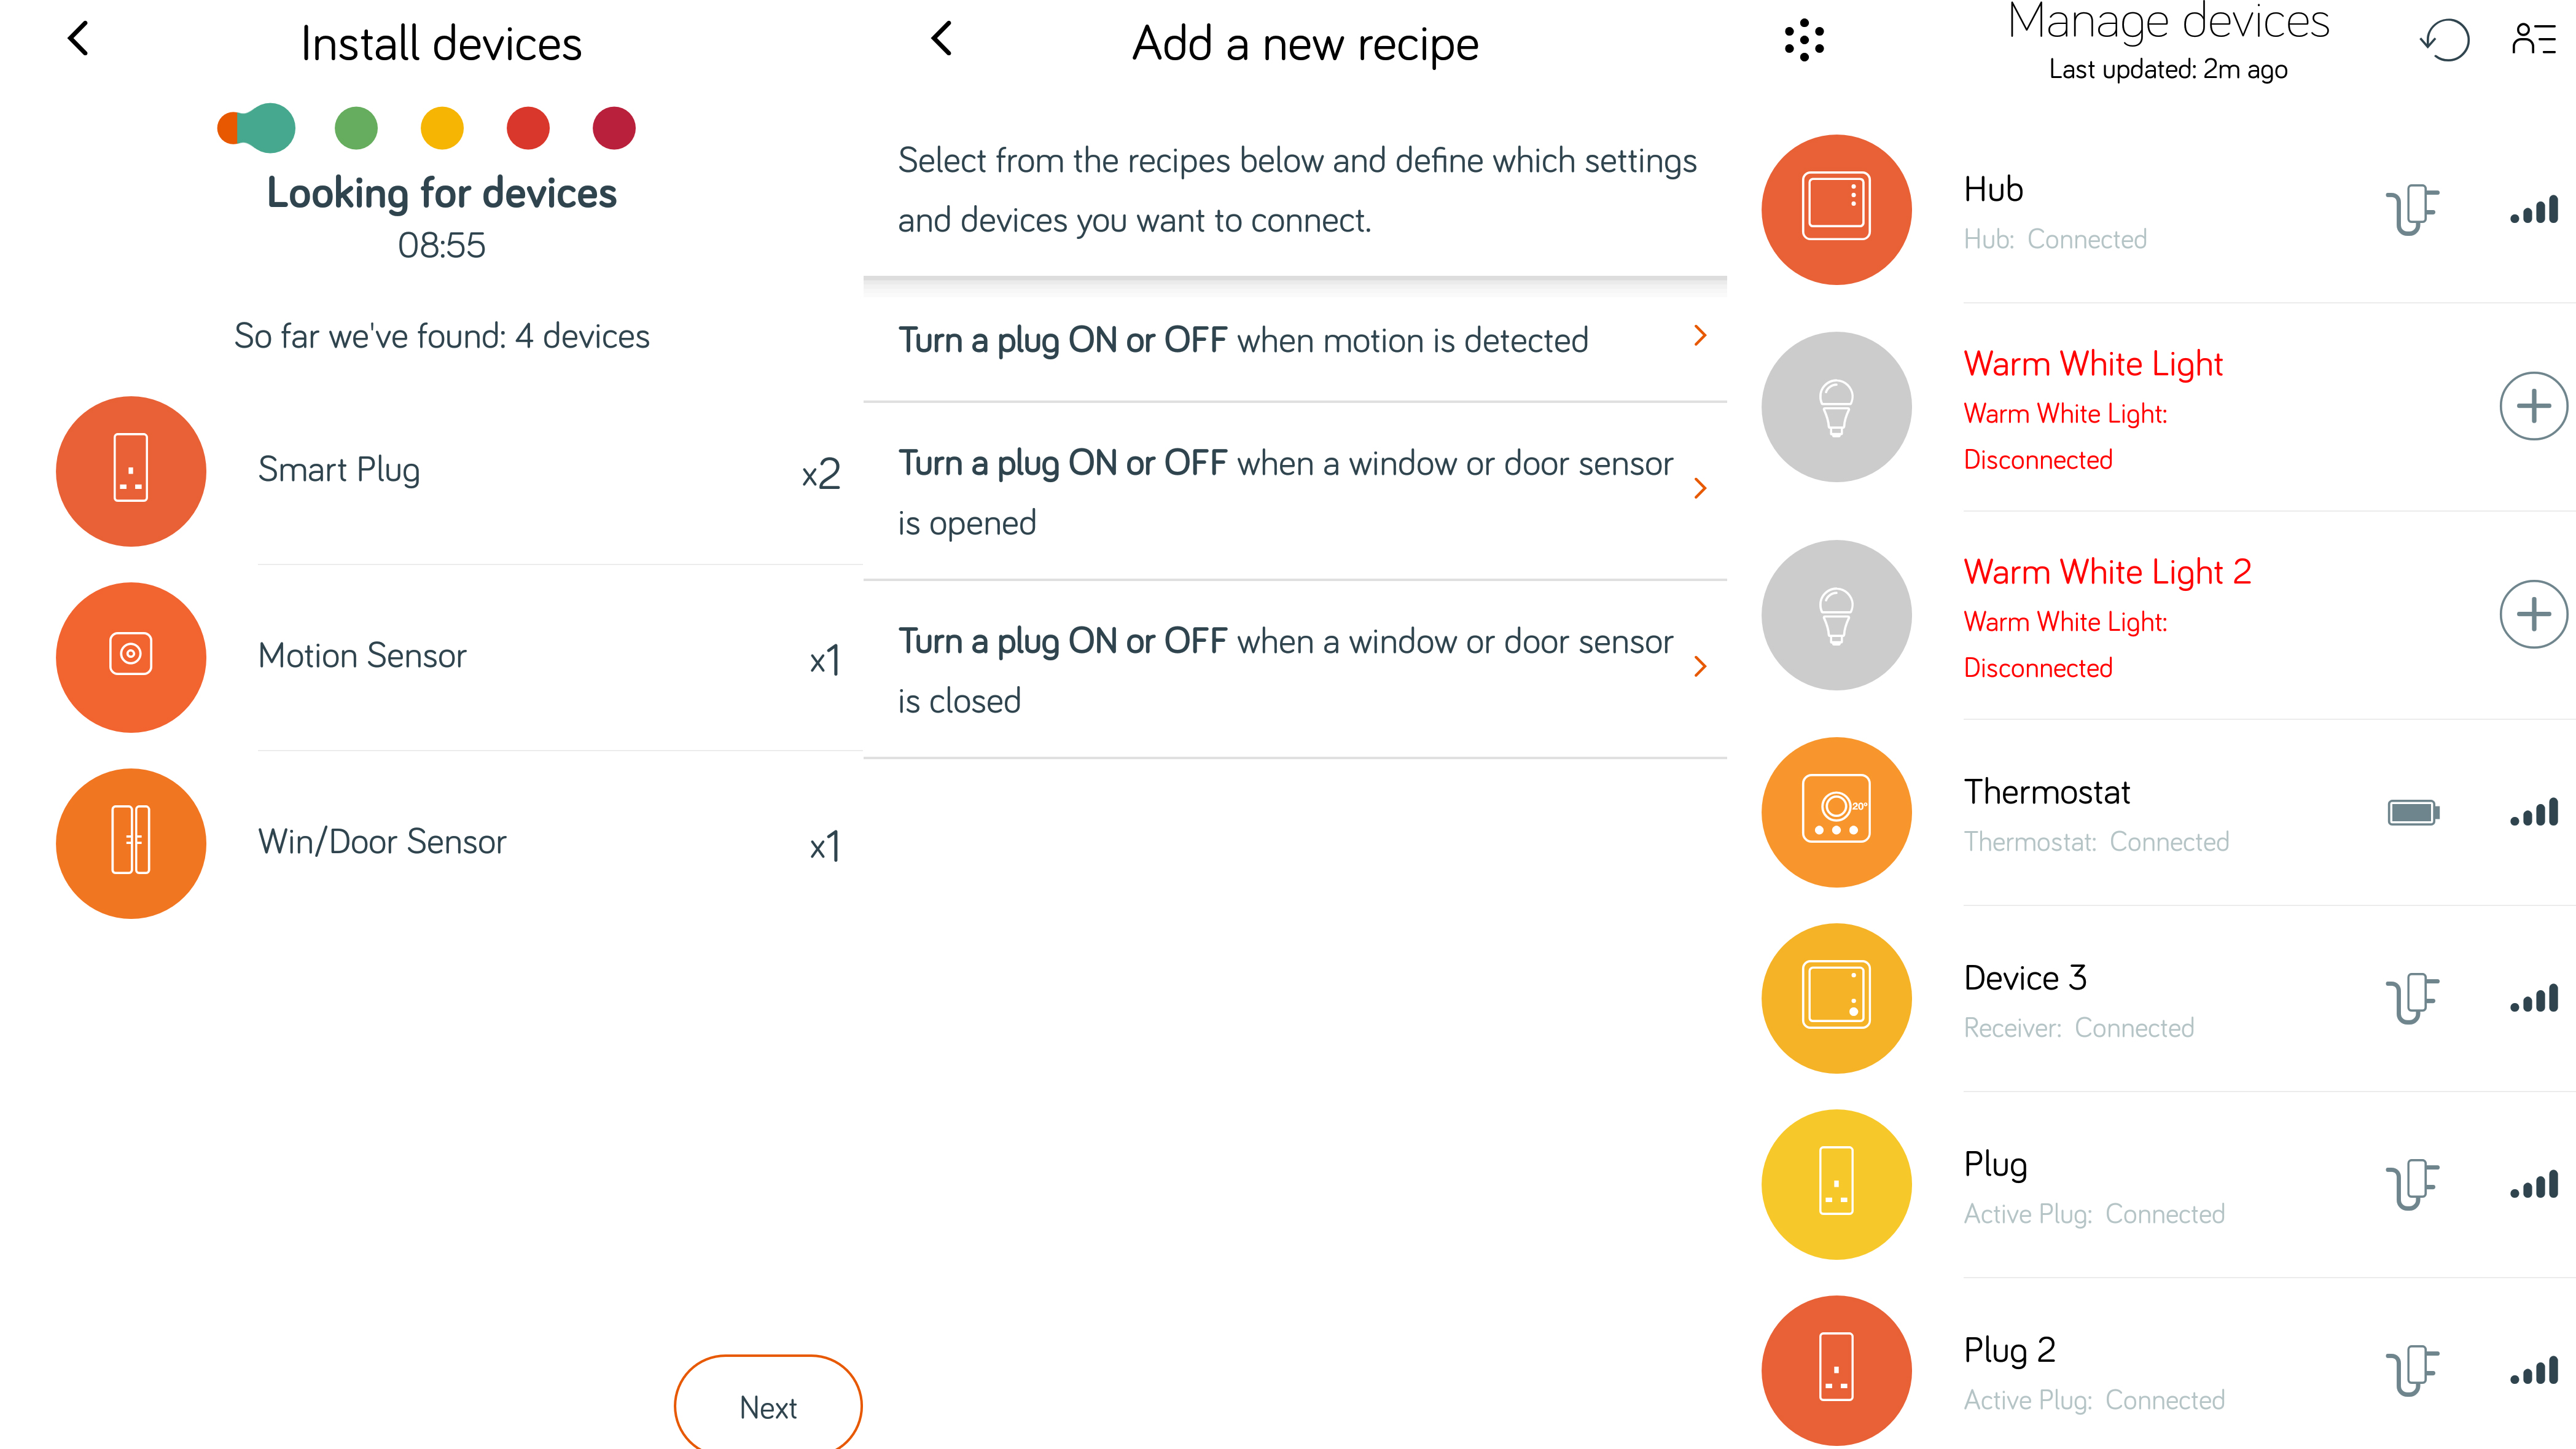
The real fun comes in with the recipes built into the app. Think of it like IFTTT, but with only recipes that you'll actually want to use. For instance, you can pair up a light with a sensor. If the sensor is tripped then you can have a recipe that will automatically turn one of your connected lights on. 

For obvious reasons, this sort of approach would be good in deterring burglars but it's also good if you want your light to come on in the middle of the night when you get up and walk past one of the sensors. It’s a great addition to the app and really makes you want to buy more Hive-related products. 

And that’s the thing about Hive’s modular approach - you can smarten up your home with the smart thermostat and be more than happy (and warm) but add a motion sensor here, an active light there and the whole system begins to marry together really well.
Be warned, though, this is when it starts to get expensive. Each active light costs upwards of £19, the sensors are around the same price and the plugs are nearly £40. Add this up and it can be pricey, but the whole idea of Hive is to add things over time. 

Hive does have a monthly plan you can buy into for £4.99 a month, which will give you big discounts so that might be worth looking into.  

Alexa integration

While Hive is pretty much a closed smart home system  (in that Philips smart lights won’t work with Hive and Hive sensors won’t work with Nest) it has integrated with Amazon Alexa, meaning that you can control your heating with your voice. We tried the Hive system with Alexa on an Amazon Echo and it really raises the bar for what a smart home can be. 

Turning off and on your lights by saying: “Alexa, turn on the hall light to 50%” will never get boring, and neither will upping your heating another few degrees by asking Alexa nicely. 

Adding Hive to the Alexa setup was really easy - you just add in your account credentials. Once done, you don’t actually need to go into the app again, just use your voice. Obviously, integrating Alexa into this setup is another cost, but the Amazon Echo combined with Hive really is a fantastic experience. 

Hive Camera review
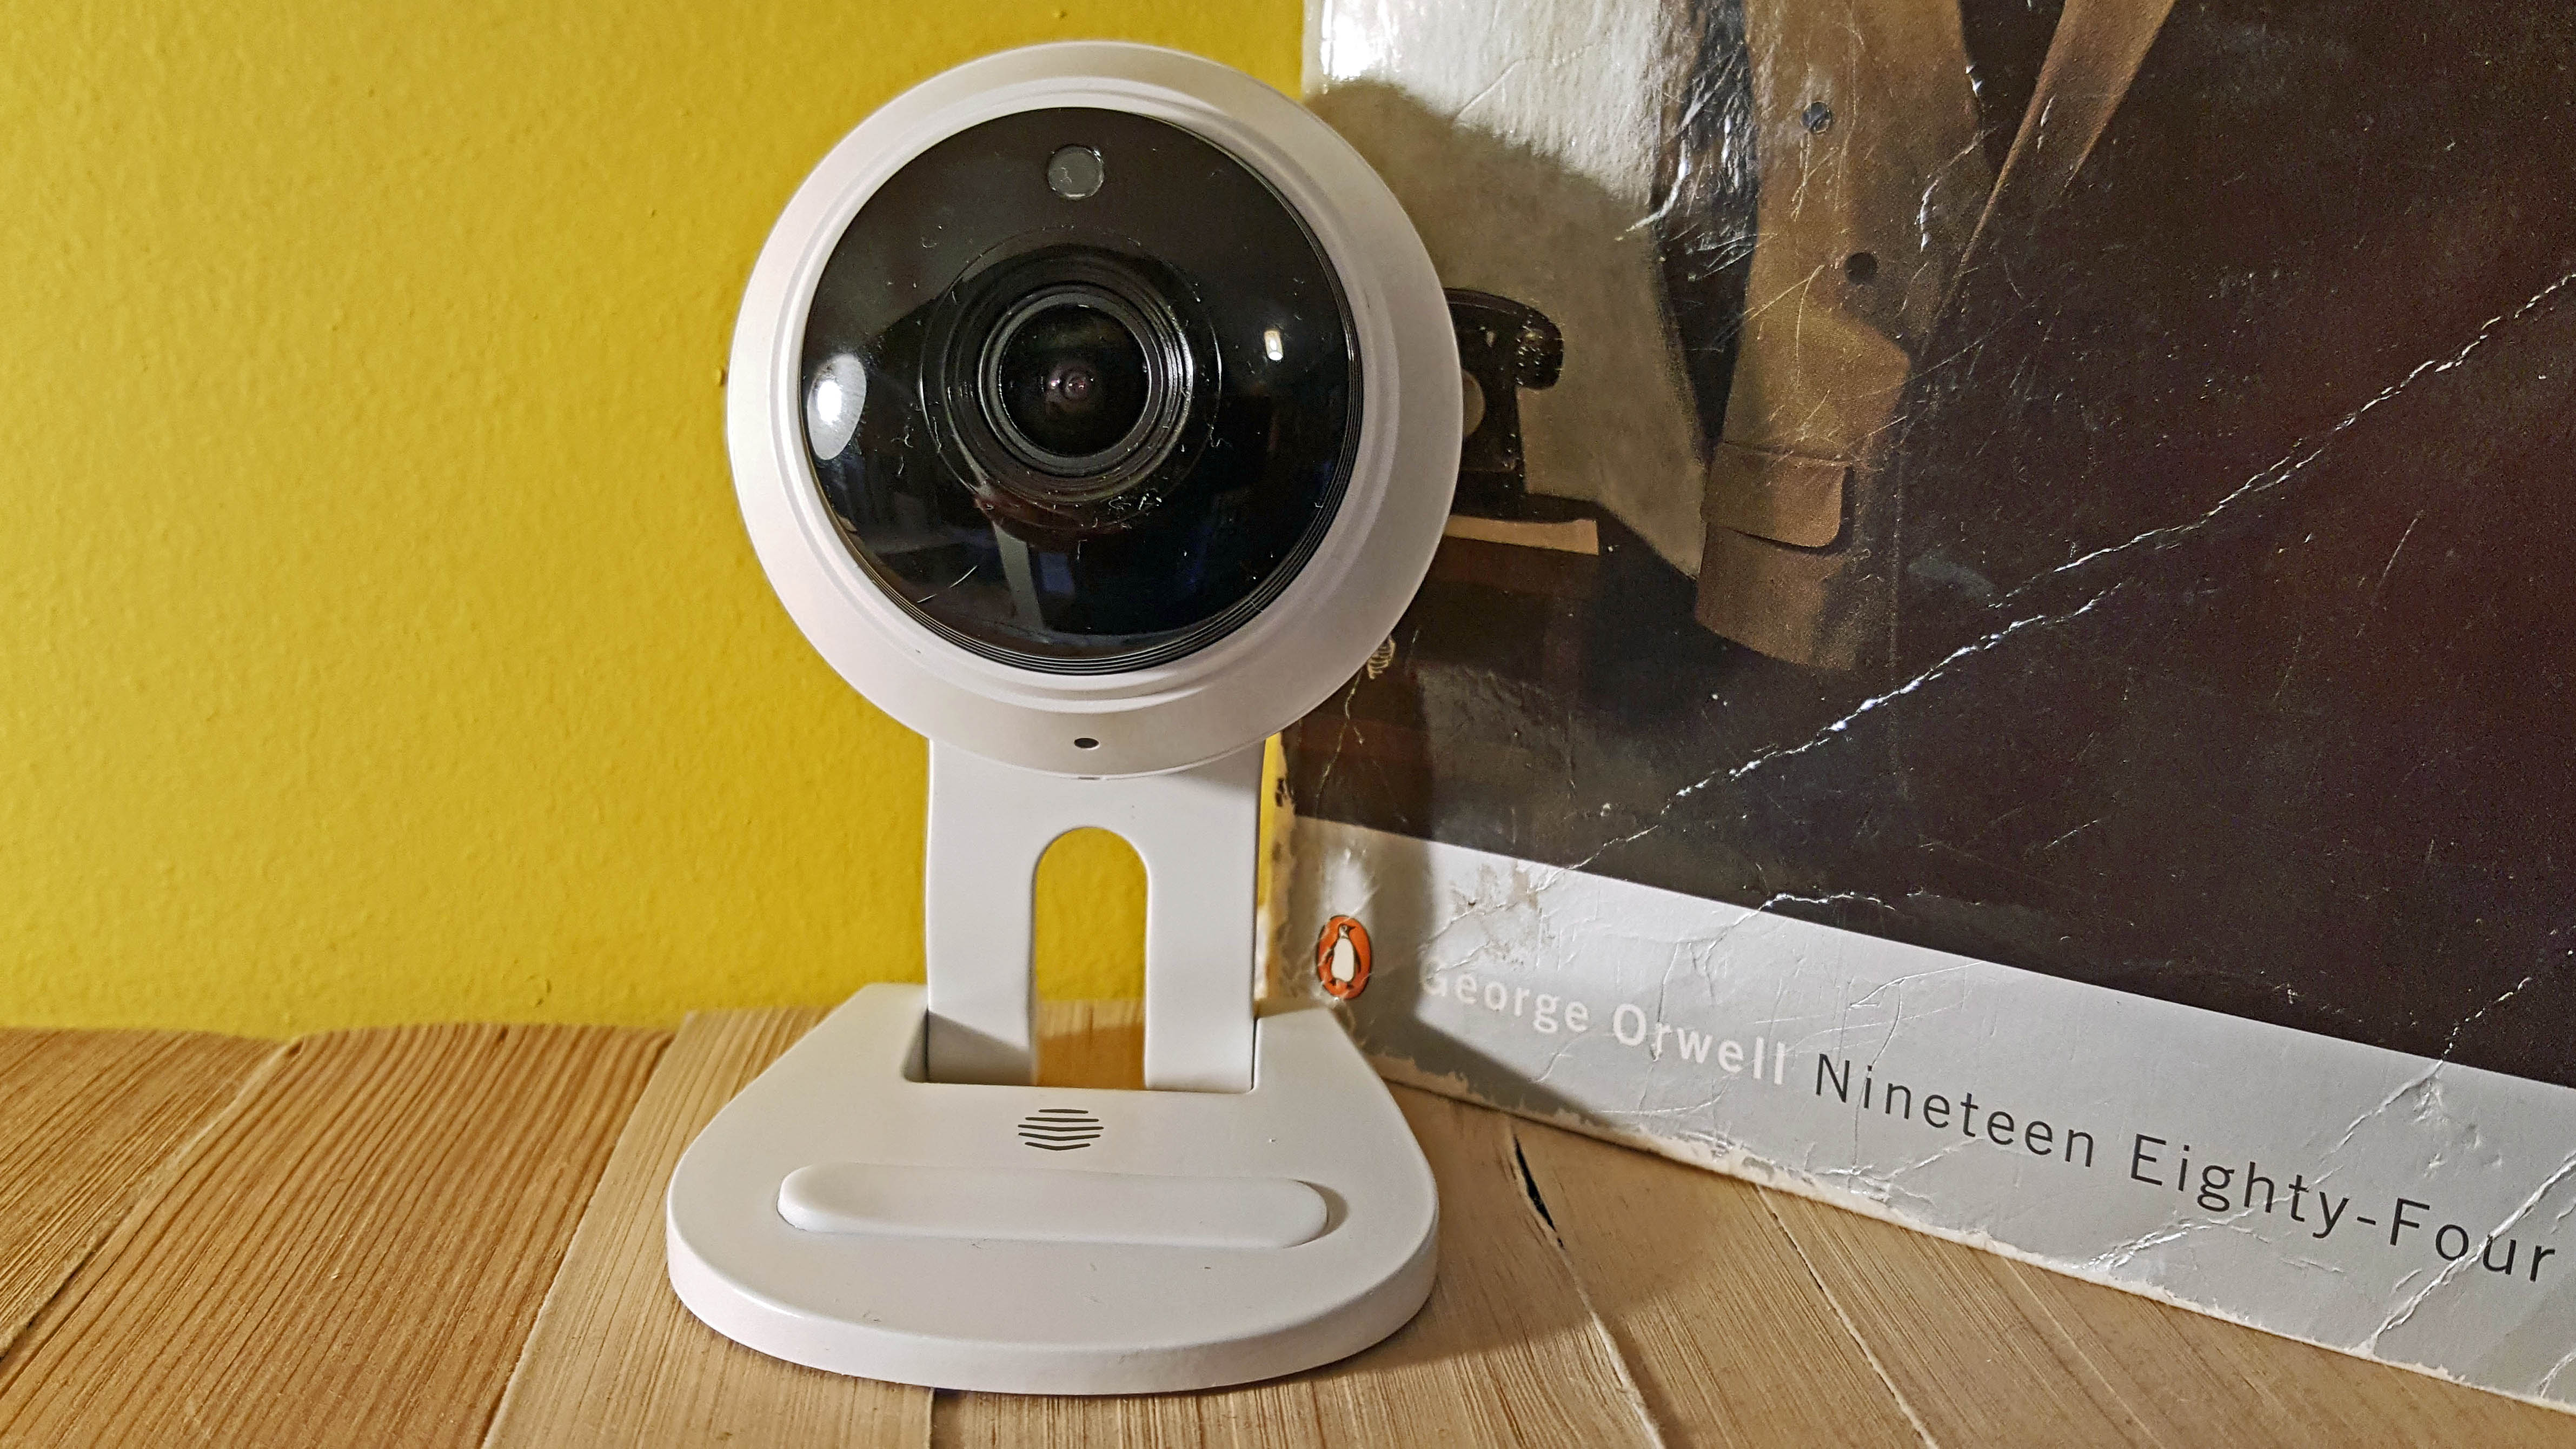
The Hive Camera has arrived to bolster the Hive setup, bringing it into line with other smart home ecosystems, namely Nest. It’s the first connected smart camera from Hive. The idea is that you add one of these - though multi-packs are also available - in your home, and can then observe it from afar via an HD stream on your Android or iOS device.

So far so good, but even though the Hive Camera is meant to live within your current Hive setup it’s actually been separated out into its own app that's distnct from the heating system, smart bulbs and sensors you may have installed in your home.

To set it up, you have to download an app called Hive Camera. So, instead of going through the main Hive app and clicking on Install a Device, you have to load up the Hive Camera app and install the camera from there. 

The good news is that the app works in a similar way to the main one - and you can use your same Hive sign-in so there’s no extra faffing in that department. Simply click on Add Camera to... well, you get the idea. From here there’s a nice visual checklist of what you need to do to register the camera with your Wi-Fi.

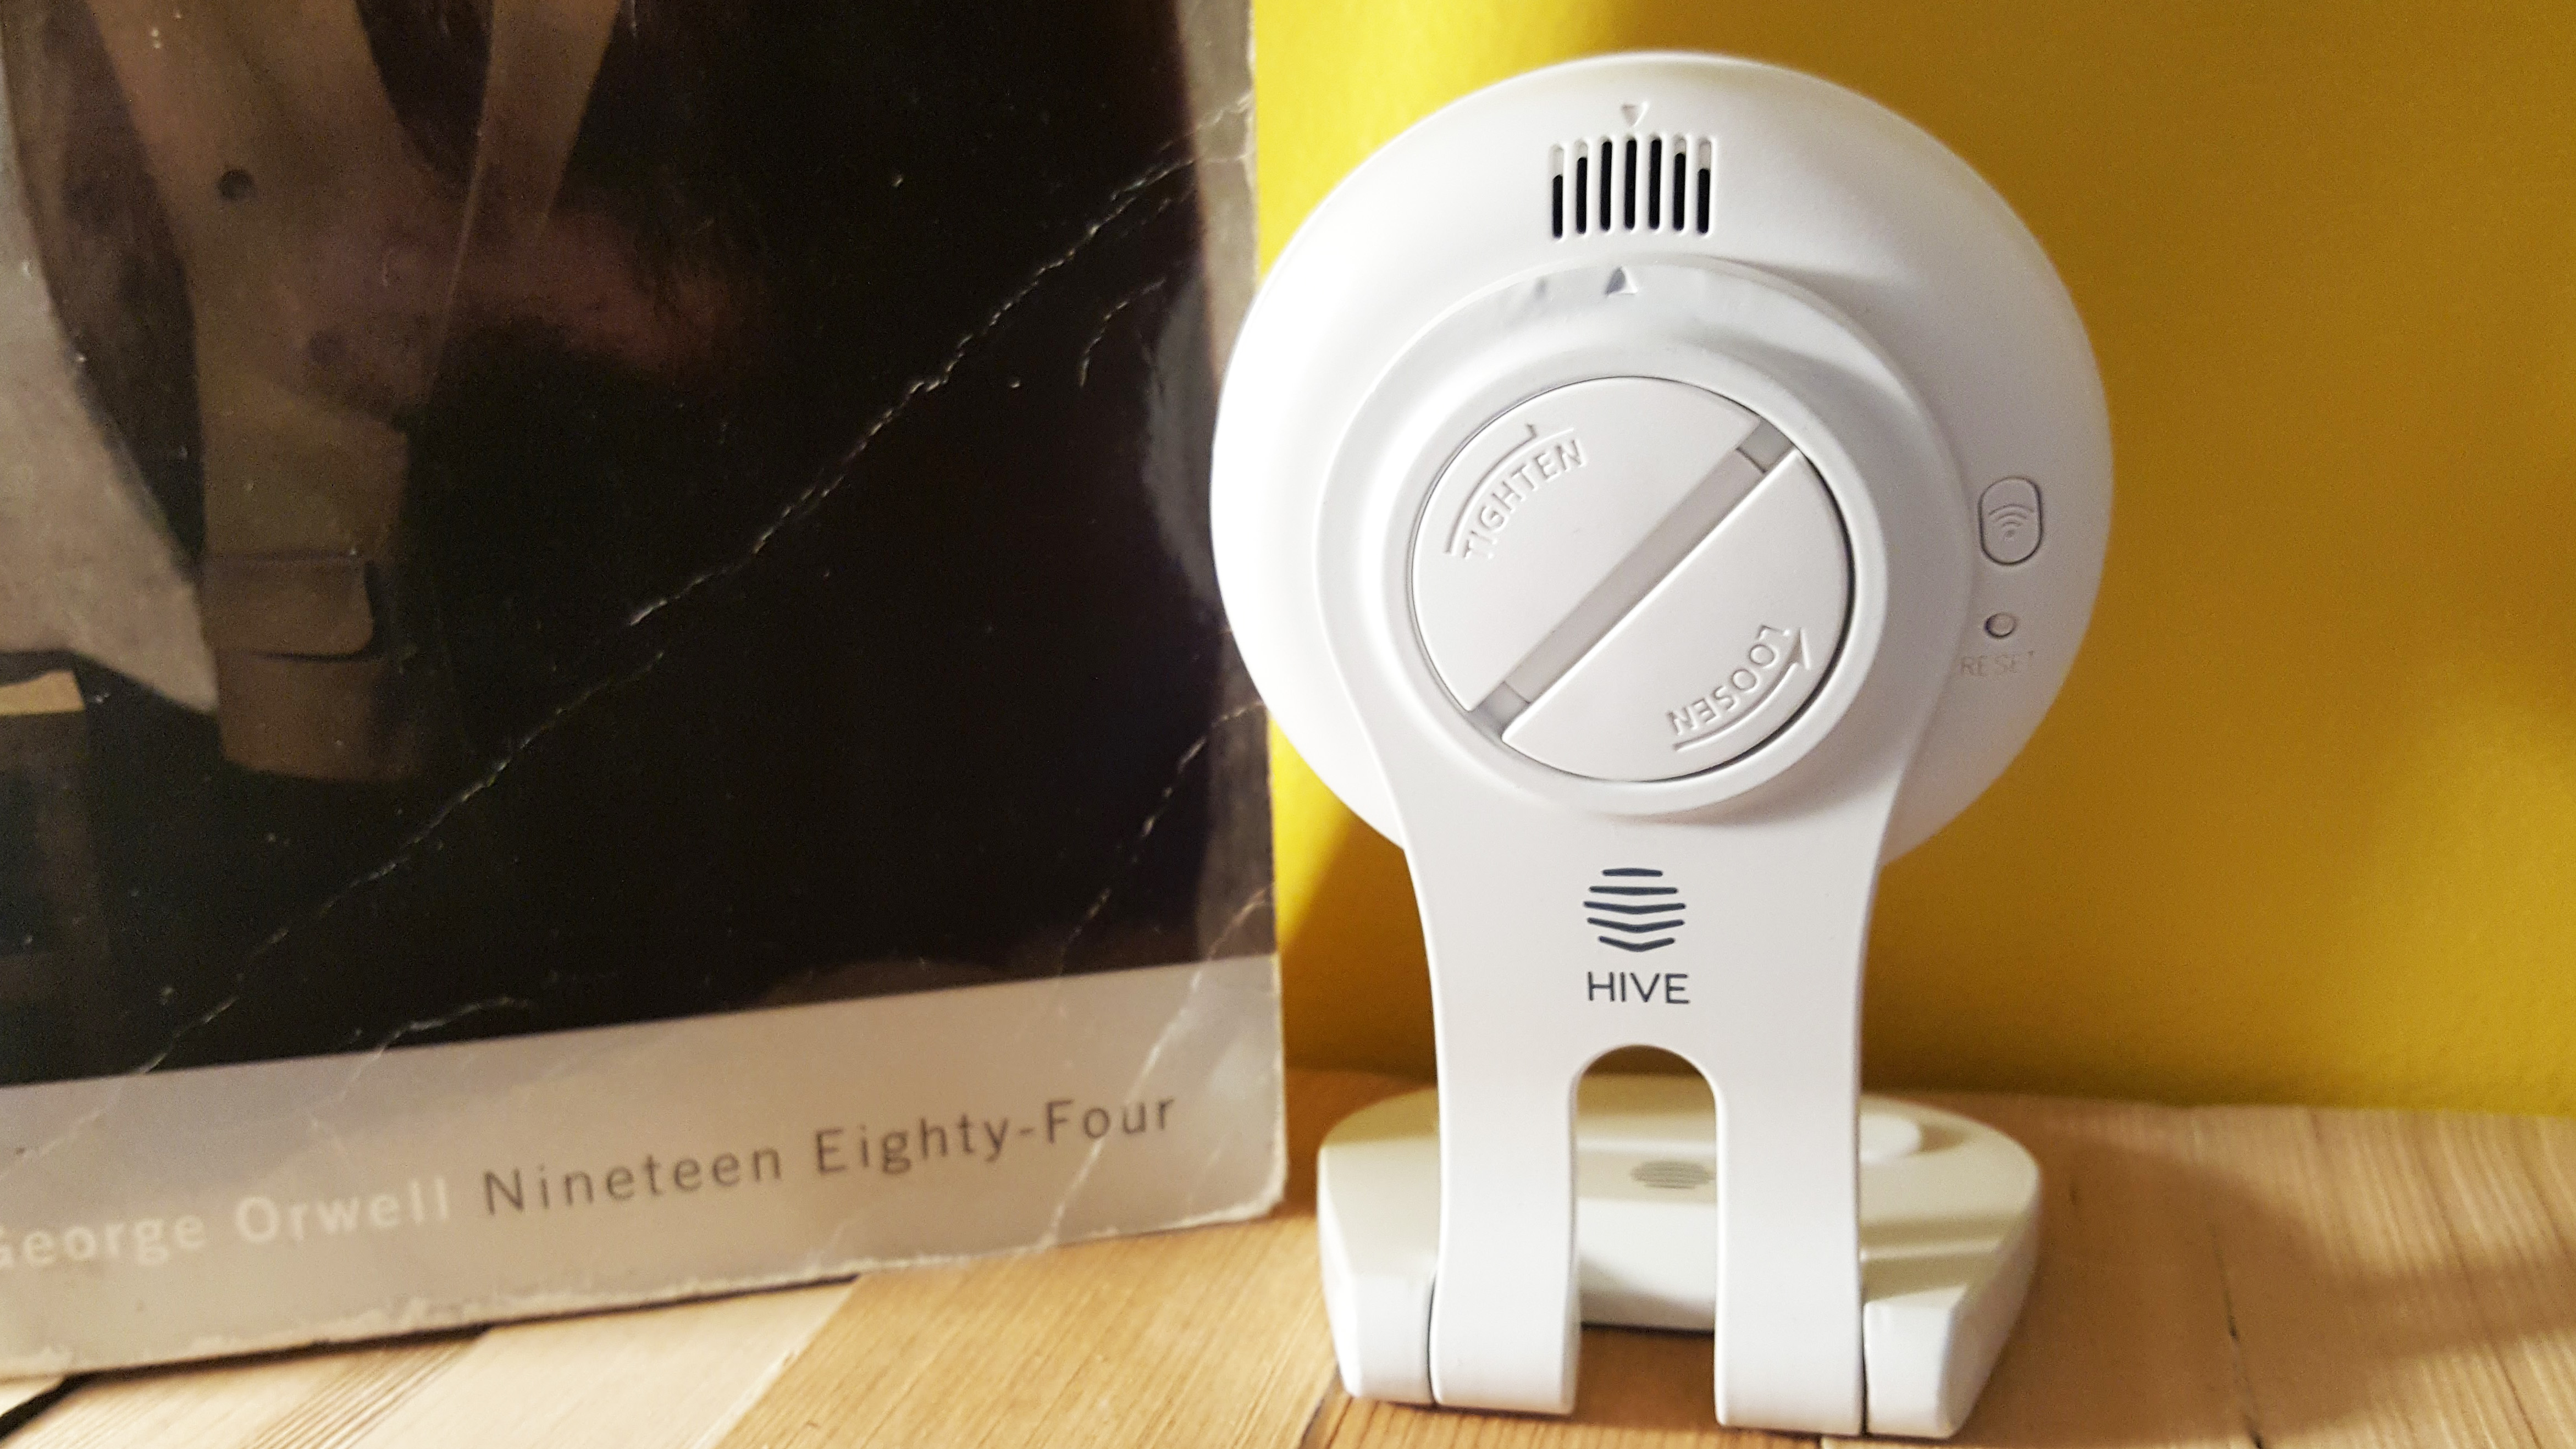
There’s just three steps: plug the thing in, push the Wi-Fi button on the back of the device and wait for the flashing LED to go from red to a yellow/green. Another page will then highlight your camera, click on this, add in your Wi-Fi password and then wait for the now blue LED light to change to green.
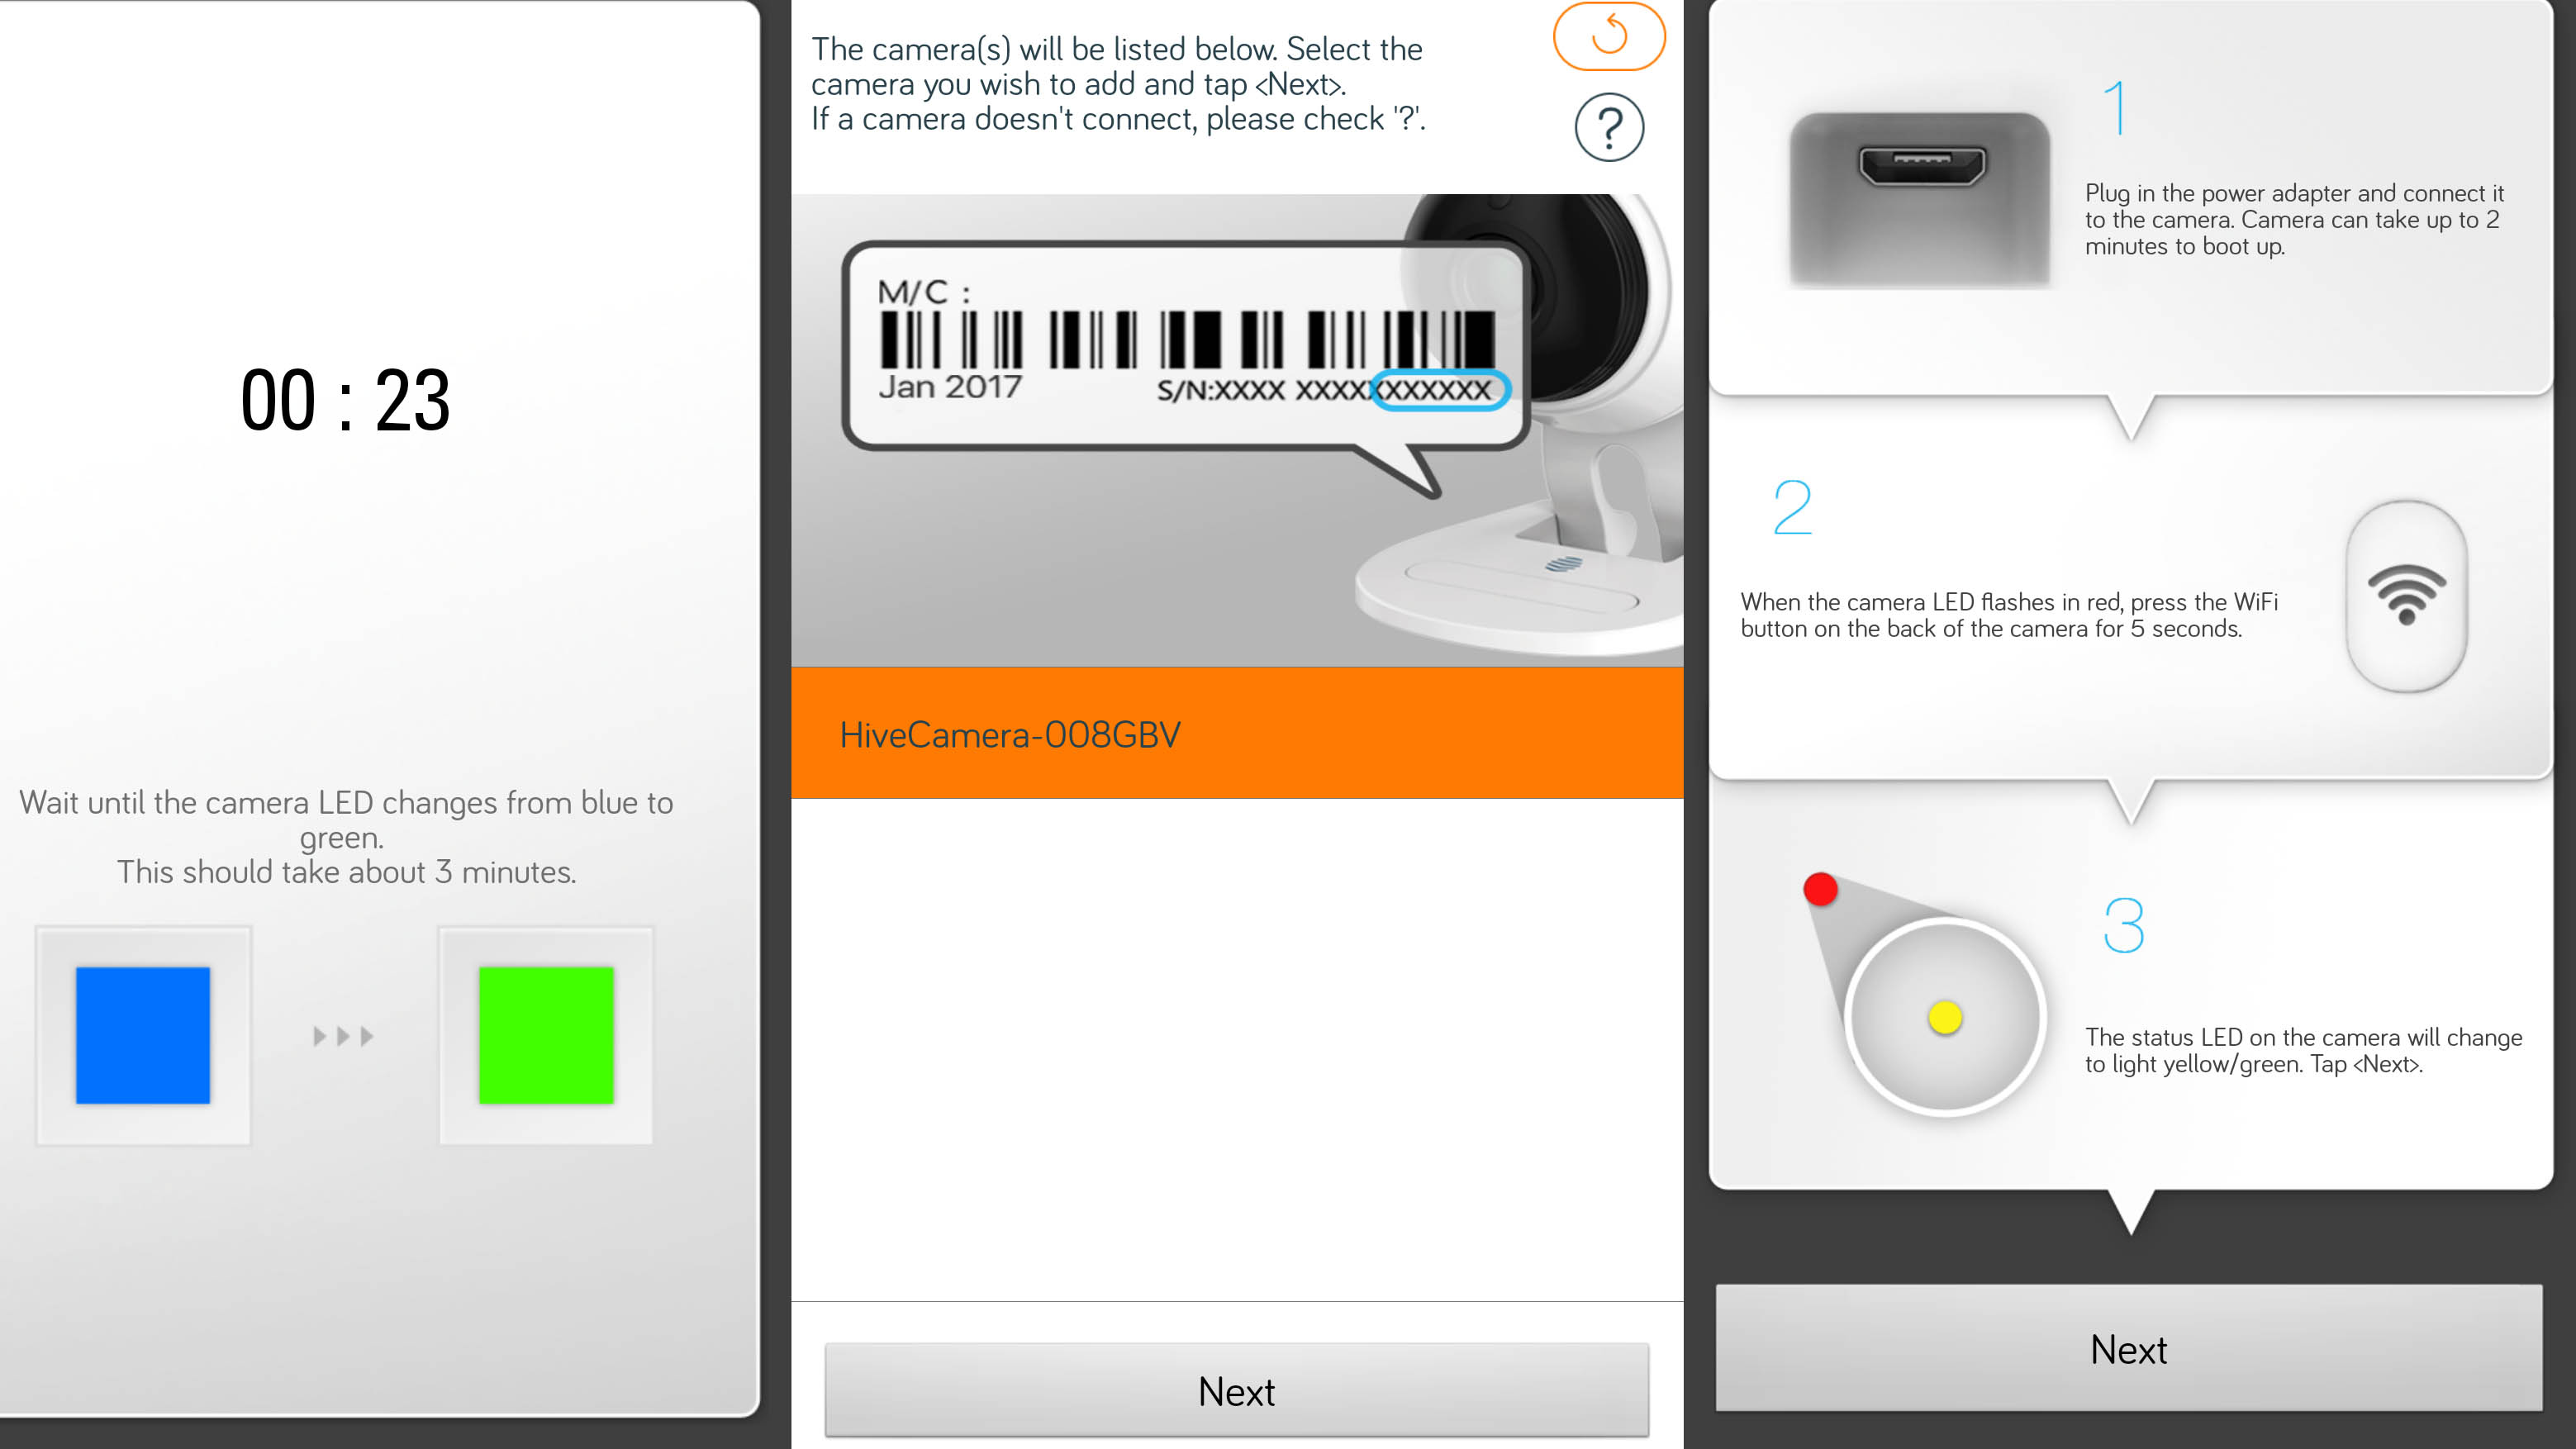

Now, this may not work first time. For some unknown reason it didn’t for us. This meant we had to reset the device through the reset button - situated next to the Wi-Fi button - and follow the steps again. It worked second time around, though, and from then on it was easy to use the app to view footage from our camera on our Samsung Galaxy S6 Edge+.

While we’re still not completely convinced that a separate app is needed to control the camera, having all the controls in one place does make a degree of sense as there’s myriad ways you can use the camera. For a start, you can choose the quality of the stream. We whacked it straight up to HD but you can opt for a lower quality (low or medium resolution) if your internet connection buckles under the might of clear video streaming. 

We did find, though, that opting for a lower stream did mean that things like the zoom controls became a little redundant as it's a little too pixelated to pick anything of note out. The stream on all qualities, though, was consistent - we saw little-to-no dropout in our tests.

Then there’s the type of alerts you may want to turn on when using the camera for security purposes. You can have the app alert you if/when the camera picks up a sound in the room and/or if it detects any movement. 

If it does and you are away from your home, there’s a good chance you will want to scare the crap out of whatever intruder is in your home when you are not there. To do this, you can use the two-way speaker system or opt for the far more fun feature of piping out the sound of a dog barking, a police siren or an alarm from the camera. Yes, it’s a bit of a gimmick but it’s a good one - even if, because of the speaker limitations of the camera, it’s not the loudest sound that’s emitted. 
The Hive Camera is being touted by Centrica (the folks behind British Gas and Hive) as an indoor security camera but the technology can also be put to good use in other ways in the home. As a new-ish parent, we tried the camera alongside regular baby monitoring system and it worked well. The camera’s night vision mode meant we had a good look at our baby when asleep and the monitoring of audio and movement helped as well. 

It’s also really handy to get the stream through a smartphone or tablet, rather than having to lug a separate monitoring device around.

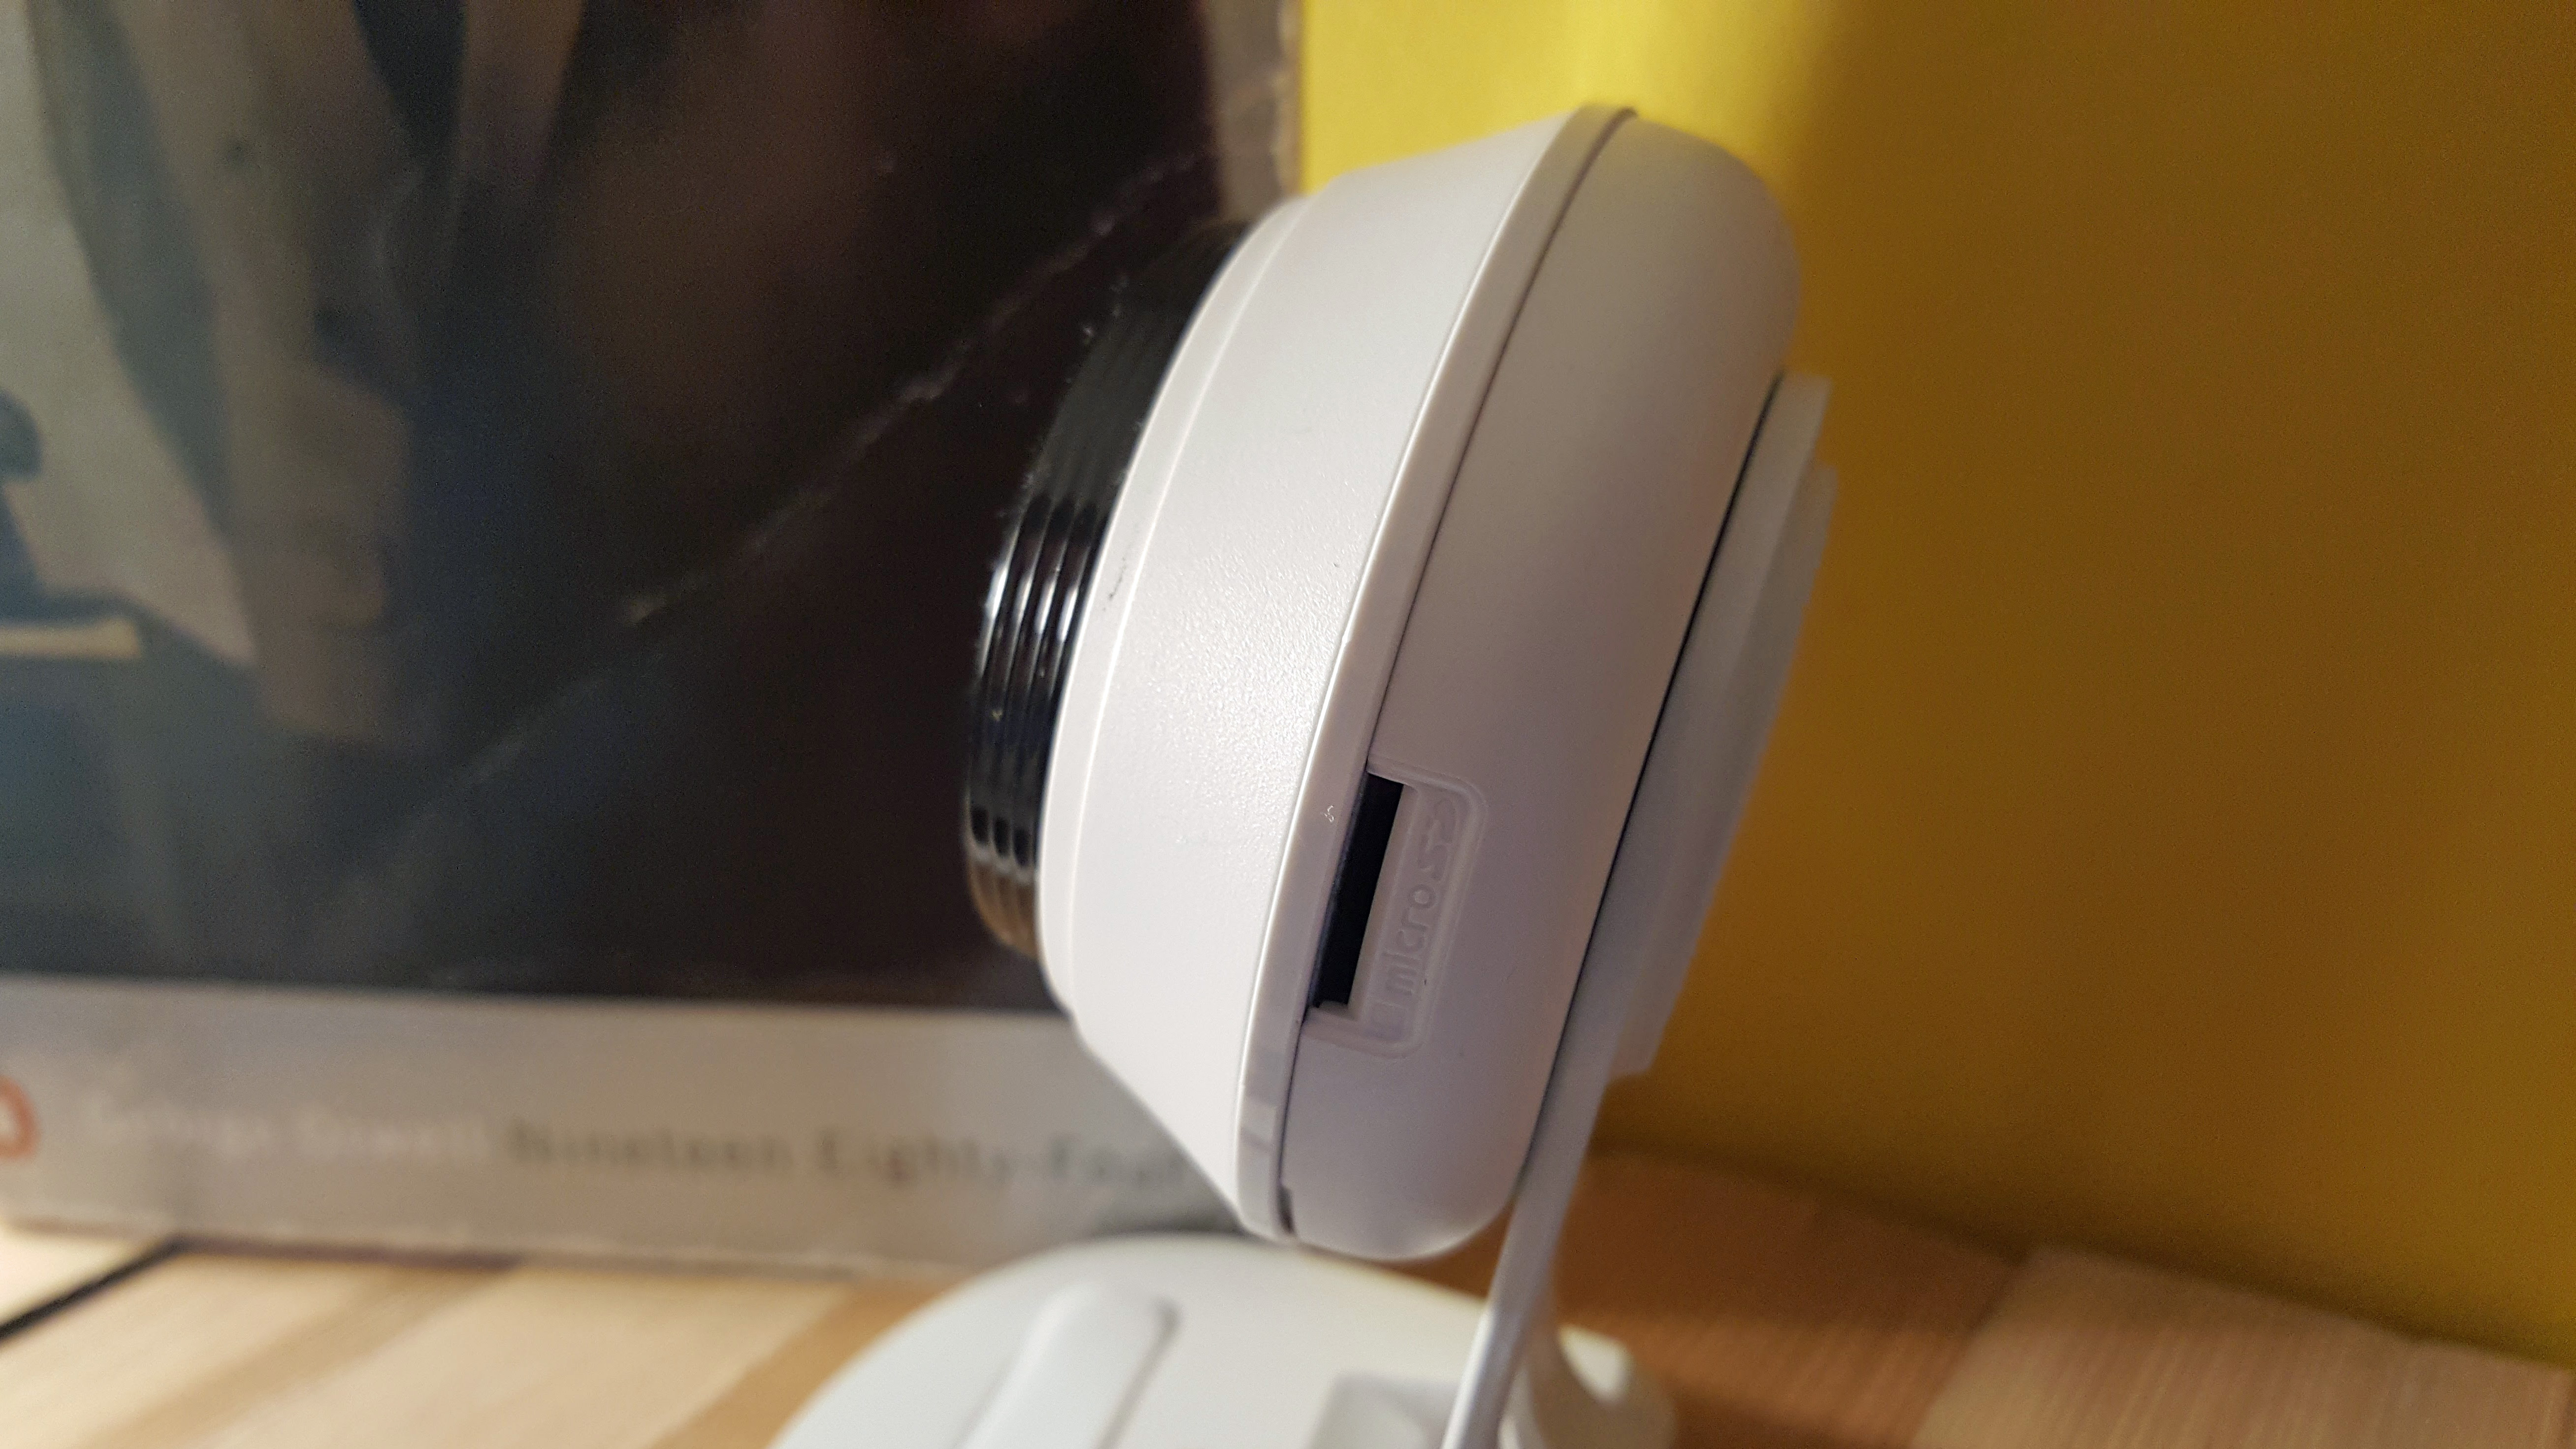
It’s not just a streaming device, either. There’s an SD card slot on the top of the device so you can add in some memory to record your streams - handy if you  want to catch burglars in the act. 
The Hive Camera is a great, if slightly estranged add-on to the current Hive setup. Its use of a separate app means that it never quite feels like it’s part of the same group of Hive accessories that work with the Hive Smart Hub. 

Centrica could remedy this fairly simply by adding some Actions that work with the Hive Camera, such as the ability to turn a light on or off when the camera detects motion - something that can be done at the moment through a Hive motion detector and Hive’s smart lights - but there’s no word on this happening just yet. 

As a standalone device, though, it’s a decent and reasonable priced way to get a smartcam into your home. The Hive Camera is available to purchase from for £129, or available for a monthly cost as part of the Hive Home Check Plan

This plan is available for a price and consists of 1x Hive Camera, 2x Hive Active Light Cool to Warm White, 1x Hub ,1x Hive Motion Sensor, 2x Hive Window or Door Sensors and 1x 16GB SD card, as well as access to Hive Live. 
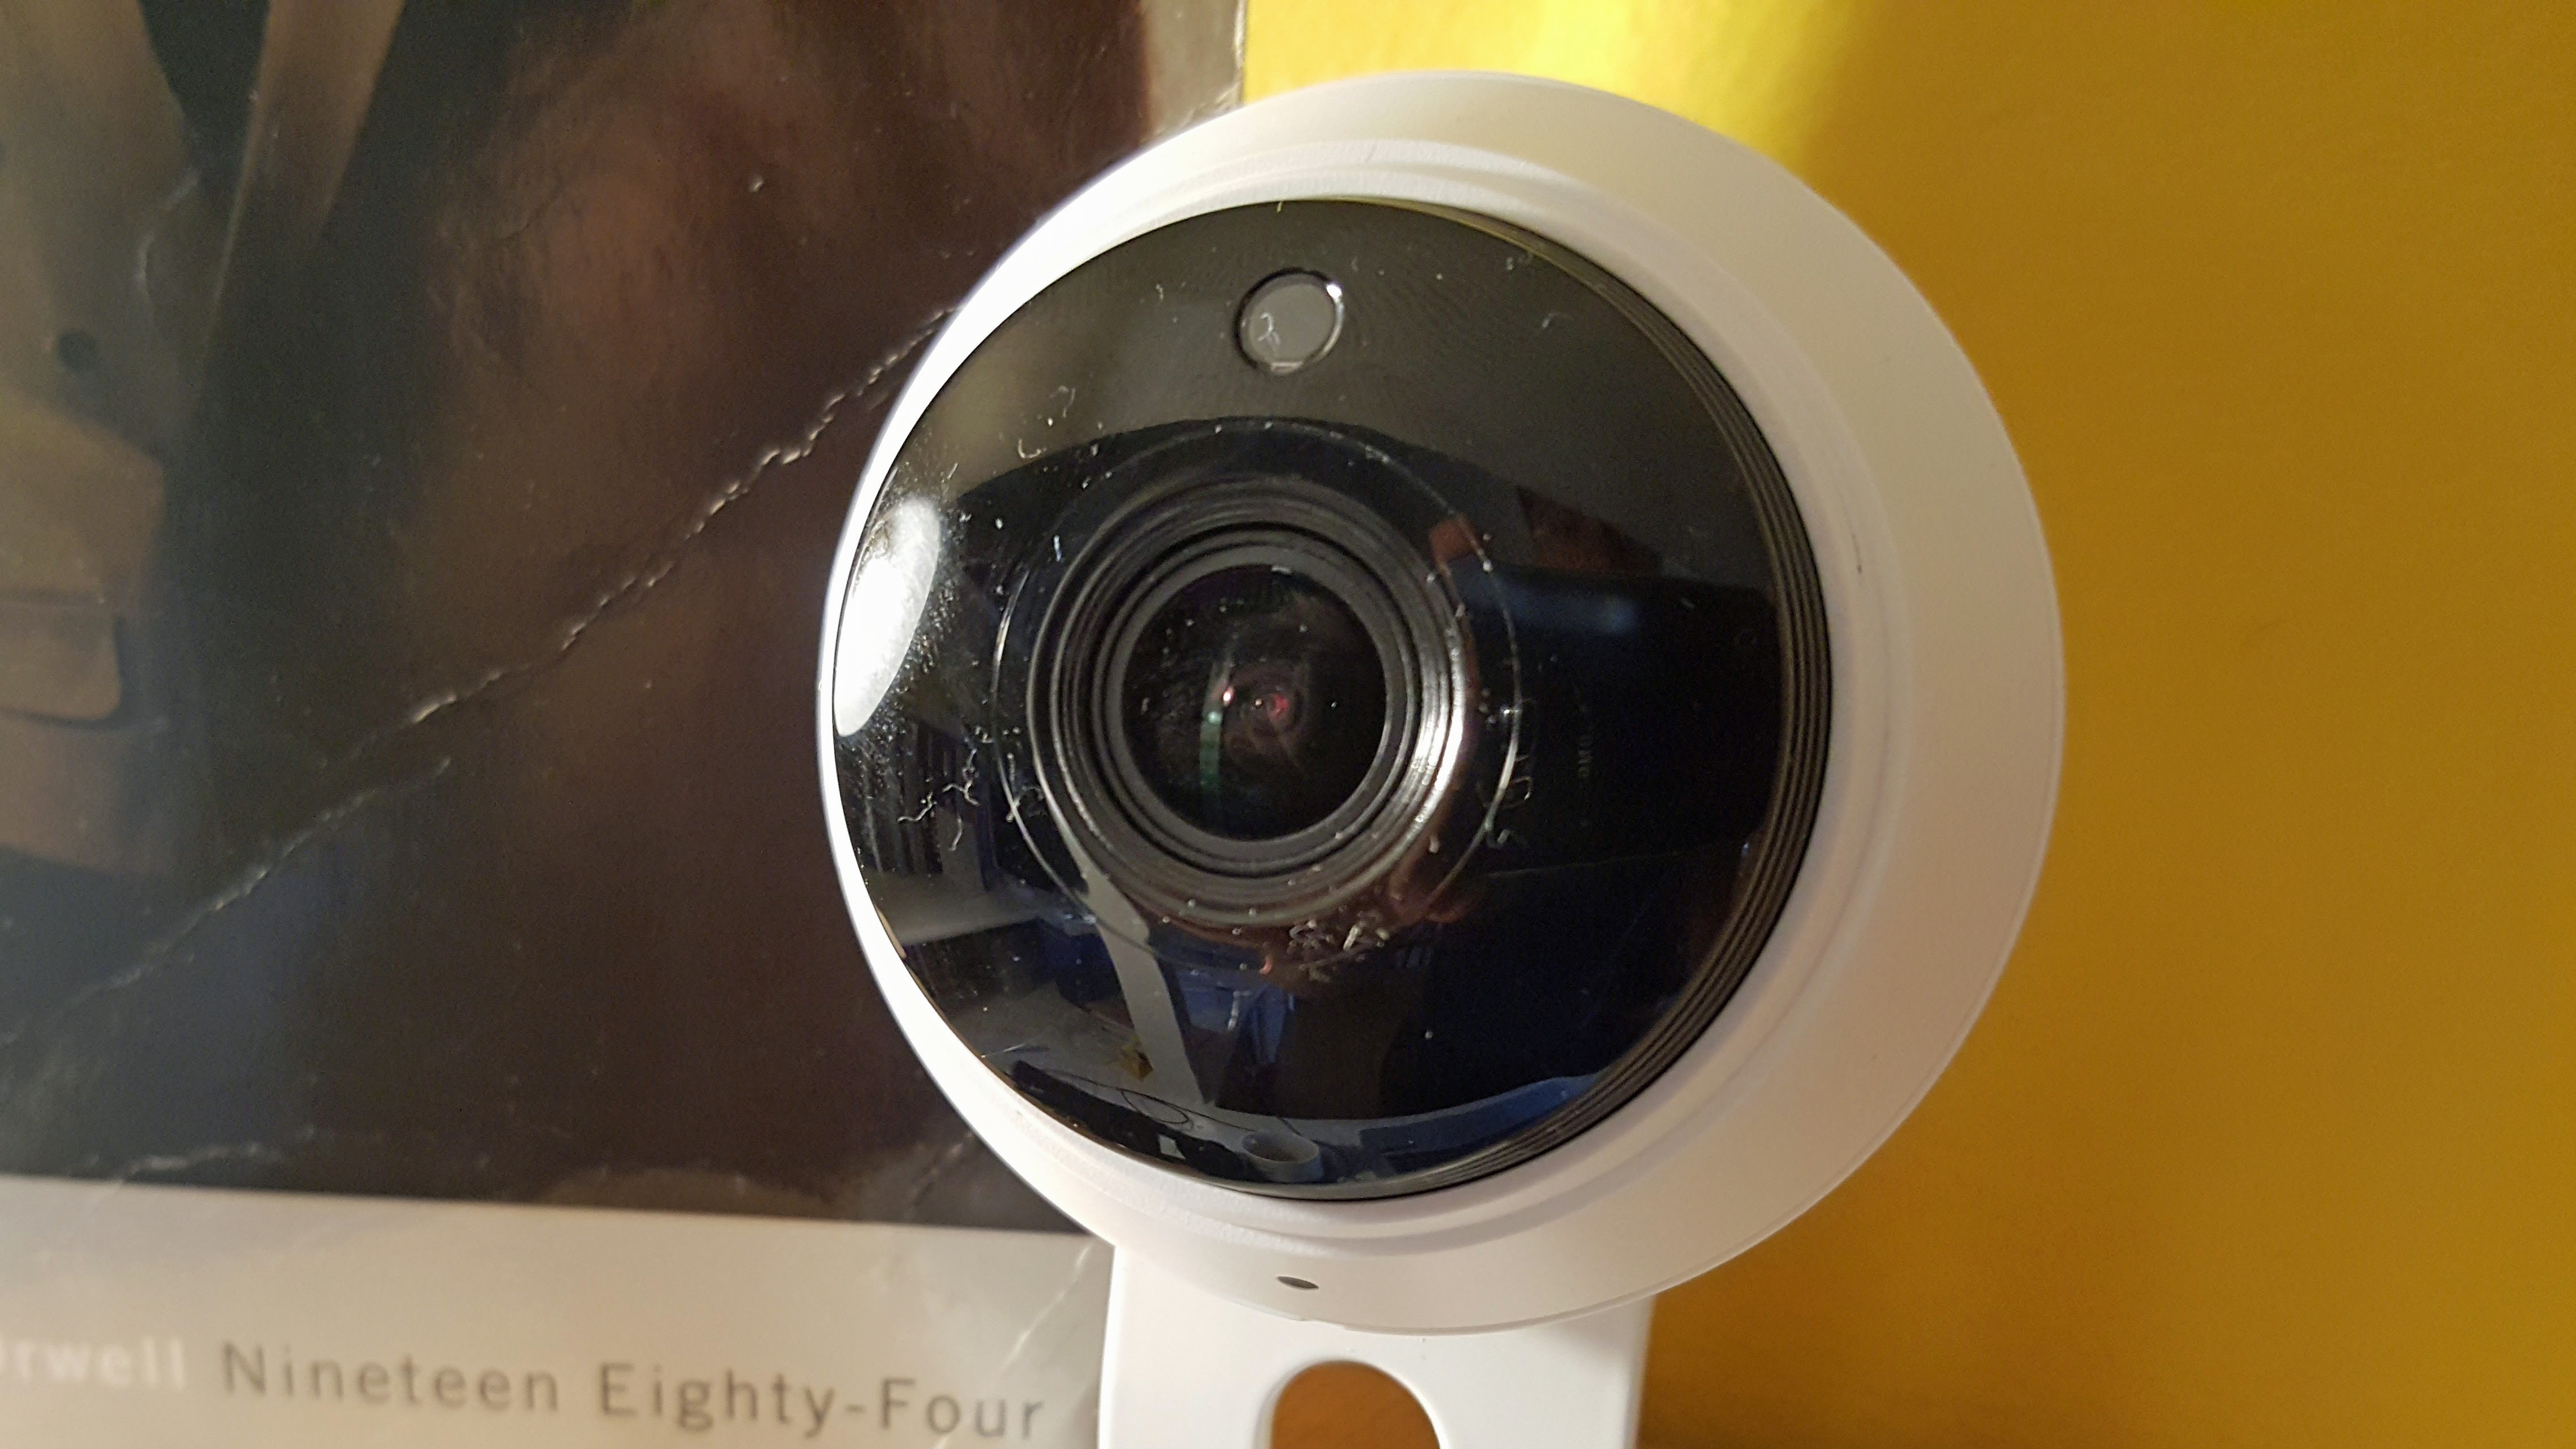
The Hive Camera is also part of a bigger and well smarter smart plan from Centrica. It was announced as the first of a number of new Hive-based products. The others aren’t released yet but include a smart leak system and a more robust Hive Active Hub which will be able to detect audio so will be able to alert you when your smoke alarm is going off. 

There is also a new Hive camera to be revealed in the near future - there’s no news as of yet but we suspect it to be an outdoor cam. Once these smart pieces are in place maybe we will start to see the Hive Camera move from the outskirts of the Hive experience and into the heart of the action.

We Liked

The Hive system is a great way to get true smart home functionality in your home. It’s easy to use too - the barrier to entry is really low as Hive is run by British Gas, it doesn't let complicated features get in the way of its ease of use. 

As it’s a modular system, you can add sensors, active lights and smart plugs, smart cameras - as many or as few as you want. The standalone heating system is smart enough on its own if that’s as far as you want to go with making your home that little bit smarter. And then there’s Alexa integration - this really gives the system a voice!

We Disliked

The initial costs are quite steep and adding devices soon adds up as well - although the introduction of the new is Hive Home Check Plan is welcomed. And while the app is great to use, we were stuck a few times when it came to scheduling our heating. It just wasn't a little fiddlier to use than we would have liked, and nowhere near as easy as the auto-scheduling offered by Nest. The addition of a separate app for the Hive Camera is also a disappointment.

Where Hive also comes up short compared to Nest is its lack of a motion sensor, which with Nest allows the thermostat to automatically turn on your heating when it senses that you're home, and conversely avoid heating an empty house.

Final Verdict

Hive is a fantastic smart home system that’s only going to grow and grow, thanks to the new products Centrica is producing to add to the system - we've seen this with the addition of the Hive Camera and there's much more to come. It’s stylish and smart enough to entice the more technologically minded to the system. The addition of Alexa support also means Hive has elevated its position in the smart home market even more.

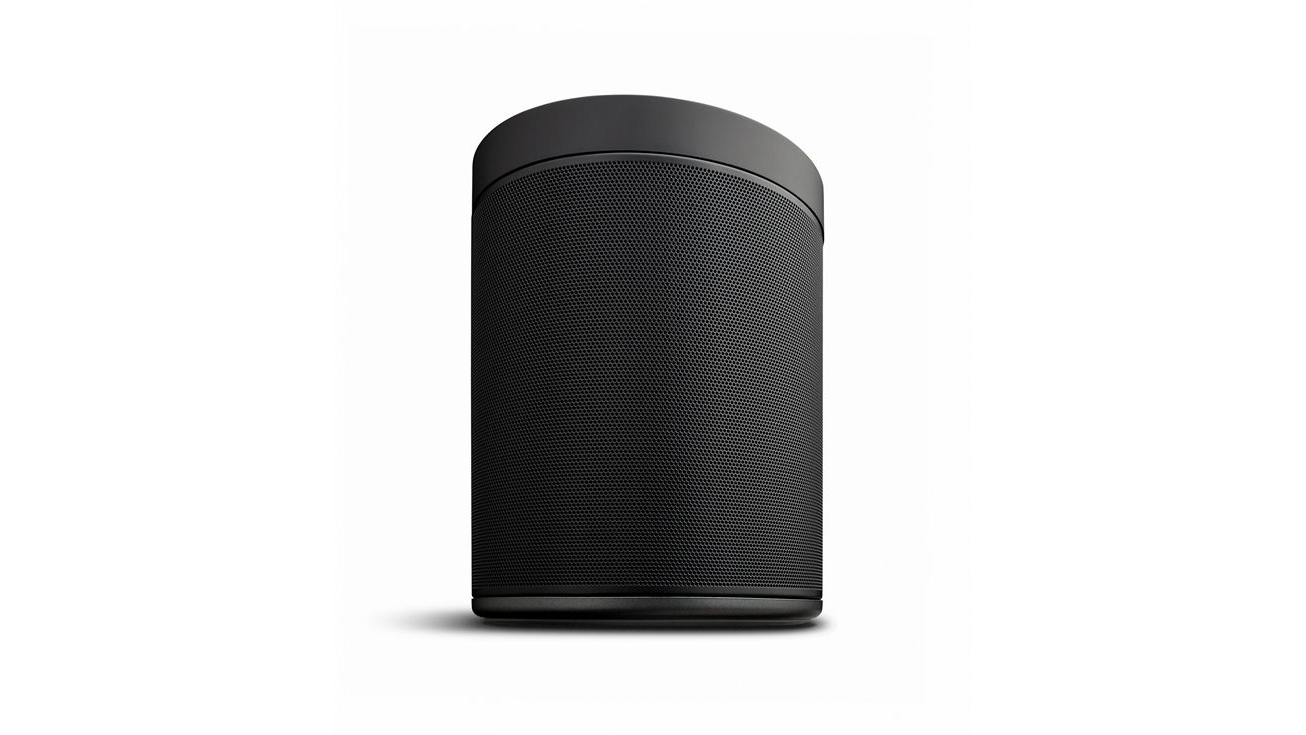
Yamaha MusicCast 20

Wireless speakers are on the rise. With the growing popularity of smart speakers, like the Amazon Echo and Google Home, and tons of great-sounding wireless speakers like the Sonos One, the future of home audio is clearly wireless. 

Yamaha may not be the first company you think of when you think of wireless audio,  but the company is proving that it has something to add through the introduction of its Yamaha MusicCast ecosystem. 

The latest entries into the list of MusicCast-enabled devices include the Yamaha MusicCast 20 (reviewed here) and more powerful MusicCast 50. 

At over $230 (£199, AU$349)  the MusicCast 20 speakers aren’t necessarily cheap – especially when you consider the fact that they’re not as smart as the likes of the Echo or Sonos One – so are they still worth investing in? 

We put the Yamaha MusicCast 20 to the test to find out.

Design and setup

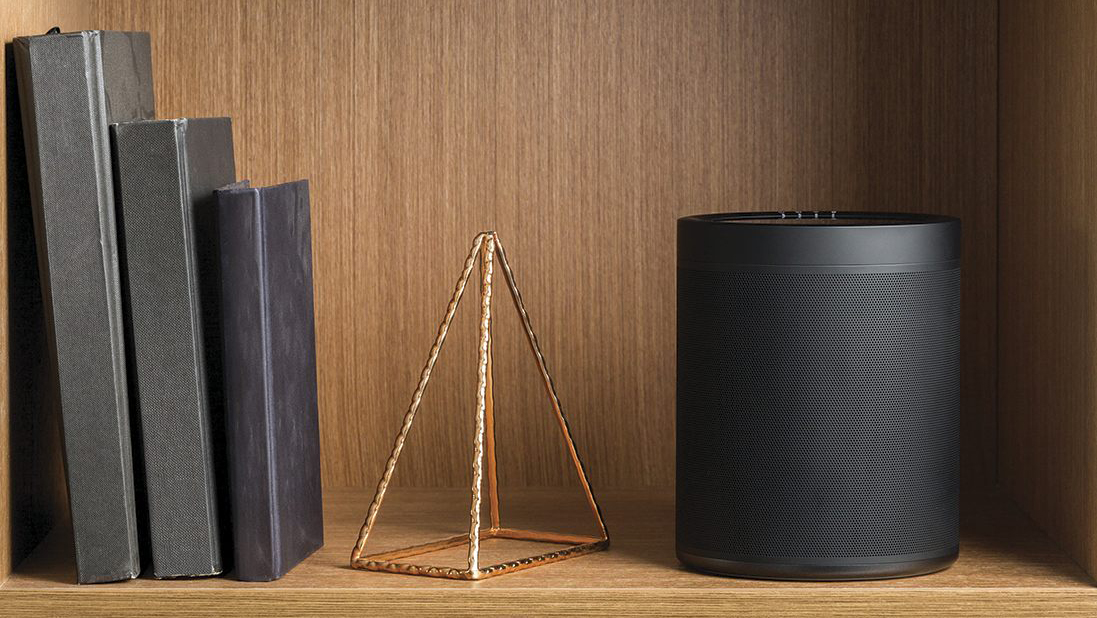
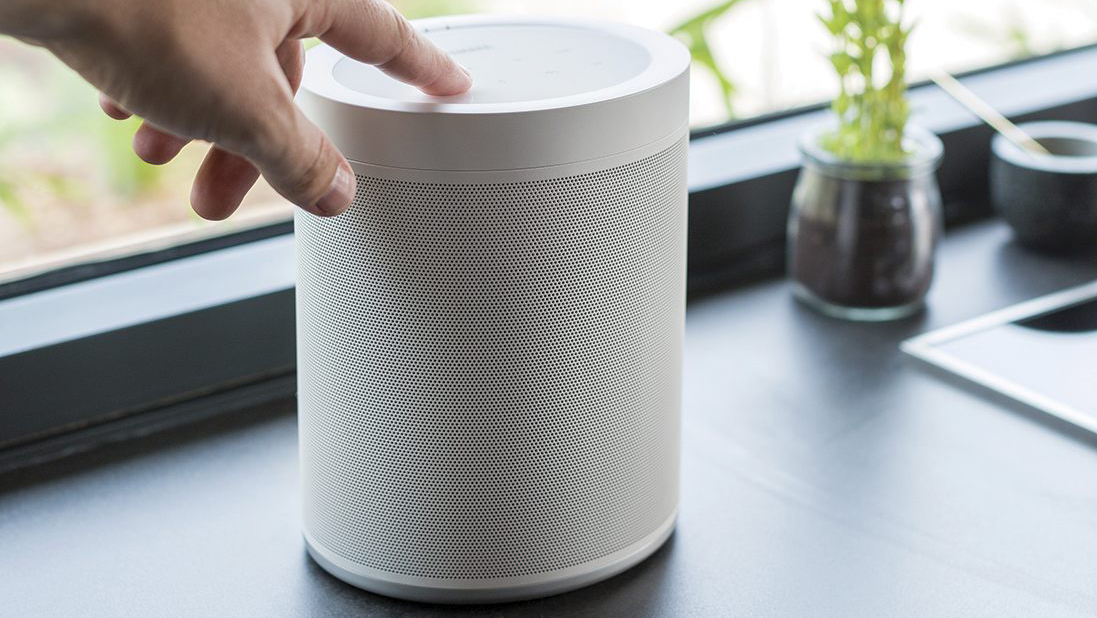
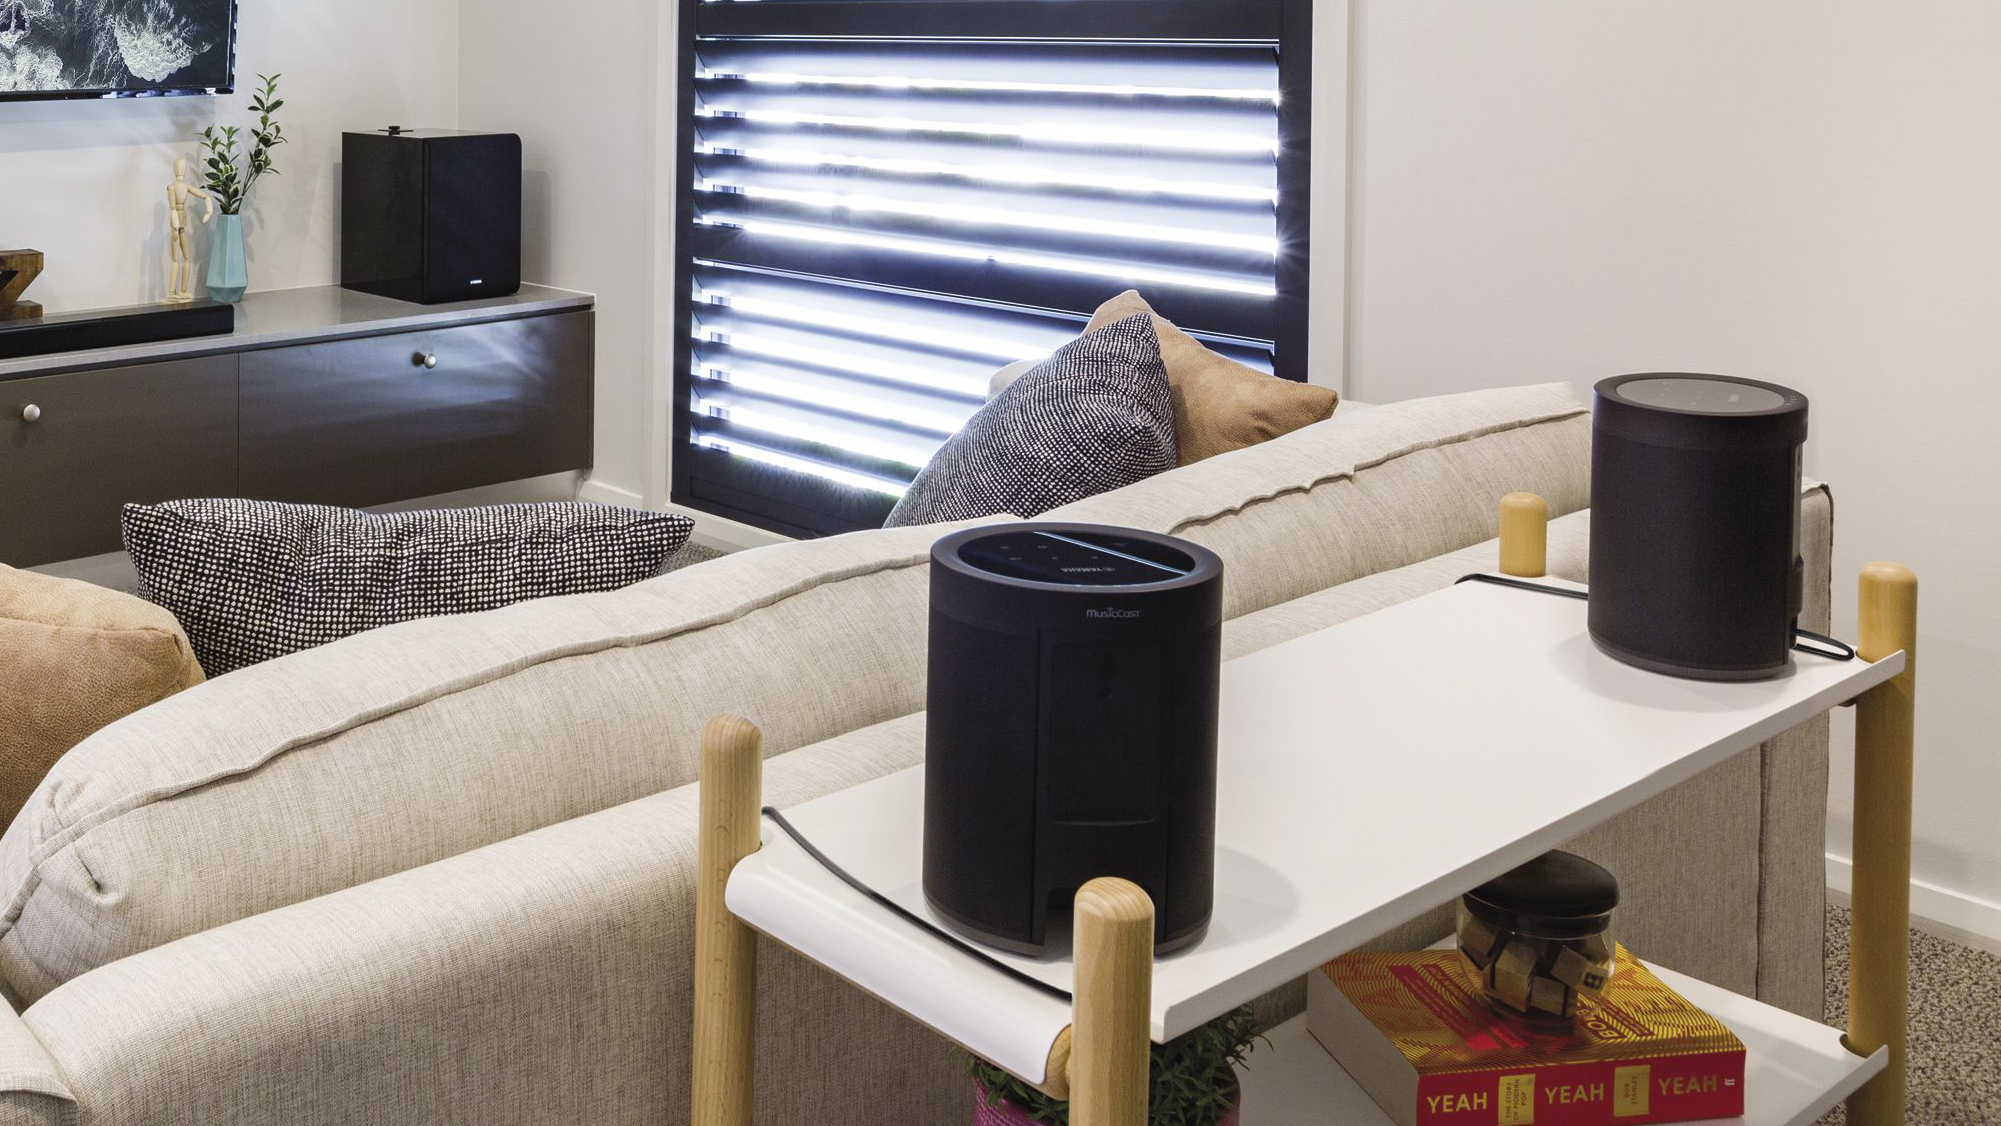
Like other wireless speakers, the Yamaha MusicCast 20 is designed to fit neatly on a bookshelf, but it’ll look at home pretty much anywhere in a modern-looking home. 

The speaker is a little larger than the Sonos One, but not overly so, and it still features a sleek and stylish design that won’t stick out too much.

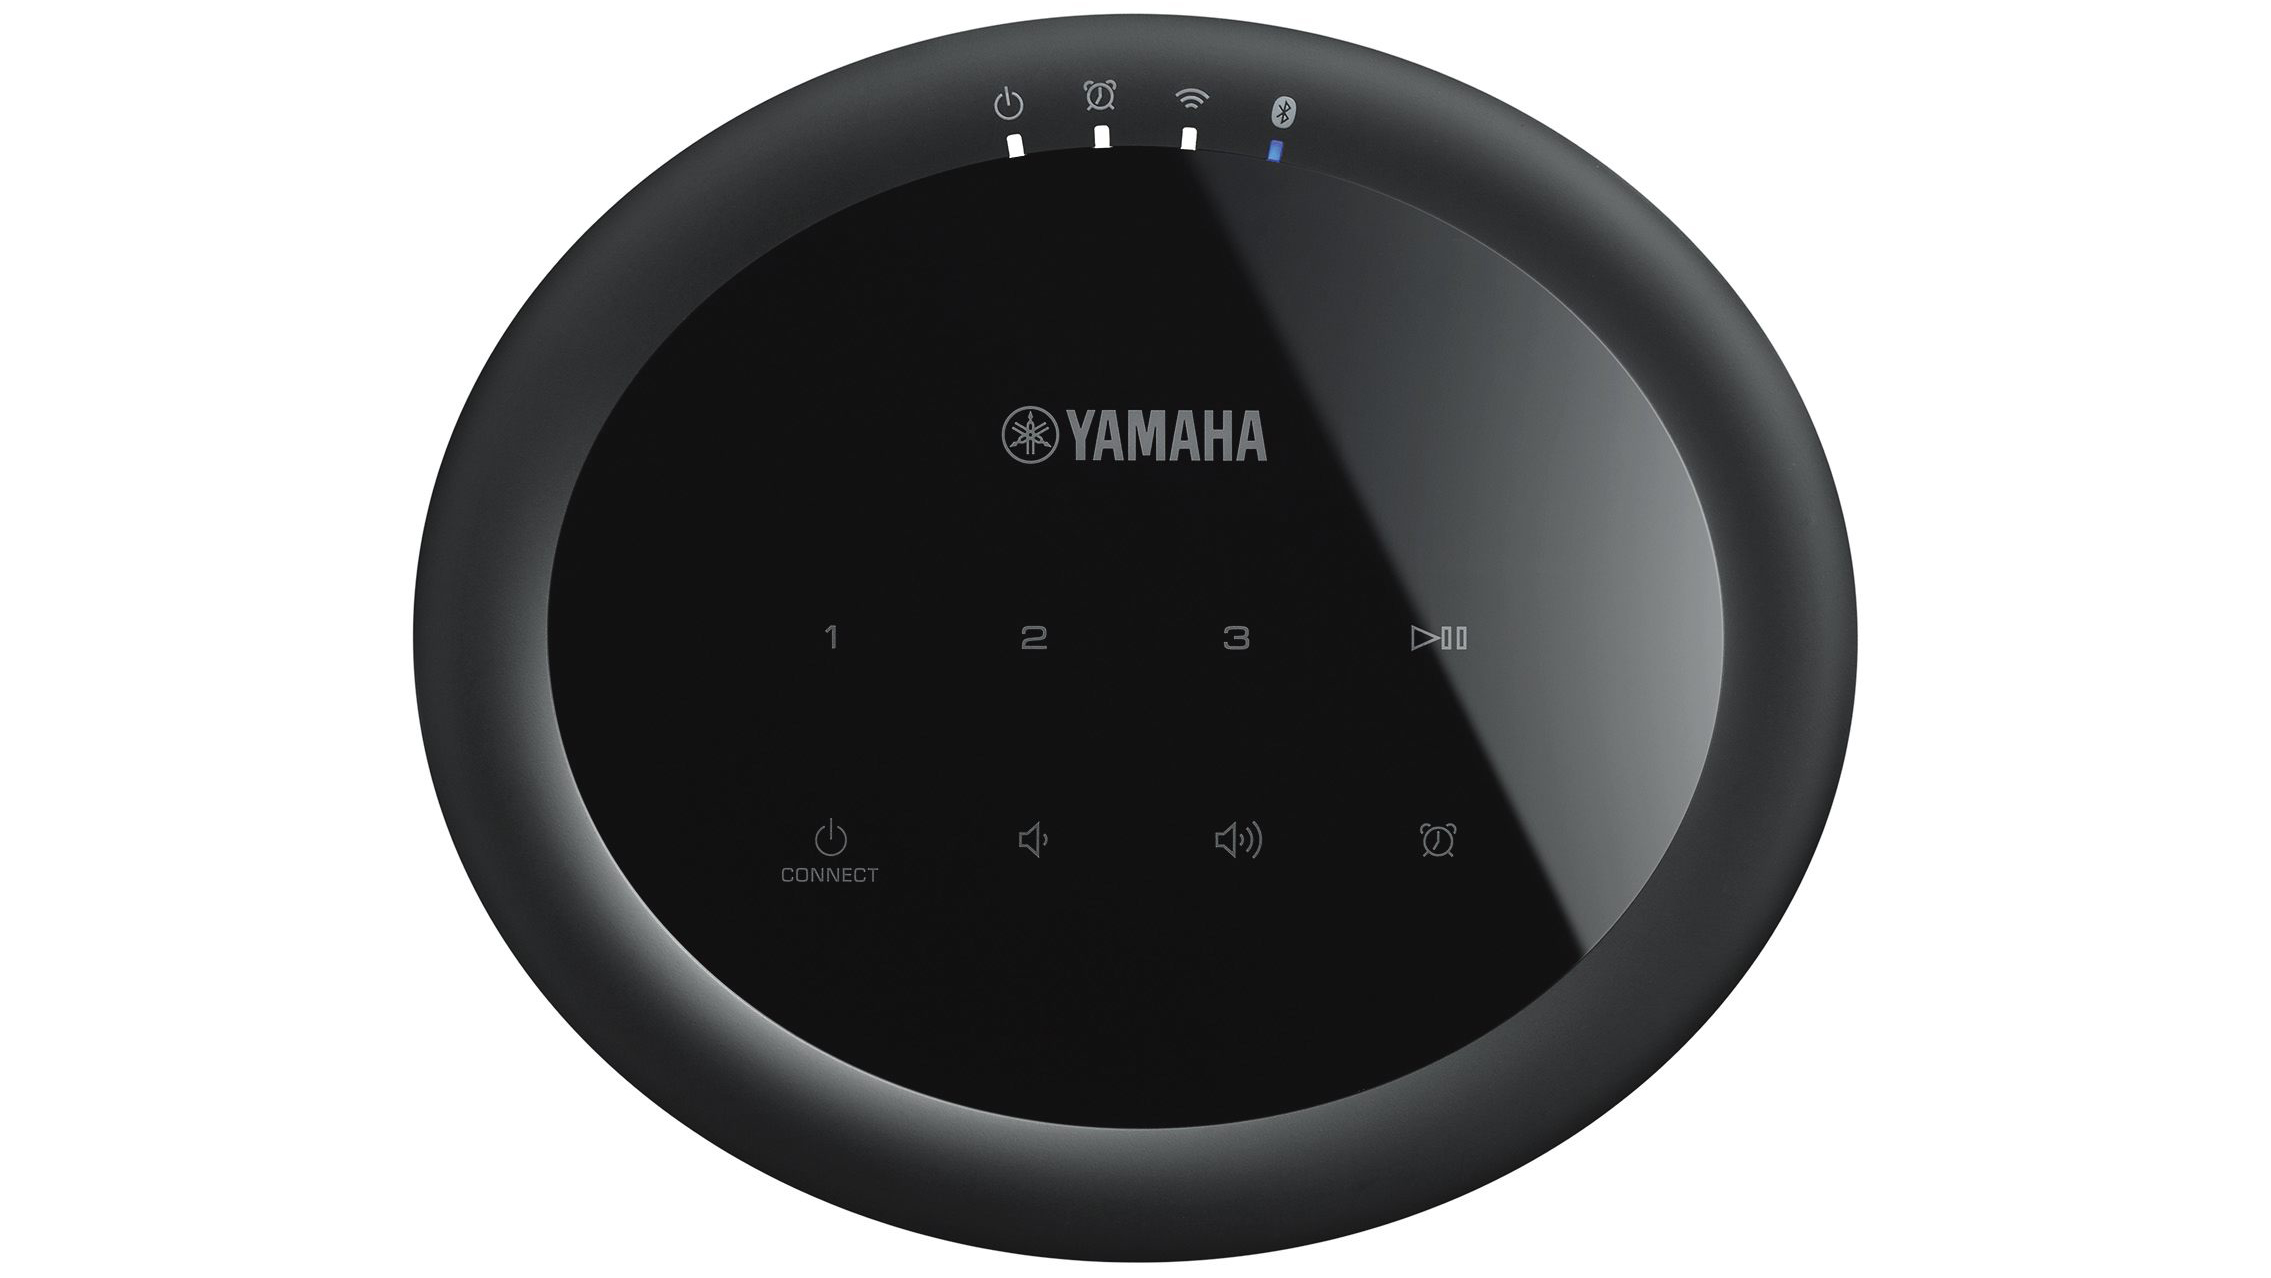
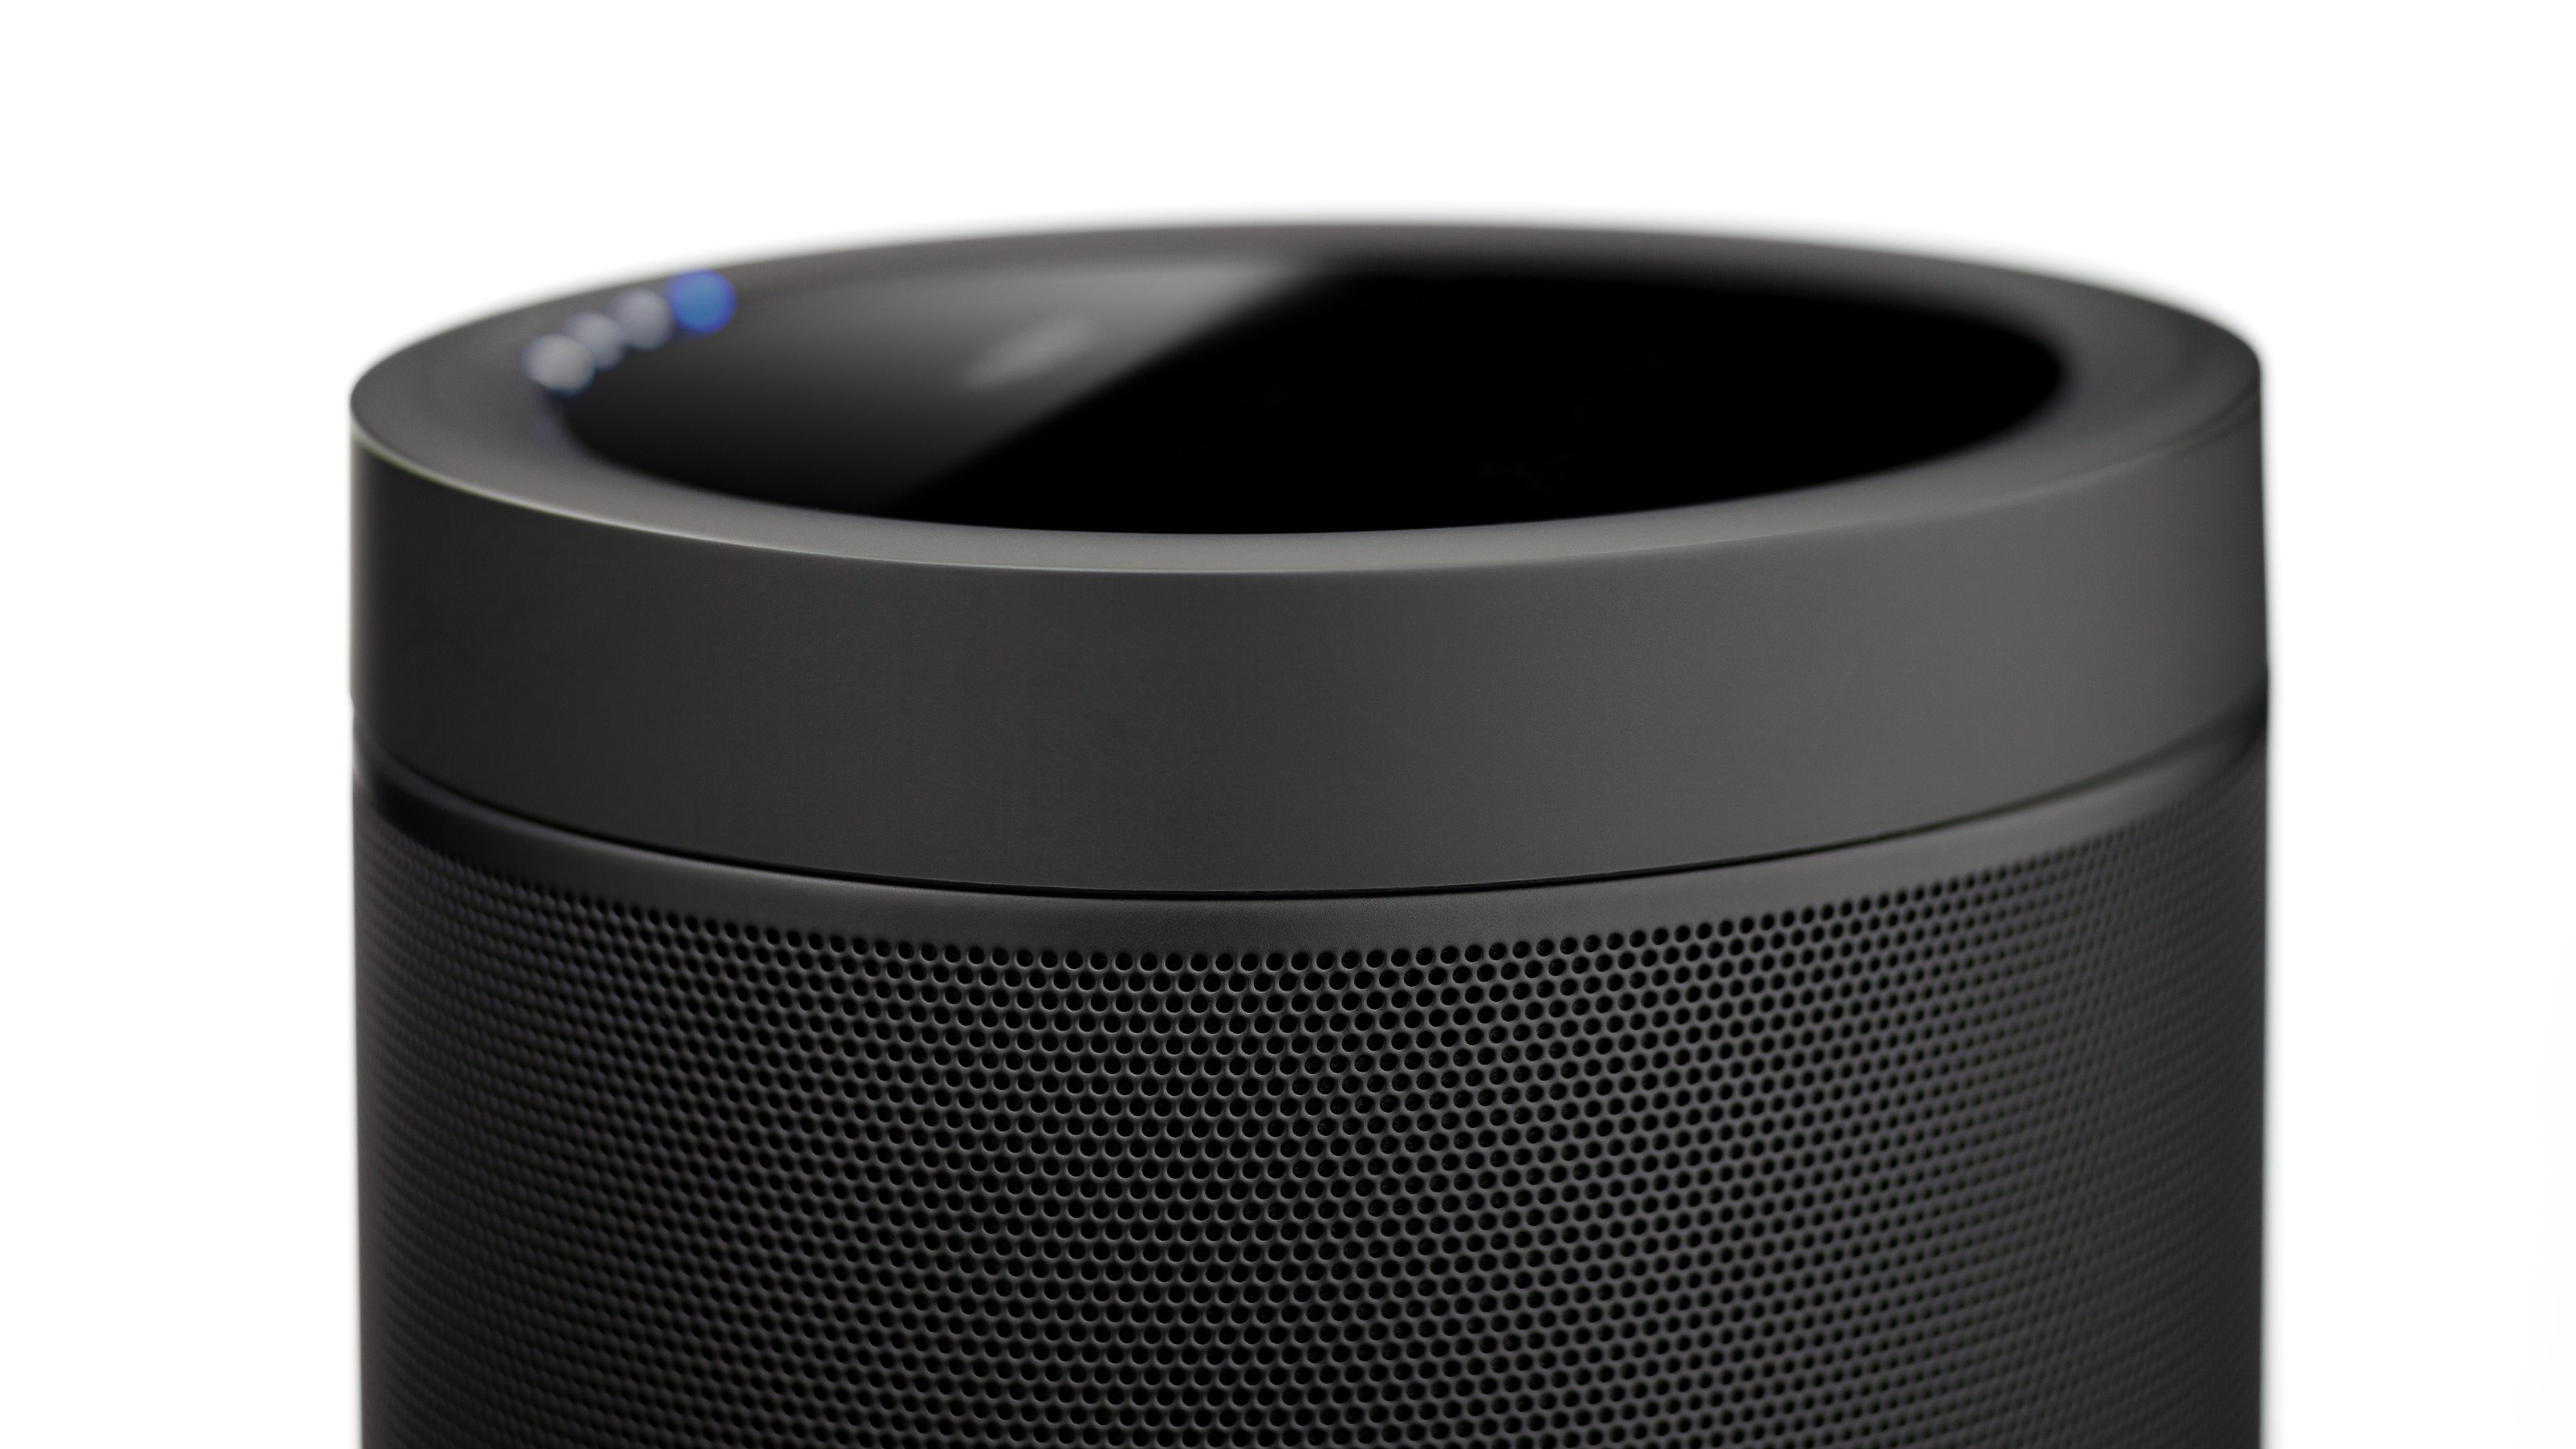
Pretty much the entire face of the speaker is a simple speaker grill, while on the back you’ll get a power input and a screw hole to mount the speaker on a wall, if you so choose. On the top is where you’ll find all the controls – and there are quite a few of them: You’ll get power controls, volume controls, playback controls, and even an alarm button to set an alarm on the speaker. There are also three numbered buttons to assign favorite inputs, which is a handy feature for those that want to be able to juggle different inputs for the speaker.

Setting up the device is actually very easy. You’ll need the Yamaha MusicCast app to do so, but all you really have to do is follow a few on-screen instructions. 

Once it’s set up, you really don’t have to interact with the app at all, if you don’t want to. That’s because the speaker supports AirPlay and Bluetooth, so you can listen through your favorite apps. From the app, you can also set up a stereo pair, which again, was very easy to do by heading to the settings in the app and hitting the “MusicCast Surround/Stereo” button.

In general, the Yamaha MusicCast 20 speaker looks quite good. It's a bit bulkier than some other options, but still very manageable. It’s also easy to set up, and while we didn’t really use the MusicCast app much after setting the device up, in general the app is pretty well-designed.

Features

Unlike some of the other smart speakers out there, you won’t get a voice assistant on the Yamaha MusicCast 20, which is probably the biggest omission. That said, the speakers work with Alexa – so you can ask another Alexa device to play music on the speaker – but that’s wildly different from having Alexa or Google Assistant built right in. 

One of the big selling points for these particular speakers is that they work with some new Yamaha receivers for surround sound. You can only use them with receivers as the rear surround speakers, however, and not the main ones. So, you can’t, for example, buy five MusicCast speakers and use them for a 5.1-channel surround sound system.

While they're a bit limited, we actually quite liked using the speakers in a surround system – they sounded pretty good as surround speakers, and while it took us a minute to properly set them up considering you have to change the settings in both the app and on the receiver, once we did we found that they worked very well.

It was equally enjoyable using the speakers as a stereo pair. We’ll get into actual sound quality a little later, but as with any wireless speakers, using a stereo pair can seriously heighten the listening experience.

The main way in which we used these speakers was through AirPlay, and they work with AirPlay very well. Unfortunately, they don’t offer Apple’s new AirPlay 2 standard – so you won’t be able to use multiple AirPlay devices natively on an iOS device. 

Thankfully, once speakers are paired or set up in a surround system through the Yamaha app, however, they do all play your music.

Performance

While design and features are important enough, in the end this is a speaker so sound quality is perhaps the most important thing to consider. 

Thankfully, the Yamaha MusicCast 20 sounds pretty good.

Let’s start with the bass, which we found to be generally punchy and thick. There seems to be quite a boost in the higher lows, helping deliver a real kick in things like kick drums, and a smooth bass guitar tone. The bass extension doesn’t seem to extend as low as we would have liked, which ultimately results in a slightly less full tone compared to some other offerings, but all except the biggest mega-bass fans should still be perfectly happy with what’s on offer here. We found that despite being smaller, however, the Sonos One offers a little more in the low frequencies.

The mid range is decently well-tuned, but it’s certainly tuned. The low mids are decently warm, while the high mids are present enough for most situations. We found that there seemed to be a slight cut to the high mids, giving things like vocals and guitars a slightly laid-back tone.

The high end is perhaps the weakest frequency range on the Yamaha MusicCast 20, but it still doesn’t sound all that bad. Like in the low-end, there simply isn’t as much extension as we might have liked. Still, the bulk of the highs are relatively well-represented. Cymbals generally get plenty of body, while vocal sibilance helps the vocal cut through the mix a little more. 
Ultimately, we like the sound of the Yamaha MusicCast 20. It sounds a little more natural than some other smart speakers, despite the fact that it doesn’t extend quite as low or high as we would have liked.

Final verdict

Looking for a great-sounding smart speaker that works wirelessly and has a ton of features? Go for the Sonos One. The Yamaha MusicCast 20 has a lot going for it, but for most it just doesn’t compete with the competition. 

That said, there are a few situations in which it might be a better choice. If you’re looking to build a surround system and like the idea of using wireless surround speakers, then the Yamaha MusicCast 20 speakers are a great option. We also recommend this speaker to those that don’t mind the lack of digital assistant and who want a slightly more natural tone.

Ultimately, the Yamaha MusicCast 20 has a good sound-quality, nice design, and plays well with other Yamaha devices. It’s a great speaker ... but in a world with more and more wireless speaker options, it’s not the best way to go.

Yamaha RX-V485

The A/V receiver is nothing new, but what is new is the fact that A/V receivers are now getting smart features, better connectivity, and more features for the money. 

That’s great news for consumers, who might want receivers with support for surround sound and wireless standards like AirPlay, without having to shell out the cash that would have been required a few years ago.

The latest company to give its lower-cost receivers an upgrade is Yamaha, which recently took the wraps off of Yamaha RX-V 85 series of receivers. 

At the top, you’ve got the Yamaha RX-V2085, which offers support for 9.2 channels of audio, dual ESS Sabre DACs, and so on. More interesting, however, are the lower-end models, like the Yamaha RX-V485, which brings features you would normally expect in far more expensive receivers to a price of under $400 (around £300, AU$550).

But with all those features, is the Yamaha RX-V485 ultimately worth buying? We put it to the test to find out.

Design

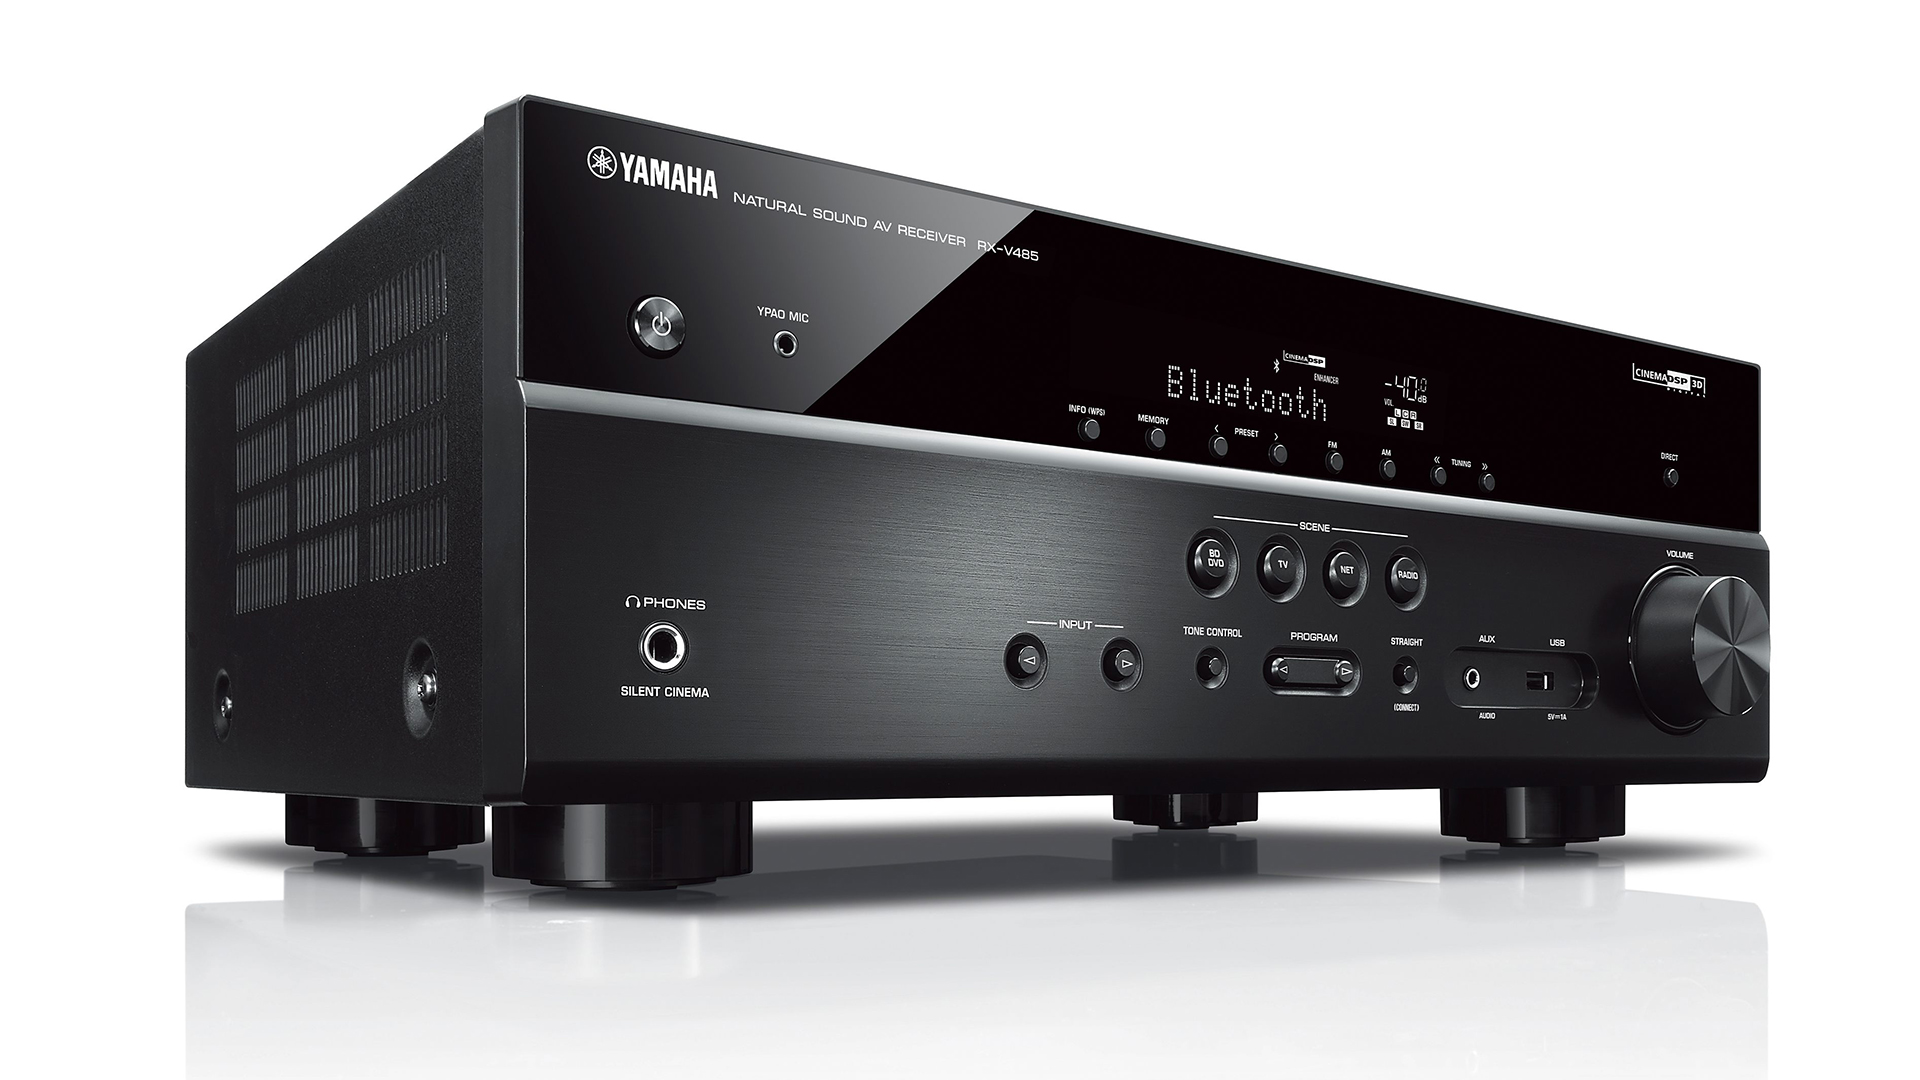
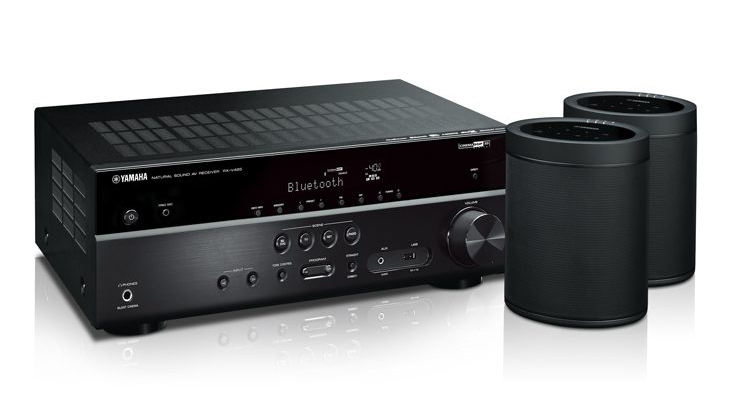
A/V receivers are normally somewhat bulky black boxes, and the Yamaha RX-V485 is no exception to that rule ... but, as far as bulky black boxes go, it certainly doesn’t look bad. The unit comes in at around 17-inches wide, almost 7-inches tall, and 13-inches deep. That’s a pretty standard size for A/V receivers like this, though it does seem to be a little shorter than some others, which is a nice touch.

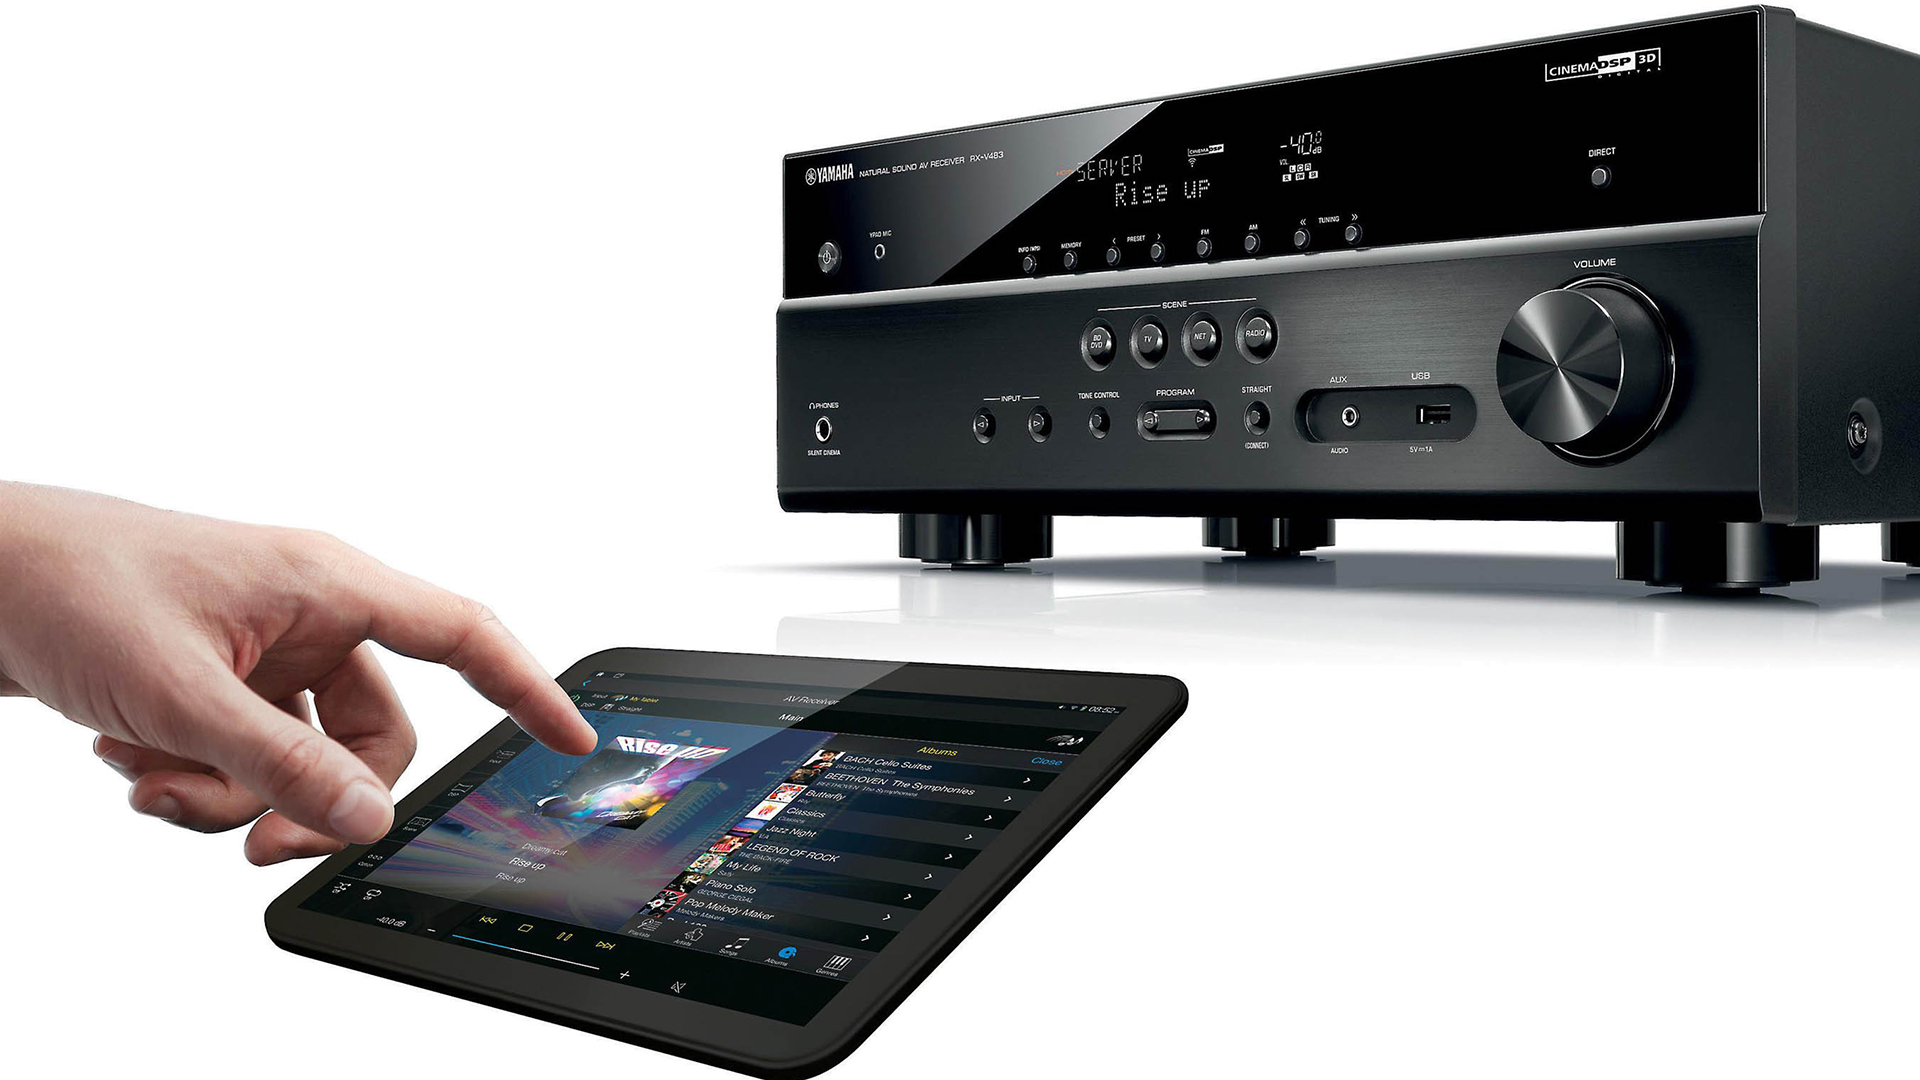
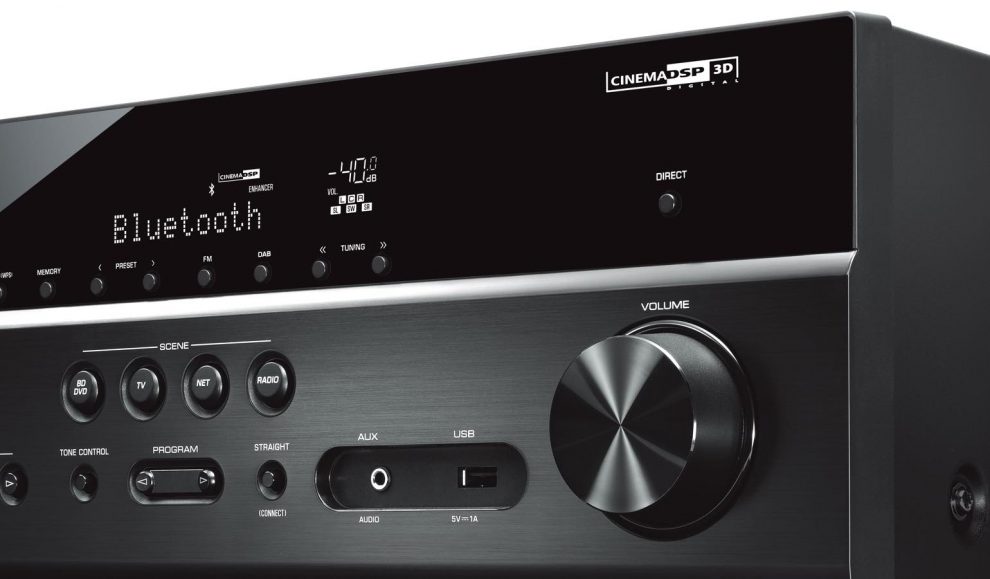
On the front of the unit, you’ll get pretty much everything you’ll expect. There’s a power button on the left, which sits a few inches above a headphone jack. Towards the center is where you’ll get the bulk of the front-mounted controls, including the ability to tweak the radio settings, change the “scene,” switch inputs, programming, and so on, as well as an aux port and a USB port. On the right, you’ll find a large volume knob.

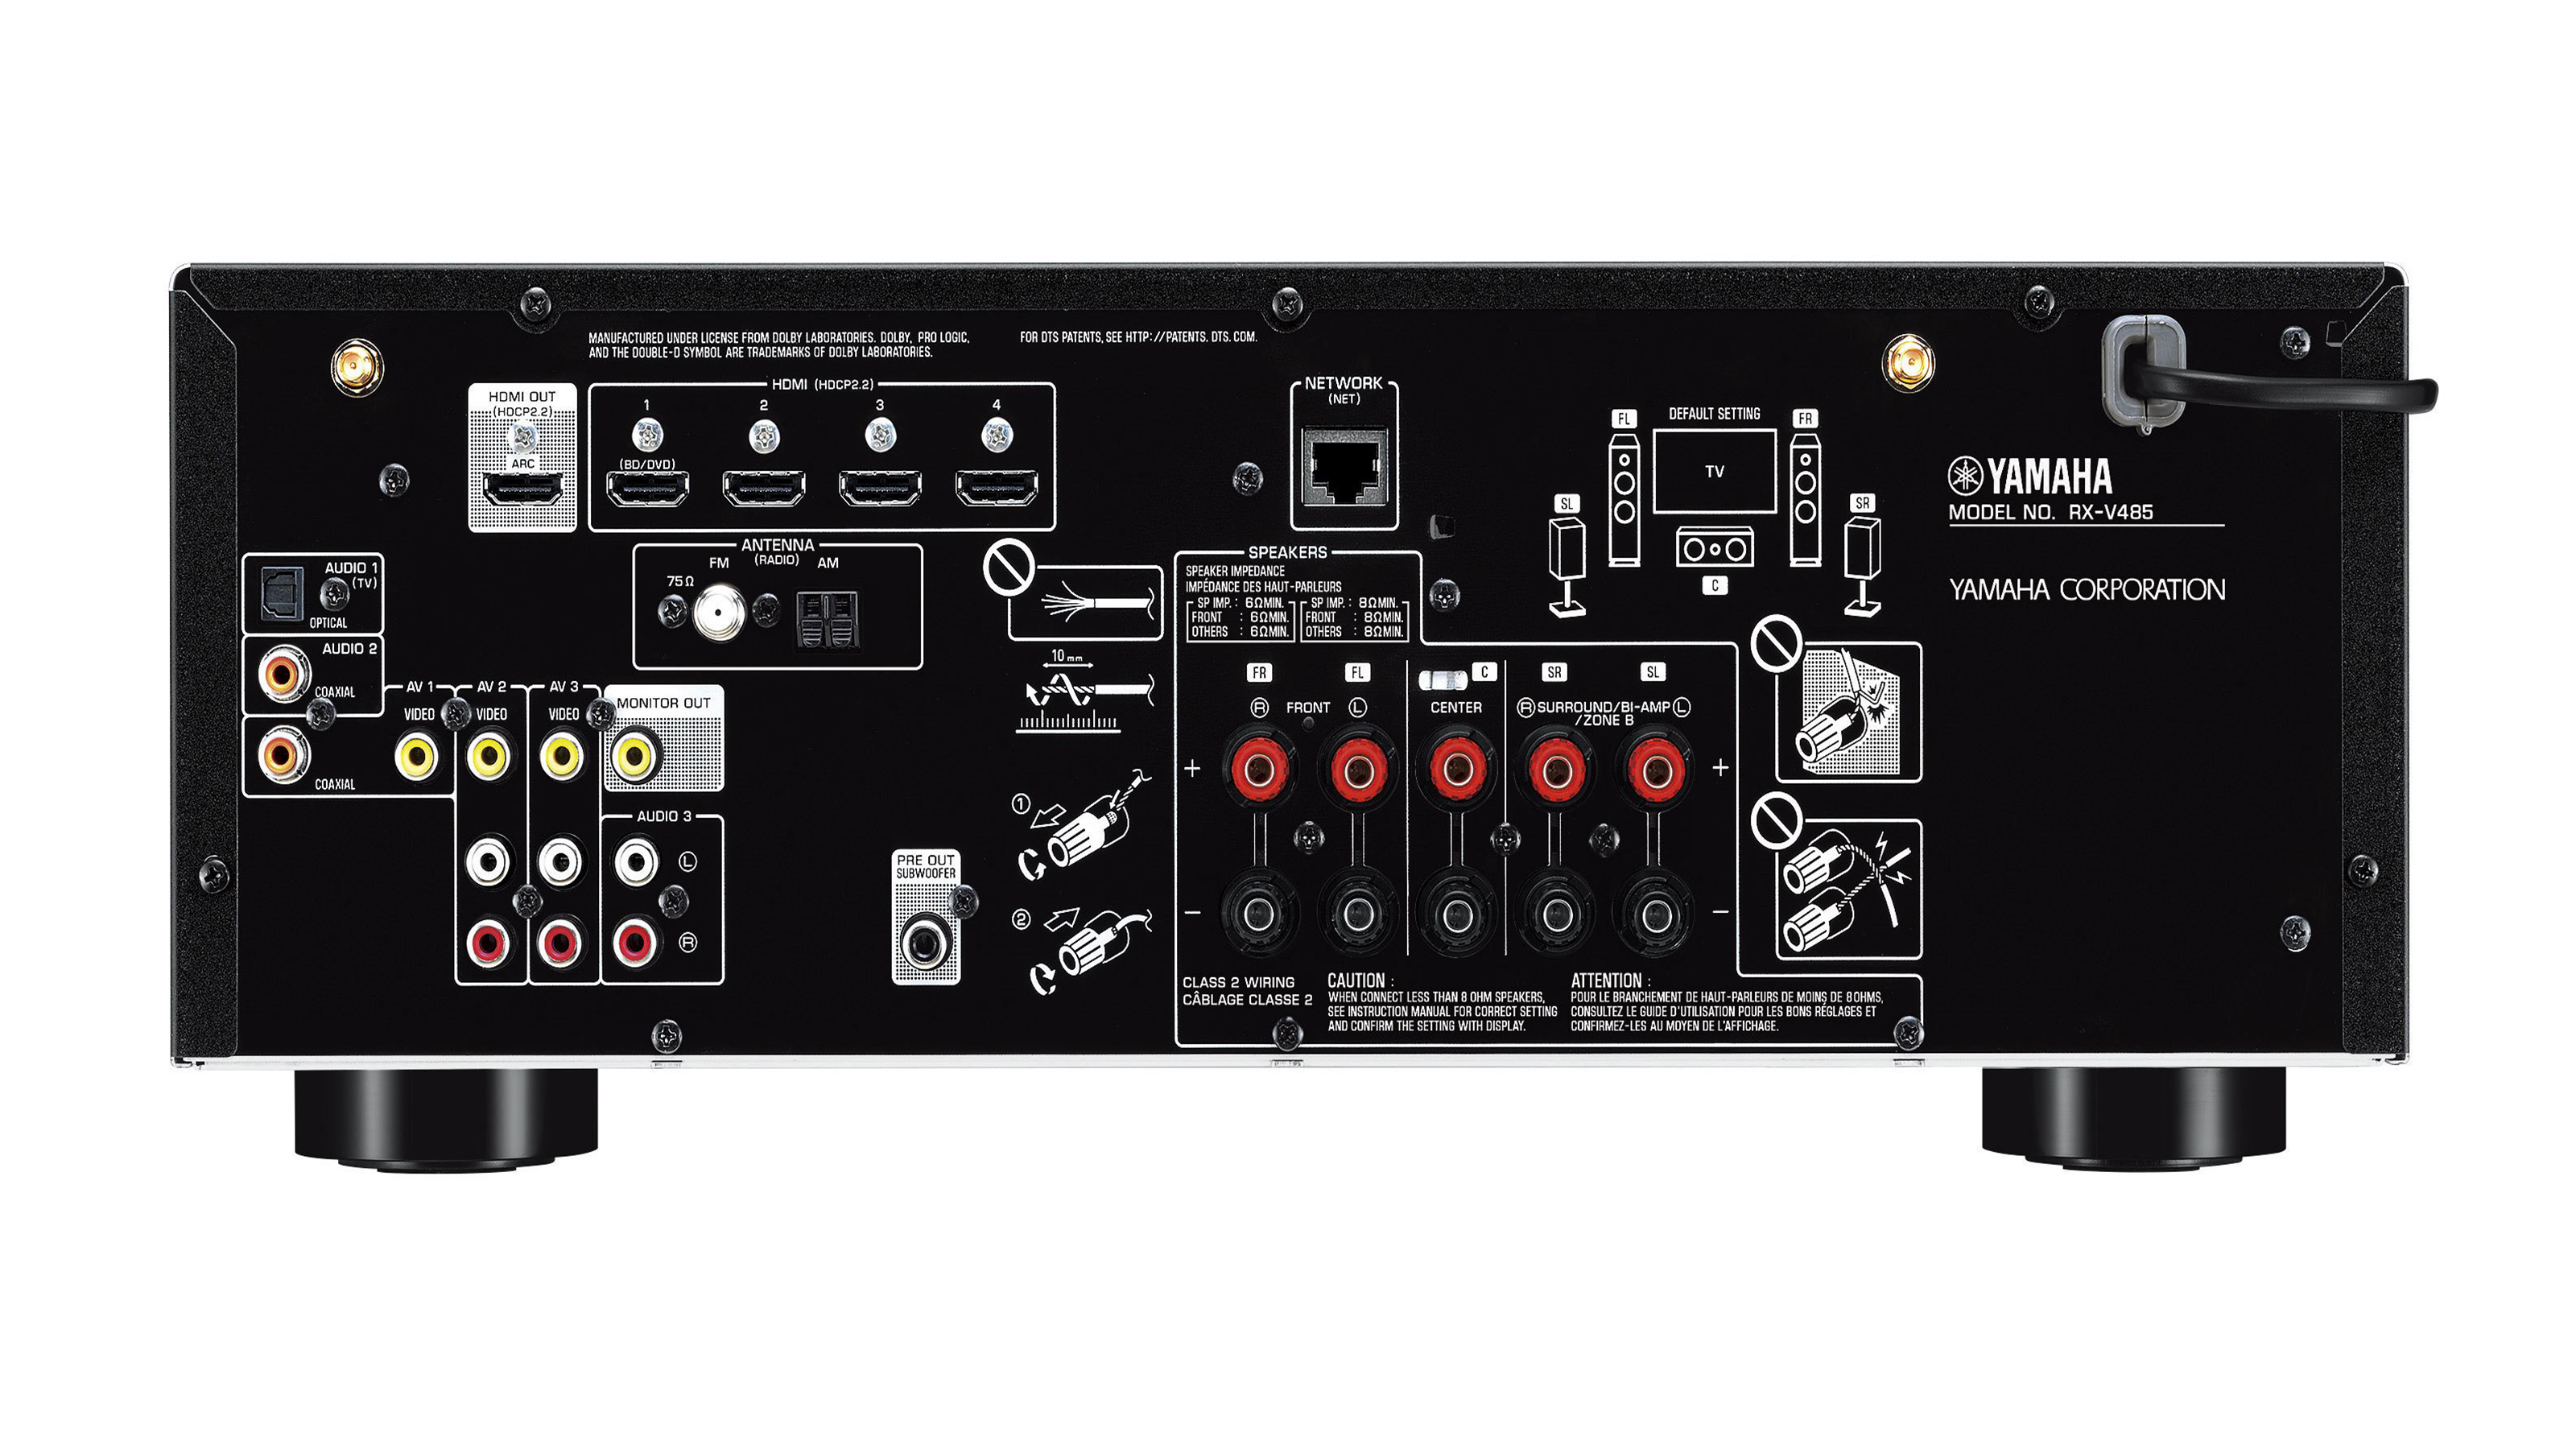
The back, of course, is where you get all your connectivity: There’s one HDMI output which will be perfectly fine for the majority of people who use the device the way it’s designed, and route all their sources through the receiver. To that end, there’s four HDMI inputs, which should be fine. For sources that don’t use HDMI, you’ve got a few other video inputs, and even a video output in case your TV doesn’t support HDMI. You’ll also get enough connectivity for a 5.1 surround sound system, which will be plenty of connectivity for most buying a receiver in this price range.

The remote is relatively well-designed too, helping ensure that it’s pretty easy to use. You’ve got power controls at the top, along with a scene selector, quick tuning buttons, volume controls, input controls, and so on. Like most remotes, once you’ve set up your receiver you’ll probably only use a few of the buttons, but the remote serves power-users who like to be able to tweak settings perfectly well, too.

Features

While the design of this receiver is perfectly fine, it’s what’s under the hood that really sells the Yamaha RX-V485. 

Let’s start with the wireless features, of which there are quite a few: The device supports Wi-Fi, Bluetooth, and Apple’s AirPlay, which is very helpful in particular for streaming music, though doesn’t seem as though you’re able to stream video directly to the receiver through AirPlay. Unfortunately, though, the Yamaha RX-V485 doesn’t seem to support Google Cast – which we see as a pretty major omission considering the AirPlay support.

Still, for those that don’t use Apple devices, Bluetooth is still there for everyone else, and while it may not be as good at integrating with other smart home features, it still worked perfectly fine for streaming audio in our tests.

One major feature that Yamaha is touting for this series of receivers is support for its MusicCast speakers, which essentially allow you to set up the receiver to use MusicCast speakers as wireless surround speakers. You can’t use MusicCast speakers as the main speakers in your setup, but it’s still a very nice feature, and means that you don’t have to run cables around your living room for decent surround sound. We’ll review the quality of the speakers themselves separately.

Setting up the MusicCast speakers to work as surround speakers was a little tricky. First, you’ll have to set up the receiver and the speakers in the Yamaha MusicCast app, then link the receiver to the speakers. Then, you’ll have to open the receiver settings from the receiver itself, and set your system to a surround system, in case you had it set up as a standard stereo system.

When you link your MusicCast speakers and receiver, only the receiver will show up in AirPlay, which could be good, or bad, depending on how you look at it. It’s good, for example, because it means the audio will play through all of your living room speakers easily. It’s bad, however, because it means you can’t only send audio to one speaker, if for some reason you want to.

Another nice addition to the receiver is that it supports Amazon’s Alexa. With it, you can use your voice to do things like change the volume. It’s a nice touch, and one that worked fine, but we didn’t find ourselves using it much. 

Other features are less smart-home related and more traditional receiver-related, but still very helpful. The receiver supports 4K HDR, Dolby Audio, and Dolby Vision, all of which should help ensure that the video and audio quality is high. 

Next up is the fact that the receiver supports two zones – meaning instead of having one 5.1-channel system, you can have one main 3-channel setup in zone one, and a 2-channel setup in zone 2. With this setup, you can play the same source to two zones at the same time and control their volume separately, which is a nice touch.

Performance

All the features on offer are helpful, but they’re limited if the receiver doesn’t perform. Thankfully, however, it performs perfectly well: the receiver sounds great at all volumes and there’s little distortion, even at higher volumes. 

If your ears are very well tuned, you might start to hear why the receiver is cheaper than some others, thanks to the slightly restrained detail in the upper frequencies, but ultimately the receiver sounds great for the untuned ear, and good for those who know what to look for.

When it comes to specs, the receiver offers 80W of power when two channels are in use, and a total harmonic distortion of 0.09%, which is inaudible. 

All that said, you’ll likely get a little more detail and clarity from some of the more expensive receivers in the range, which replace the standard Yamaha DACs with ESS Sabre DACs.

Final verdict

The Yamaha RX-V485 offers a ton of features at an excellent price and it’s easy to recommend buying it, especially for those that like the idea of using Yamaha’s MusicCast speakers for surround sound. For those that don’t, however, there may be some other options. 

We recently reviewed the Onkyo TX-NR676, for example, which offers many of the same smart features at a similar price, plus it supports a 7.1-channel setup plus another two-channels for a second zone – so, if you plan on going beyond the 5.1-channel setup, it may be the way to go. The Onkyo unit also supports Google Cast, so if you use Android or Google Chrome, it could be a little more handy.

Still, despite the lack of some of those features, the Yamaha RX-V485 is easy-to-use, relatively full-featured, and sounds great. If you plan on using 5.1-channels or less, and won’t miss the lack of Google Cast, then it’s an excellent option to go for.

BenQ EX3203R

Multiple hot new features and innovations have been rocking the PC monitor market recently. For BenQ’s latest large format and gaming-centric model, therefore, standing out isn’t going to be easy. It’s tough out there.

Luckily, the new BenQ EX3203R offers an intriguing mix of features and capabilities. Highlights include 144Hz refresh, a curved panel, USB-C connectivity and adaptive sync support, all wrapped up in a 32-inch package. 

The kicker, arguably, is VESA DisplayHDR 400 certification. That’s a pretty compelling core proposition and will tick a lot of gamer’s boxes.Those looking for a more general purpose display might like the look of that feature set, too.

However, at this relatively competitive price point - and arguably at almost any current price point - you can’t quite have everything. Notably, the EX3203R is what you might call a 2.5K rather than 4K or UHD monitor. 

It also lacks support for Nvidia’s particular take on adaptive syncing and, if you’re a fan of super-wide aspect ratios, you’re not going to find satisfaction here. On the other hand, the sub-4K resolution can make for a better fit for gaming in terms of enabling faster frame rates with any given graphics card.

Price and availability

Priced at £499 in the UK, $699 Stateside and $799 in Australia, the BenQ EX3203R is fairly aggressively positioned, if a little more expensive in the US than other territories. 

Directly comparable models, such as AOC’s AG322QCX and the Asus ROG Strix XG32VQ are priced similarly but notably lack HDR support. On paper, then, the BenQ has a clear edge.

Design

The 31.5 inches of panel in a 16:9 format makes for a pretty big, bold physical presence. Aesthetically, the EX3203R is relatively restrained by gaming peripheral standards. But with slim bezels around three sides of the LCD panel and a sleek silver stand, it’s a classy affair and feels fairly expensive.

That panel, incidentally, is VA rather than IPS. That helps with contrast and color saturation, but can be somewhat problematic when it comes to viewing angles and pixel response. 

That said, BenQ has equipped this monitor with 144Hz refresh capability and claims 4ms response capability, so in theory it’s quick. It also supports the new second generation of AMD’s FreeSync adaptive refresh technology. That adds support for HDR and wider color gamuts to the FreeSync feature set.

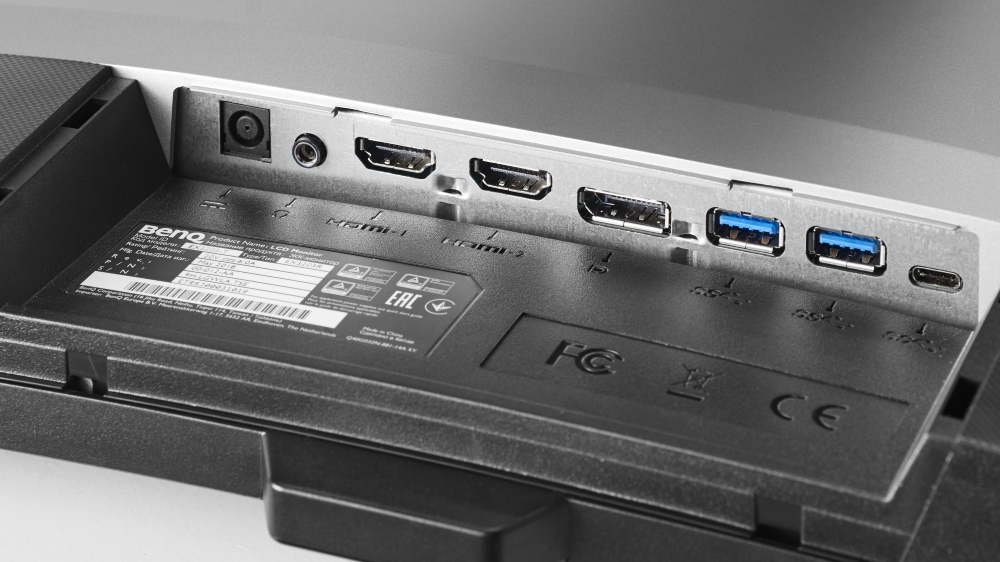
Connectivity-wise, a pair of HDMI 2.0 ports plus DisplayPort should ensure most of your bases are covered. Even better is the inclusion of USB-C connectivity, enabling single-cable connectivity for everything from the image signal to peripherals and even charging for laptops. It’s a desirable port to have in terms of future-proofing, too.

HDR support

Which brings us to the EX3203R’s most intriguing engineering element, that VESA DisplayHDR 400 certification. HDR is quickly becoming a fairly bewildering technology, replete with numerous standards. 

But is the DisplayHDR 400 standard really true HDR? It requires, for instance, a brightness of 400cd/m2 where many would argue that the full impact of HDR only arrives at higher peak brightnesses around 1,000cd/m2.

What’s not debatable is that DisplayHDR 400 is the very bottom rung of the VESA HDR ladder and the least demanding option for any given monitor manufacturer. Not only does DisplayHDR 400 have modest brightness requirements, it also doesn’t dictate local dimming and makes less stringent demands in terms of color reproduction. BenQ says the EX3203R is good for 90% coverage of the DCI-P3 profile. Fair to say, then, that DisplayHDR 400 is HDR lite.

Performance

Expectations suitably managed, how does the BenQ EX3203R actually perform? Immediate impressions certainly tally with the underlying VA panel technology on offer. Colours are punchy and vibrant, whites are bright and clean, while blacks are deep and inky. The EX3203R’s panel is rated at 3,000:1 for static contrast capability and it looks every bit as good as that. The panel’s gentle curve also makes for a nicely immersive experience.

What the EX3203R doesn’t obviously look like - and perhaps shouldn’t be a surprise given the realistic limitations of the DisplayHDR 400 standard - is a true next-gen HDR display. With the full HDR stack enabled, HDR content does look pretty stellar. But the EX3203R can’t compete with brighter ‘full’ HDR displays with local dimming when it comes to blowing your socks off with highlighted details popping out of dark scenes.

It’s also worth noting that HDR remains a problematical technology in terms of everything from ensuring it’s enabled both on the display and in Windows 10 and having content, be that games or video, that is HDR enabled. Enabling HDR globally in Windows, for instance, makes for a rather dull look for desktop elements. HDR, in short, remains complicated and the supporting content relatively scarce.

As a general purpose monitor, the EX3203R’s most obvious shortcoming is its relatively modest 2,560 by 1,440 native resolution. That makes for fairly big, coarse pixels when spread across a 32-inch panel. A high-DPI display this most certainly is not.

That said, as a gaming device the lower resolution makes for pretty pleasing results. The VA panel prevents it from being at the cutting edge in terms of response. But inverse ghosting is not a major issue here and the benefits of that 144Hz refresh in terms of in-game smoothness are absolutely undeniable, even if you’ll need a powerful and pricey graphics card to make the most of it despite the restrained 2.5K native resolution.

Verdict

On paper, the EX3203R makes a powerful case for itself by adding HDR certification without an obvious price premium. In practice, it’s not a true HDR display. But that doesn’t mean it’s not a good monitor.

Gamers looking for a big, bold and beautiful display with high refresh rates and adaptive sync support should give the EX3203R serious consideration, albeit in the knowledge that this isn’t the most responsive monitor on the market.

That you get a little bit, though not full, HDR goodness thrown in just sweetens the deal. For those looking for a more productivity orientated monitor, there are better deals elsewhere.

McAfee Ransomware Interceptor

Silent, deadly and constantly evolving, ransomware is never far from the headlines. You might expect McAfee to want to boast about its free McAfee Ransomware Interceptor, then, but instead it's buried deep in the security company's website.

One reason could be that the Interceptor is still listed as a 'pilot', more of an experimental anti-ransomware tool than a full-strength product. There doesn't seem to be much experimenting going on, either, as the last update at the time of writing was May 18, 2017.

The official Interceptor FAQ page points out another problem: Interceptor isn't covered by McAfee's technical support. If you have any issues, you could be on your own.

This doesn't necessarily mean Interceptor has no value. The website explains that it "leverages heuristics and machine learning" to identify threats, rather than using simple signatures, which could allow the program to block even brand new and undiscovered threats.

A second advantage is this kind of behavior monitoring approach doesn't normally conflict with other antivirus tools, allowing you to run Interceptor alongside almost anything to add an extra layer of ransomware protection. Perhaps it's a little out-of-date, and maybe Interceptor only detects a few extra threats, but the program is unlikely to cause any trouble and could make you a little safer overall.

That's the best case scenario, anyway, but does Interceptor really have what it takes to identify ransomware from its behavior alone? We would have to download and install the program to find out more.
McAfee Ransomware Interceptor

Setup

McAfee Ransomware Interceptor is free for anyone to use, with no registration or other hassles required. Visit the website, choose the 32 or 64-bit version, read the license and you can download the program with a click.

The installer is a very compact 3.3MB, which is probably why the setup process appeared very simple, with absolutely no settings or options to consider. We were briefly concerned when a command window appeared and the installation seemed to pause, with nothing at all happening for more than a minute. But then the window disappeared, the installer advised us to reboot our test system, and closed normally.

Despite the tiny setup program, Ransomware Interceptor had taken up a fair chunk of disk space. Most of this was the 310MB occupied by McAfee's core management framework, though; the main program files took barely 17MB.

The package was much lighter in terms of RAM use, with its three background processes taking barely 11MB between them under normal circumstances, and no significant CPU time. This probably isn't going to be a product which slows you down.

Malware will sometimes try to detect and disable security tools by closing processes, deleting files or Registry keys. This can be surprisingly easy – we've seen some antivirus packages which can be killed from a batch file – and so we always check how well security software can protect its own code.

The results didn't impress, at least initially, when we discovered an attacker with Admin privileges could delete most of McAfee's management framework.

Of course, to be fair, if malicious code is running on your system with admin rights, then you're already in big trouble. And although we managed to cause some damage, McAfee's SystemCore support files remained available, and Interceptor continued to run as normal.

There's little sign of Interceptor's activities, as the program has no real interface beyond a single system tray icon, which contains just three management tools. We could toggle protection on and off, whitelist a trusted program to prevent it being blocked in future, or view a detection log to see what Interceptor had done.

You don't get any significant control of how the package works, then, as is the case with some of the competition. Whitelisting programs or turning Interceptor off are your only options.

Despite its extremely basic interface, we also noticed a minor deficiency. Right now, Interceptor displays the same system tray icon whether it's active or not, and the only way you can see its status is to right click the icon and check its menu. We would prefer to see the icon change – to perhaps green for active, red for inactive – allowing you to see Interceptor's status at a glance.

McAfee Ransomware Interceptor

Performance

Testing behavior-based anti-ransomware software is always difficult. Their value is in the claim that they can detect malware which doesn't exist yet, but that's hard to assess unless you have wide access to the very latest threats.

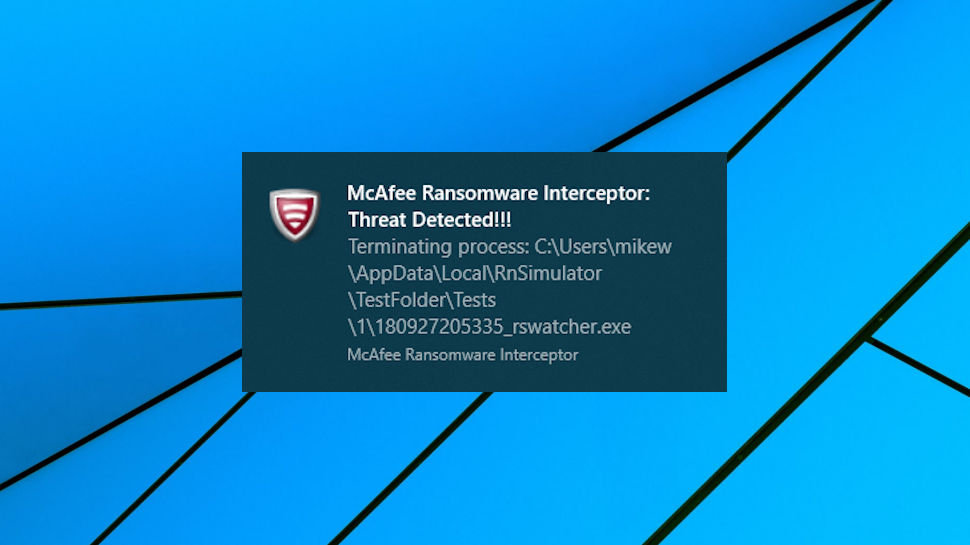
We started with a simpler approach, testing Interceptor against Cerber, a known ransomware strain. The results were excellent, with Interceptor blocking the Cerber process before it could encrypt a single file, and displaying an alert. That's no surprise – we would expect McAfee to have designed Interceptor to look for threats like Cerber – but it does show the program is offering some useful protection.

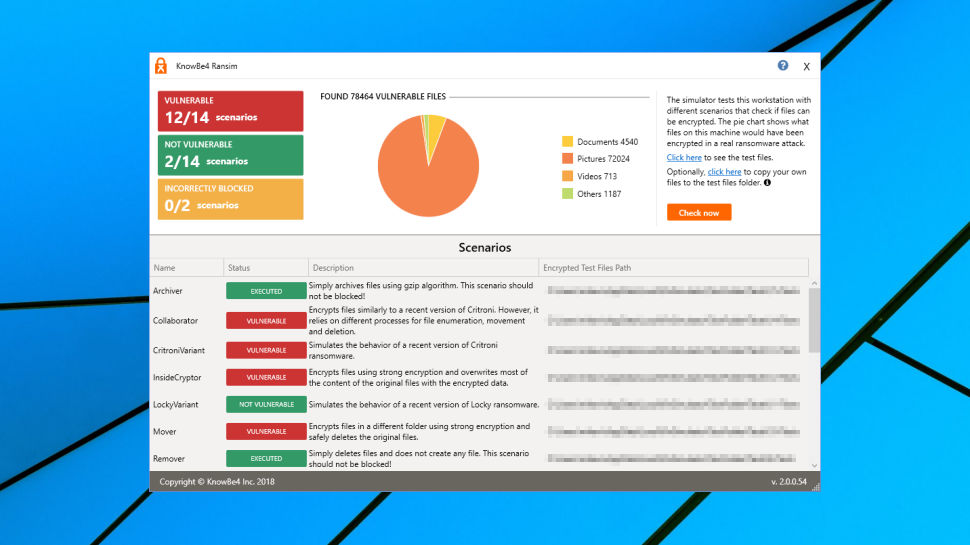
Next, we turned to RanSim, KnowBe4's free ransomware simulator. This runs various tests using different types of ransomware-like behavior, and tells you which have been blocked.

The last time we looked at Interceptor, it failed to detect any of RanSim's 14 attack scenarios. This test showed some improvement, with two attacks being blocked, but we were still vulnerable to the other 12 scenarios. This isn't as alarming as it sounds – all scenarios aren't equal, and it's entirely possible that Interceptor's two detections would be enough to block most real-world ransomware – but we've seen other security tools score higher.

McAfee Ransomware Interceptor

Finally, we turned to a very simple ransomware simulator of our own. It's far more basic than RanSim, with just a single mode of attack, spidering through a test set of folders, detecting and encrypting many common document types. But as it has never been released, we know it's something the McAfee Ransomware Interceptor developers won't have seen before, making it an interesting test of Interceptor's behavior monitoring and heuristics.

Unfortunately, it was a test which Interceptor comprehensively failed. Our simulator was allowed to run to completion, and successfully encrypted every user document and file in our test tree.

We need to interpret these results with care. RanSim may use ransomware-like actions, but it only worked on its own sample files, leaving ours untouched. Interceptor arguably made the right decision by allowing it to run.
We think RanTest is probably the more significant failure, as it was able to encrypt thousands of real files on our test system. It's not real ransomware and only spidered through a single test tree, so it's possible the program didn't meet Interceptor's threshold for detection.

But other antivirus and anti-ransomware tools generally block our simulator right away, with for example Kaspersky Antivirus 2019 not only spotting the threat and killing the process, but also recovering the handful of files it had managed to encrypt before being stopped.

Interceptor still deserves major credit for blocking real-world ransomware, and that is the test which matters most. The program largely failed with our simulated threats, but it may still improve your security, and do so without causing conflicts with other security apps.

Final verdict

Ransomware Interceptor is simple, ultra-lightweight and blocks real-world ransomware without difficulty. It's not as effective with simulated threats as the top antivirus engines, but could still be worth installing as a second layer of security.

!!!!!!!!!!

Popular Posts

Categories

Blog Archive